How to Uplink -NB and -CB series devices data by MQTT with Thingseye
Table of Contents:
1. Introduction
This document guides you on integrating Dragino -NB and -CB series devices data with Thingseye.
The NB series devices end with the suffix -NB, and the CB series devices end with the suffix -CB. For example, S31B-NB is an NB device, and S31-CB is a CB device.
2. Prerequisites
To complete this tutorial, you need to have certificate files. lns1.thingseye.io is the Dragino's MQTT broker, which requires a CA certificate file, Certificate file, and the Private key file to use.
If customers need to use this MQTT connection with Thingseye, they need to contact TE team to obtain three license files or click this link to download the certificates..

3. Configure Thingseye's Integration
3.1 Creat new MQTT integration
In the left navigation, click Integrations center, and then click Integrations.
On the Integrations page, click on the '+' button.
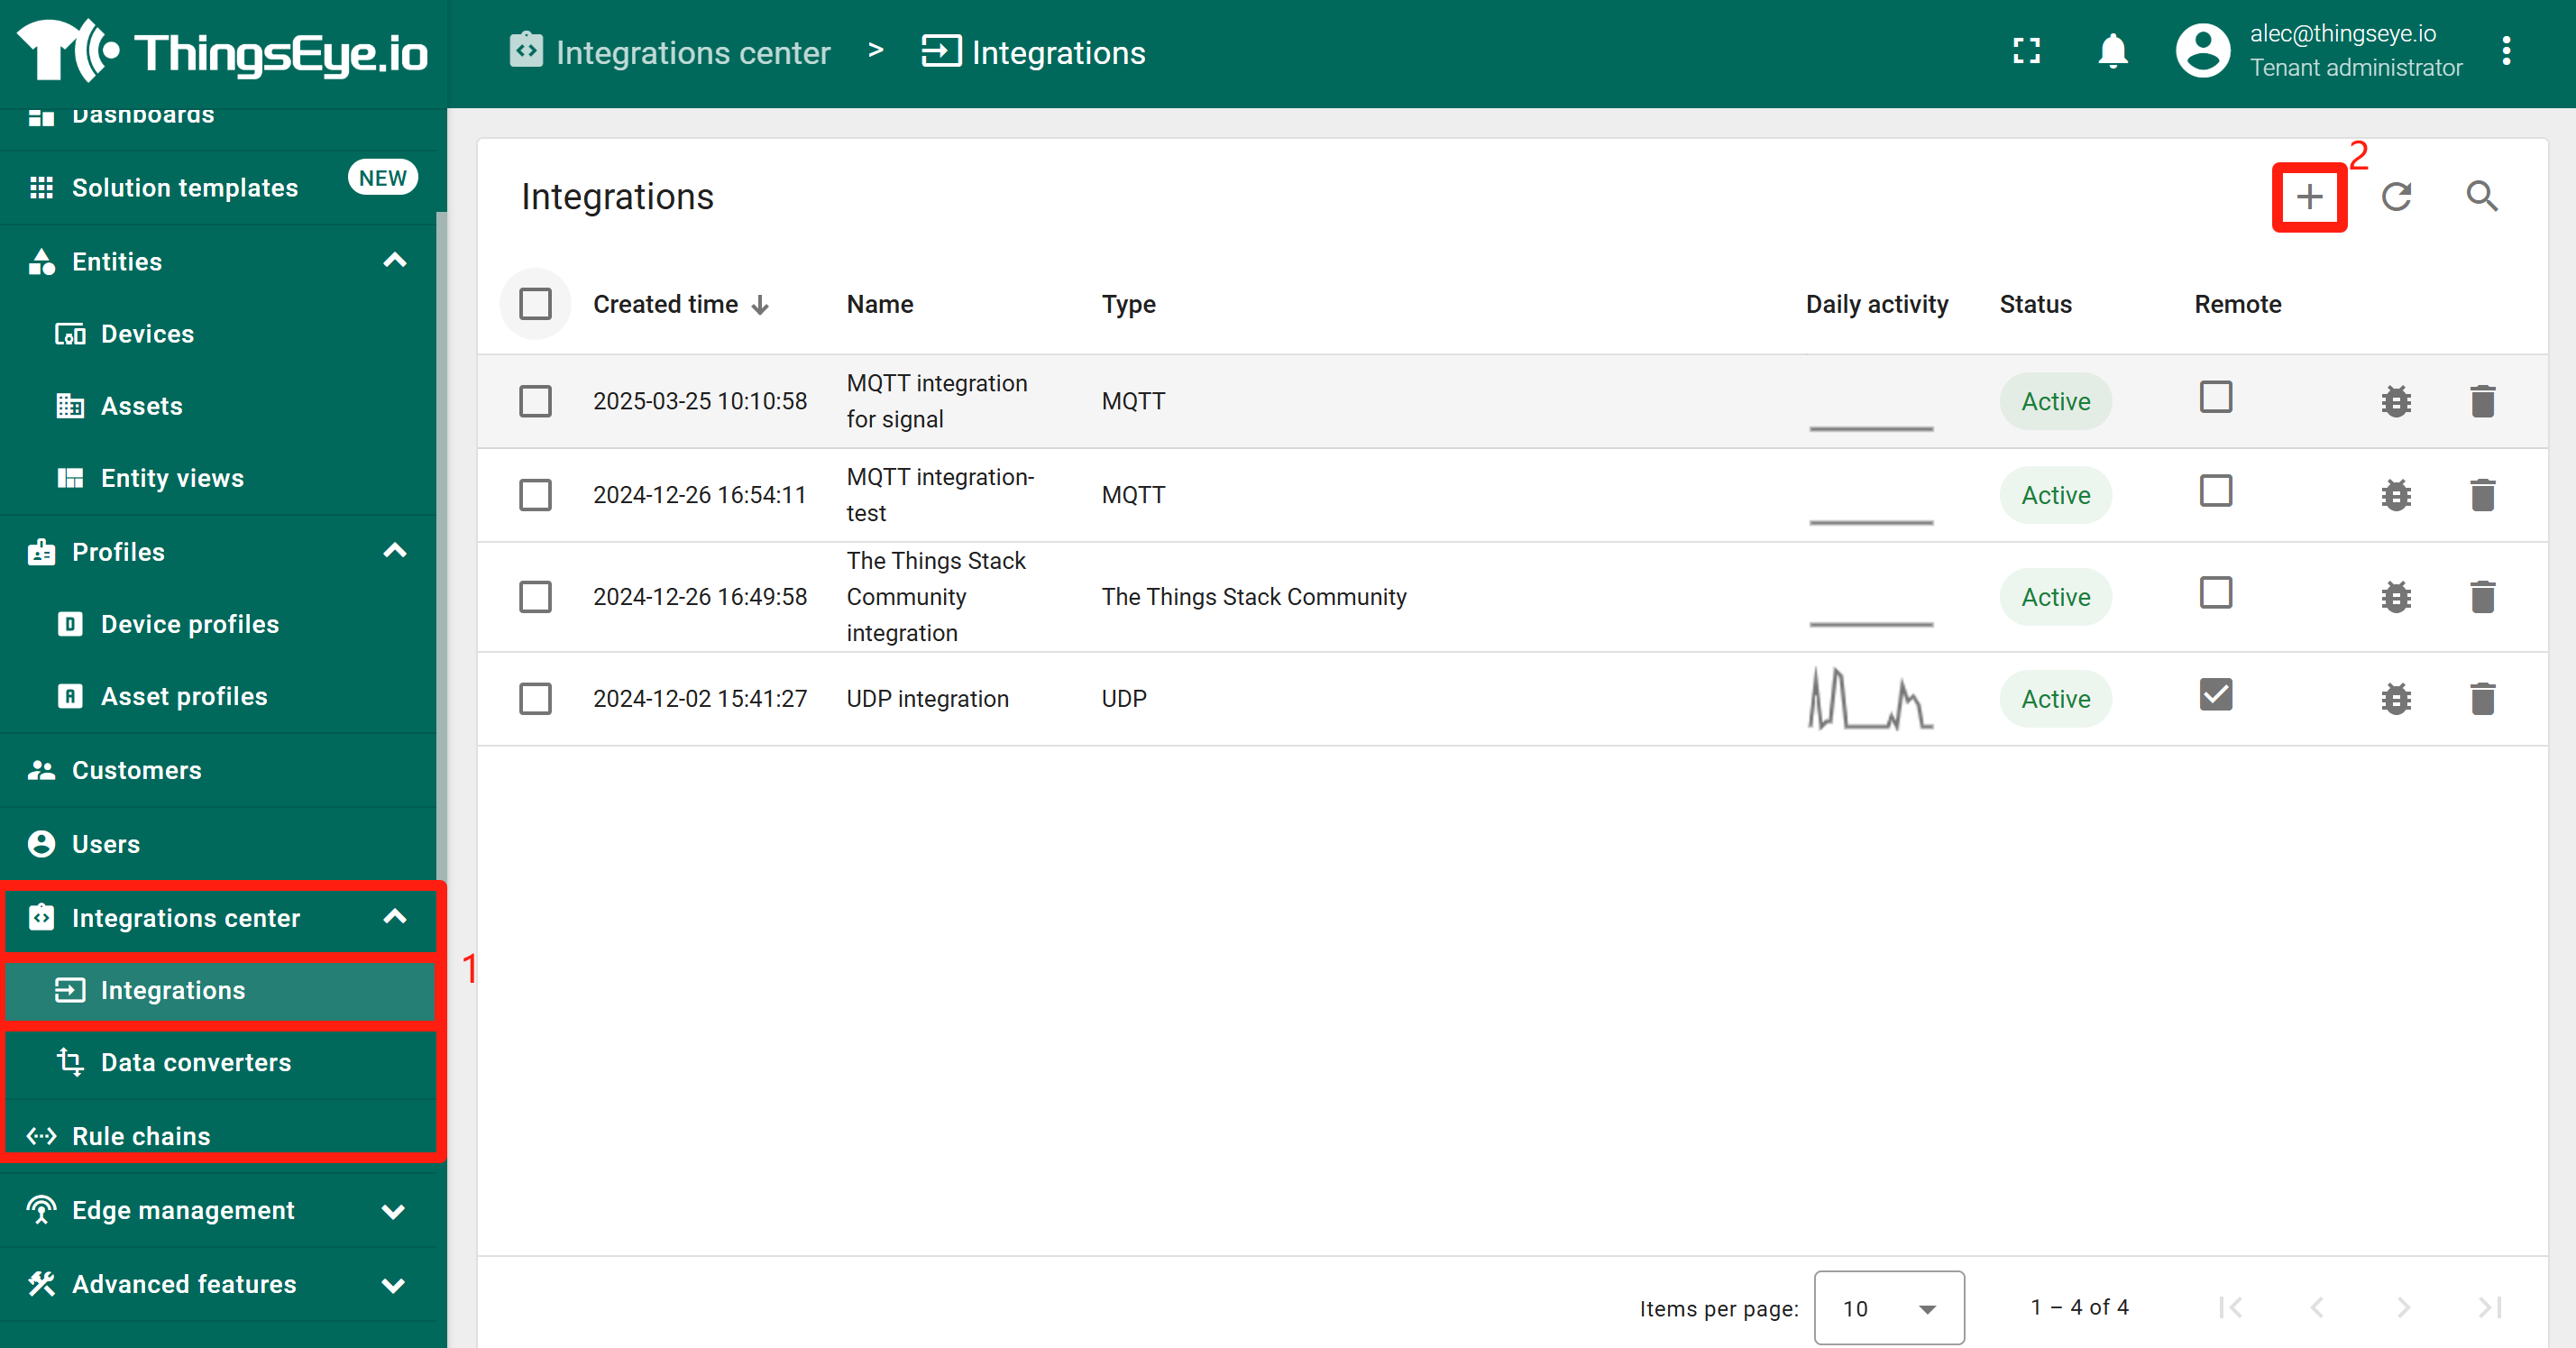
The Add integration window appears.
In the Add integration window, configure the following settings:
Basic settings:
- Integration type: MQTT
- Name: MQTT integration
- Enable integration: YES
- Debug mode:YES
- Allows create devices or assets: YES
Click Next button.

Uplink/downlink data converter:
Next, directly select to create a new Uplink data converter .
Click Next button.

Downlink data converter:
- Next, directly select to create a new Uplink data converter .
Click Skip button.

Connection:
- Host: lns1.thingseye.io
- Port: 8883
- Credentials : PEM(Paste 3 certificates to boxs below)Click this link to download the certificates.
- Password: Password or nothng
- Enable SSL: YES
- Topic: It needs to align with the device's topic.
- QoS: 0-At most once or an MQTT QoS level
Click Skip button.

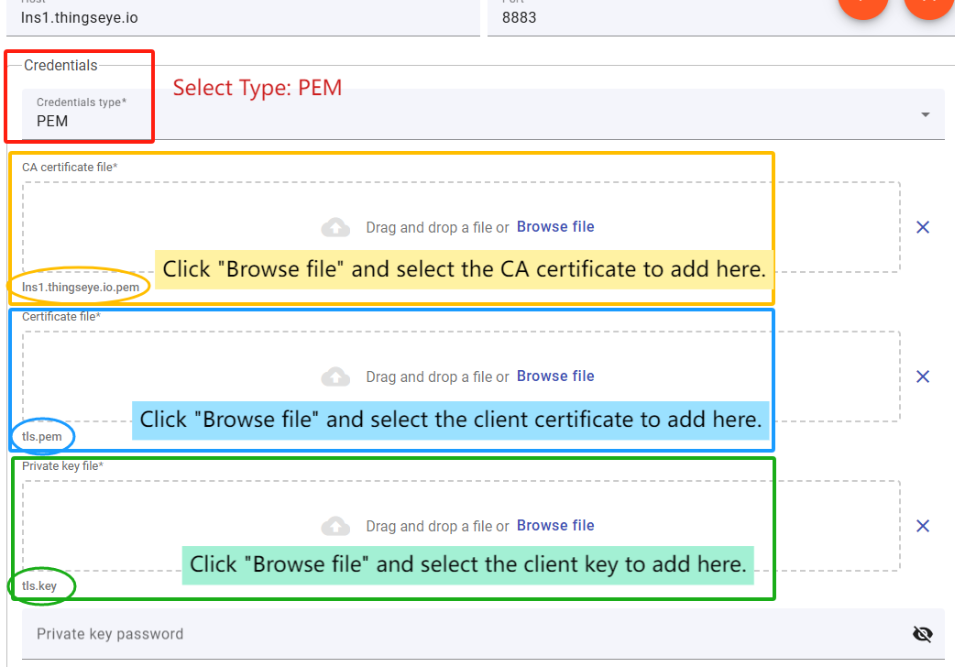
Click on the Add button.
You should see that the newly added integration is listed on the Integrations page.
Since we haven't received data from a device yet, the integration Status is shown as Pending, Active instead if it have.

4. Configure Thingseye's Data Converters
First, you need to download the MQTT uplink/downlink JS code.
In Thingseye, Data Converters are components used to transform incoming or outgoing data between different formats, typically to convert raw telemetry data from devices into a structured format that Thingseye can understand, or vice versa.
4.1 Uplink
- Uplink Converter
The purpose of the decoder function is to parse the incoming data and metadata to a format that ThingsBoard can consume.
Go to the Integrations center -> Data converters page, and find that MQTT uplink converter that was newly created when the integration was created.
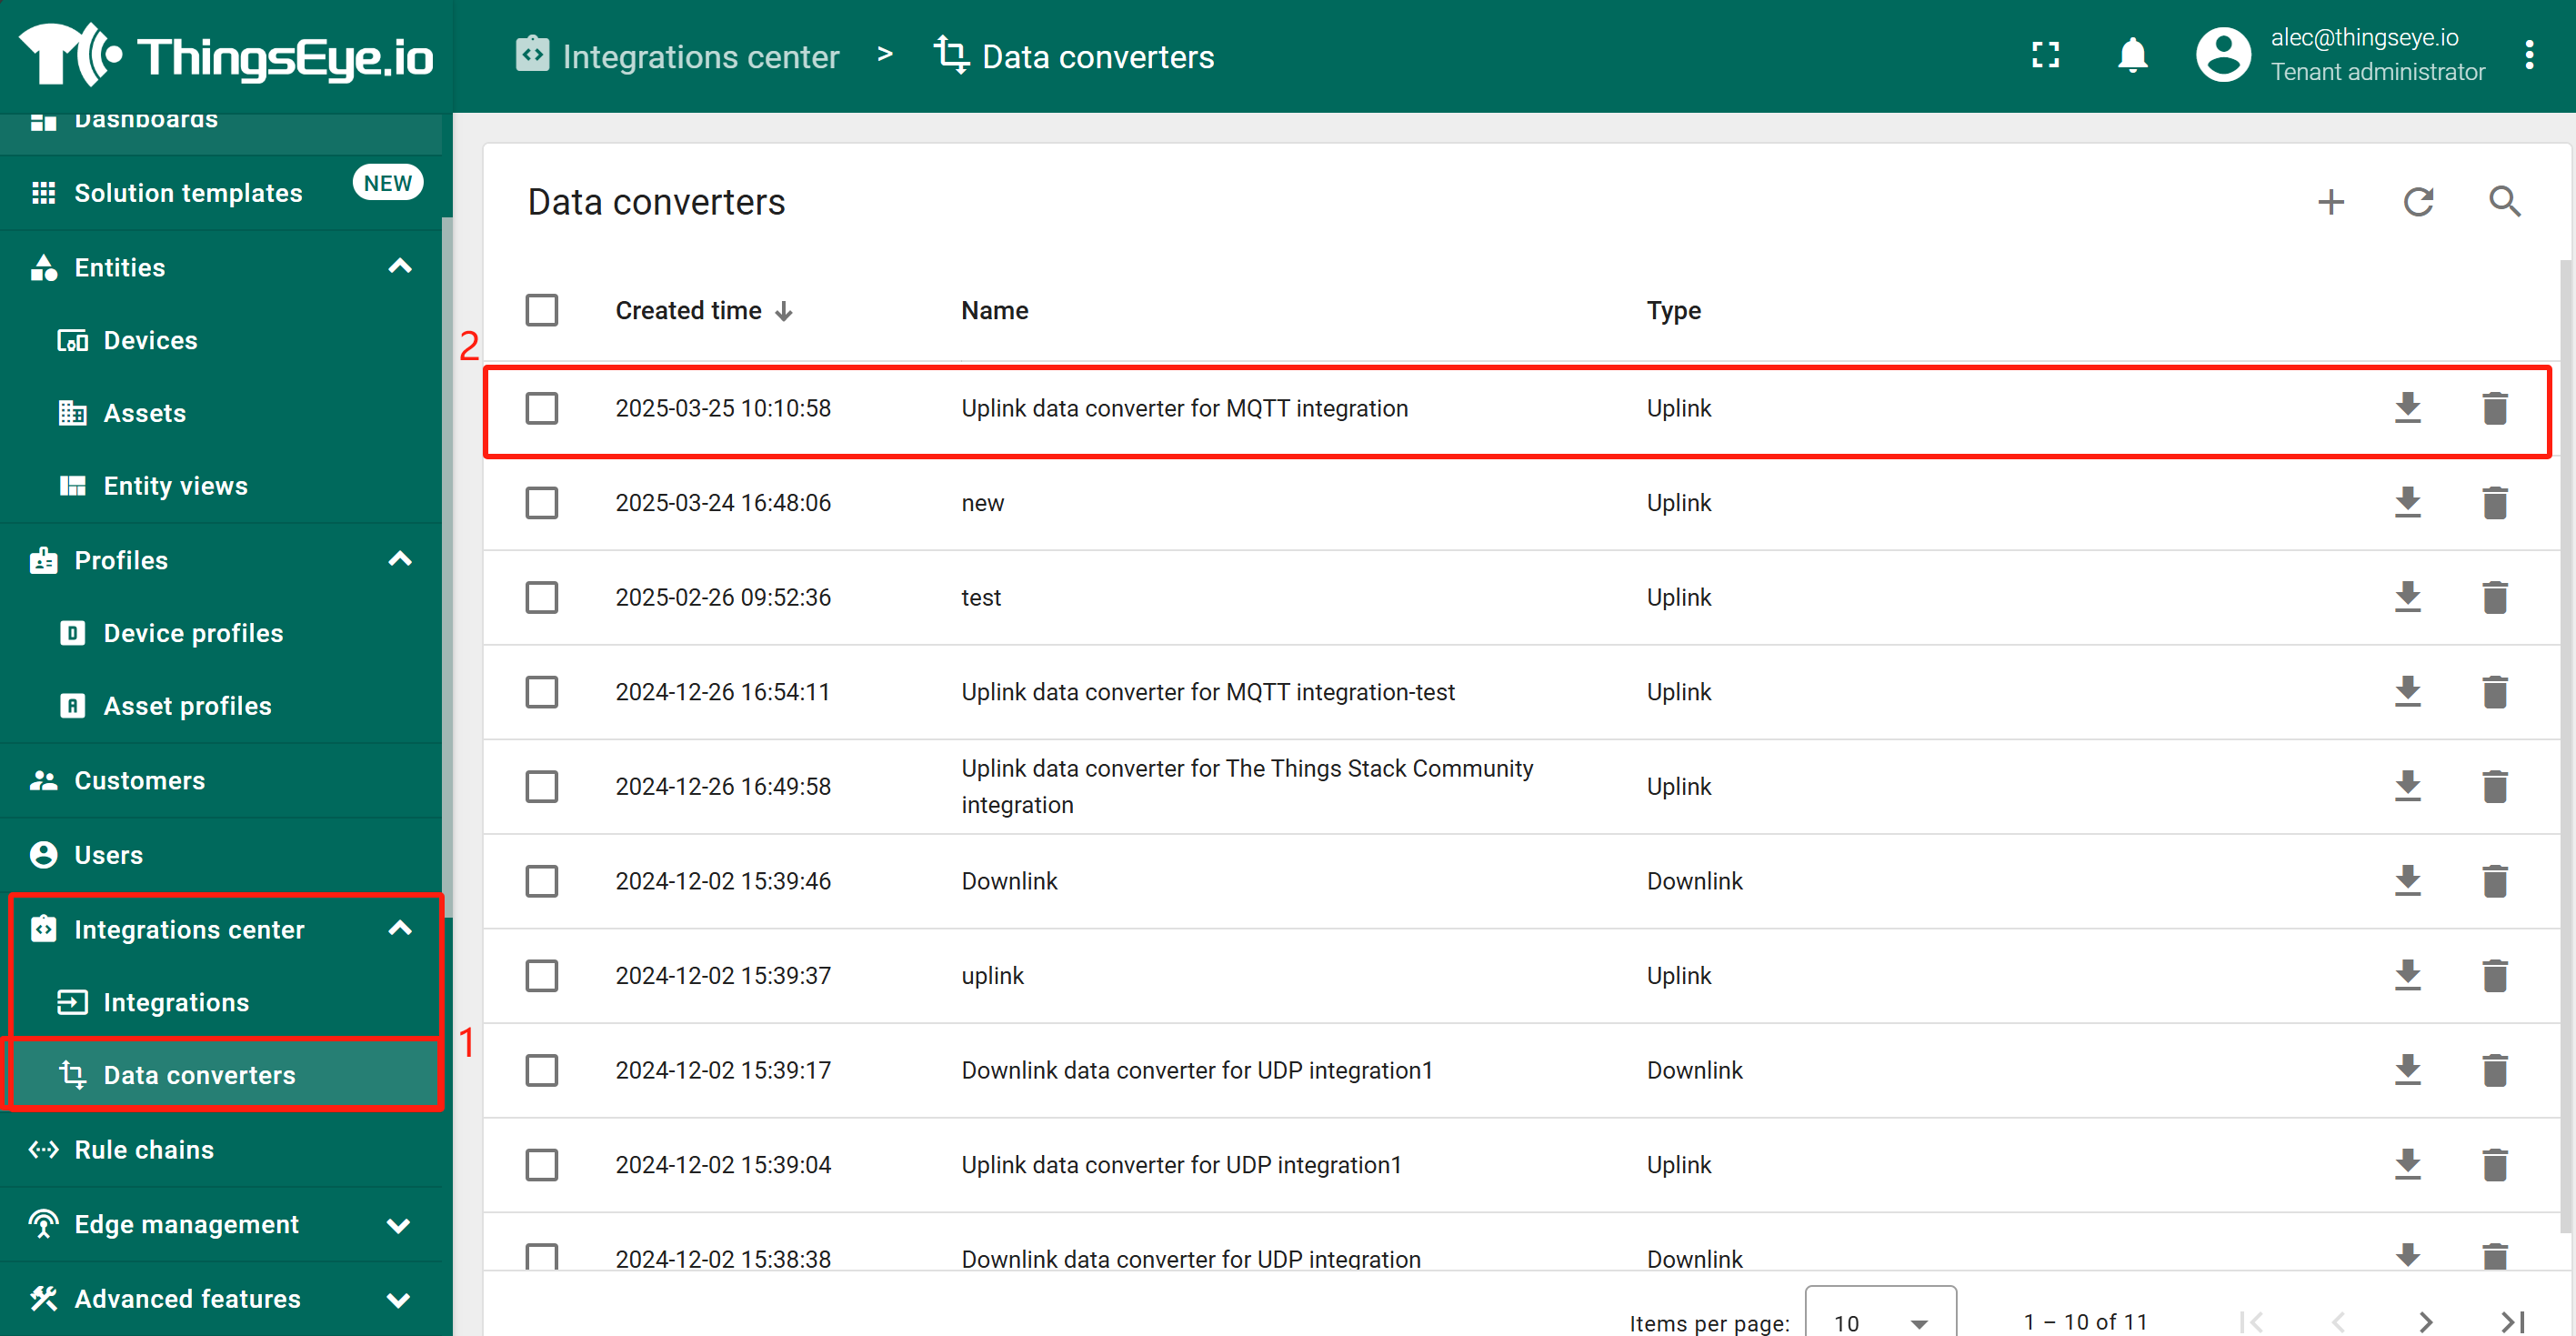
Enter edit mode and apply MQTT uplink JS code to this uplink converter.
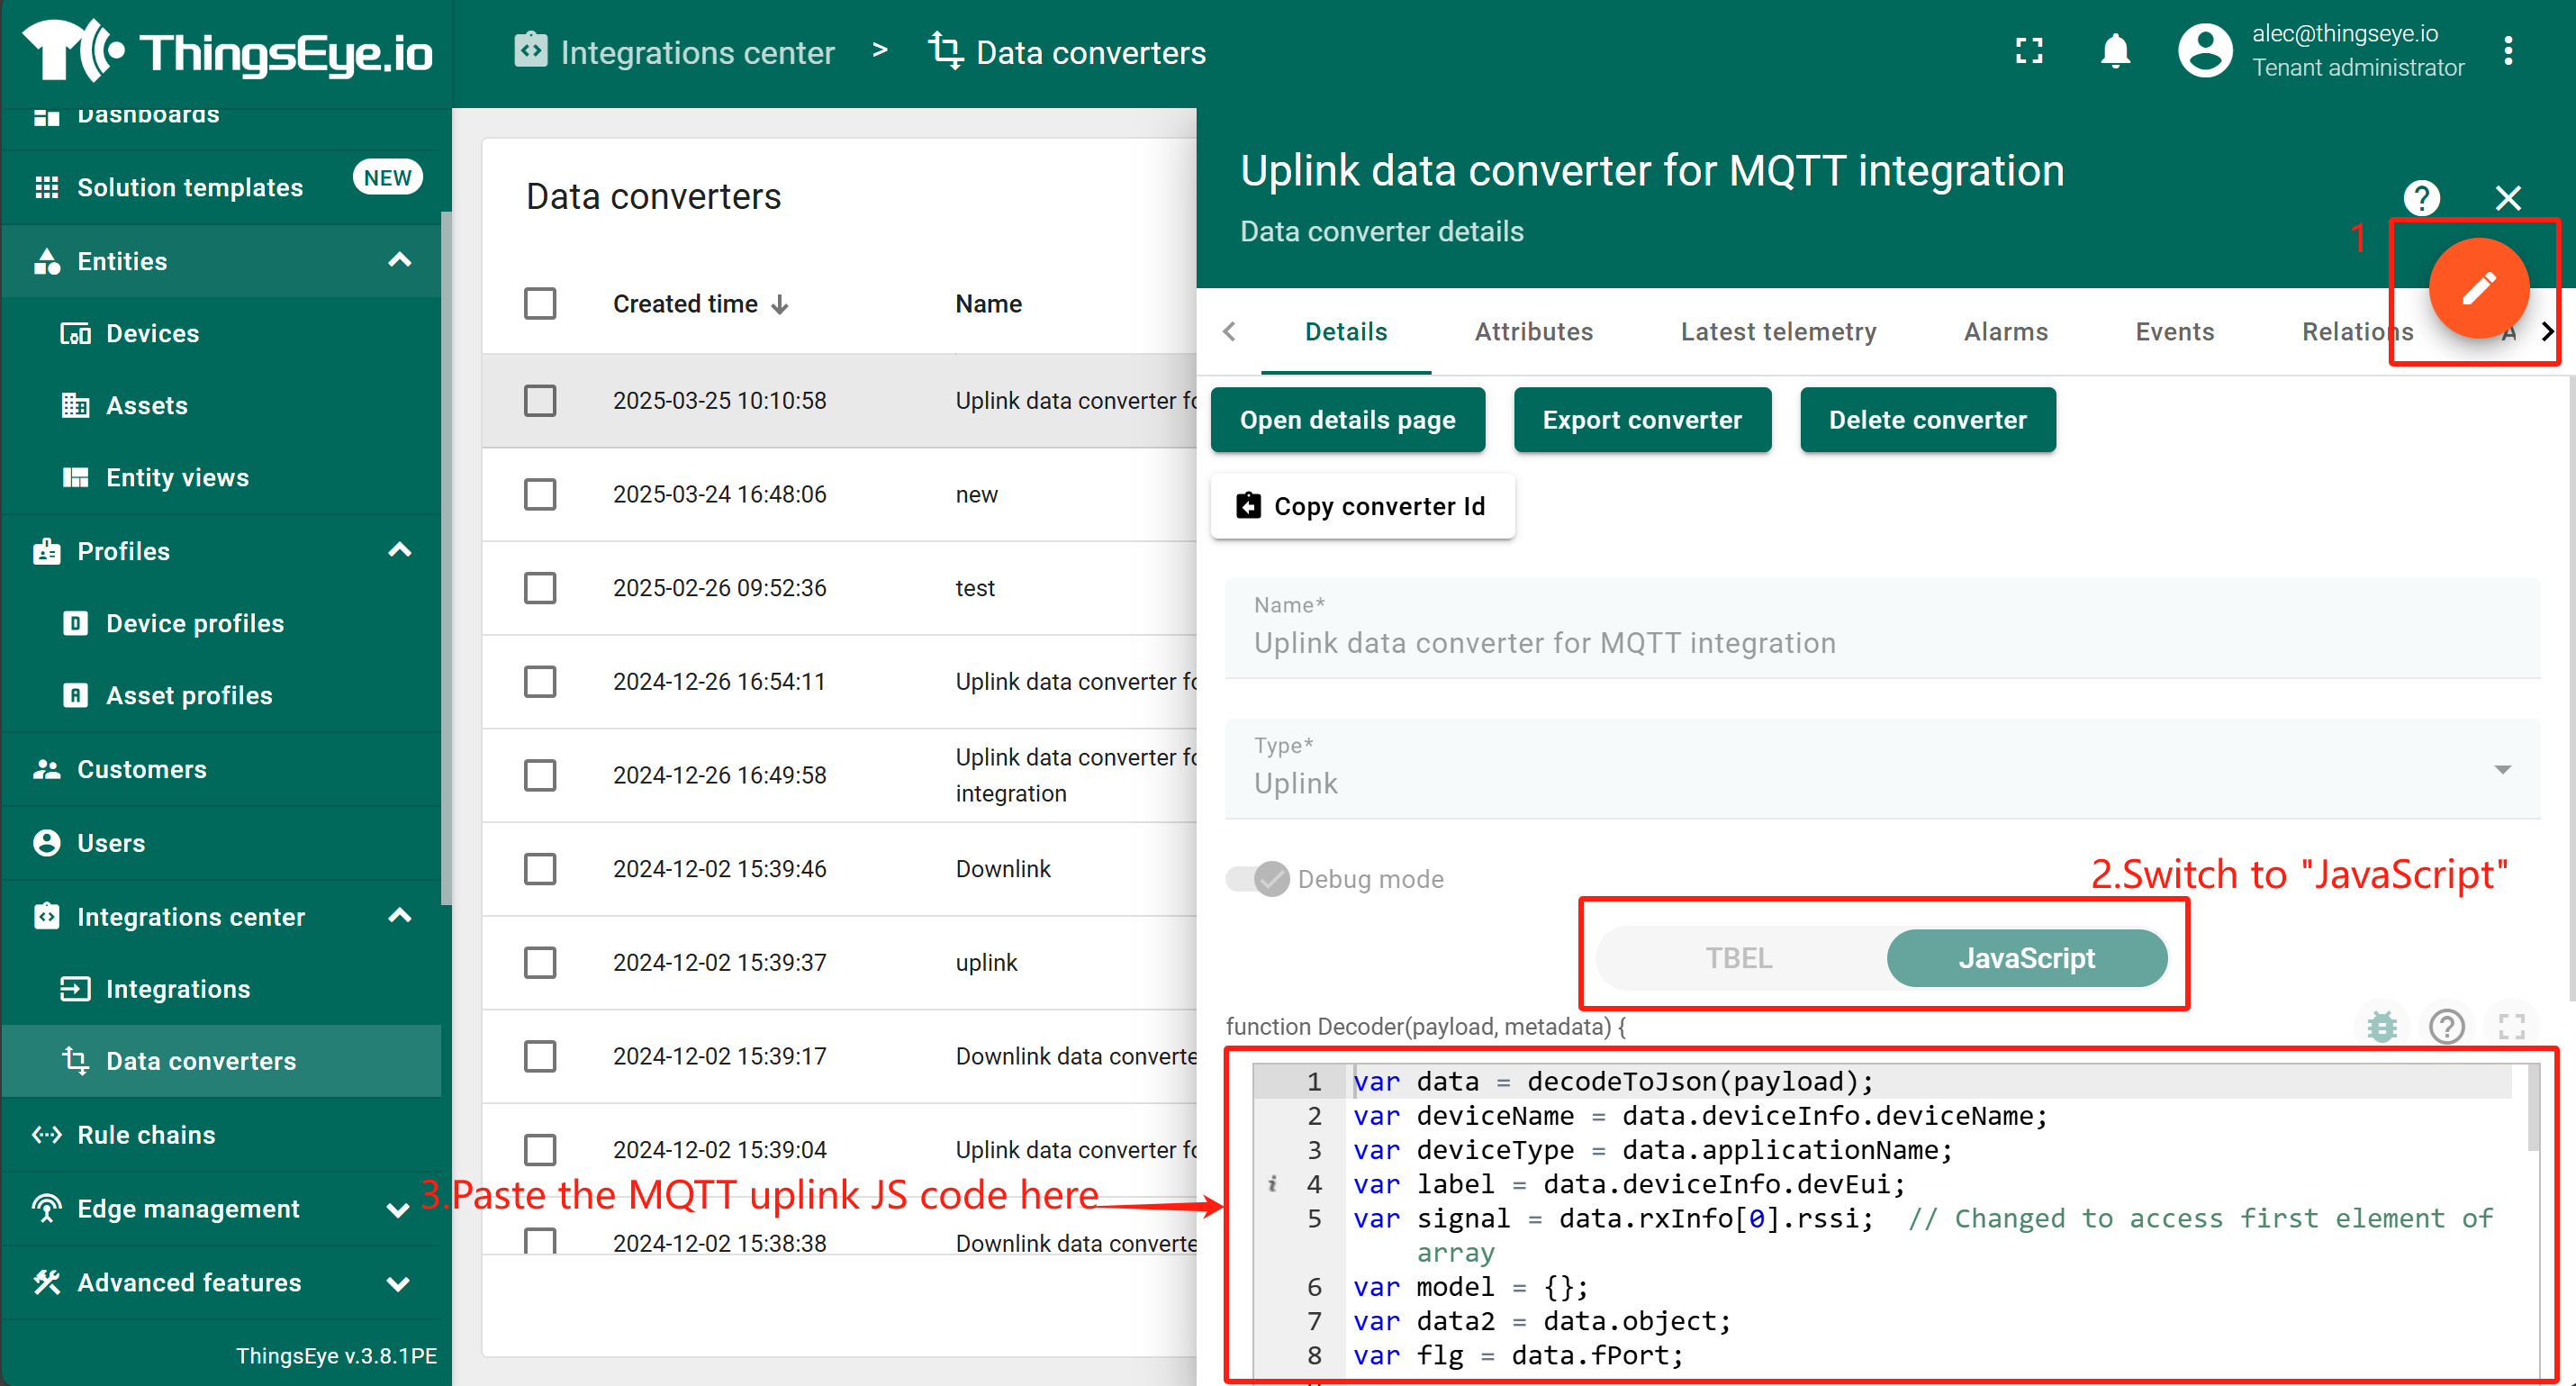
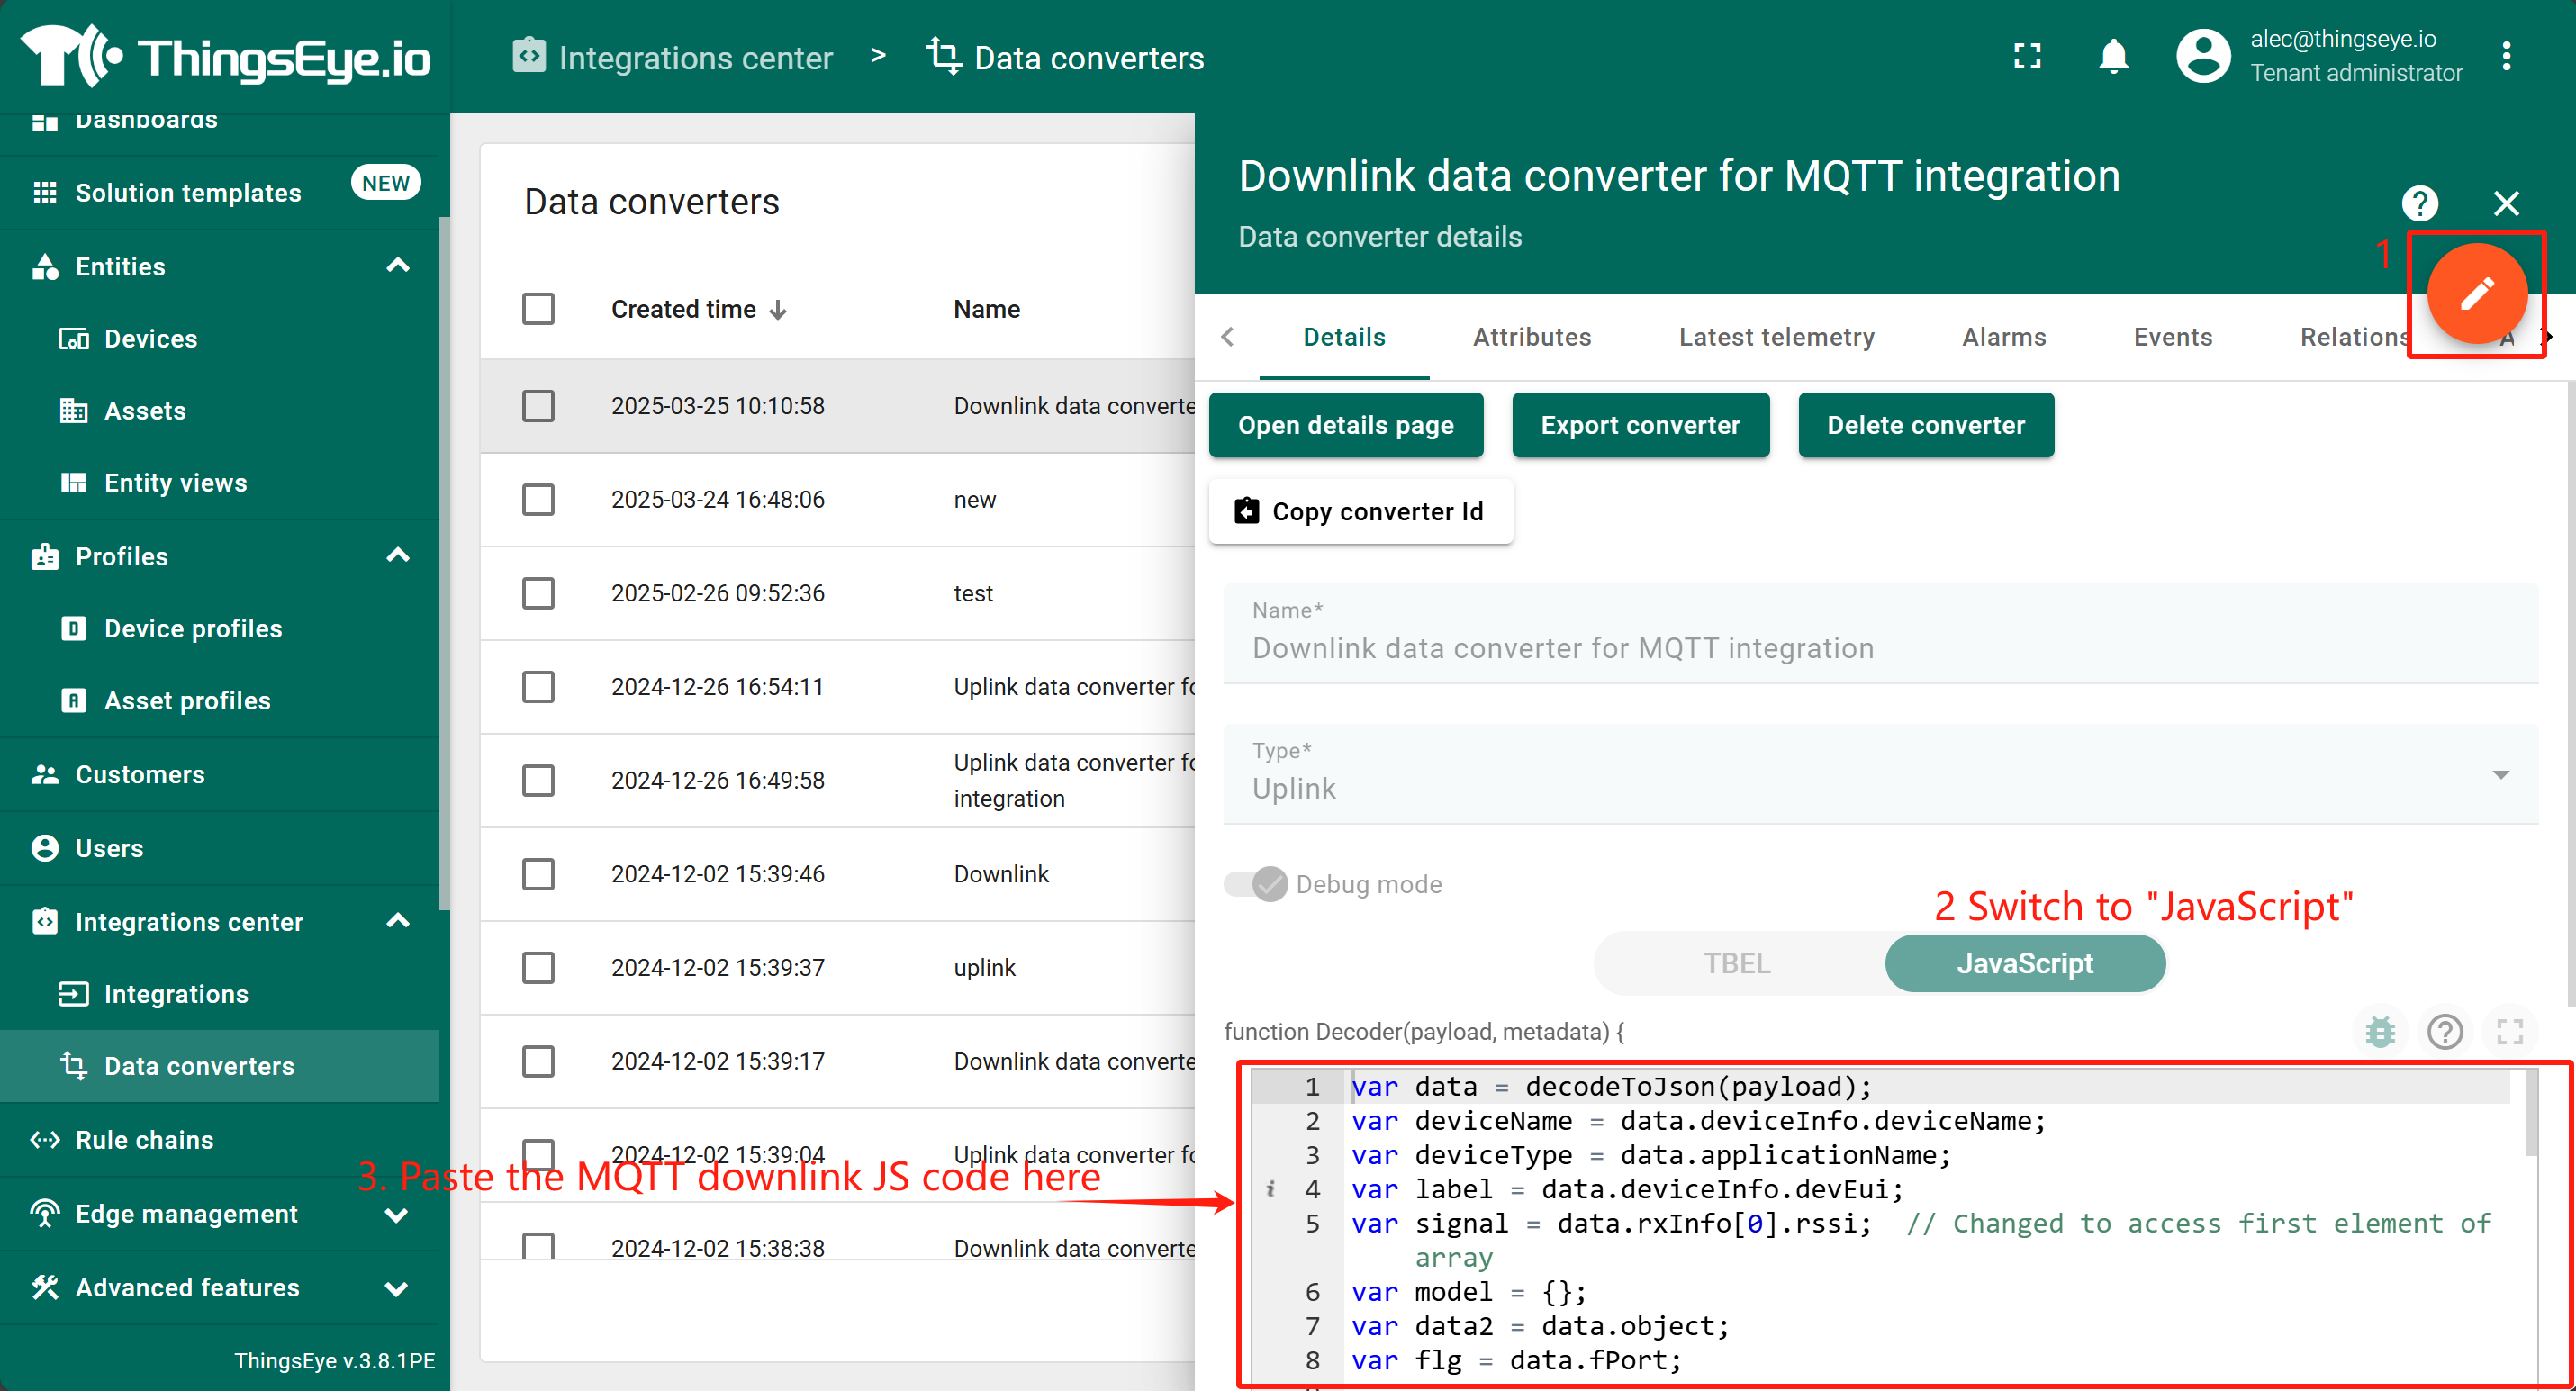
4.2 Downlink
Downlink Converter
Go to the Integrations center -> Data converters page, and find that MQTT downlink converter that was newly created when the integration was created.
Enter edit mode and apply MQTT downlink JS code to this downlink converter.
4.3 Simulate with MQTT.fx


5. Test connect
AT Commands
- AT+PRO=3,5 // Use MQTT Connection & Json Payload
- AT+SERVADDR=lns1.thingseye.io,8883
- AT+SUBTOPIC=8899 // Consistent with the Topic of MQTT integration created by ThingsEye
- AT+PUBTOPIC=8899 // Consistent with the Topic of MQTT integration created by ThingsEye
- AT+CLIENT=NULL
- AT+UNAME=NULL
- AT+PWD=NULL
- AT+TLSMOD=1,2
Test Uplink by click the button for 1~3 seconds, the MQTT integration in ThingsEye allows you to view the data upstream from the device:
Go to "Device" -> "Search Device", enter the IMEI of the device to find the device.
