Dragino Gateway & LoRaWAN Device Quick Configuration Guide
Table of Contents:
1.Overview
When you receive the gateway, you need to register the gateway to the server for it to work properly, here are the instructions for registering the gateway to the server
2. Configuring gateway
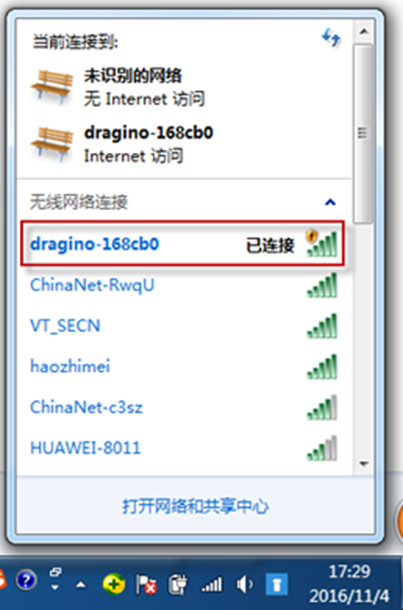
2.1Connect to gateway wifi
When the gateway starts up for the first time, it will automatically generate a WiFi network named dragino-xxxxxx.
Wi-Fi Name:dragino-xxxxx
Passphrase:dragino+dragino
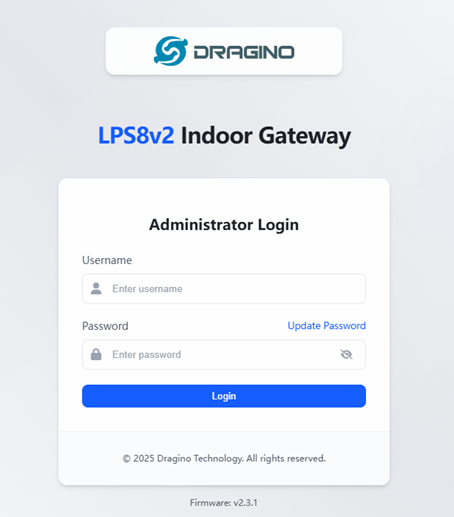
2.2 Enter the gateway management interface
After connecting to the gateway's Wi-Fi, open a browser on your computer and enter the LPS8N's IP address
Ip address:http://10.130.1.1/
username:root
Passphrase:dragino
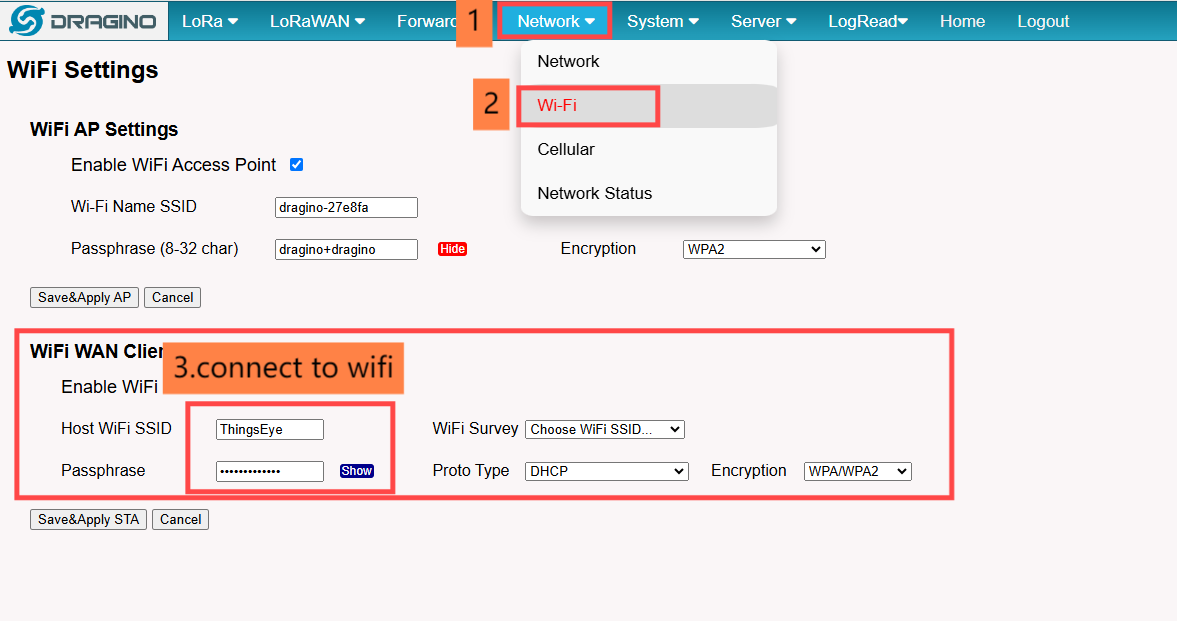
2.3 Configure the gateway to connect to wifi
If your gateway is networked with wifi, you need to configure the gateway's networking wifi as follows:
2.4 Configure the server addresss
For Ins servers,the bands and ports are fixed as follows: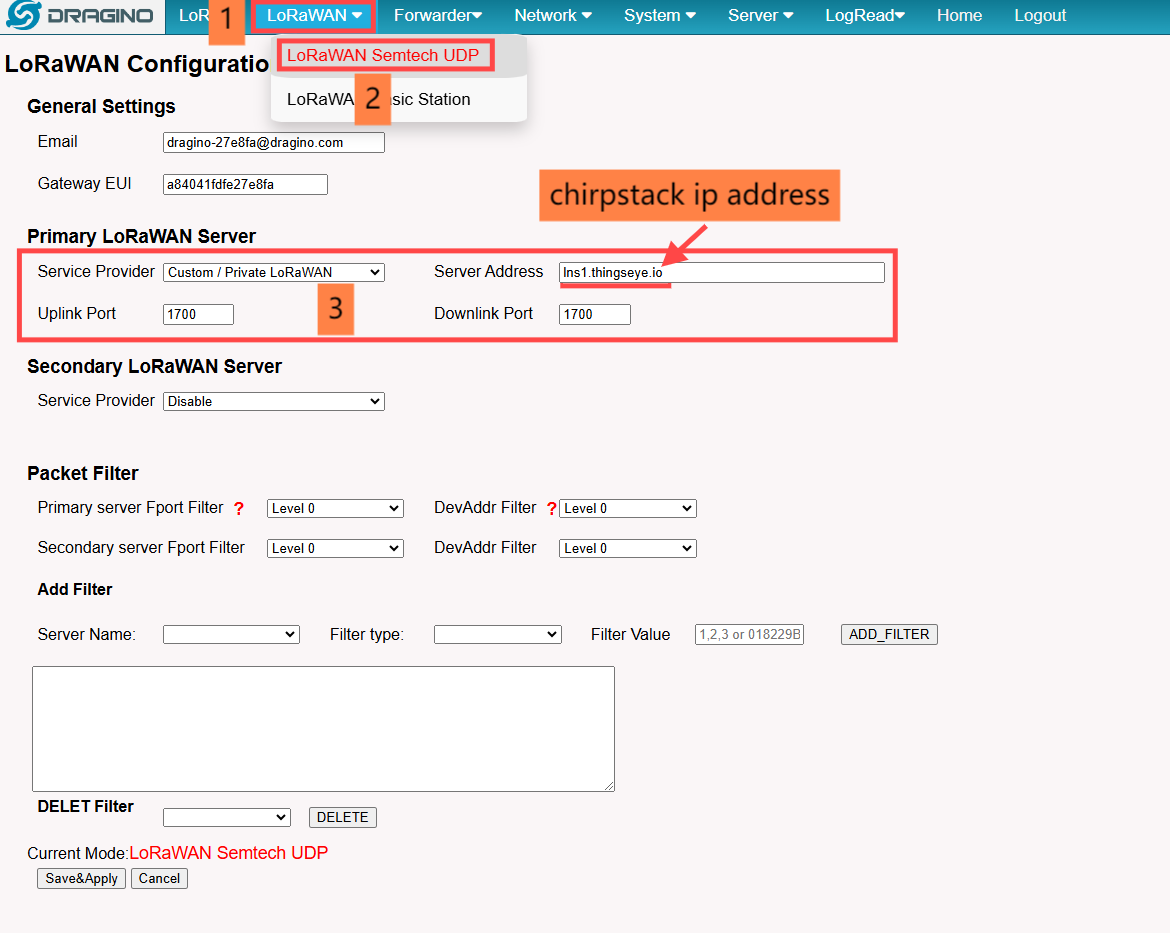
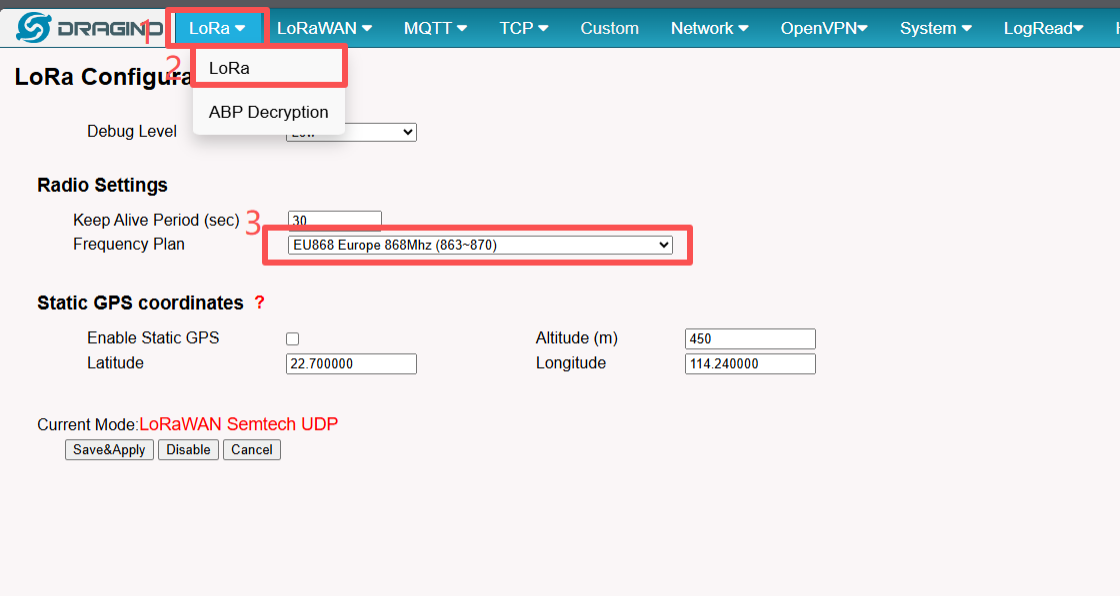
2.5 Configure the server Port and Frequen
For lns servers, the bands and ports are fixed as follows: 1706 ------------------------------------------------------------eu868 (Only used by lns1 servers, no other distinction is made) |

3. Registered device on ThingsEye
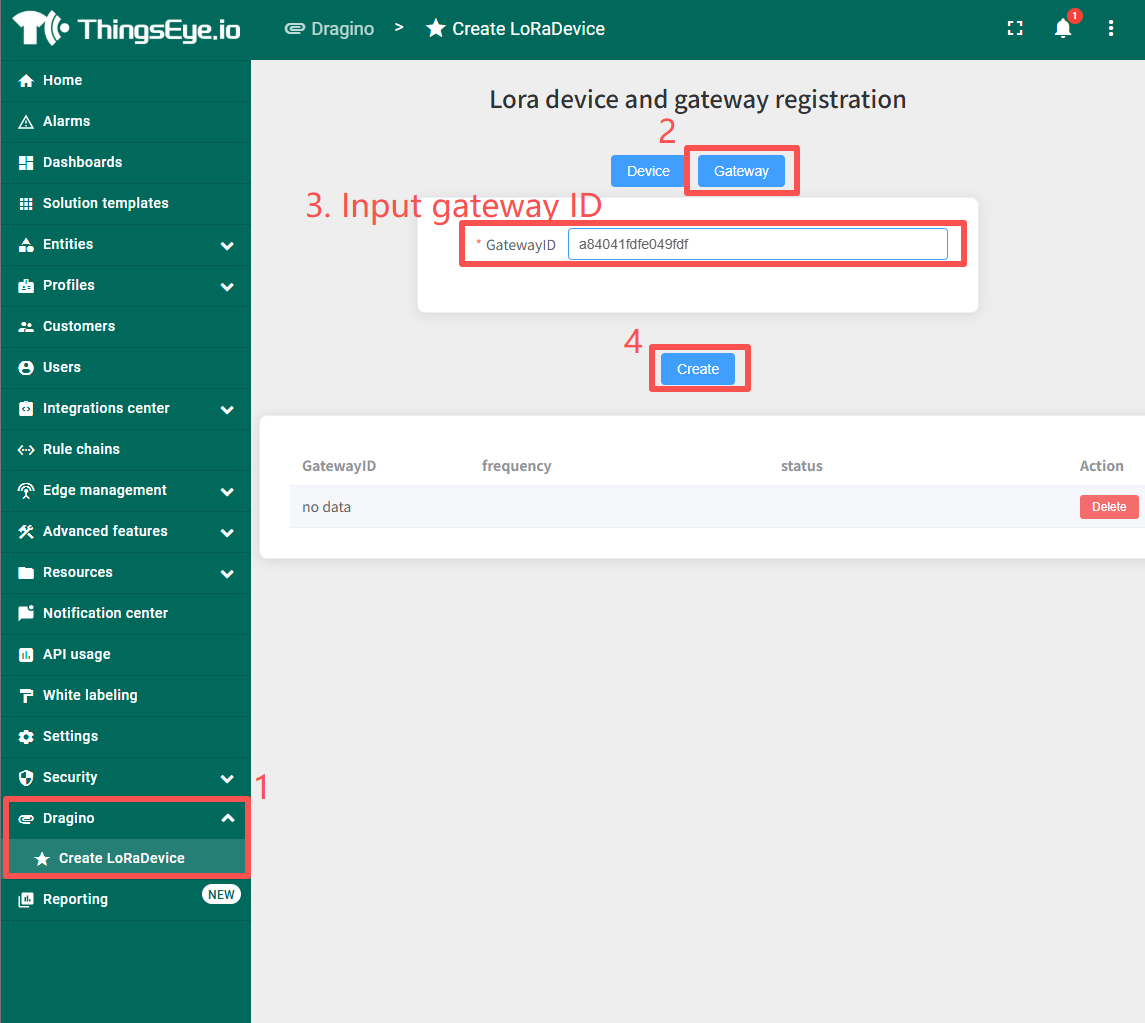
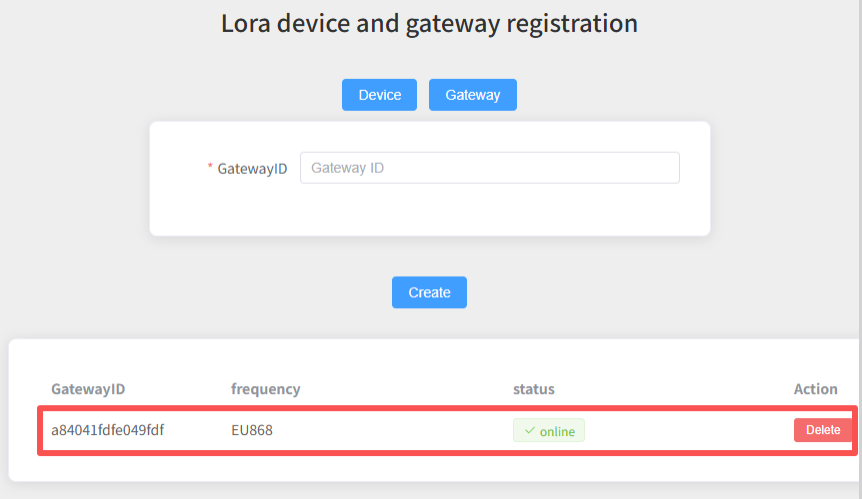
3.1 Registered gateway
Input gateway ID then restart gateway, check whether be online.
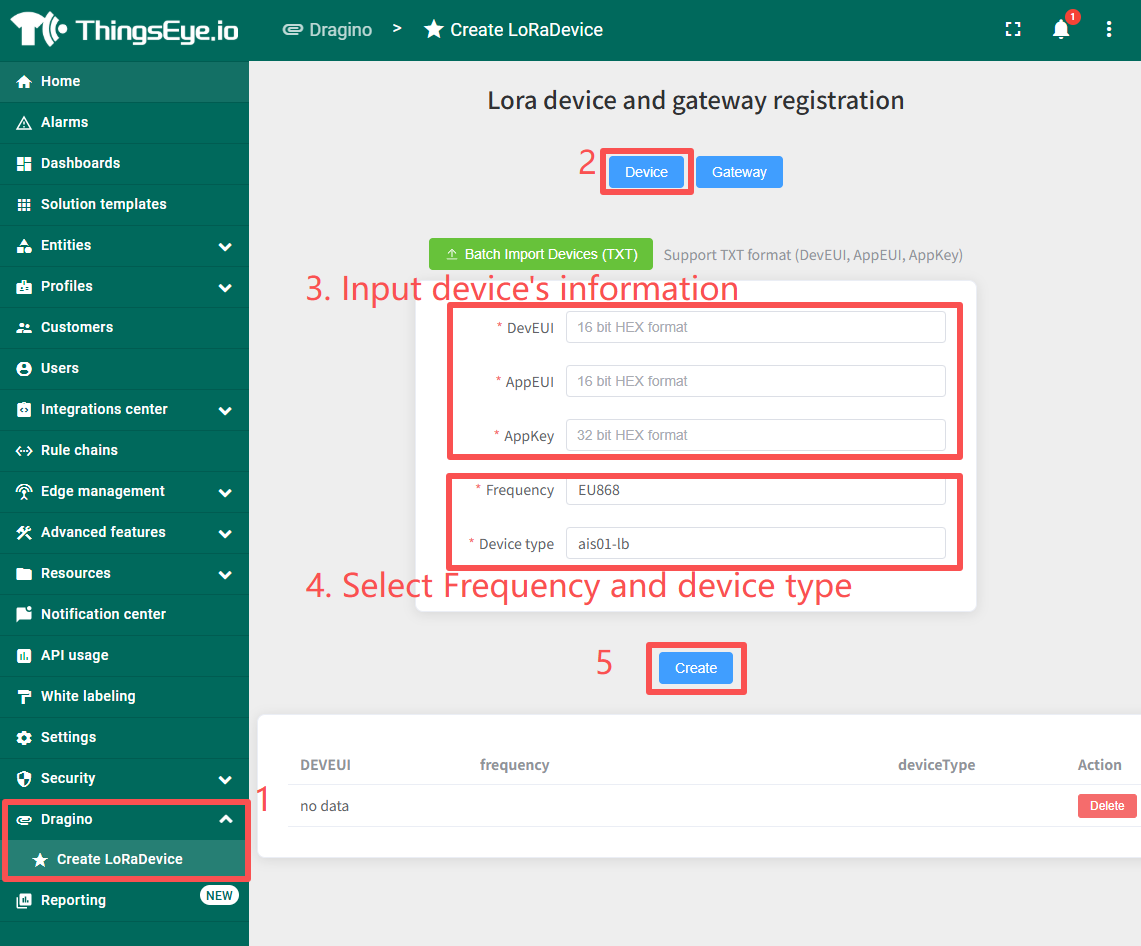
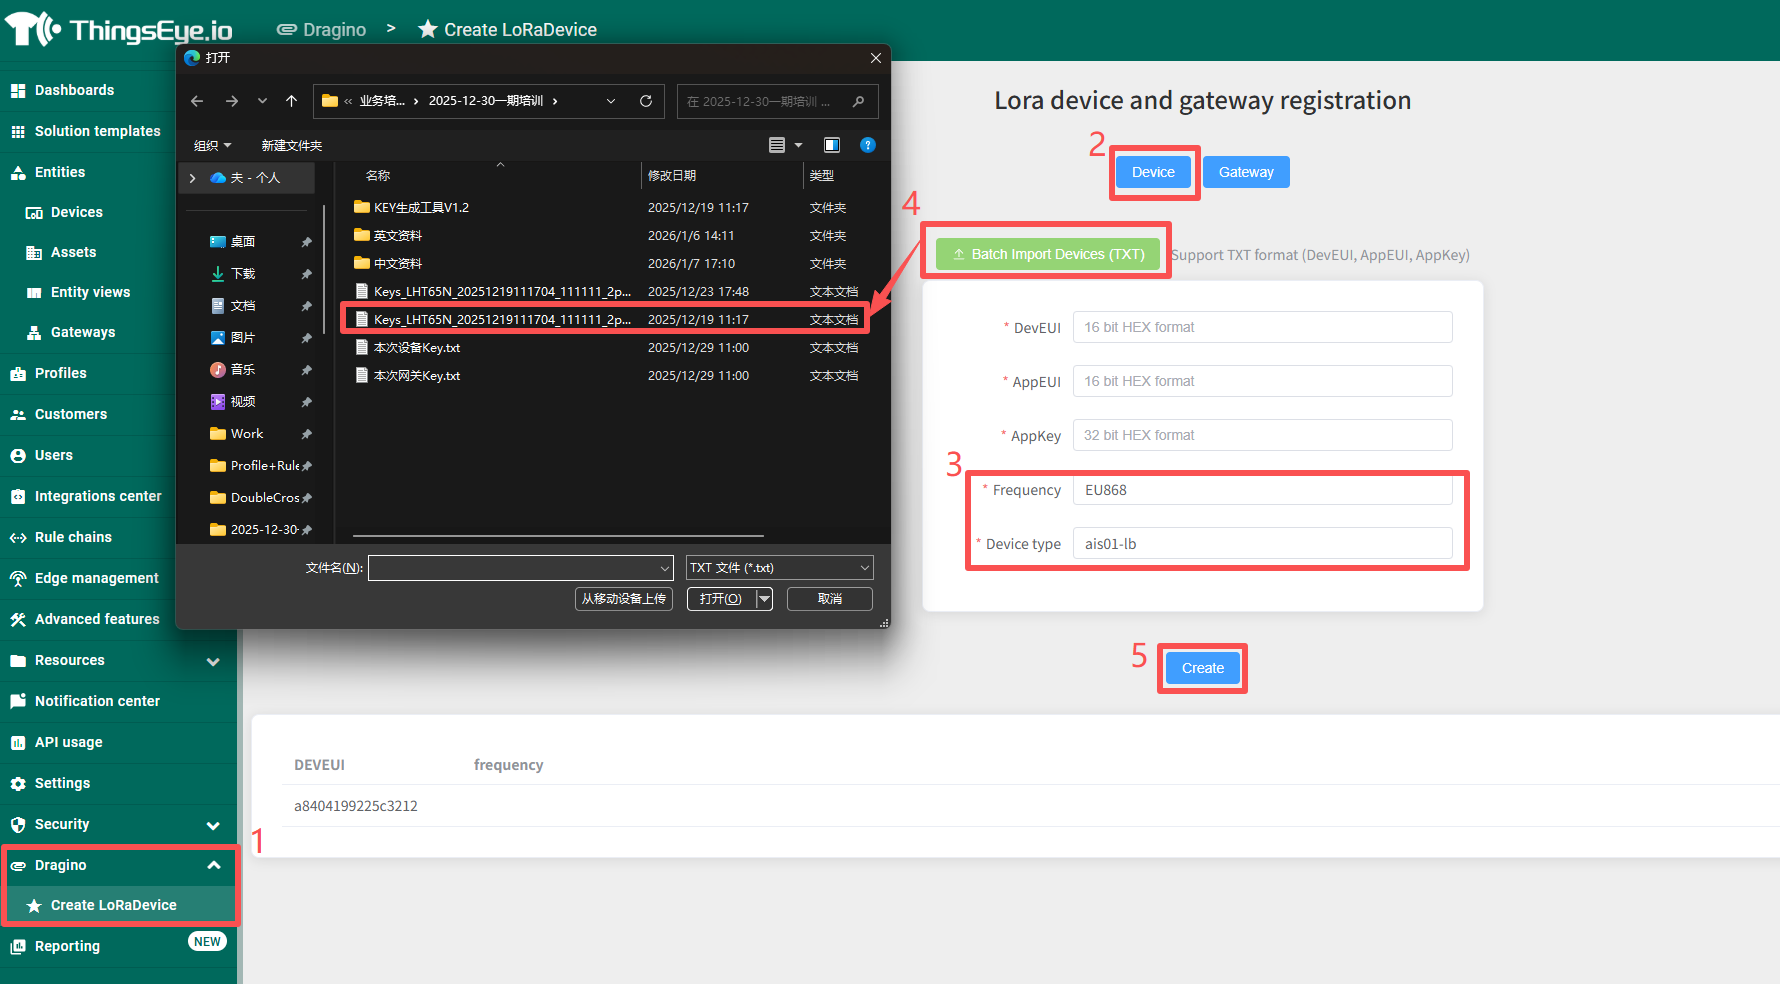
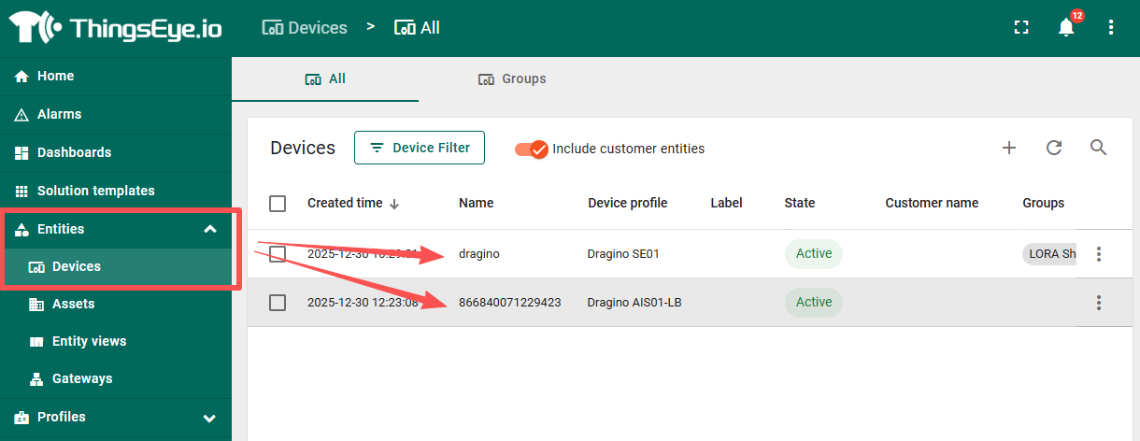
3.2 Registered LoRa devices
1) Single device registration: Input device's information、select frequency & device type. Then restart devices check whether be online.
2) Batch registration of devices: Import device key file、select frequency & device type. Then restart devices check whether be online.
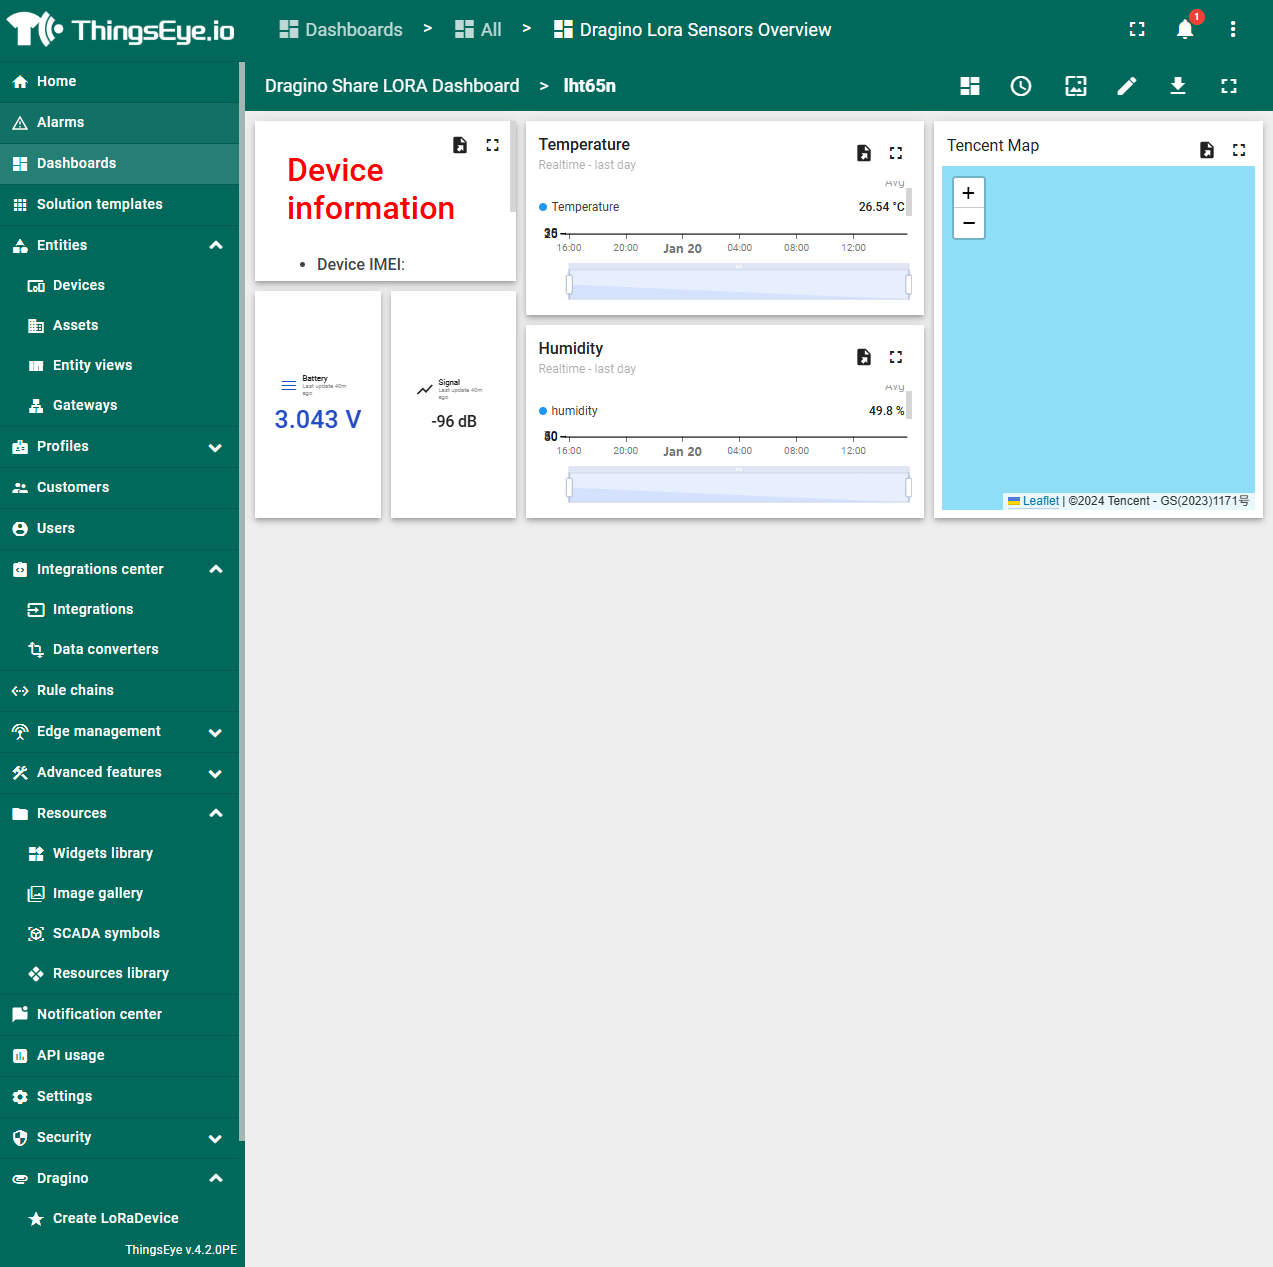
4. Data visualization
If you don't have an ThingsEye(TE) account yet, please see this guide: ThingsEye Account - ThingsEye Wiki
The following assumes you have a TE account.
Login TE: https://thingseye.io/
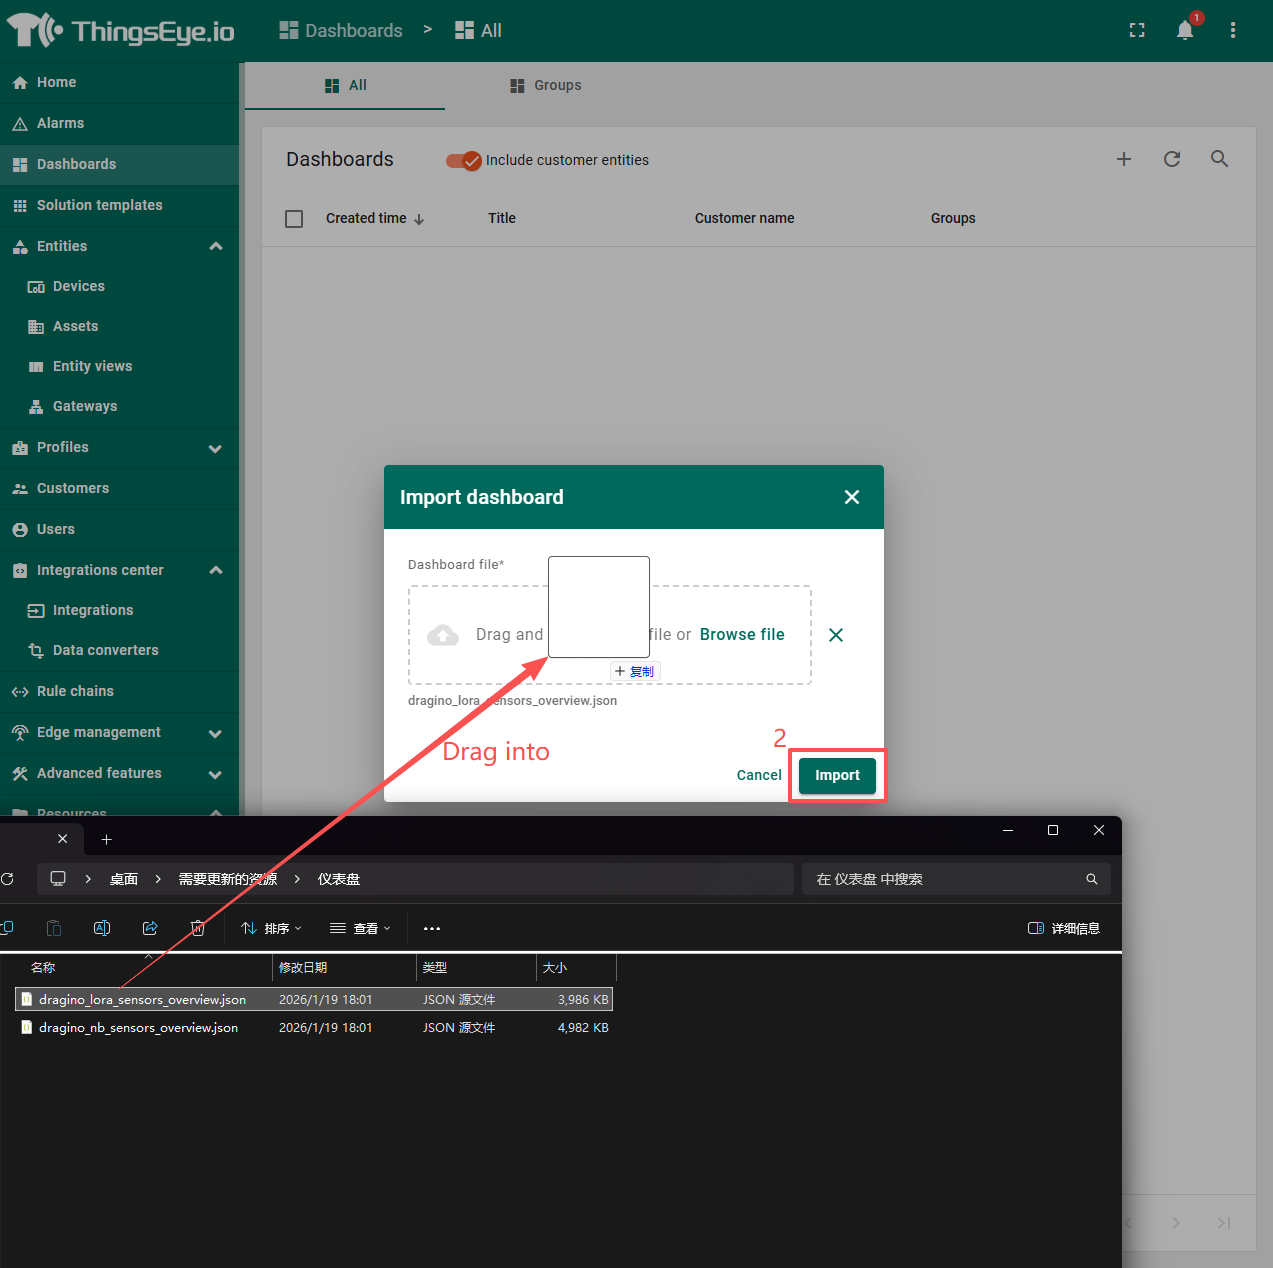
Download this dashboard:
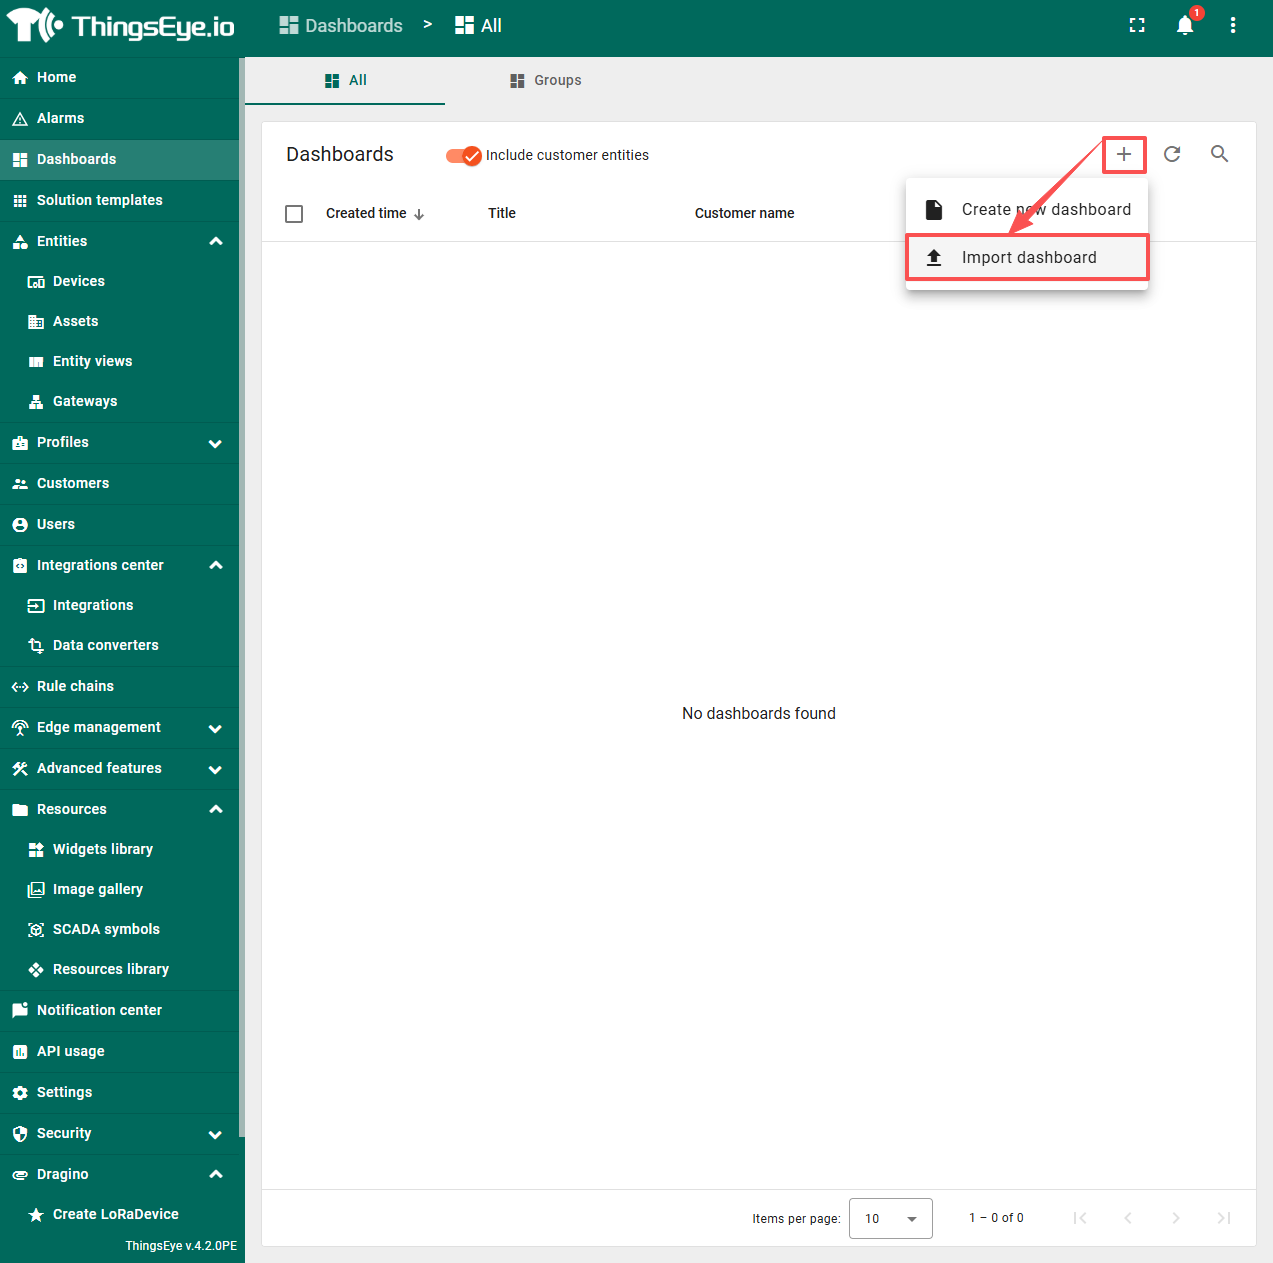
Import the dashboard
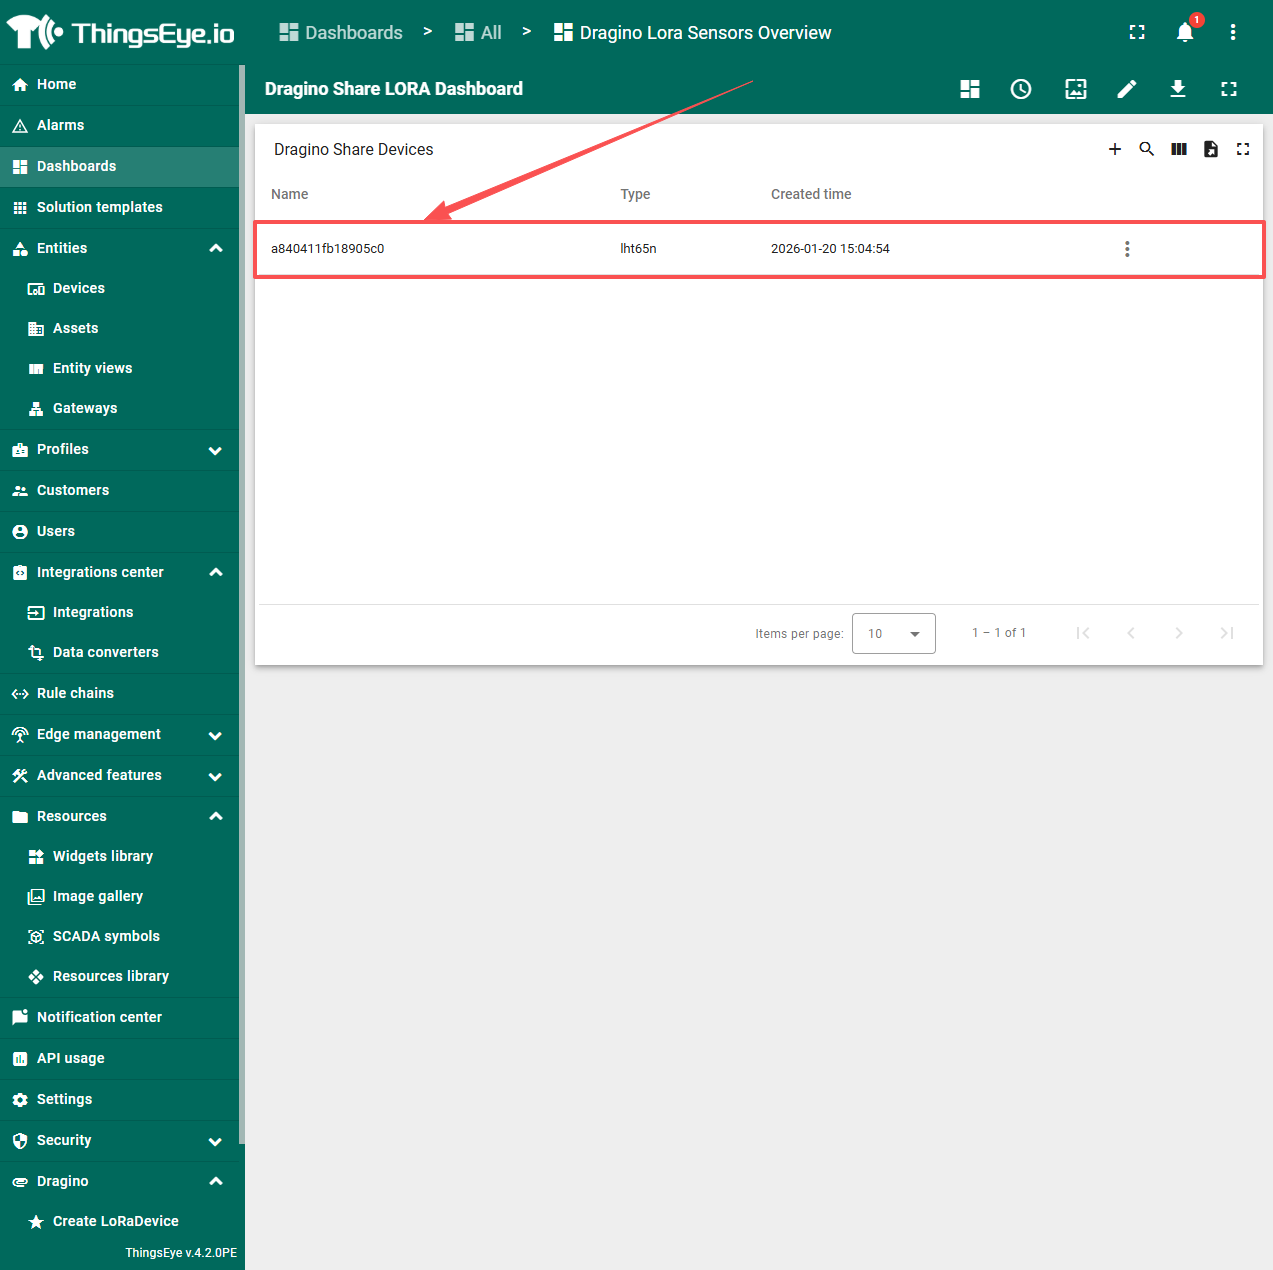
Open the dashboard, click device