
Table of Contents:
1.Overview
When you receive the gateway, you need to register the gateway to the server for it to work properly, here are the instructions for registering the gateway to the server
2. Configuring Gateway
2.1.1 Connect to gateway wifi
When the gateway starts up for the first time, it will automatically generate a WiFi network named dragino-xxxxxx with the password dragino+dragino.
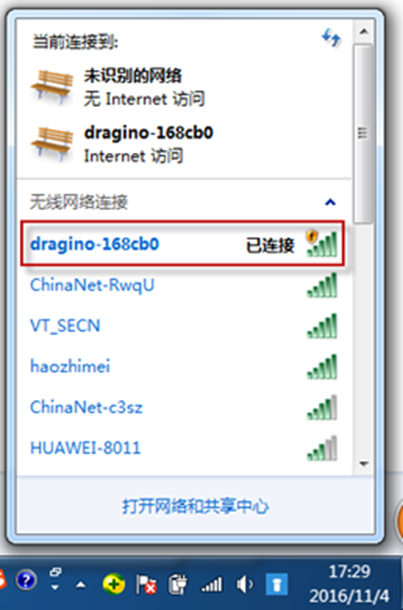
Wi-Fi Name:dragino-xxxxx Passphrase:dragino+dragino |
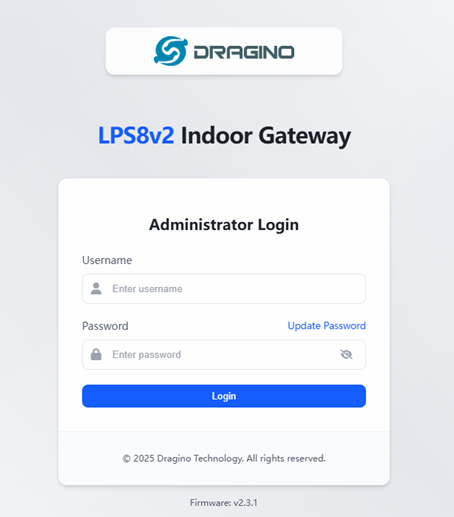
2.1.2 Enter the gateway management interface
After connecting to the gateway's Wi-Fi, open a browser on your computer and enter the LPS8N's IP address
Ip address:http://10.130.1.1/
username:root
Passphrase:dragino
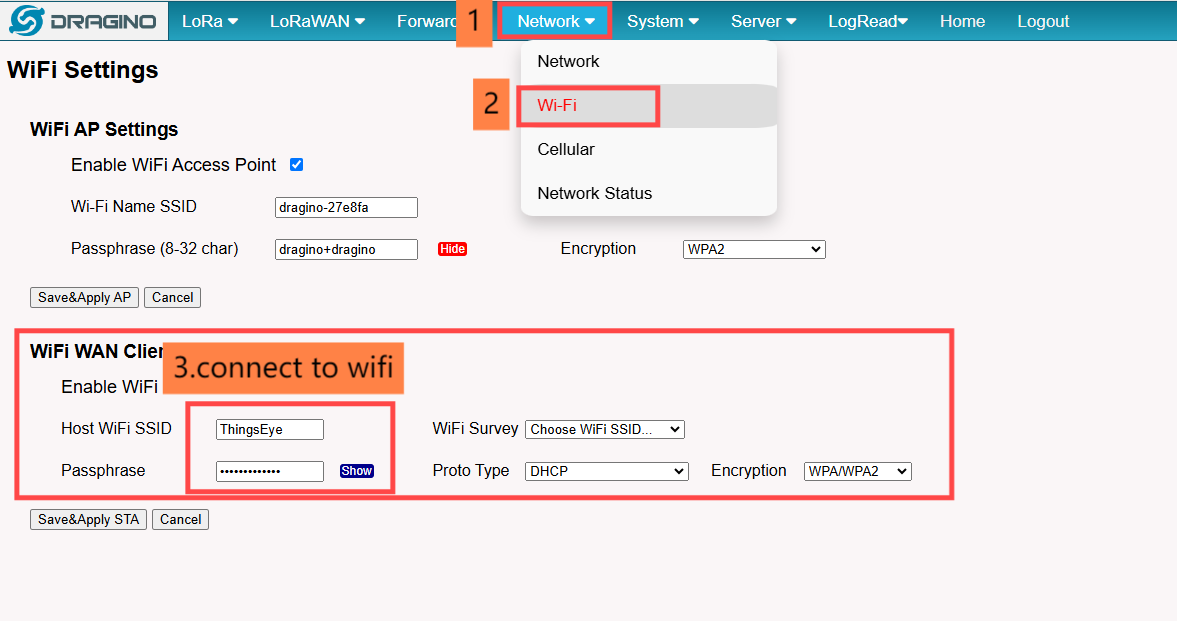
2.1.3 Configure the gateway to connect to wifi
If your gateway is networked with wifi, you need to configure the gateway's networking wifi as follows:
2.1.4 Configure the gateway
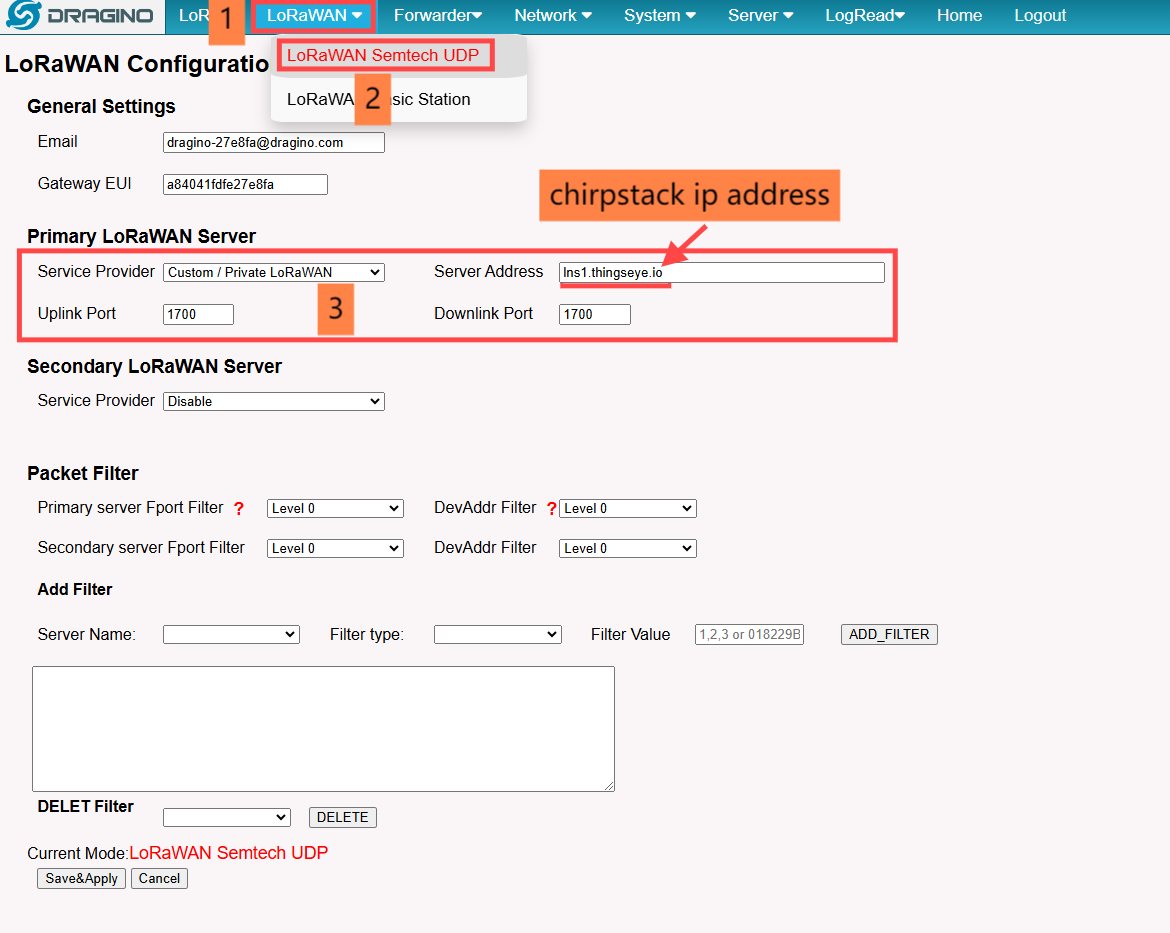

For lns servers, the bands and ports are fixed as follows:
1706 ------------------------------------------------------------eu868
1705-------------------------------------------------------------as923
1700-------------------------------------------------------------us915
(Only used by lns1 servers, no other distinction is made)
2.2 Connect to chirpstack

![]()
![]()
![]()

2.3 Checking gateway Status

3.Register to ttn
3.1 Gateway Configuration
3.1.1 Connect to gateway wifi
Wi-Fi Name:dragino-xxxxx Passphrase:dragino+dragino |
3.1.2 Enter the gateway management interface
Ip address:http://10.130.1.1/
user ID:root
Passphrase:dragino
3.1.3 Configure the gateway to connect to wifi
If your gateway is networked with wifi, you need to configure the gateway's networking wifi as follows:
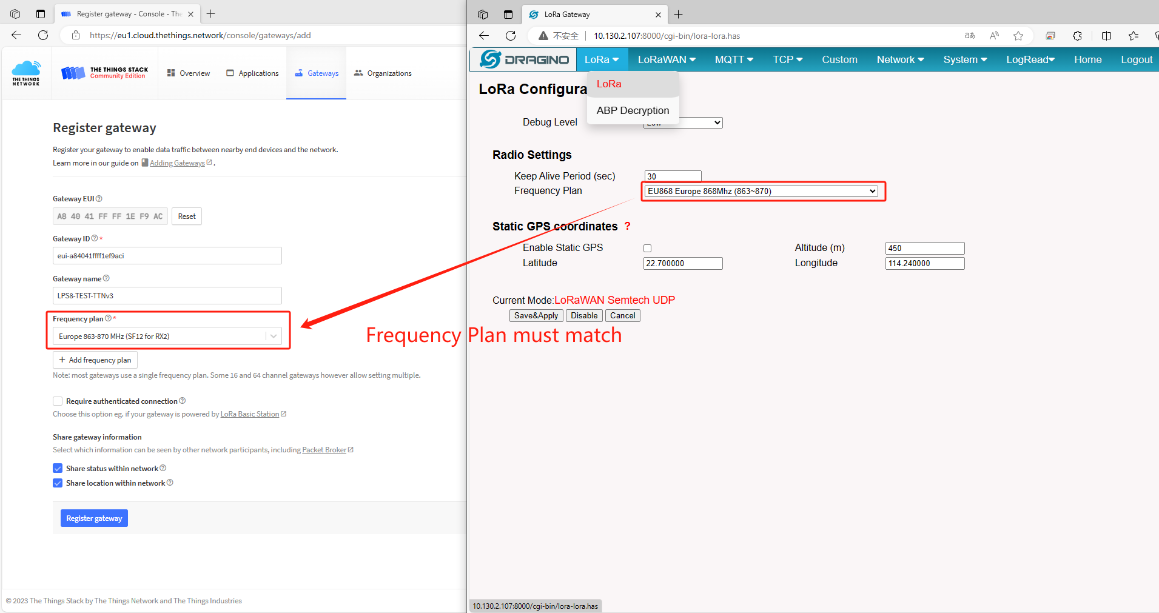
3.1.4 Configure the gateway
Choose the first “The Things Network V3” for the service provider, and the first server address by default.

3.2 Register Gateway

![]()


3.3 Show Status
After registering the gateway, you need to wait 2-3 minutes for it to display properly
