
Chirpstack is integrated into the Thingseye step via MQTT
Table of Contents:
How to connect chirpstack to Thingseye by way of MQTT
- How to connect chirpstack to Thingseye by way of MQTT? The following tutorial will show you
Step 1: Thingseye adds MQTT integration
Go to the Integrations page in the Integrations center section. Click the plus button to start adding a new integration. Select the type "MQTT" integration and click "Next";

Step 2. Add an uplink and downlink data converter
In the function decoder field, specify the script to parse and transform the data.

- Uplink——JavaScript:
var data = decodeToJson(payload);
var deviceName = data.deviceInfo.deviceName;
var deviceType = data.applicationName;
var devEui = data.deviceInfo.devEui
var label = data.deviceInfo.devEui
var model = {};
var data2 = data.object;
var flg = data.fPort
for (var key in data2) {
// 将属性名存入新对象中
model[key] = data2[key];
}
//var obj = {"devid":deviceName}
var result = {
deviceName: deviceName,
deviceType: deviceType,
telemetry: model,
groupName: "Case Study",
//label:label,
attributes:{"devEui":devEui,
//"timevalue":"test",
"inactivityTimeout":1260000
// "High_humidity_alarm":"not set",
// "High_temperature_alarm":"not set",
// "Low_humidity_alarm":"not set",
// "Low_temperature_alarm":"not set",
// "Low_voltage_alarm":"not set"
//"customerName": "Civionic Engineering & Consulting (2014) Inc."
}
};
function decodeToString(payload) {
return String.fromCharCode.apply(String, payload);
}
function decodeToJson(payload) {
var str = decodeToString(payload);
var data = JSON.parse(str);
return data;
}
return result;

- Dowblink——JavaScript:
// Encode downlink data from incoming Rule Engine message
// msg - JSON message payload downlink message json
// msgType - type of message, for ex. 'ATTRIBUTES_UPDATED', 'POST_TELEMETRY_REQUEST', etc.
// metadata - list of key-value pairs with additional data about the message
// integrationMetadata - list of key-value pairs with additional data defined in Integration executing this converter
// /** Encoder **/
//var data = {"value":99};
// // Process data from incoming message and metadata
// data.tempFreq = msg.temperatureUploadFrequency;
// data.humFreq = msg.humidityUploadFrequency;
// data.devSerialNumber = metadata['ss_serialNumber'];
// // Result object with encoded downlink payload
var result = {
// downlink data content type: JSON, TEXT or BINARY (base64 format)
contentType: "TEXT",
// downlink data
data: msg.shared_value ,//JSON.stringify(data),
// Optional metadata object presented in key/value format
metadata: {
topic: '/test/down/'+metadata.deviceName
}
};
return result;
Step 3. Configure the connection
Generate MQTT certificate integrated on chirpstack
Chirpstack generates CA certificate, TLS certificate, and TLS key respectively
They correspond to the CA certificate file, Certificate file, and Private key file on thingseye


Integrated Certificate Download Address:
te-platform/ChirpStack_Integration Certificates at main · ThingsEye-io/te-platform · GitHub
Enter the server address Host: lns1.thingseye.io on the Connection configuration
Port: 8883
Credentials type: PEM
Upload the certificate and key file


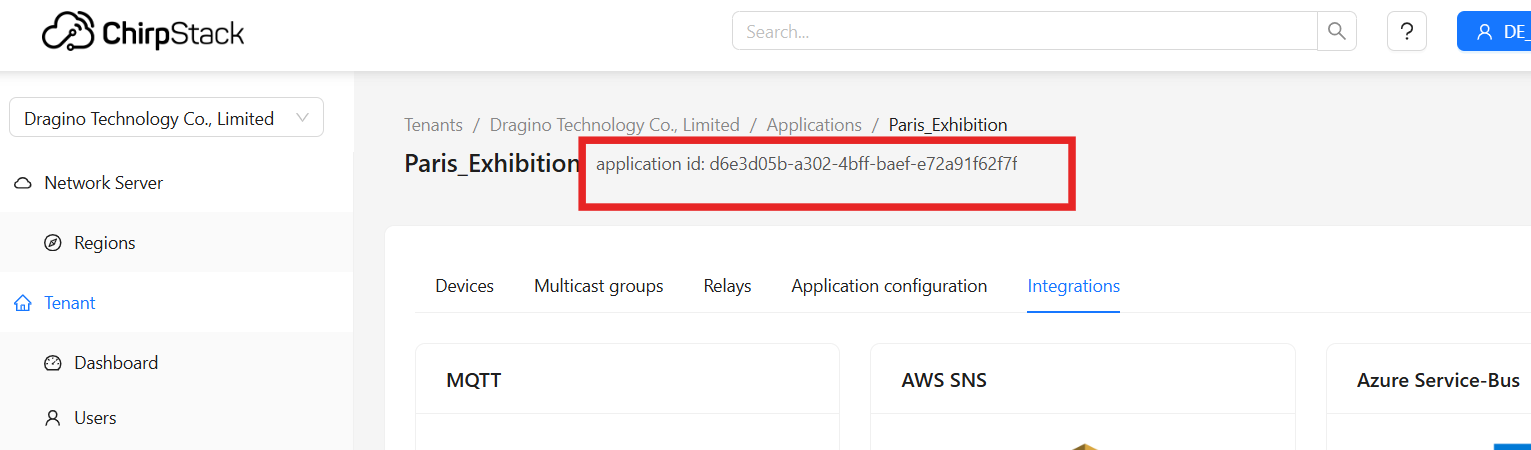
The default for Topic is:
application/chirpstack application id/device/+/event/up

Step 4. Check the connection

