
Dragino GE Version NB Device Quick Configuration Guide
- 1. General NB device configure to attach network (skip this step for 1TB devices)
- 2. Configure via Mobile APP
1. General NB device configure to attach network (skip this step for 1TB devices)
To attache NB-IoT sensors to NB-IoT Network, You need to:
- Get a NB-IoT SIM card from Service Provider. (Not the same as the SIM card we use in mobile phone)
- Open the cover and power off End Node ( Take out the Jumper)
- UnsCrew and remove the module
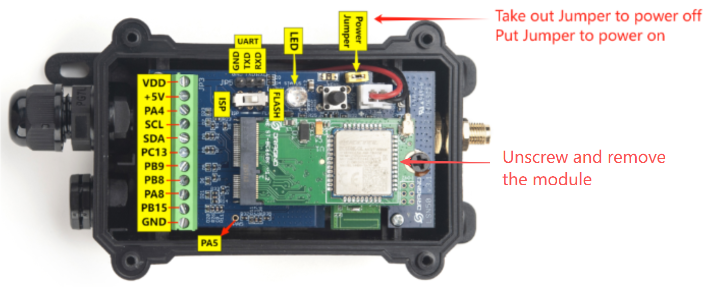
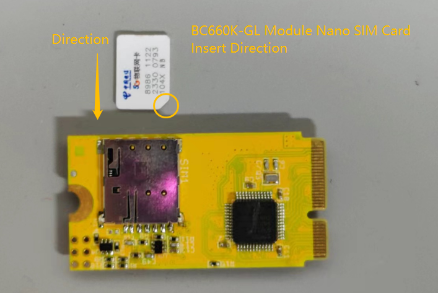
- Insert the SIM card to Sensor. ( See below for direction)
- Install the module and tighten the screws, then Power On End Node.(Put the Jumper)
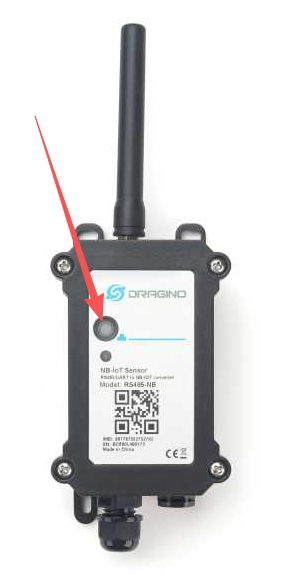
- Put the cover on and press and hold the push button for 5 seconds to restart the device.
2. Configure via Mobile APP
2.1 Download APP
Download from Google Play Store
Open the Google Play Store, search for "Devices.tool", download and install.

Download from Dropbox
Click on the URL below to enter Dropbox to download the app:
2.2 How to use BLE to configure Sensors
See Video Instruction: Use BLE to configure Sensors

Install in mobile and run. Press the reset button of the device to be tested, and then click "SCAN BLUETOOTH DEVICES". Find the correct device and connect(the correct device name should be the same as the DEV EUI of the device).


After the connection is successful, enter the interface and click "DIALOGBOX".

Each device has unique password named AT PIN. Input the password and you will be able to get access to the UART of the device.

Enter AT PIN + line break in the dialog box, click "Send", and return the data display "Password Correct" to start configuring the AT command.

Note:
Devices.Tool is now compatible with sending commands without line breaks, and supports the simultaneous configuration of multiple AT commands. A record is also automatically saved after an instruction is sent, and clicking on a command in the history will display it directly in the input box.
2.3 Configure server address ,data format and APN


