1. About this demo
This demo is to show the installation for various sensors in Dragino Office, Dragino Facotry & ThingsEye Office. It covers various types of sensors such as Temperature, Humidity, CO2, Water Flow, Vibration & many many.
User can check this Public Share Link and see the dash board for this demo. The dash board keeps updating, while the main structure will keep the same. It has Three Level DashBoard as decribe below.
- First Level - Overview for all branches: This dashboard shows all branches overview status and location.
- Second Level - Branch Level: This dashboard shows all sensors installation and status in the selected branch.
- Third Level - Sensor Level: This dashboard shows the detail reading for a specify sensor

![]()

![]()

The rest of this chapter will provide the introduction for how to set up similiar solution.
2. Set up a similiar dashboard
2.1 Creat the dashboard and add branch
2.1.1 Create Dashboard
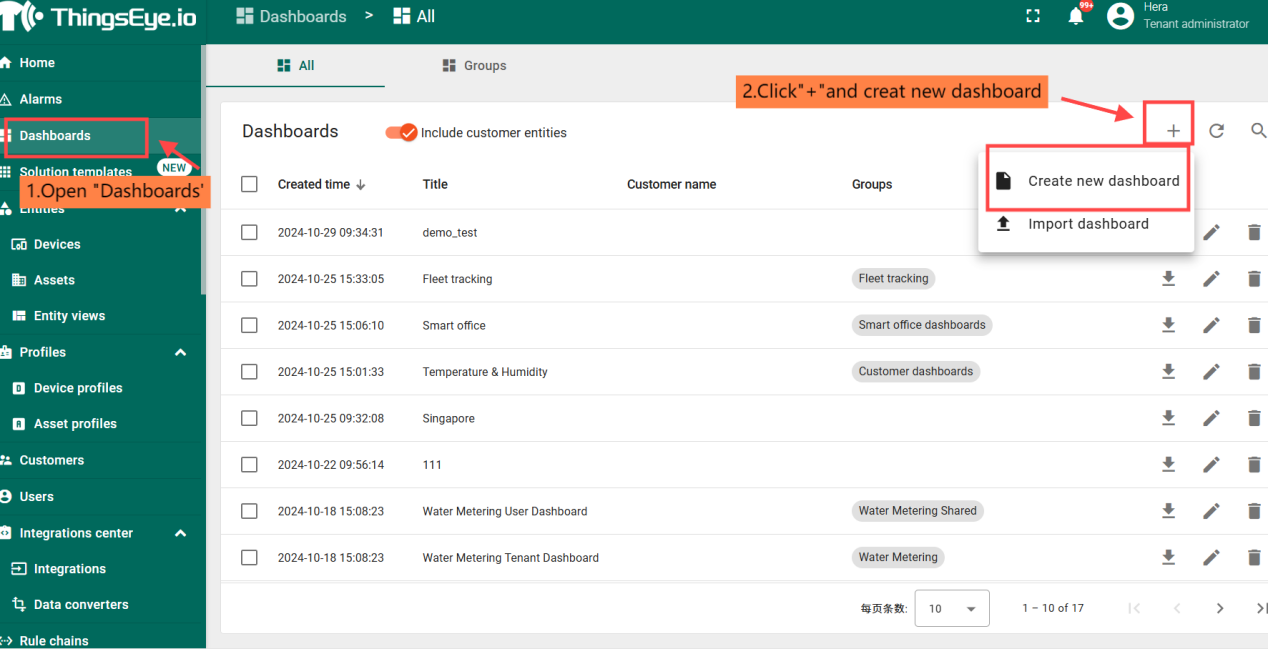
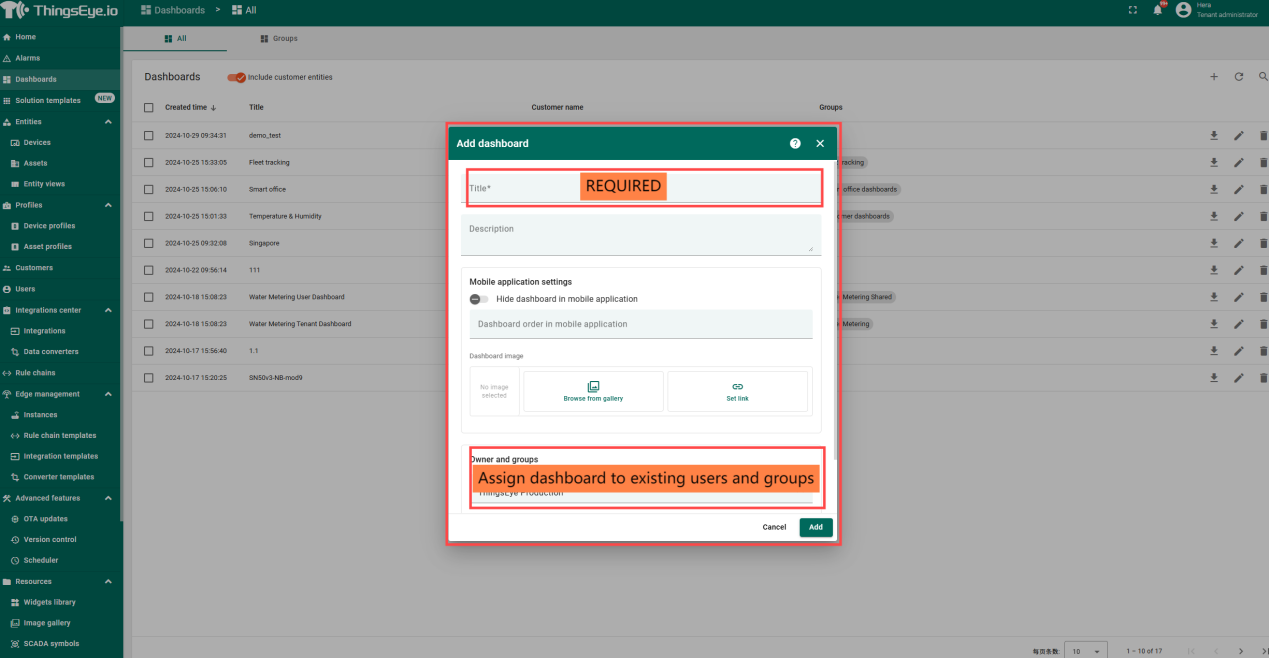
Assigning users and groups is not necessary and can be done uniformly after completing the overall project creation
2.2 Add a branch
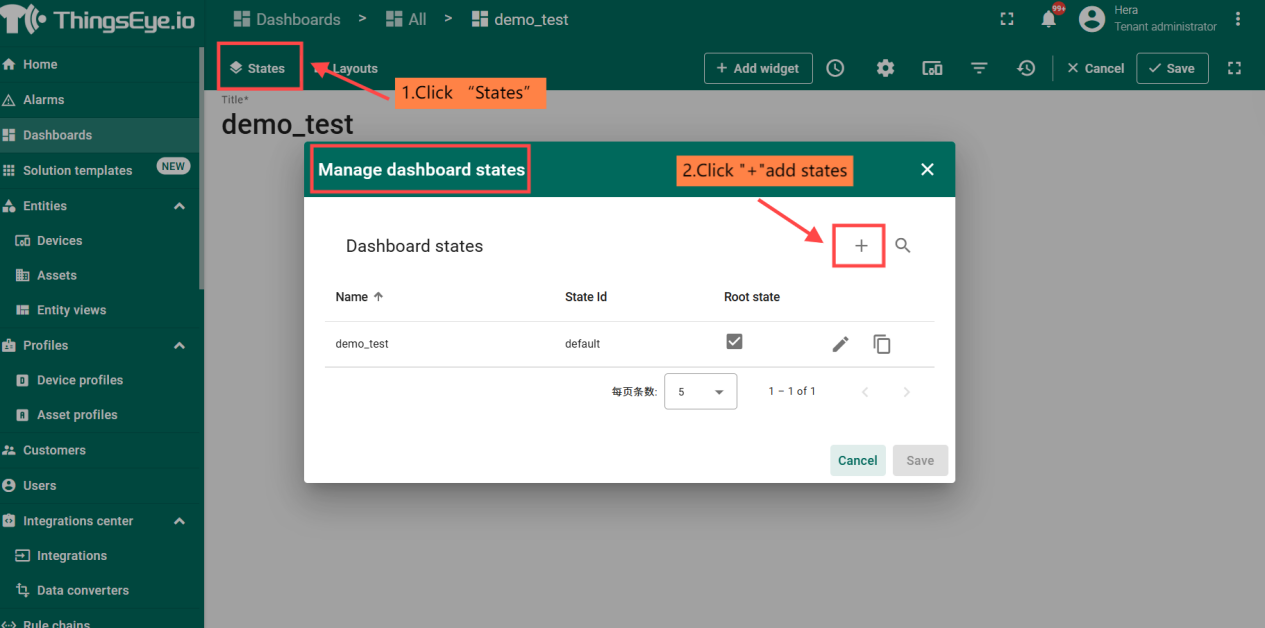
How many interfaces do you need to display, and how many statuses you need to create.
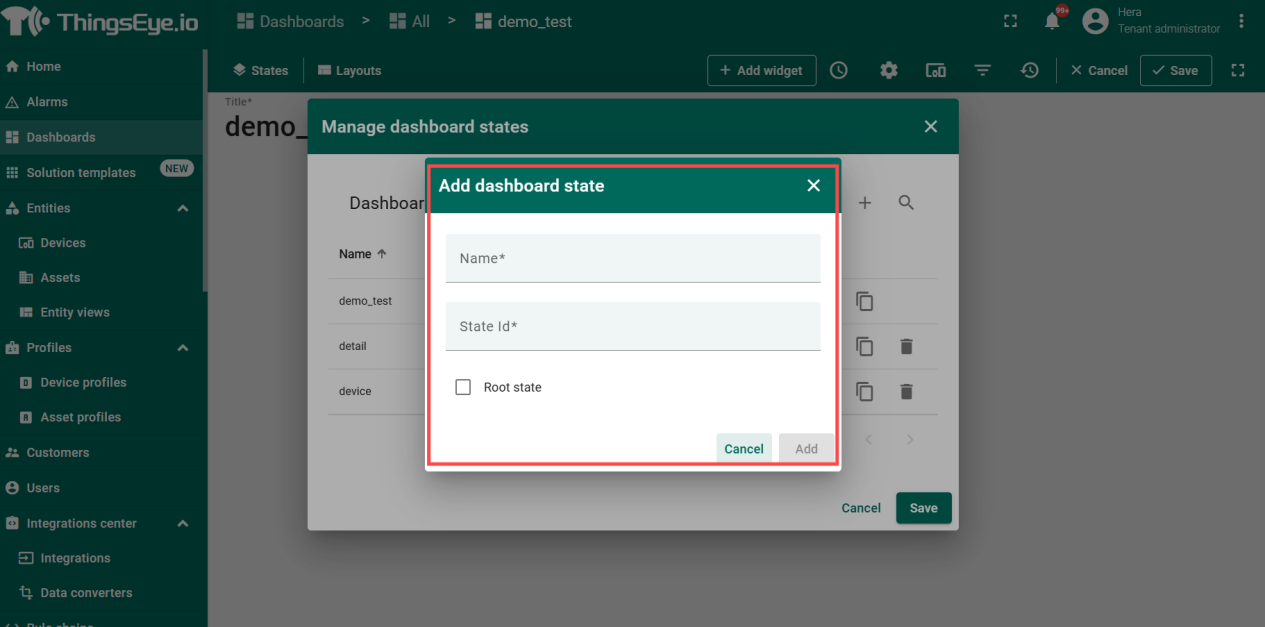
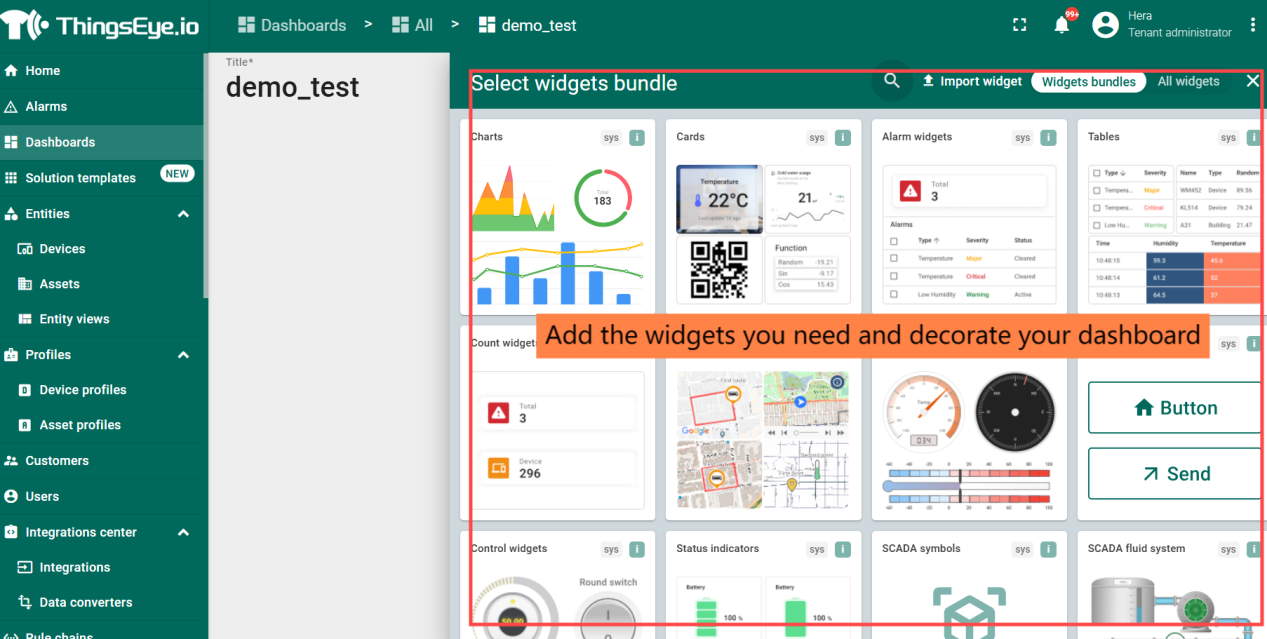
After creating the branch, you can add widgets into your dashboard and decorate it.
2.3 Connect Sensors
2.3.1 Add LoRaWAN Sensors
2.3.2 Add NB-IoT Sensors
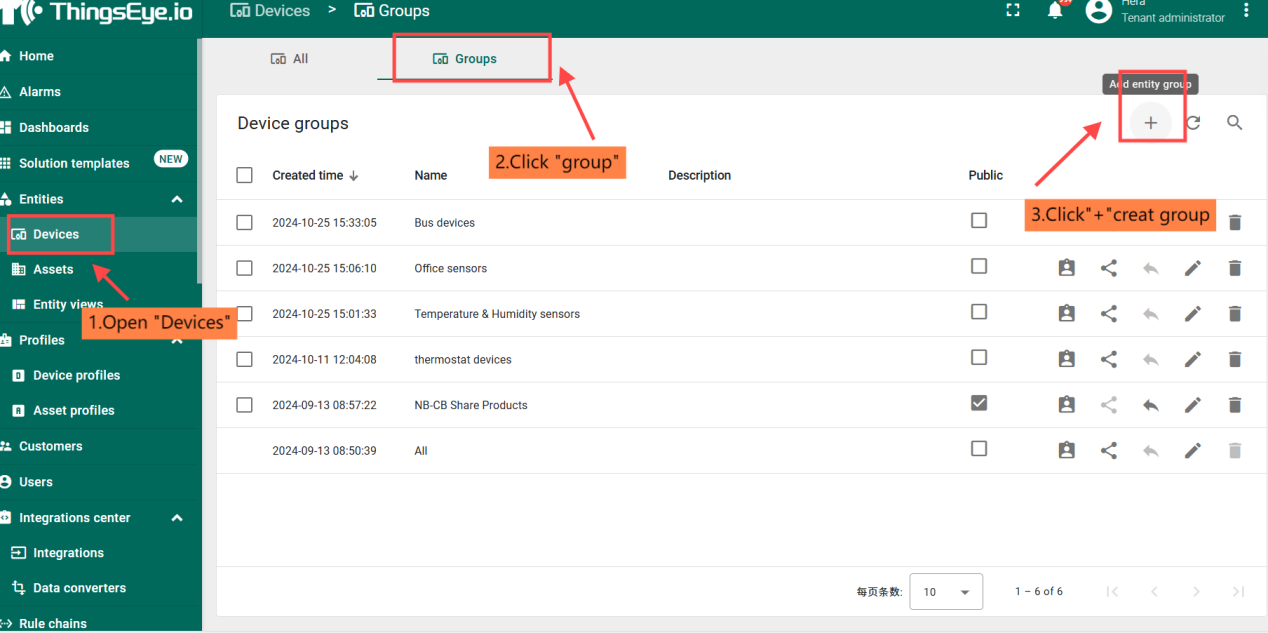
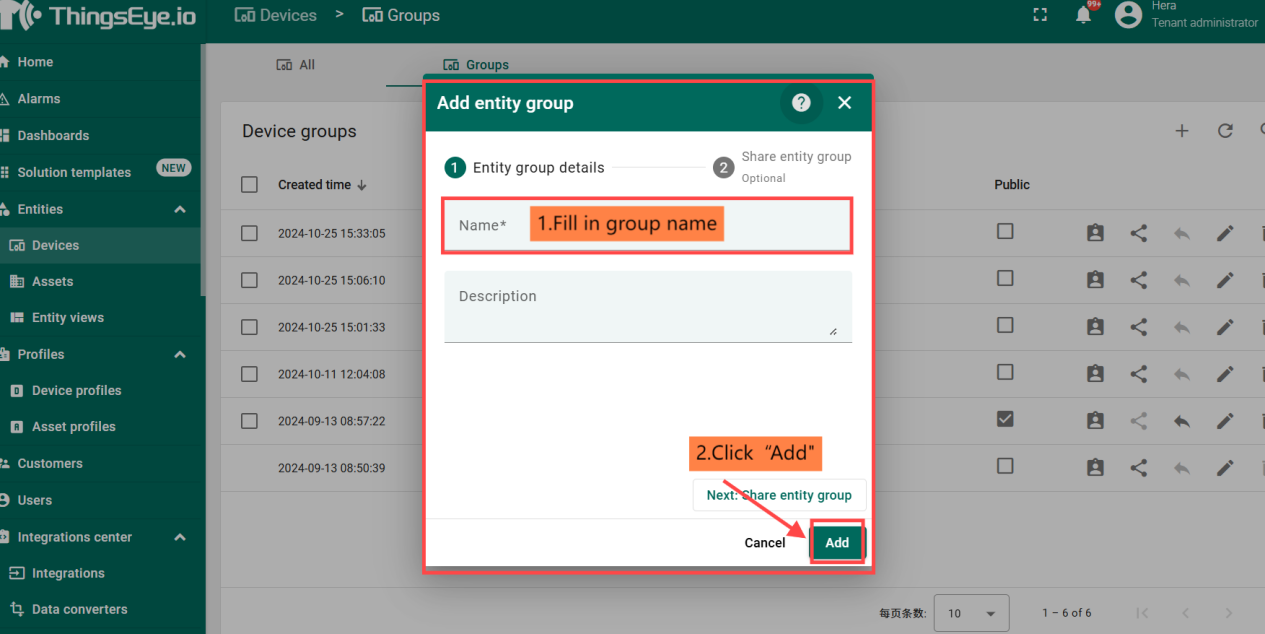
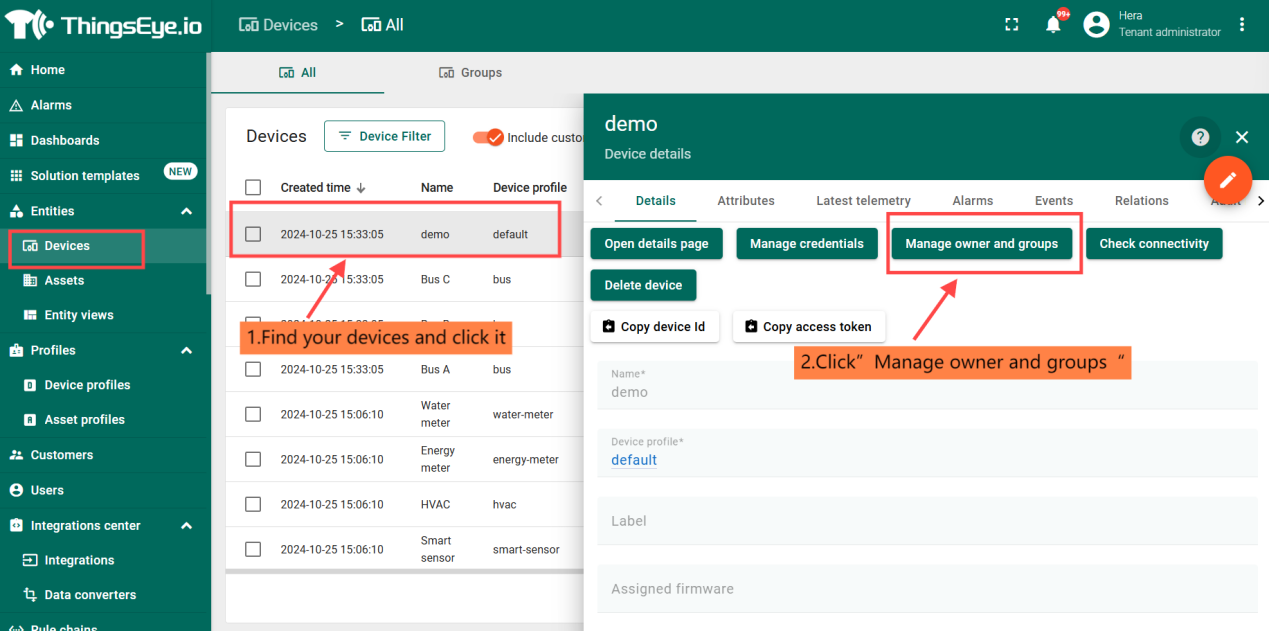
2.4 Creat group and add device
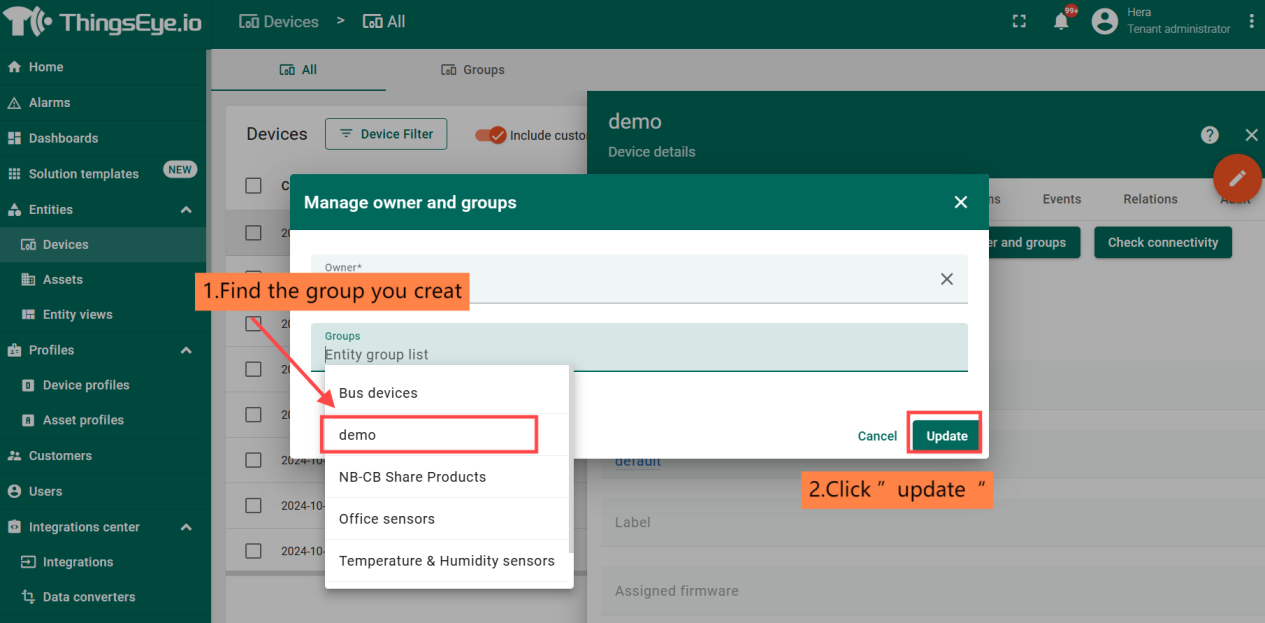
2.5 Creat entity alias and connect
2.5.1 Creat entity alias
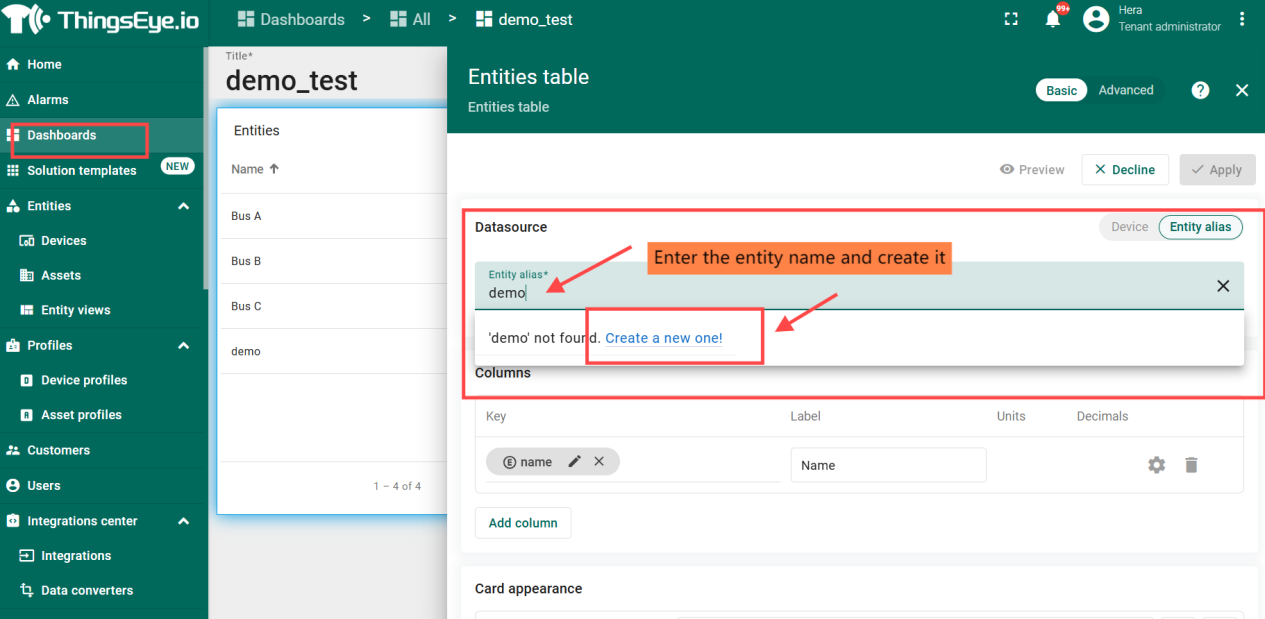
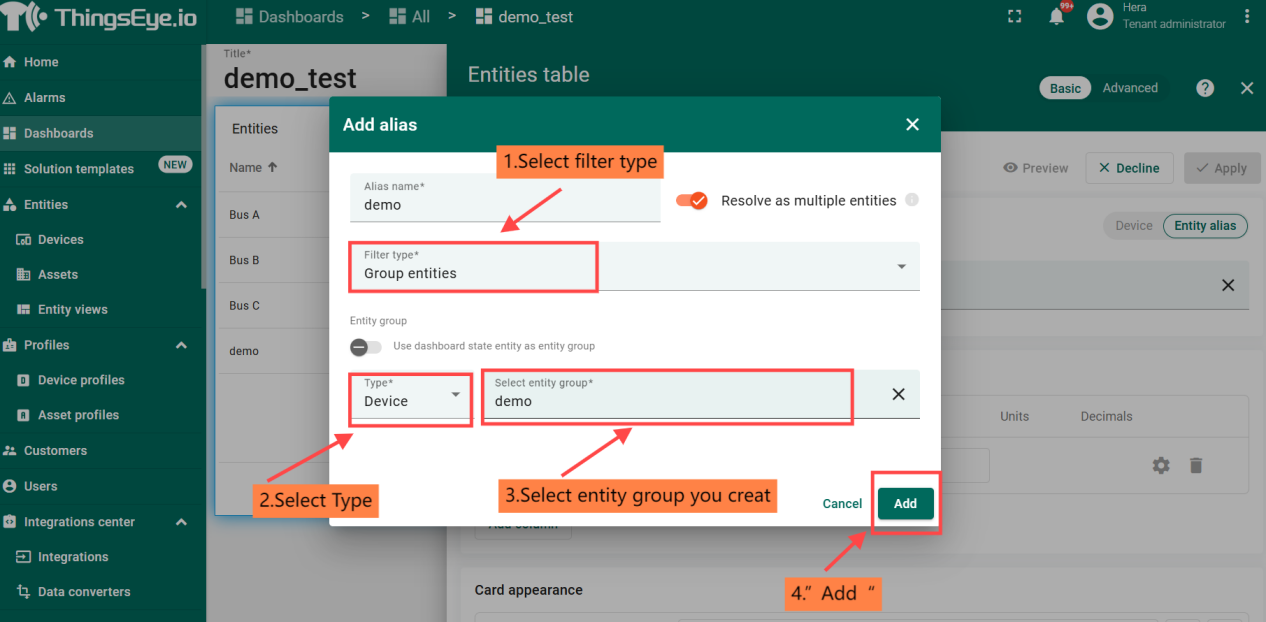
2.5.2 Connect entity
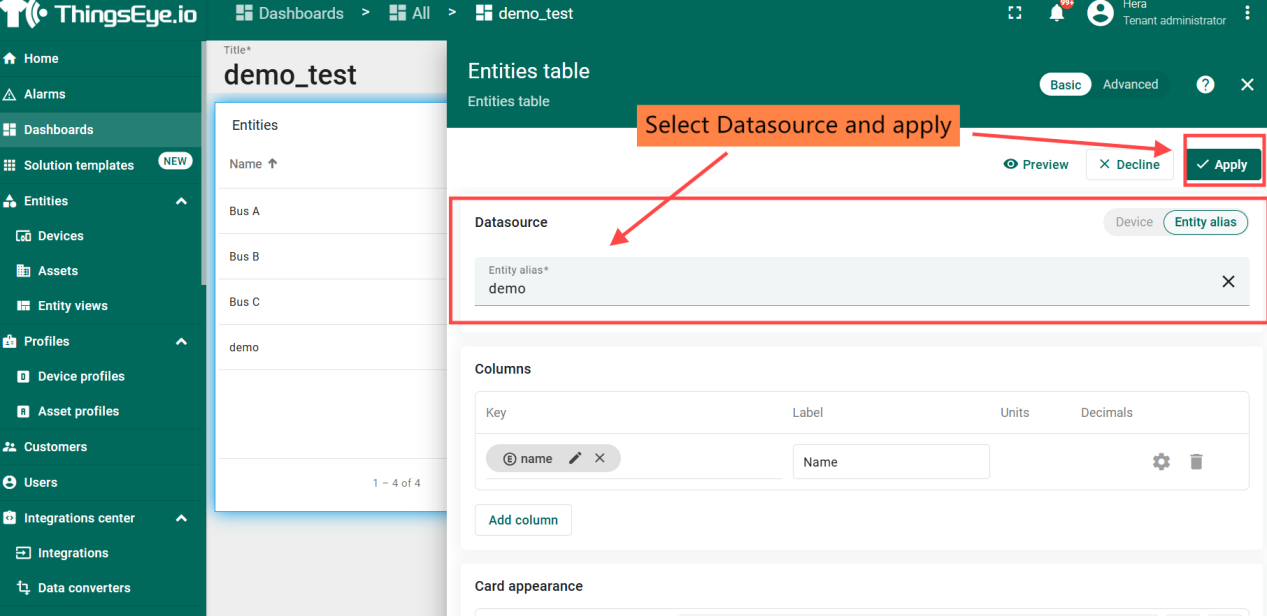
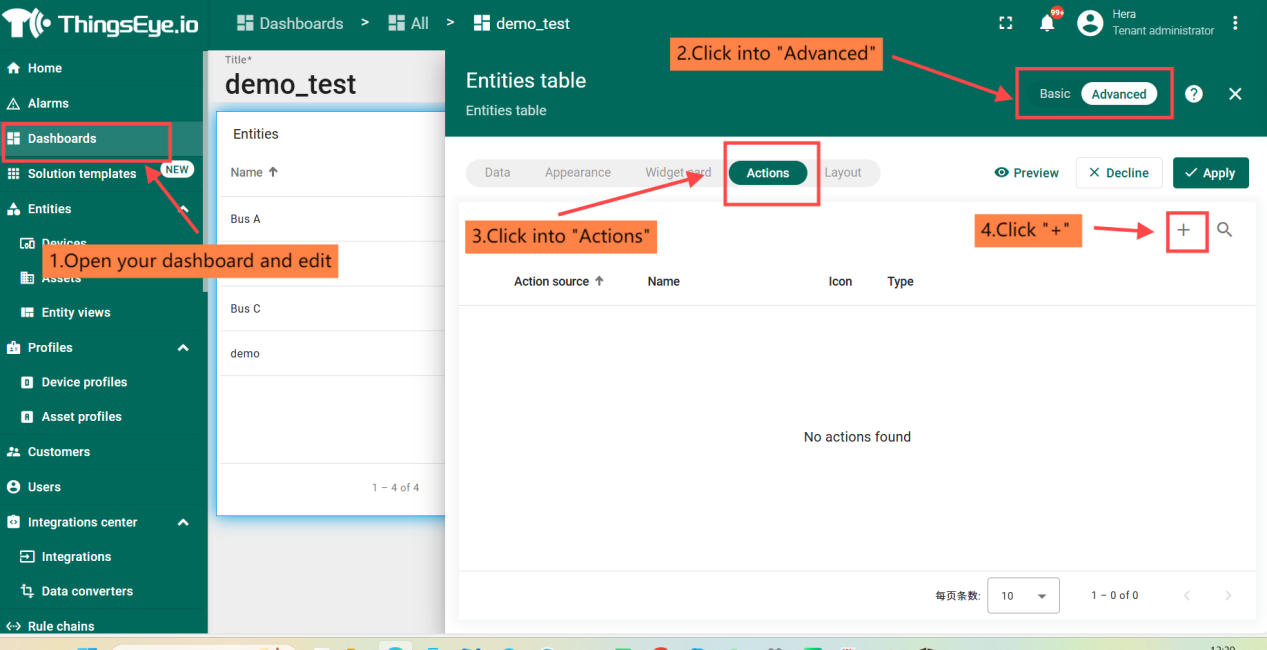
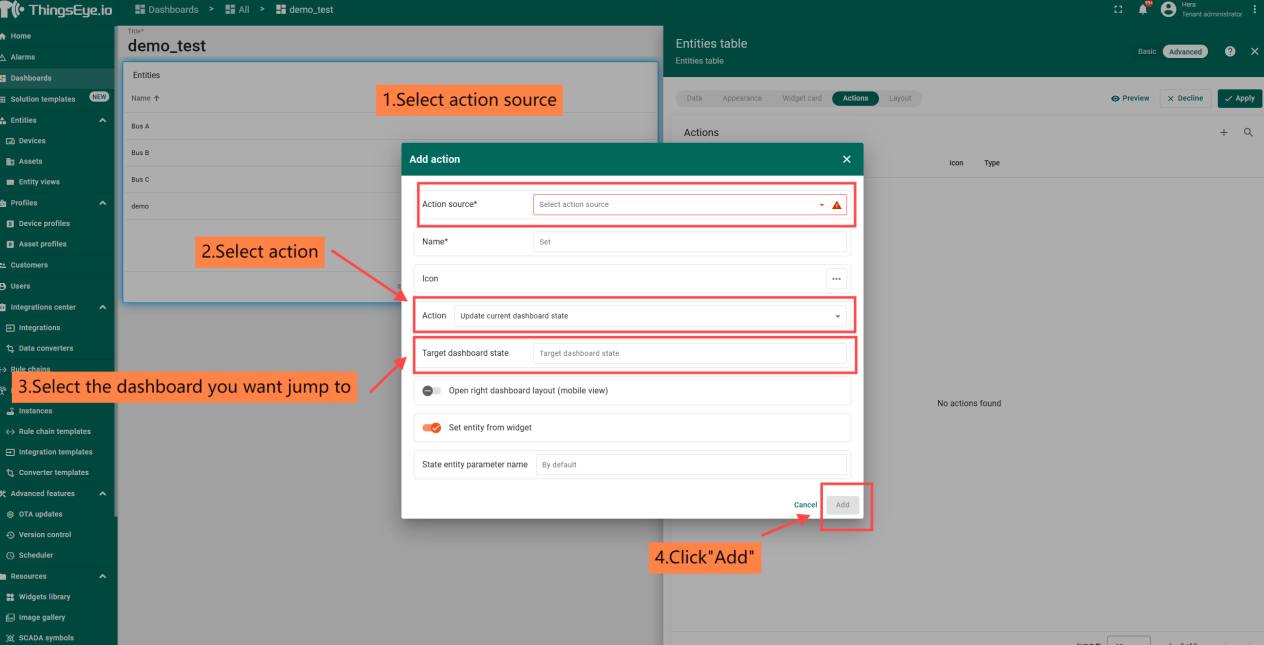
2.6 Creat actions
3.Set up Alarm
3.1 Creat device profiles

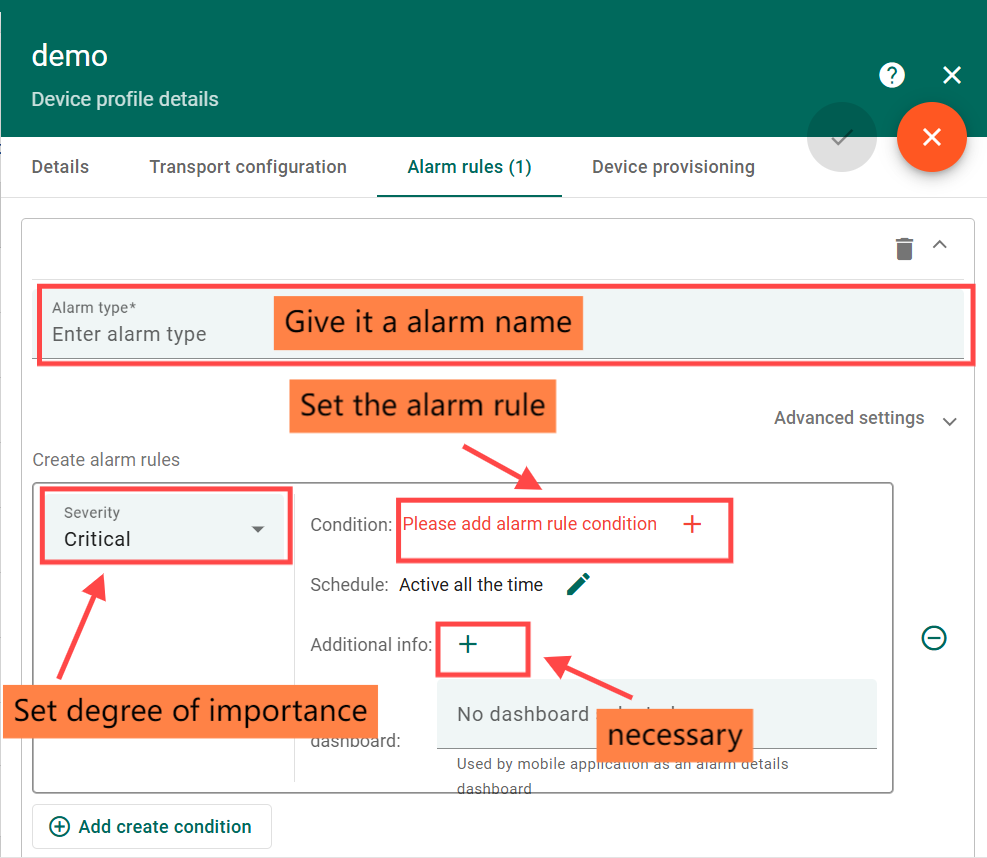
3.2 Set up Alarm

3.3 replace device profile

4. create rule chain
4.1 creat rule chain
Regarding the rule chain, you can see the relevant explanation below:
https://wiki.thingseye.io/xwiki/bin/view/Main/Basic%20configuration%20of%20rule%20chains/
4.2 replace rule chain

5. More features


