Create report
How to generate a simple report
Creat report
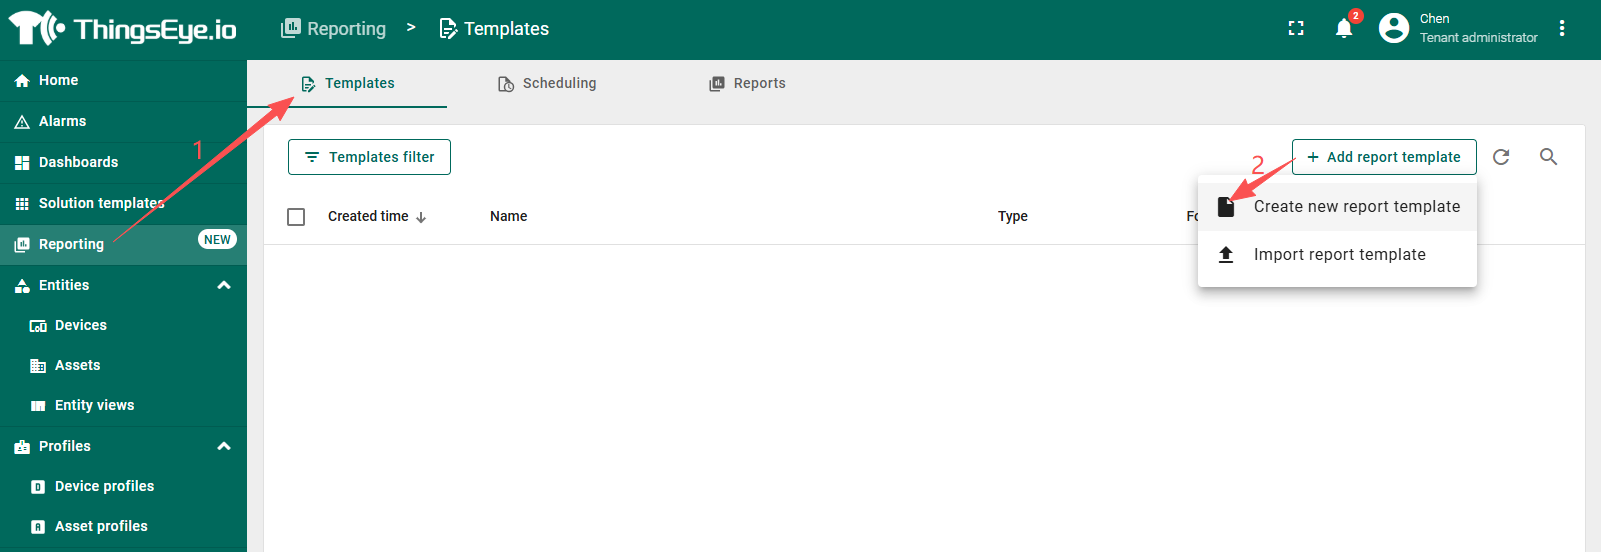
- Open the “Reporting” page from the left-hand sidebar. You'll automatically be taken to the “Templates” tab.
- Click the “+ Add report template” button in the top-right corner.
- Choose “Create new report template”.
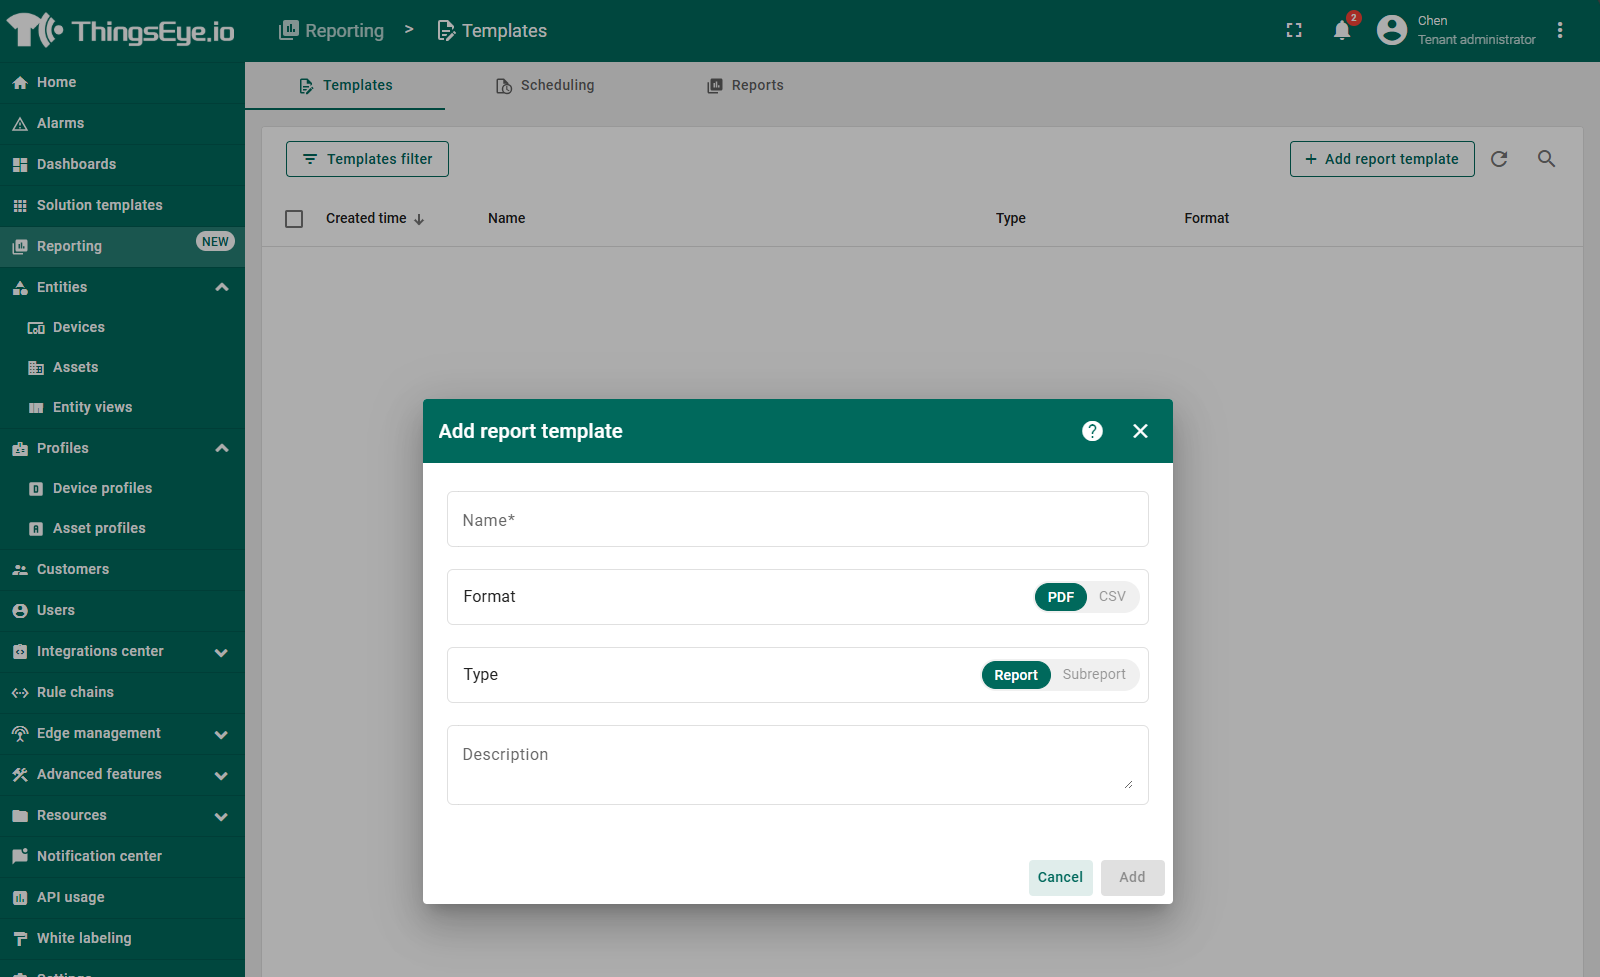
- In the popup, fill out the following:
- Name – a descriptive name for the report template.
- Format: Choose PDF or CSV report format.
- Type:
- Report - a complete standalone report template.
- Subreport - a modular component that can be embedded inside another report.
- Click “Add” to create the report template and open the Report Builder interface, where you can design the structure, layout, and content of your report.
- Open the “Reporting” page from the left-hand sidebar. You'll automatically be taken to the “Templates” tab.
- Click the “+ Add report template” button in the top-right corner.
- Choose “Create new report template”.
- In the popup, fill out the following:
- Name – a descriptive name for the report template.
- Format: Choose PDF or CSV report format.
- Type:
- Report - a complete standalone report template.
- Subreport - a modular component that can be embedded inside another report.
- Click “Add” to create the report template and open the Report Builder interface, where you can design the structure, layout, and content of your report.
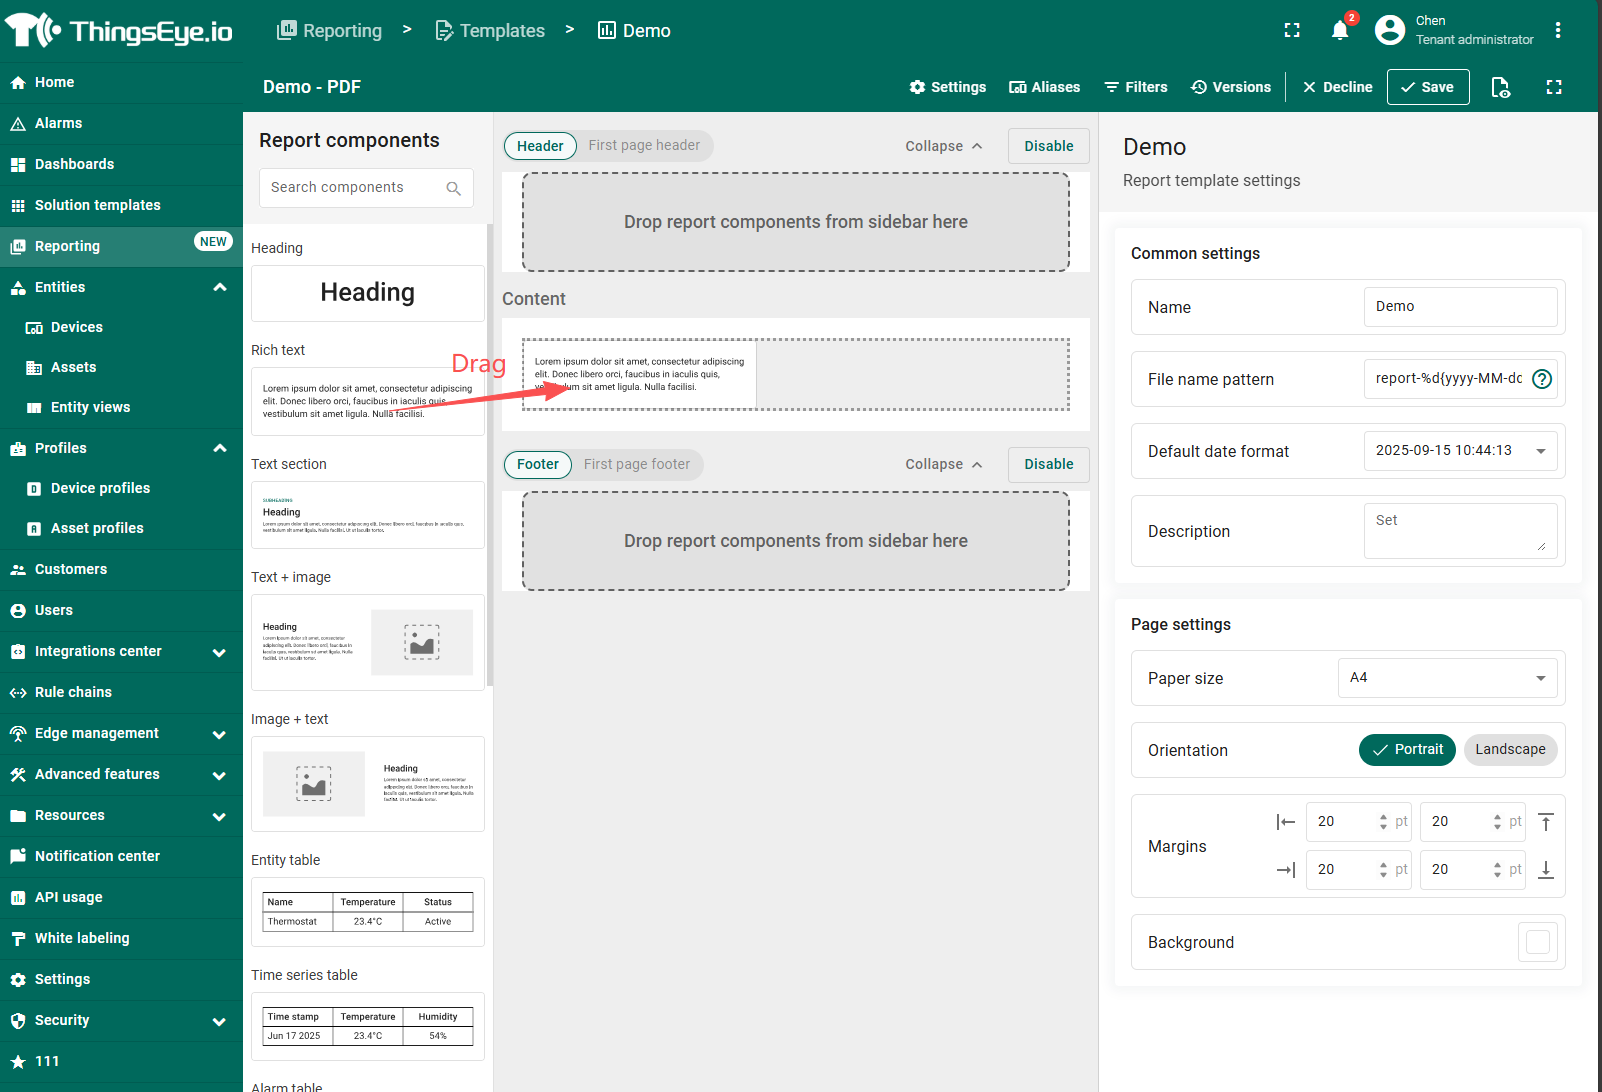
Report Builder
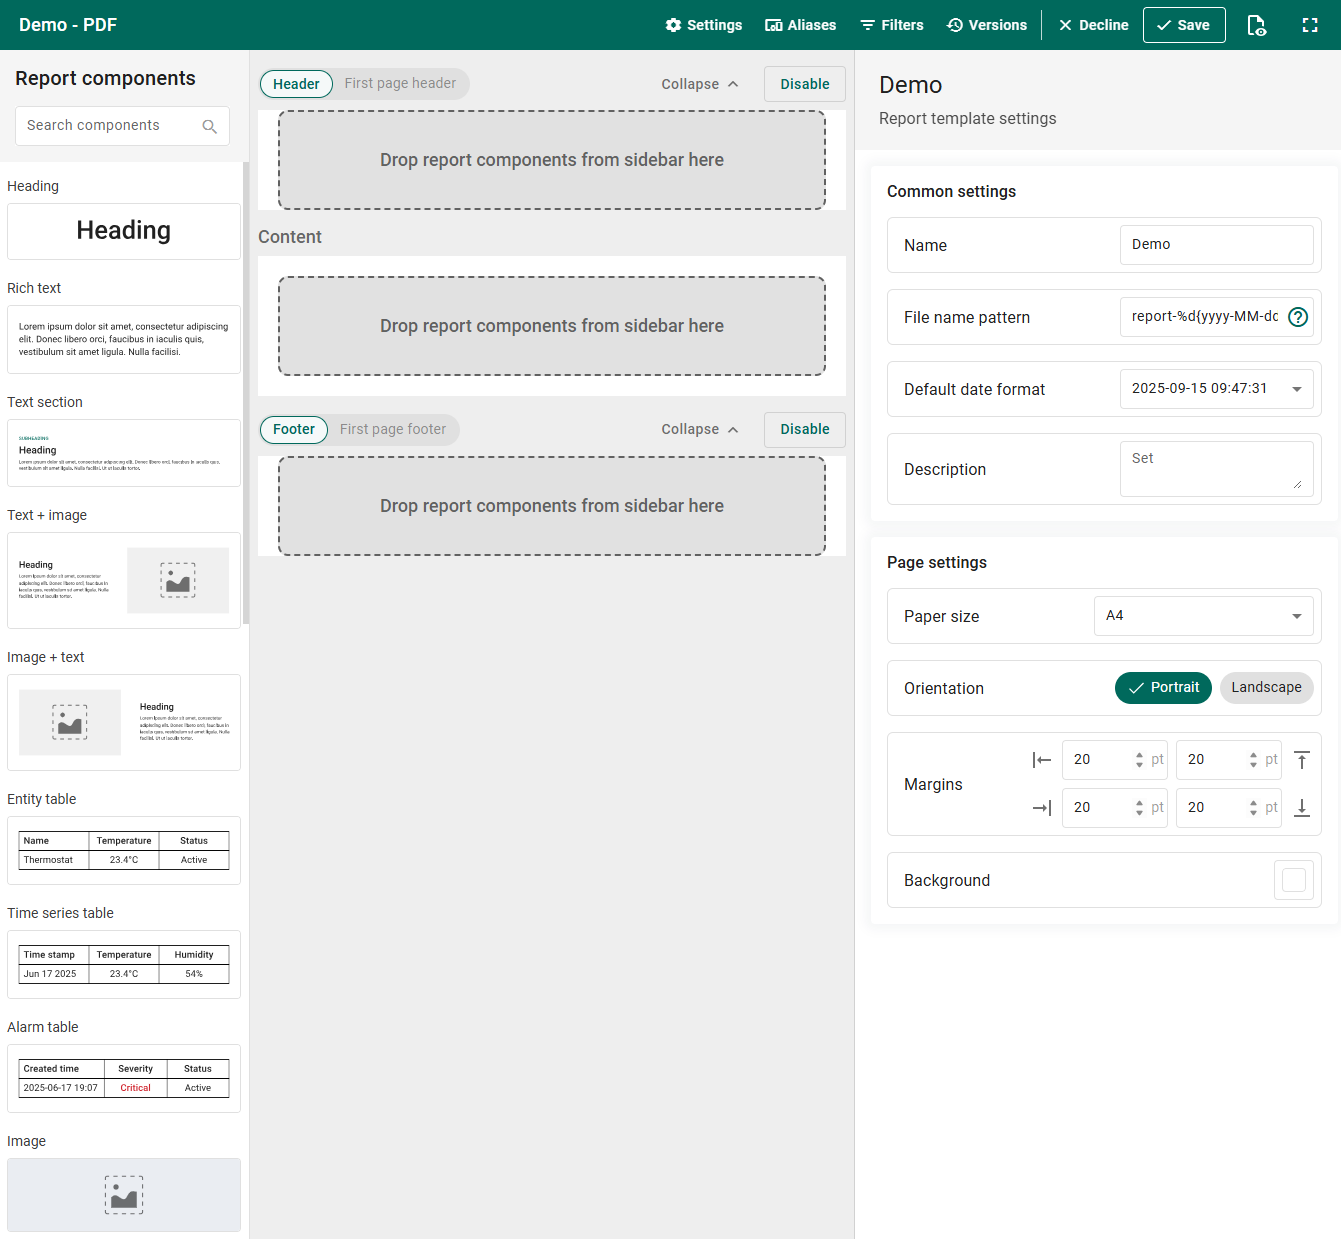
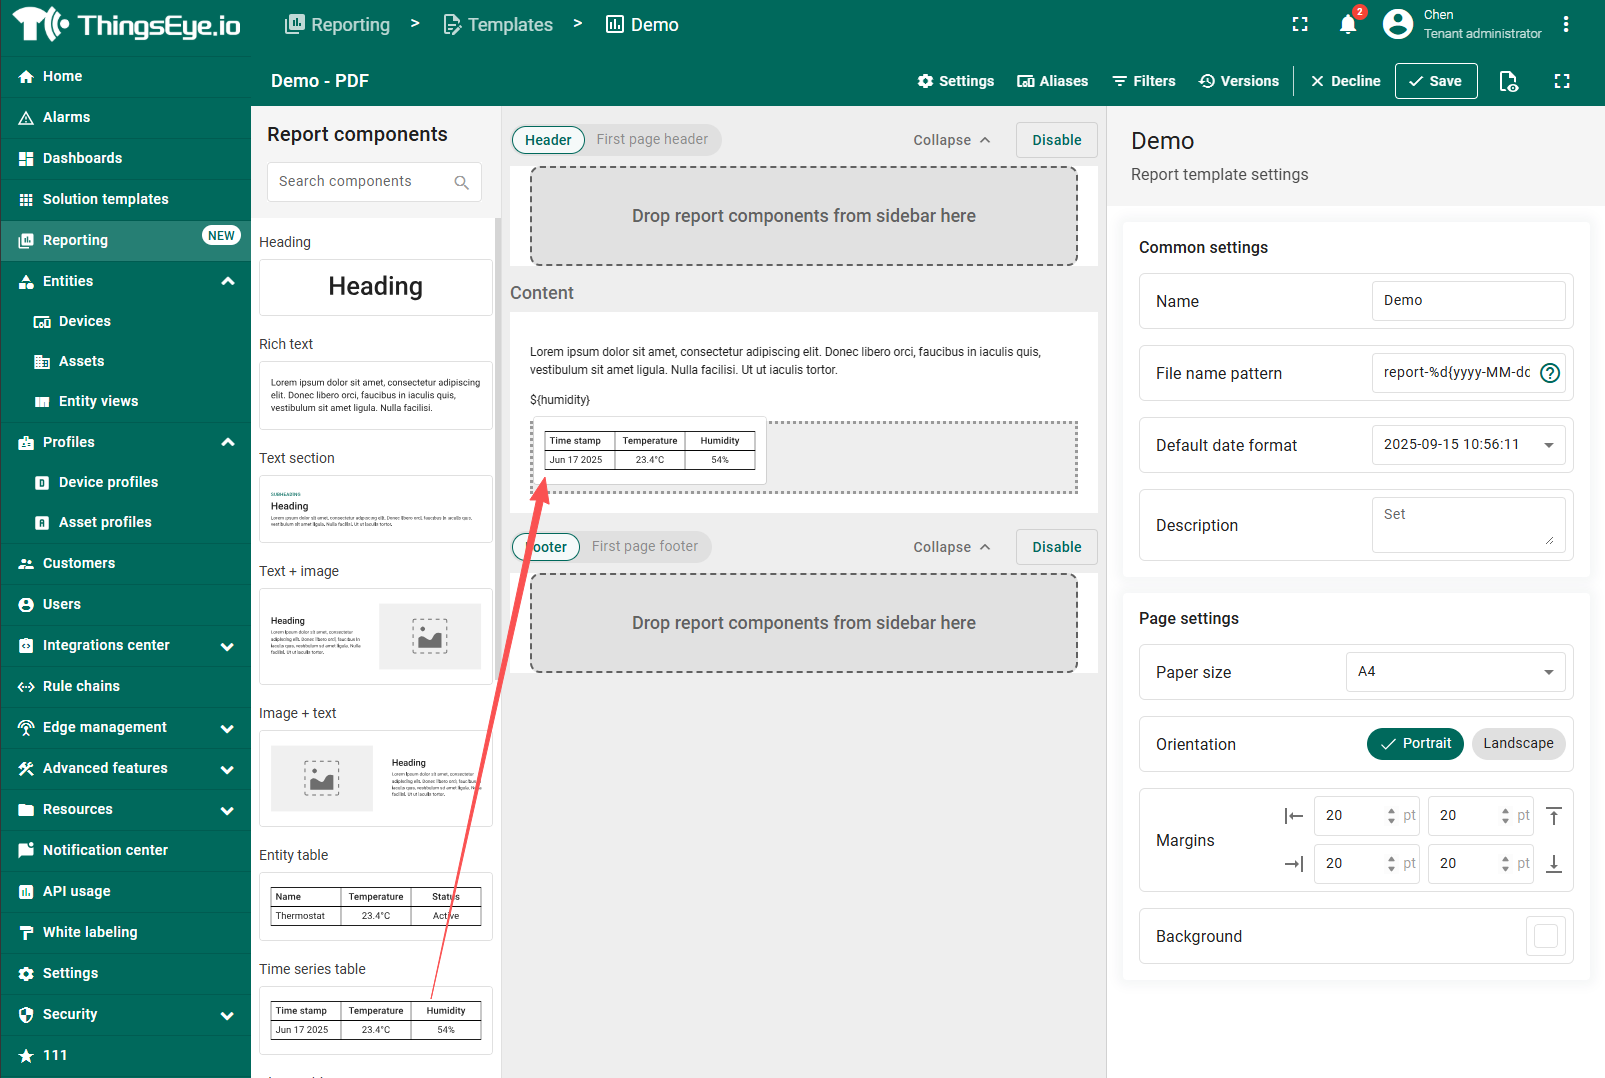
The Report Builder is a drag-and-drop editor that lets you design your report template using visual and data components. You have full control over both the appearance and structure of the report.
Each component has two main configuration sections:
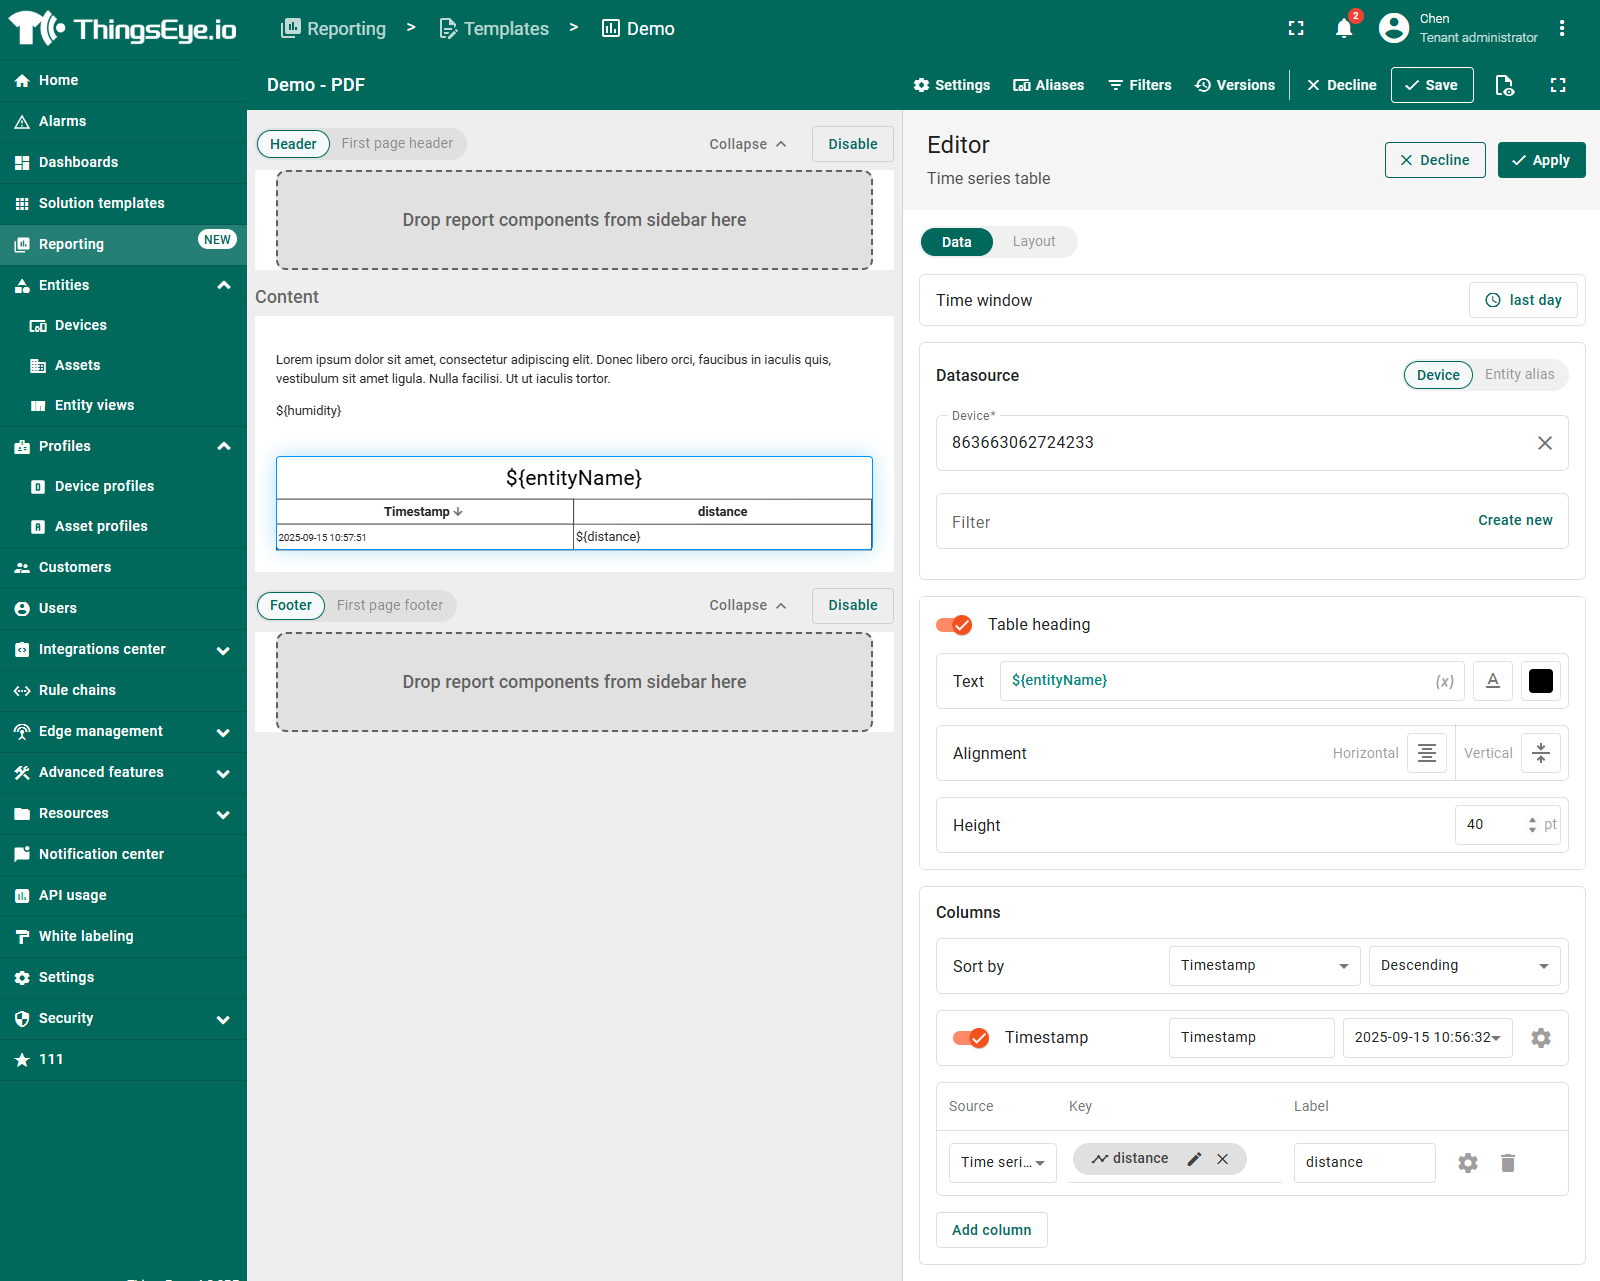
- Data configuration — defines which data the component will display and how it will be filtered. Supports entity aliases and filters for dynamic data binding.
- Layout configuration — controls the visual style and formatting in the final document.
Here's what the Report Builder looks like:
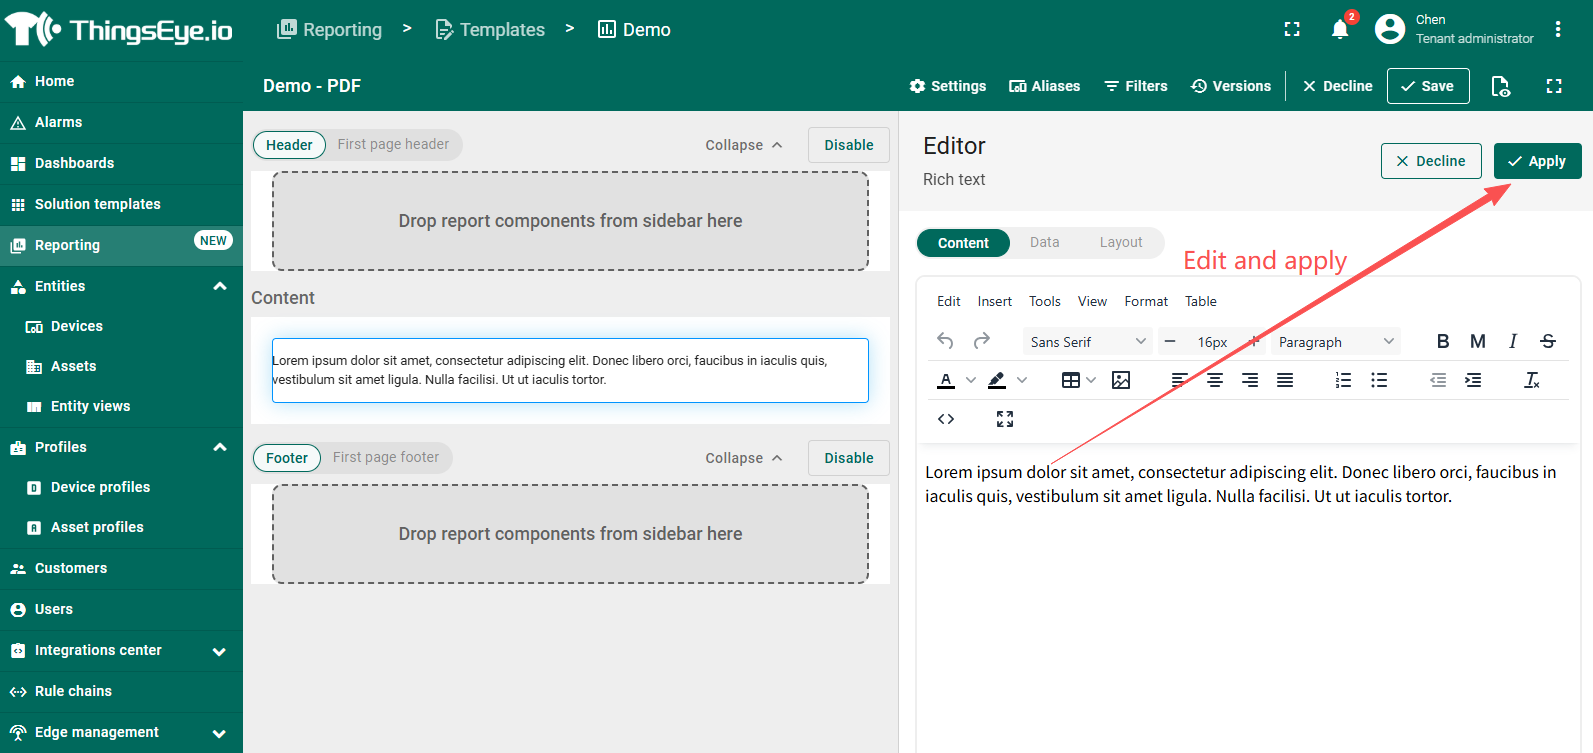
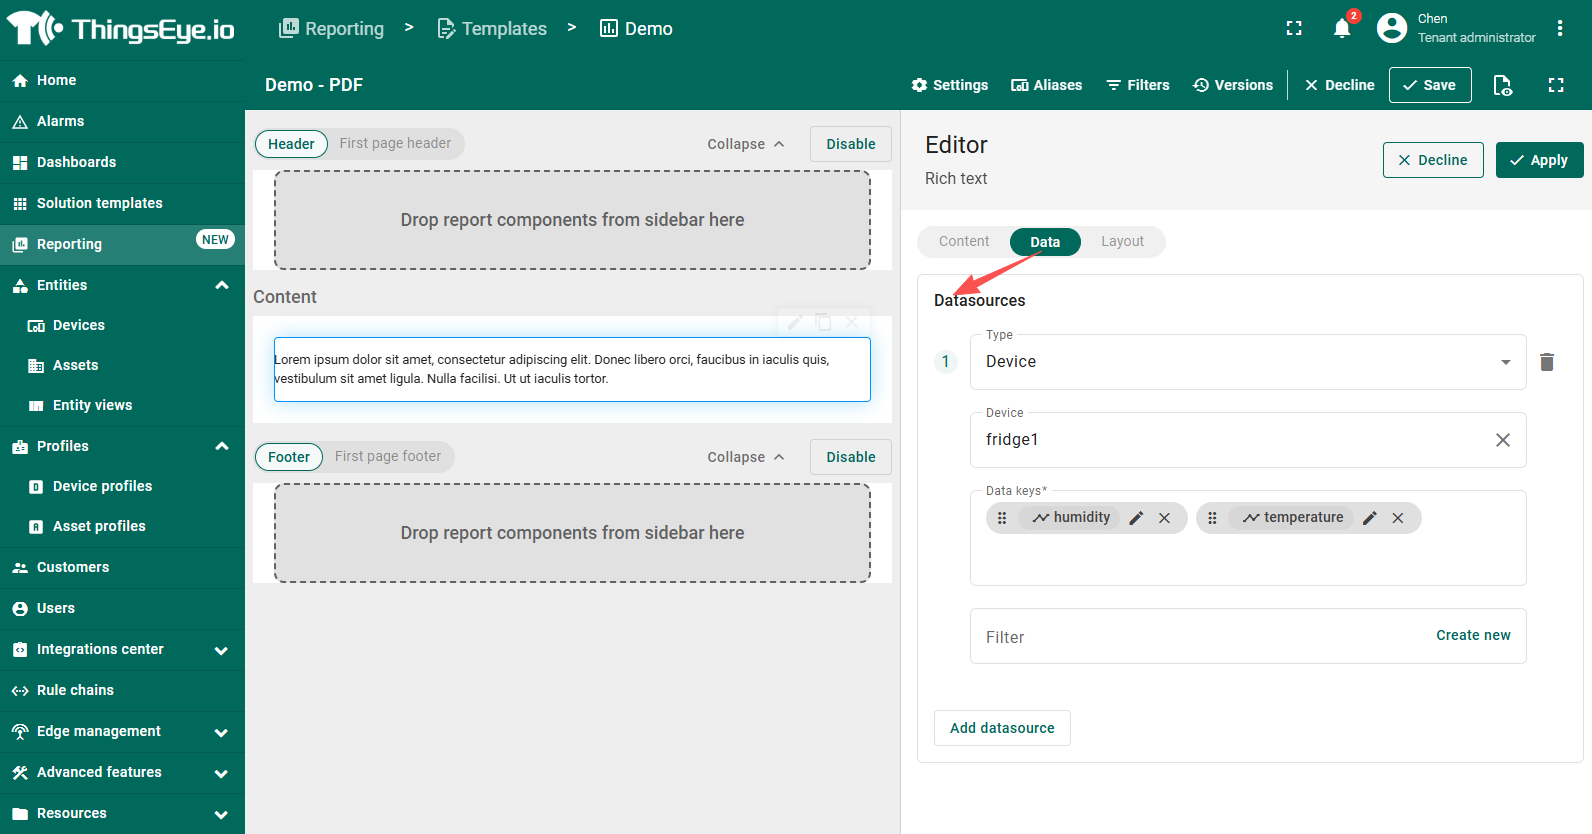
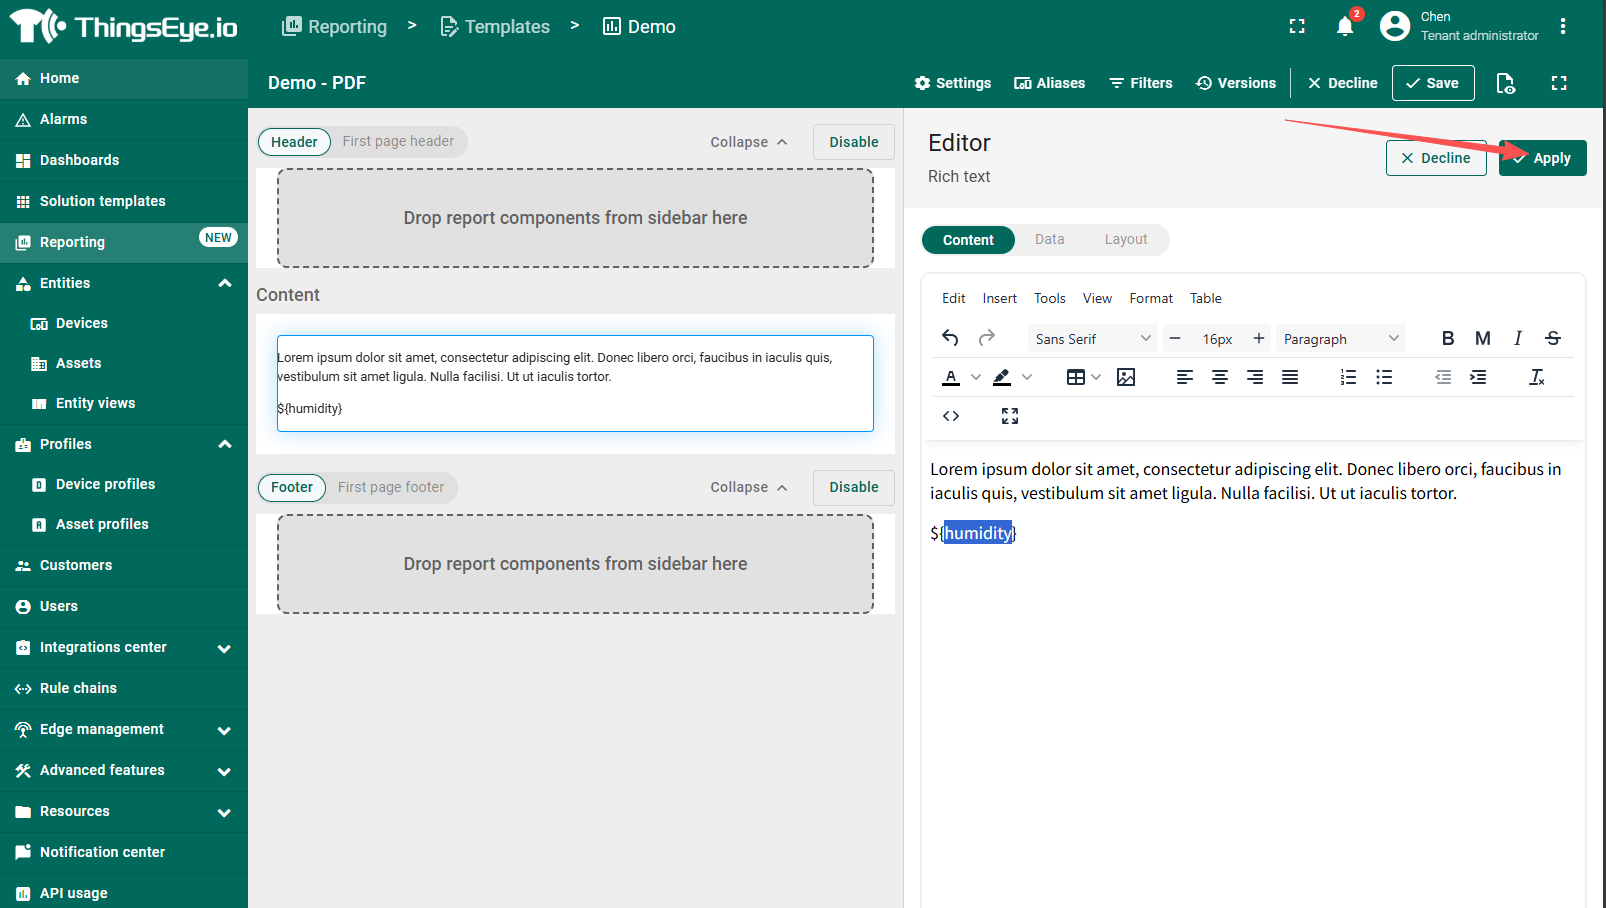
- In the Report Builder, add a component (for example, Rich text) and, in the “Data” tab, specify its data source (target entity and data keys).
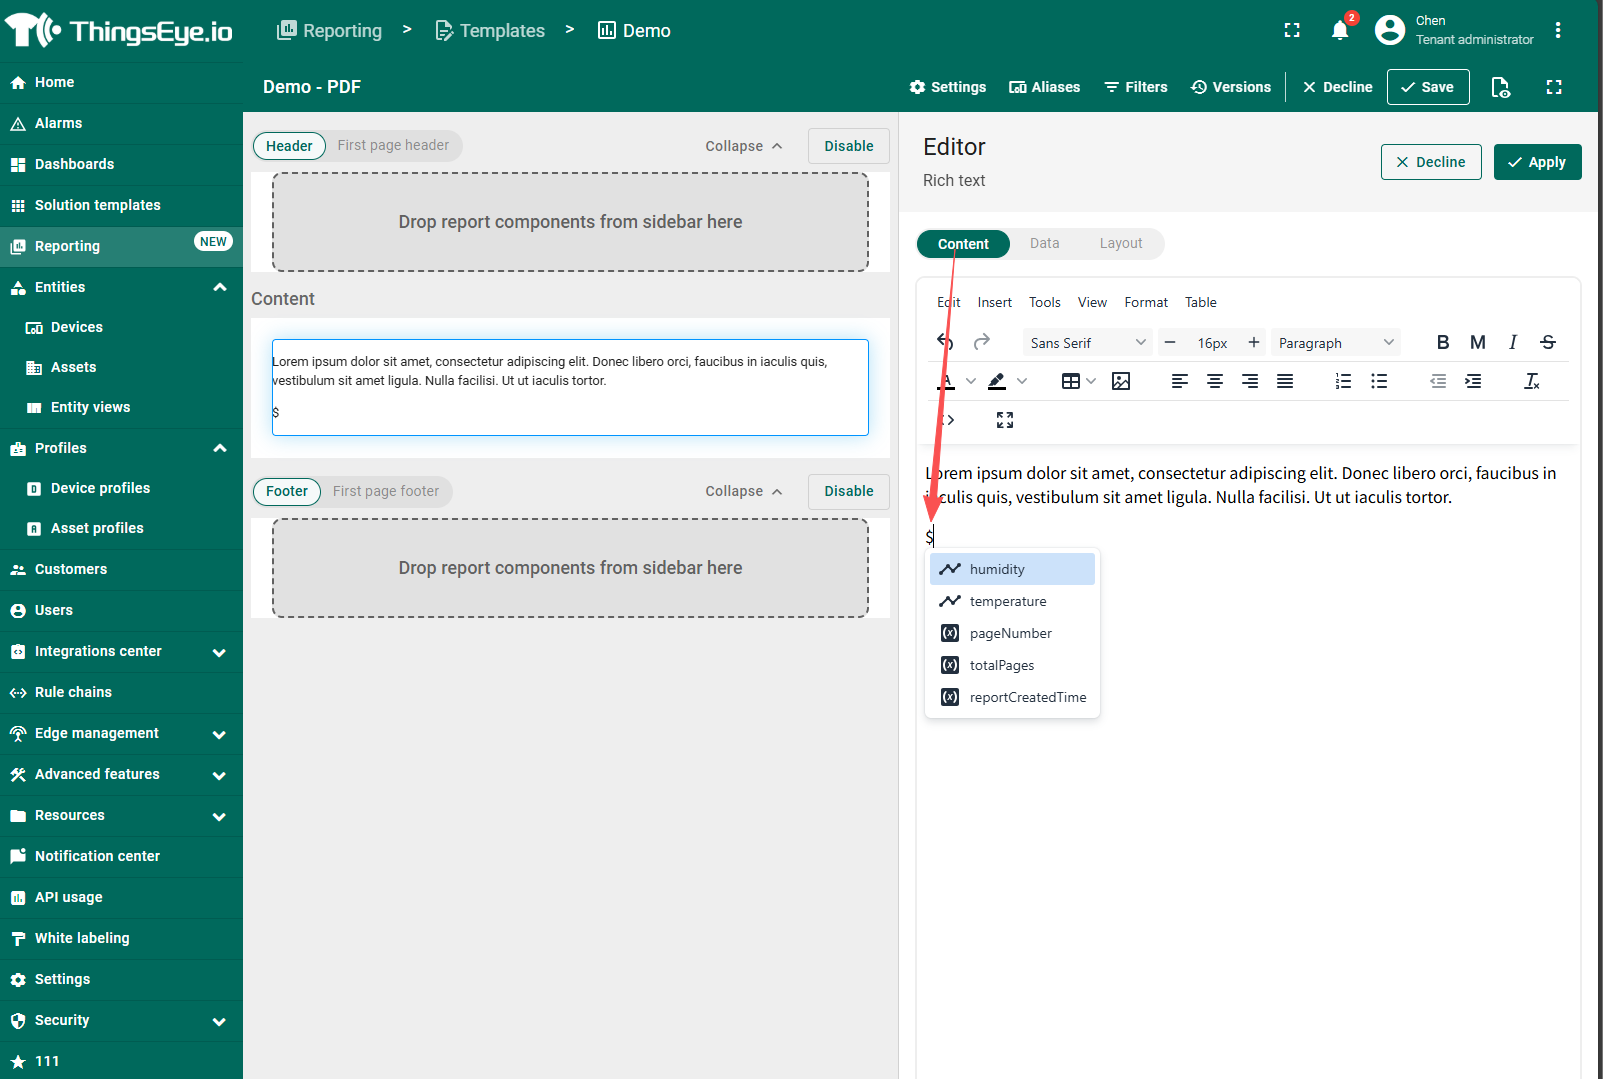
- Next, in the component's text field, type the symbol where you want to insert a variable's value. This will open a list of all available variables in the current context.
- Select variables (for example, ${humidity}), and its value will be inserted into the report during generation.
- When finished, click the “Save” button in the top-right corner to apply your changes.
- And so on, continue to add other components
Generate report
To verify the result, generate a test report sample by clicking the corresponding button in the top-right corner.
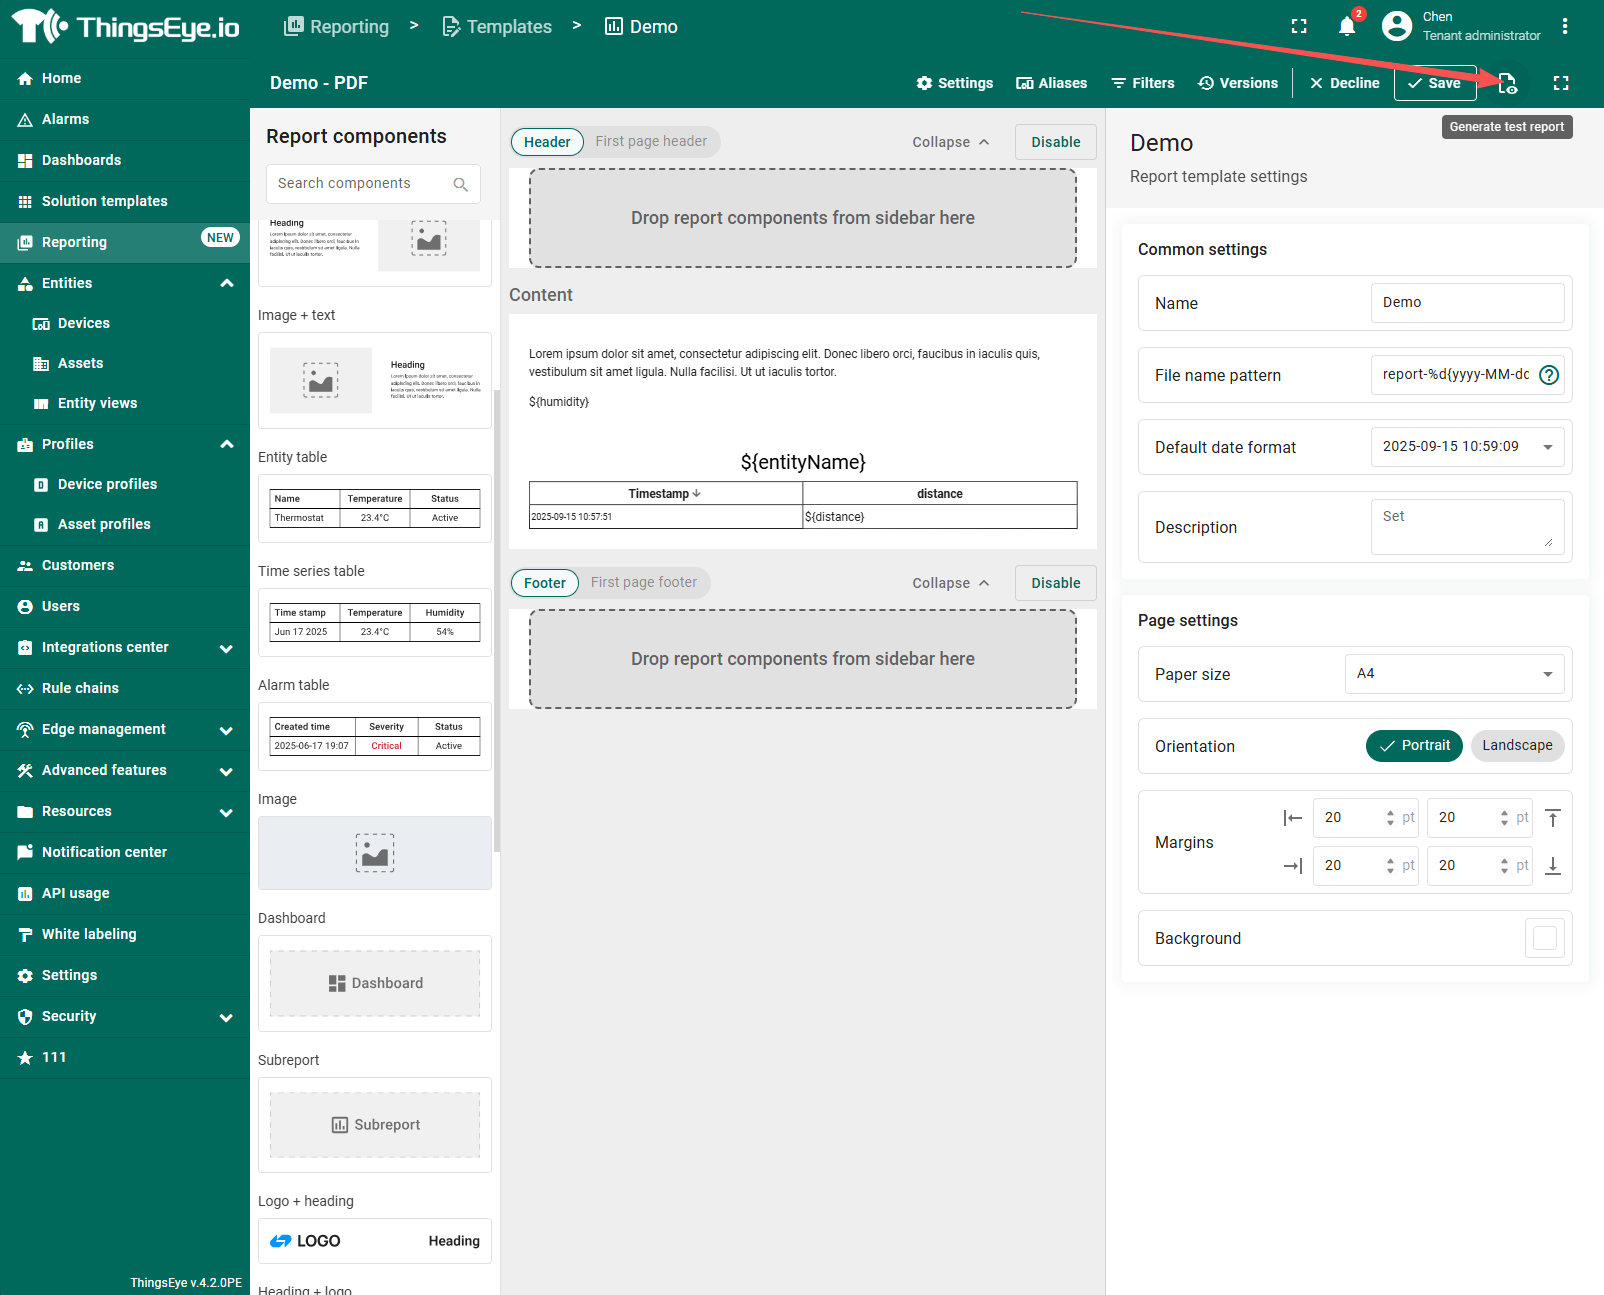
Demo:
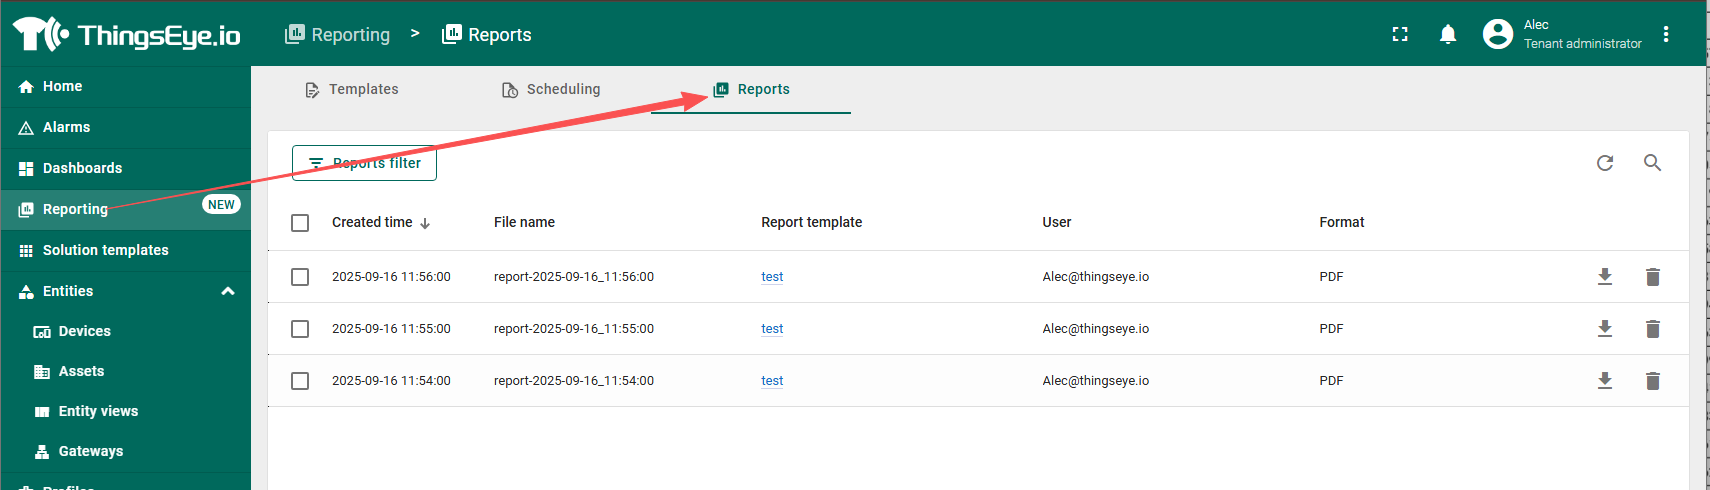
Download Report
The “Reports” tab stores all your generated reports. Here you can:
- Download reports.
- Filter reports by report template or by the user whose credentials were used to generate the report.
- Delete unnecessary reports.