LoRaWAN Downlink via ThingsEye and ChirpStack
This guide explains how to send LoRaWAN downlink commands from ThingsEye and how to verify the queued command in the built-in ChirpStack.
Scope: This guide applies only to ThingsEye and the ChirpStack instance provided with it.
1. Open the Dashboard and Import the Downlink Widget
- Log in to ThingsEye.
- Go to Dashboards and open the dashboard where you want to add the downlink function.
- Enter dashboard edit mode and click Add new widget.
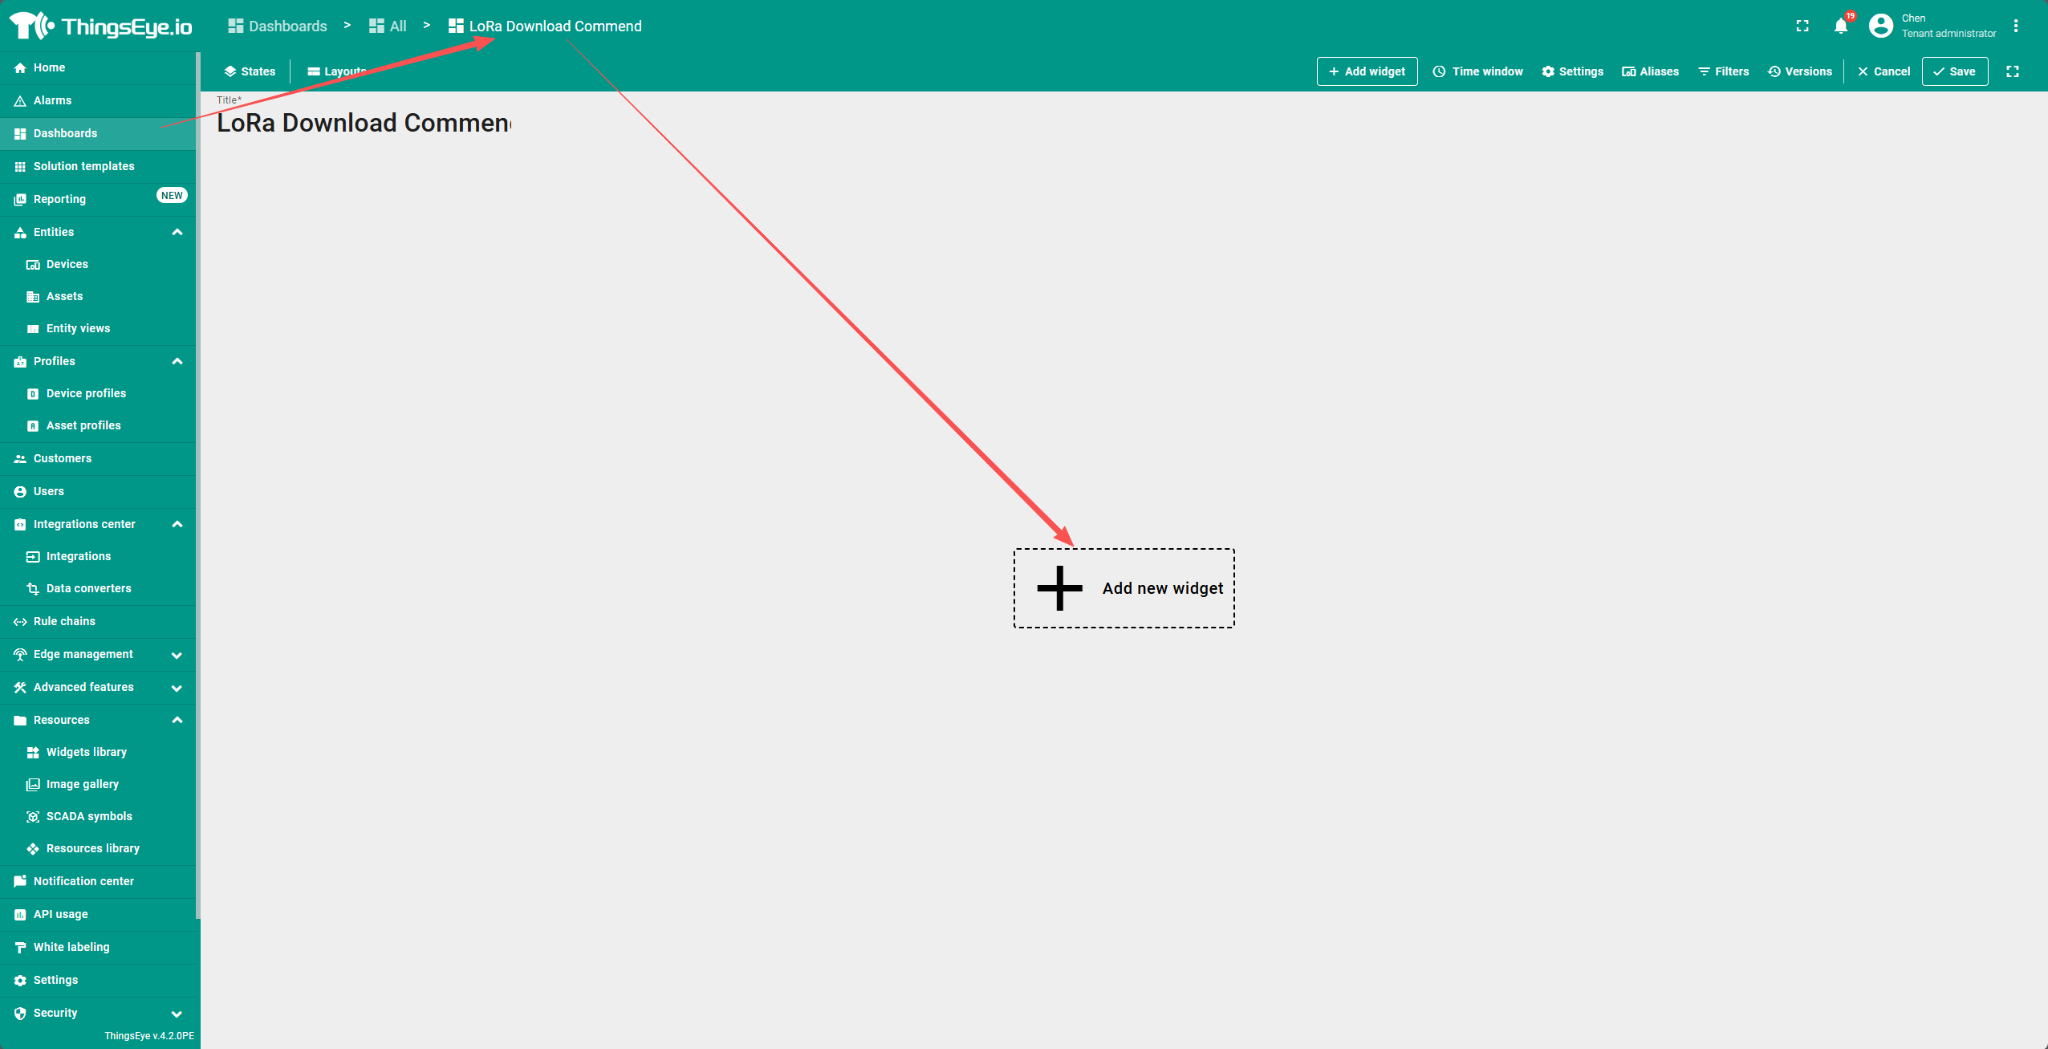
- In the widget selection window, click Import widget.
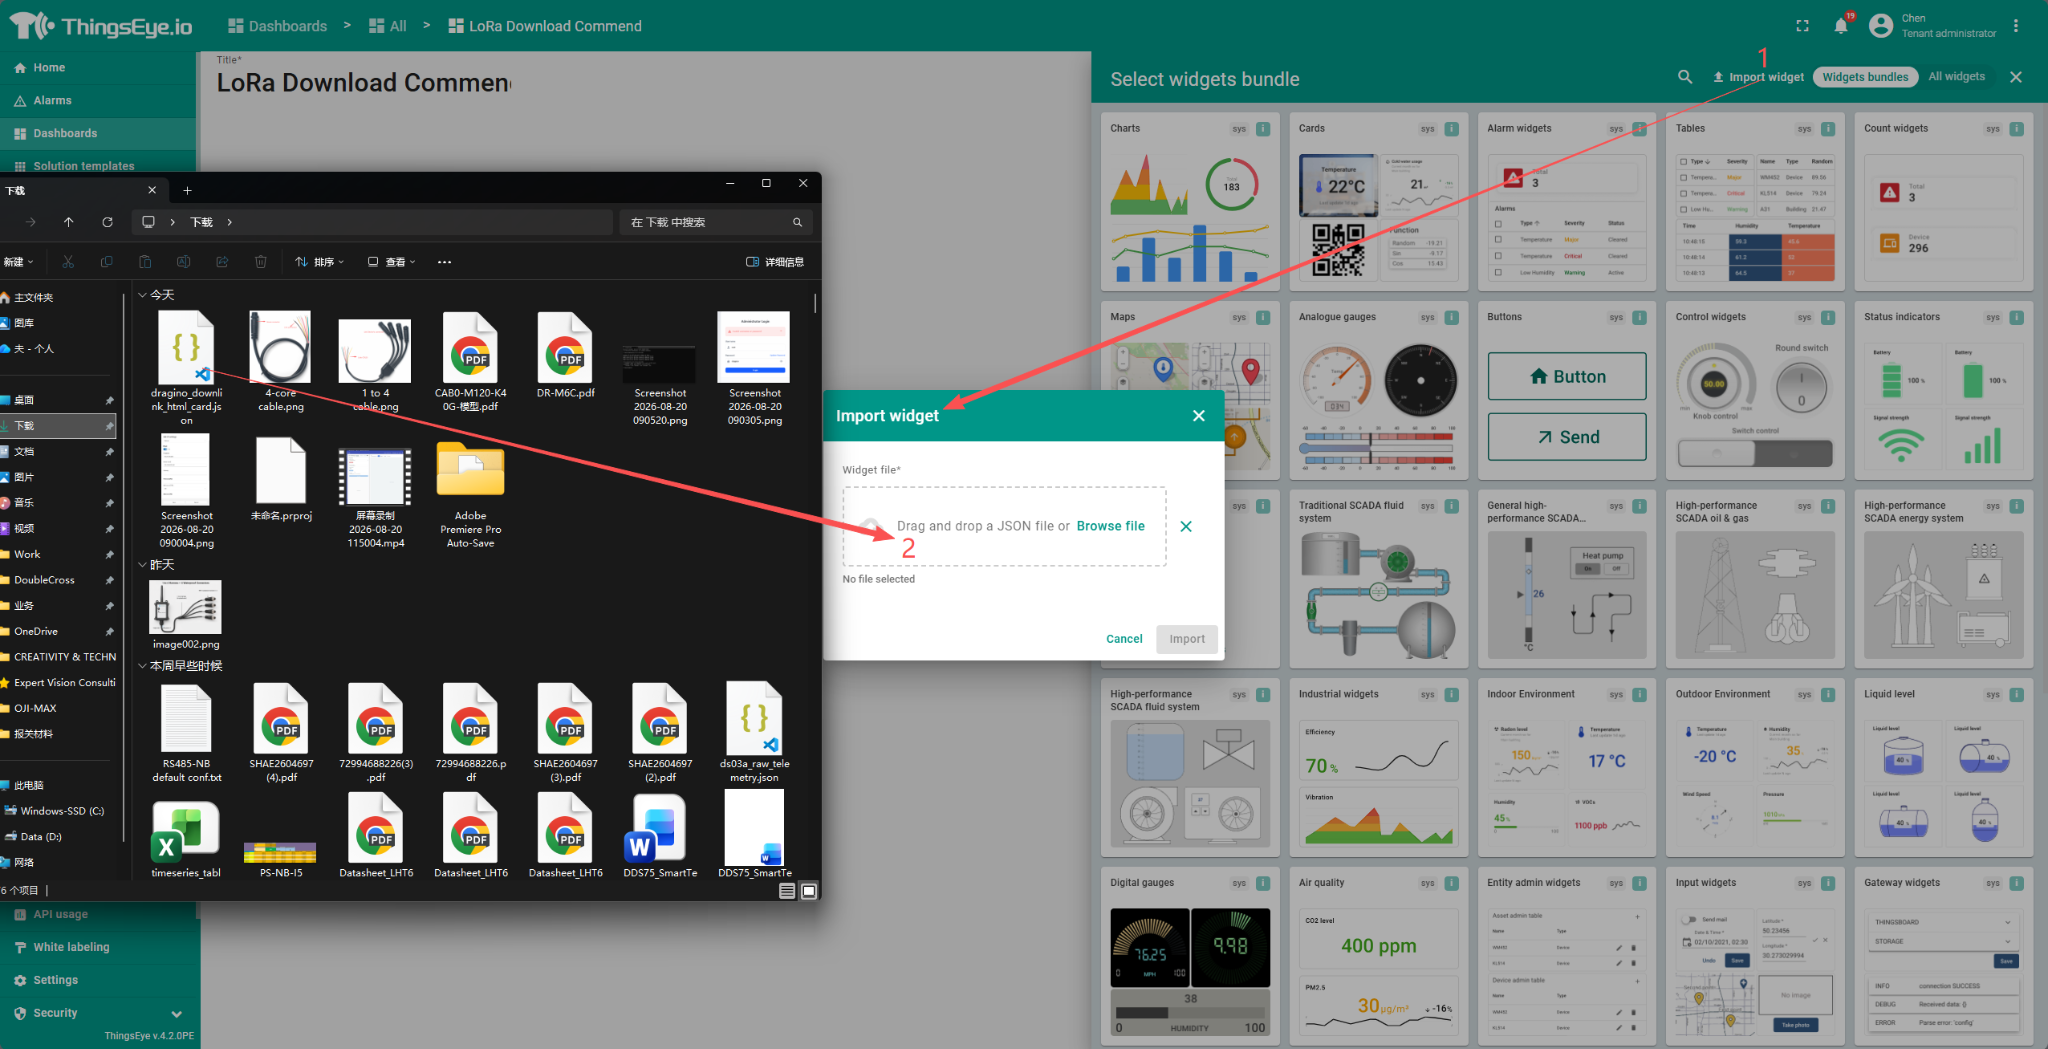
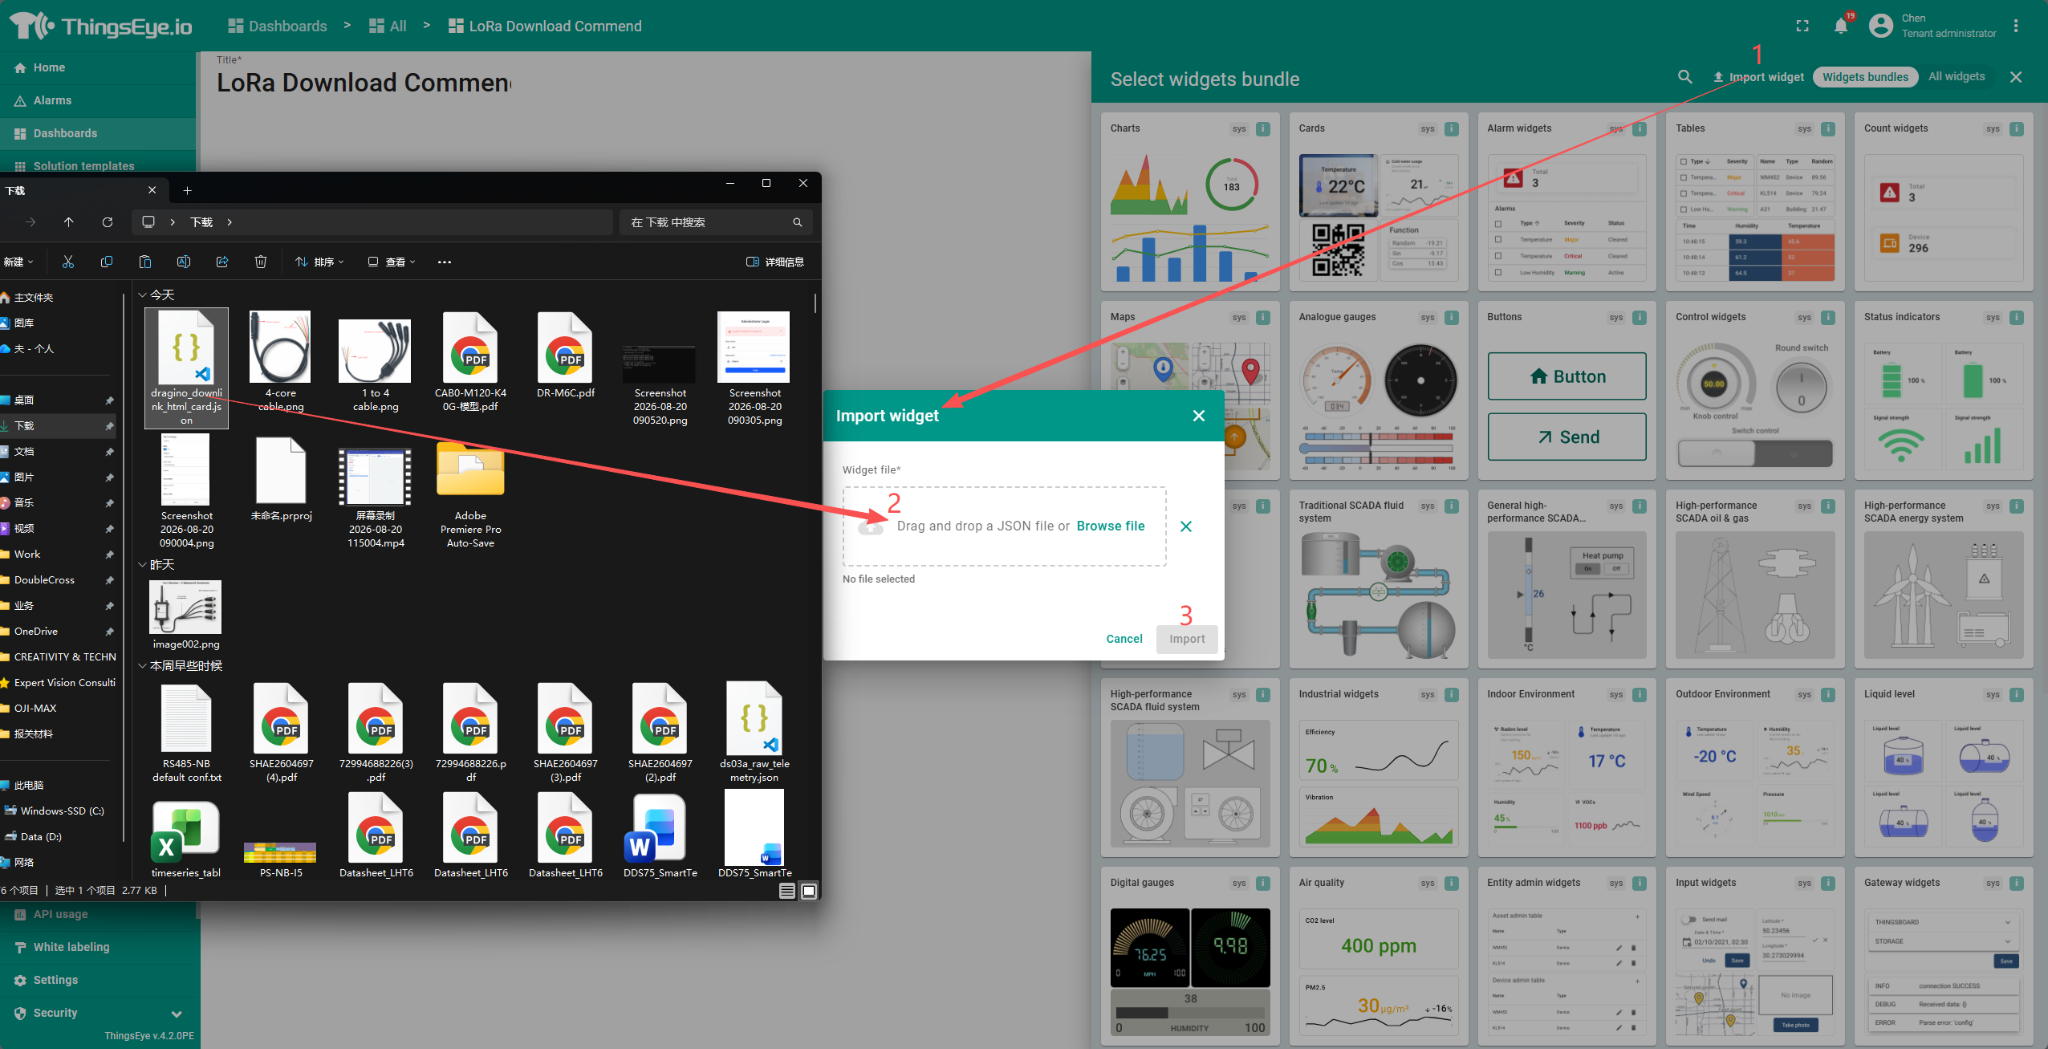
- Select the provided widget file:
- Click Import to add the widget to the dashboard.
2. Check the Widget Datasource
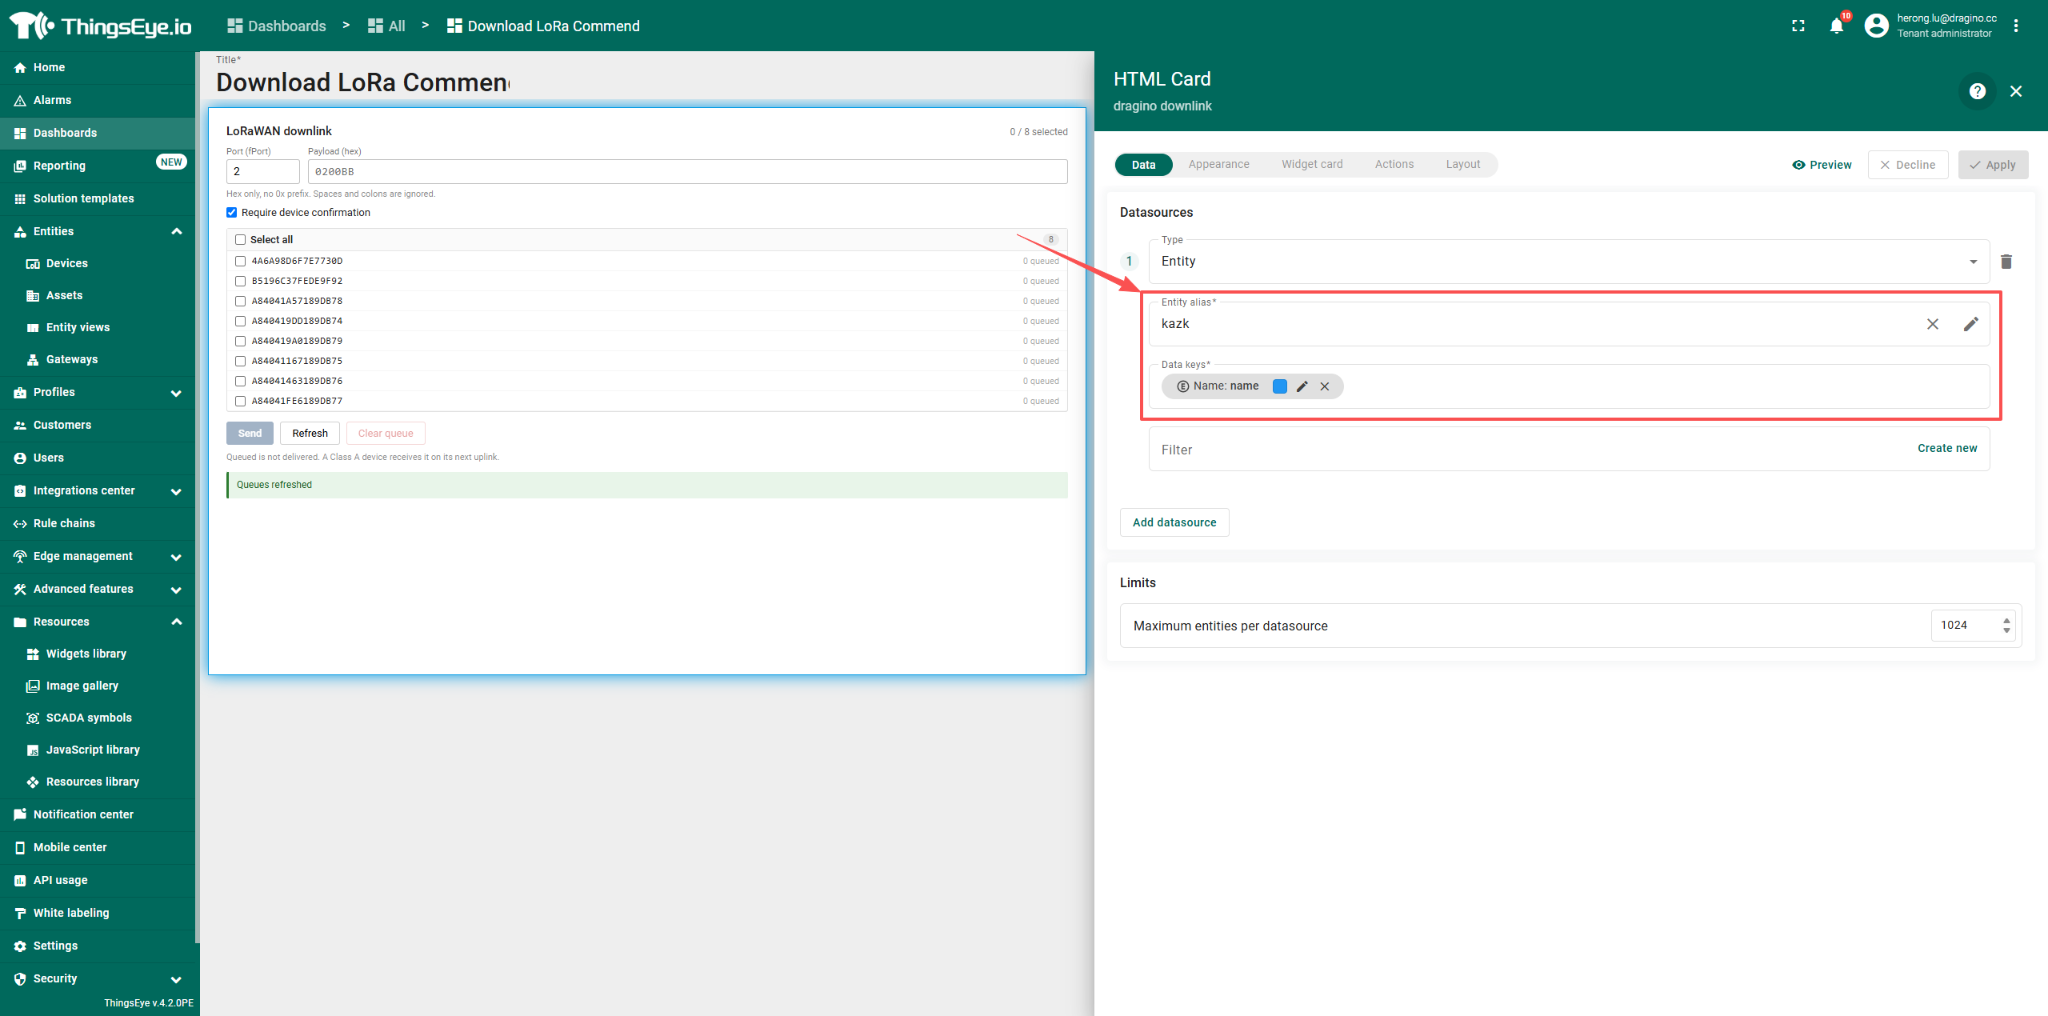
After importing the widget, check its datasource configuration.
Important
The datasource used by this widget is limited to devices that meet both of the following requirements:
- The device is already registered in the ChirpStack.
- The device uses a 16-character hexadecimal device ID.
If you have other devices already registered in ChirpStack but they are not available in this widget, please contact Hera@thingseye.io for configuration support.
3. Send a Downlink Command from ThingsEye
In the LoRaWAN downlink widget:
- Enter the required FPort.
- Enter the downlink command in HEX format.
- Do not add the
0xprefix. - Spaces and colons are ignored.
- Do not add the
- Select one or more target devices.
- Enable Require device confirmation if confirmation is required.
- Click Send.
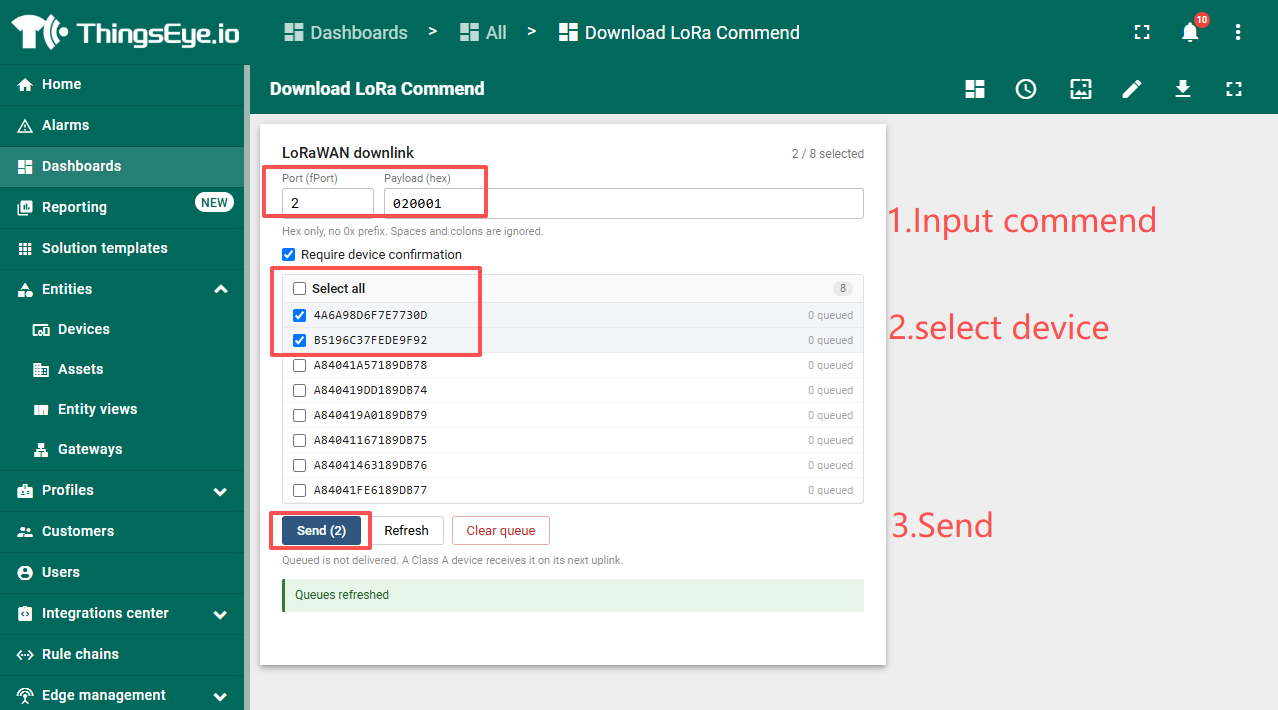
The command is then added to the downlink queue.
For a LoRaWAN Class A device, a queued downlink is normally delivered after the device sends its next uplink.
You can use:
- Refresh to update the queue status shown in the widget.
- Clear queue to remove queued downlink commands.
4. Check the Downlink Queue in ChirpStack
To verify that the command has been queued correctly:
- Open the built-in ChirpStack.
- Go to Applications.
- Open the required application.
- Select the target device.
- Open the Queue tab.
- Click Reload.
- Check the queued downlink entry.
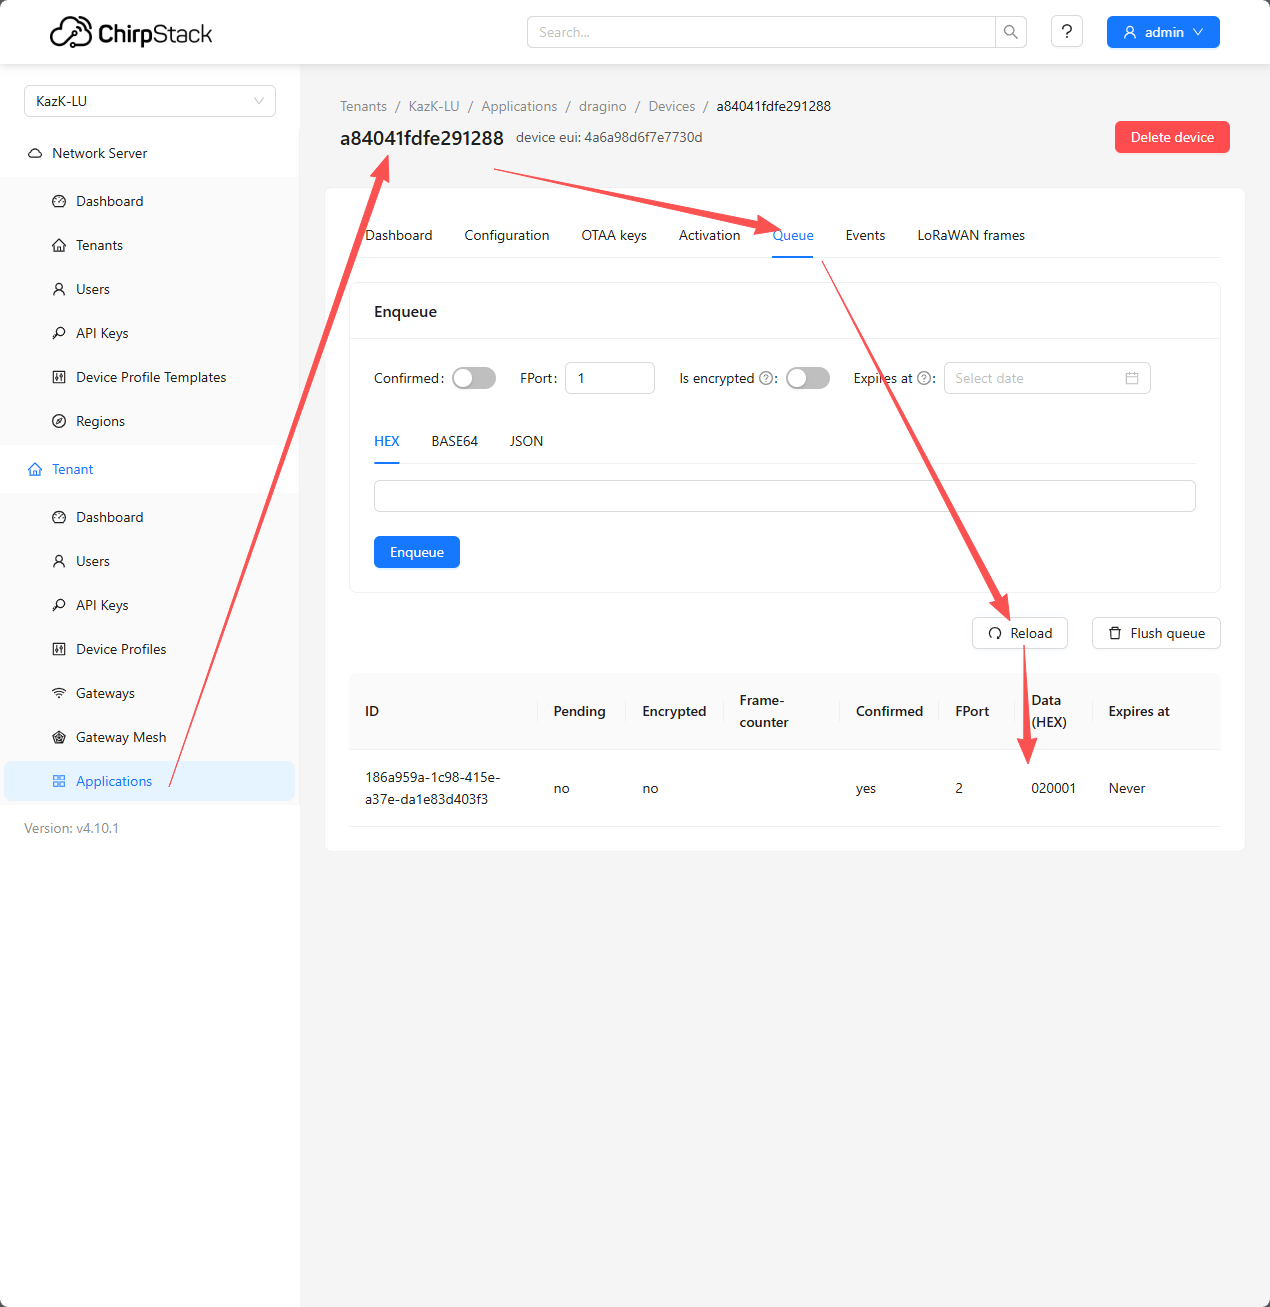
The queue entry can be used to verify information such as:
- Confirmed status
- FPort
- Data (HEX)
- Queue status
If the expected downlink appears in the ChirpStack queue, the command has been successfully queued for the selected device.
Troubleshooting
The device is not shown in the ThingsEye widget
Check that:
- The device is already registered in the ChirpStack.
- Its device ID is a 16-character hexadecimal value.
If the device is registered in ChirpStack but still does not appear in the widget, contact Hera@thingseye.io.
The downlink remains in the queue
For a LoRaWAN Class A device, the network waits for the device's next uplink before it can transmit the queued downlink. Confirm that the device is still sending uplinks normally.
The command is not visible in ChirpStack
Check the following in ThingsEye:
- The correct target device was selected.
- The FPort is correct.
- The payload is valid HEX data.
- The Send button was clicked successfully.
Then refresh the ChirpStack Queue page and check again.