Tenant Management
Overview
Applicable Role: System Administrator.
The Tenant Management module enables System Administrators to perform full lifecycle management of multiple tenants on the platform, including creating, editing, and deleting tenants. A tenant is the basic unit of resource isolation on the platform, with each tenant having its own independent resources such as devices, users, assets, and dashboards. Through this module, System Administrators can manage multi‑tenant operations on the platform.
1. Create a Tenant
Procedure
Step 1: Go to the tenant management page
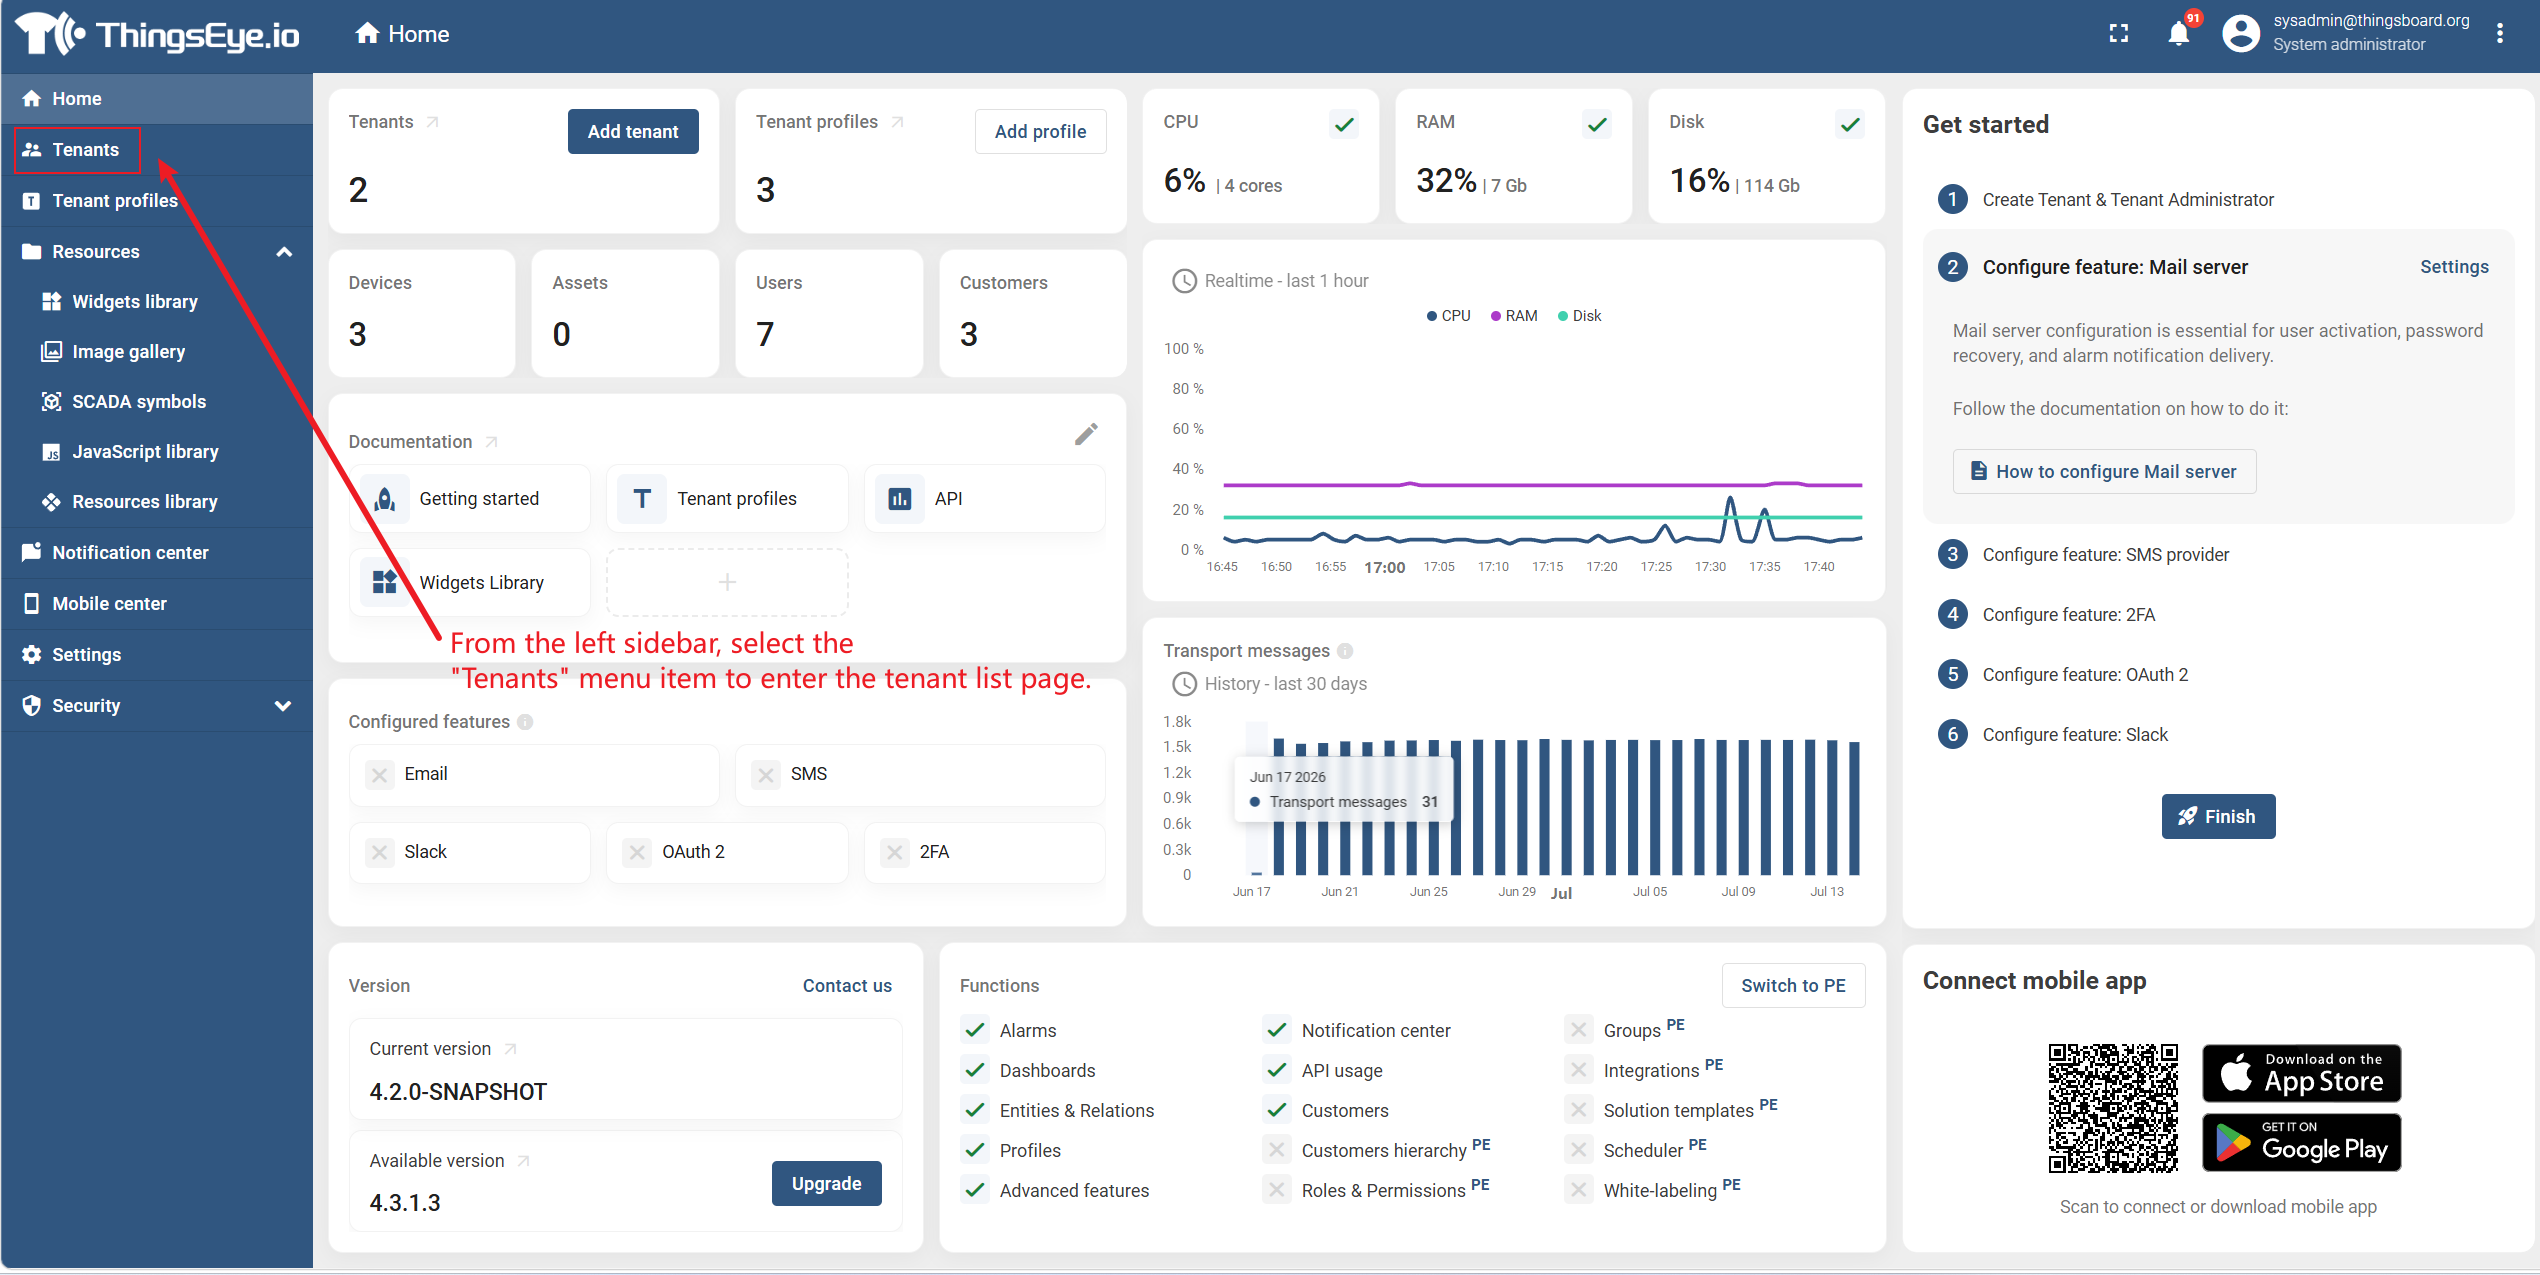
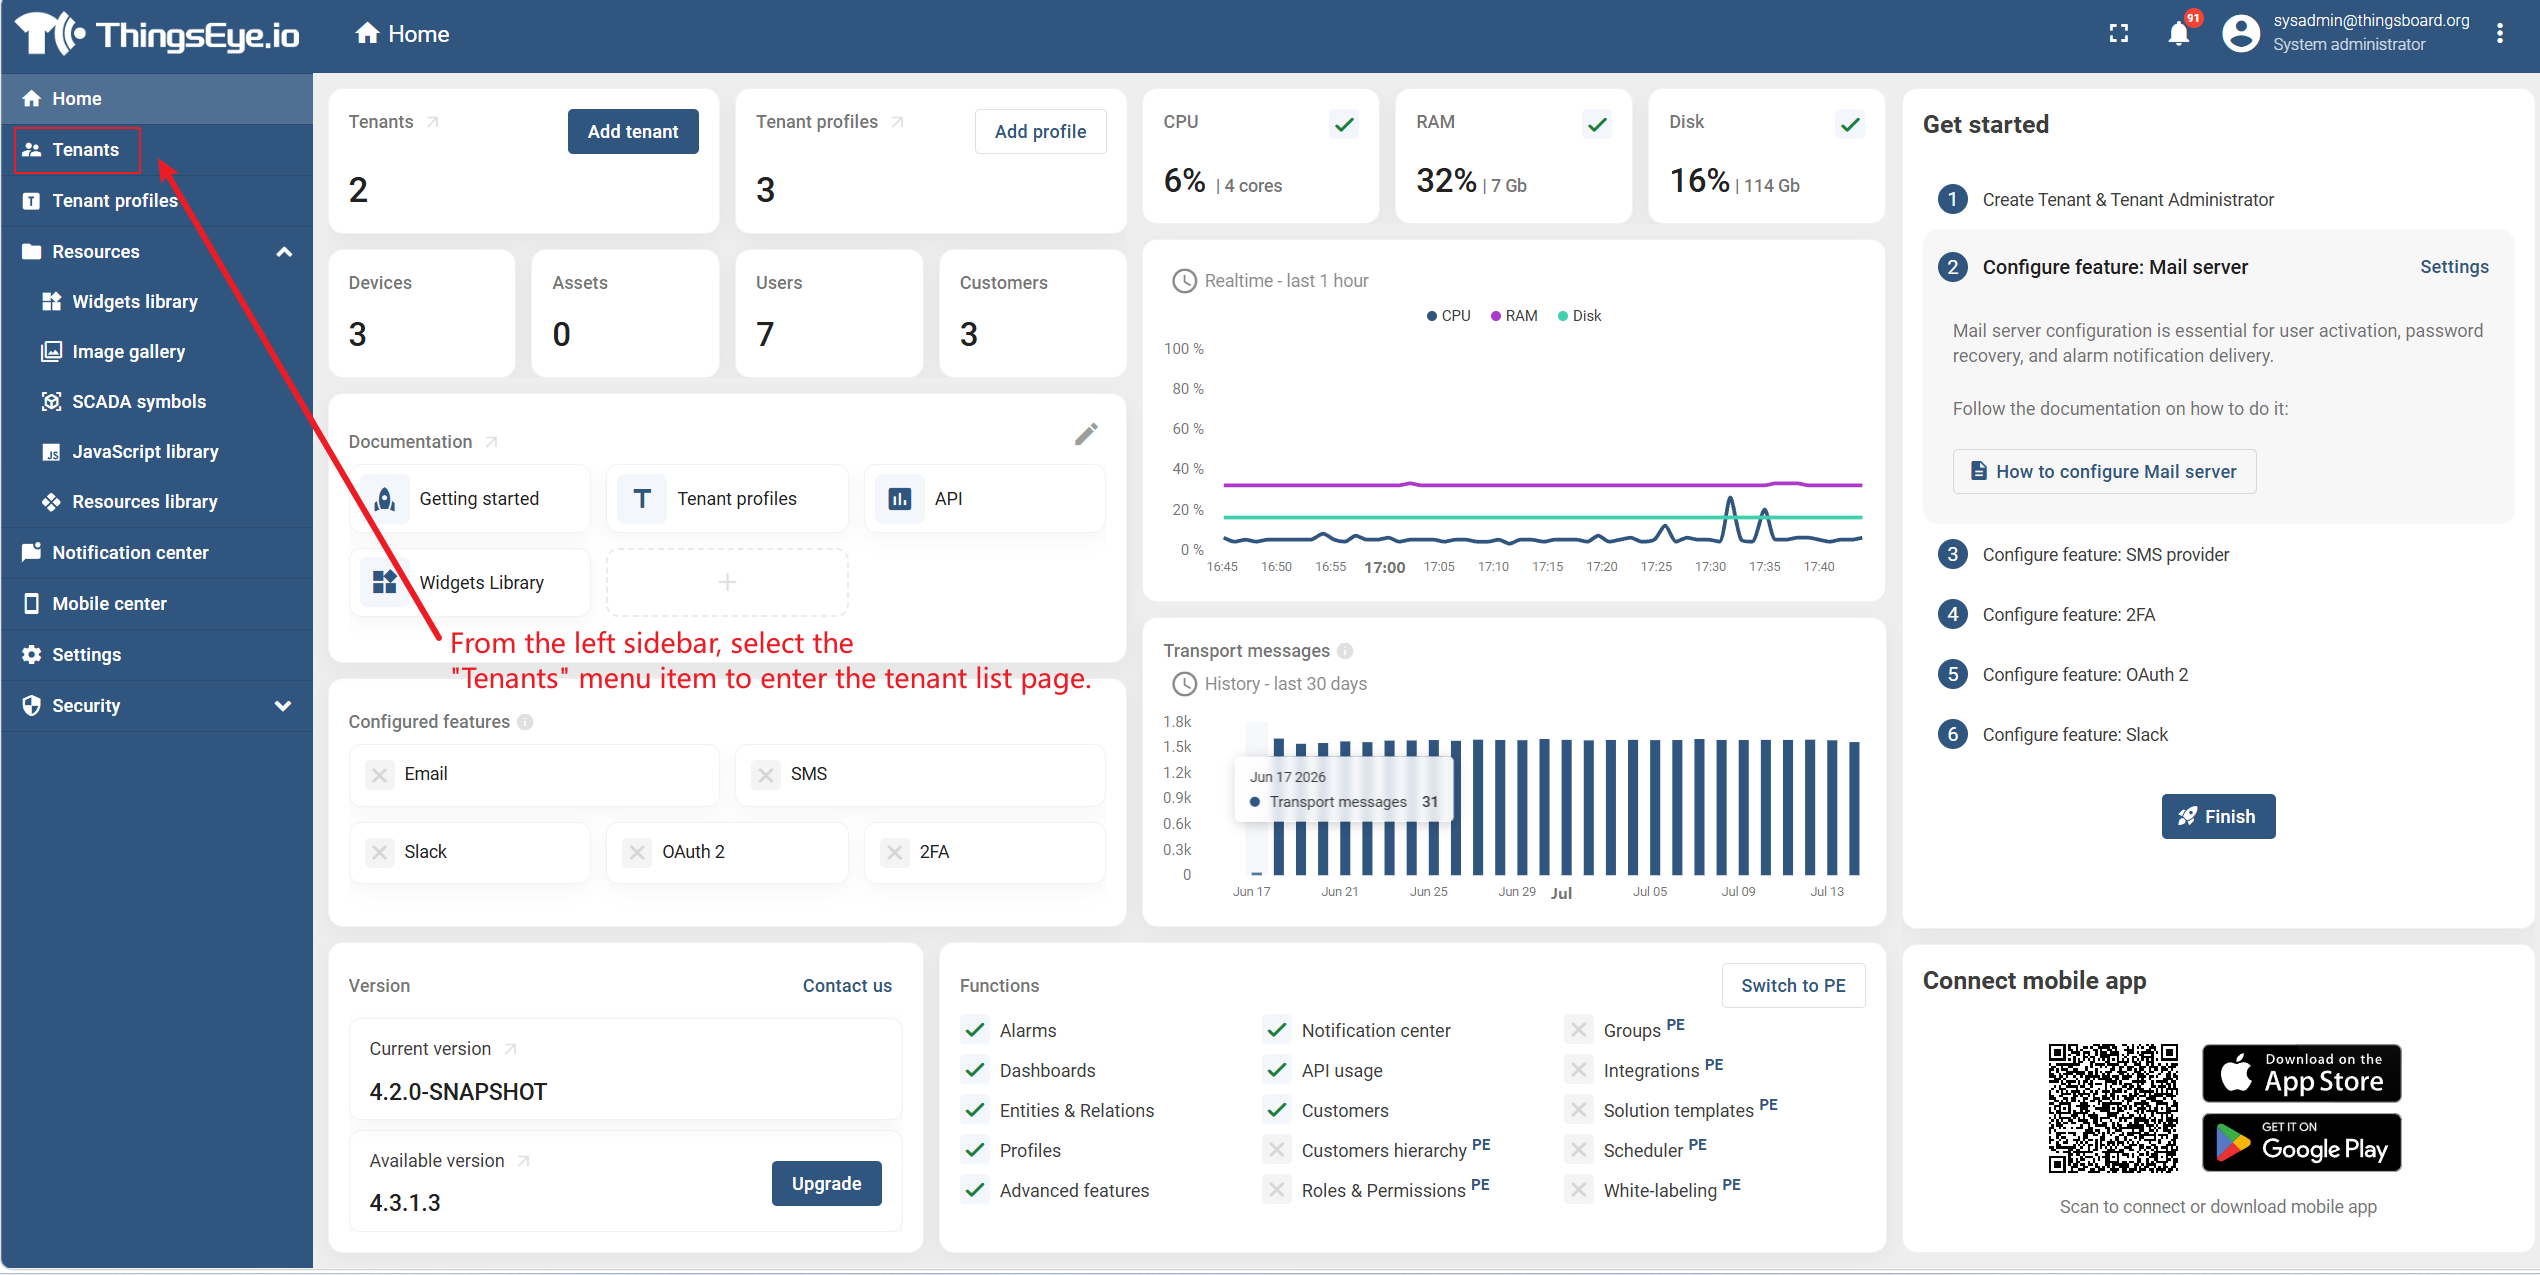
Select the "Tenants" menu item from the left sidebar to go to the tenant list page.
Step 2: Open the Create Tenant dialog
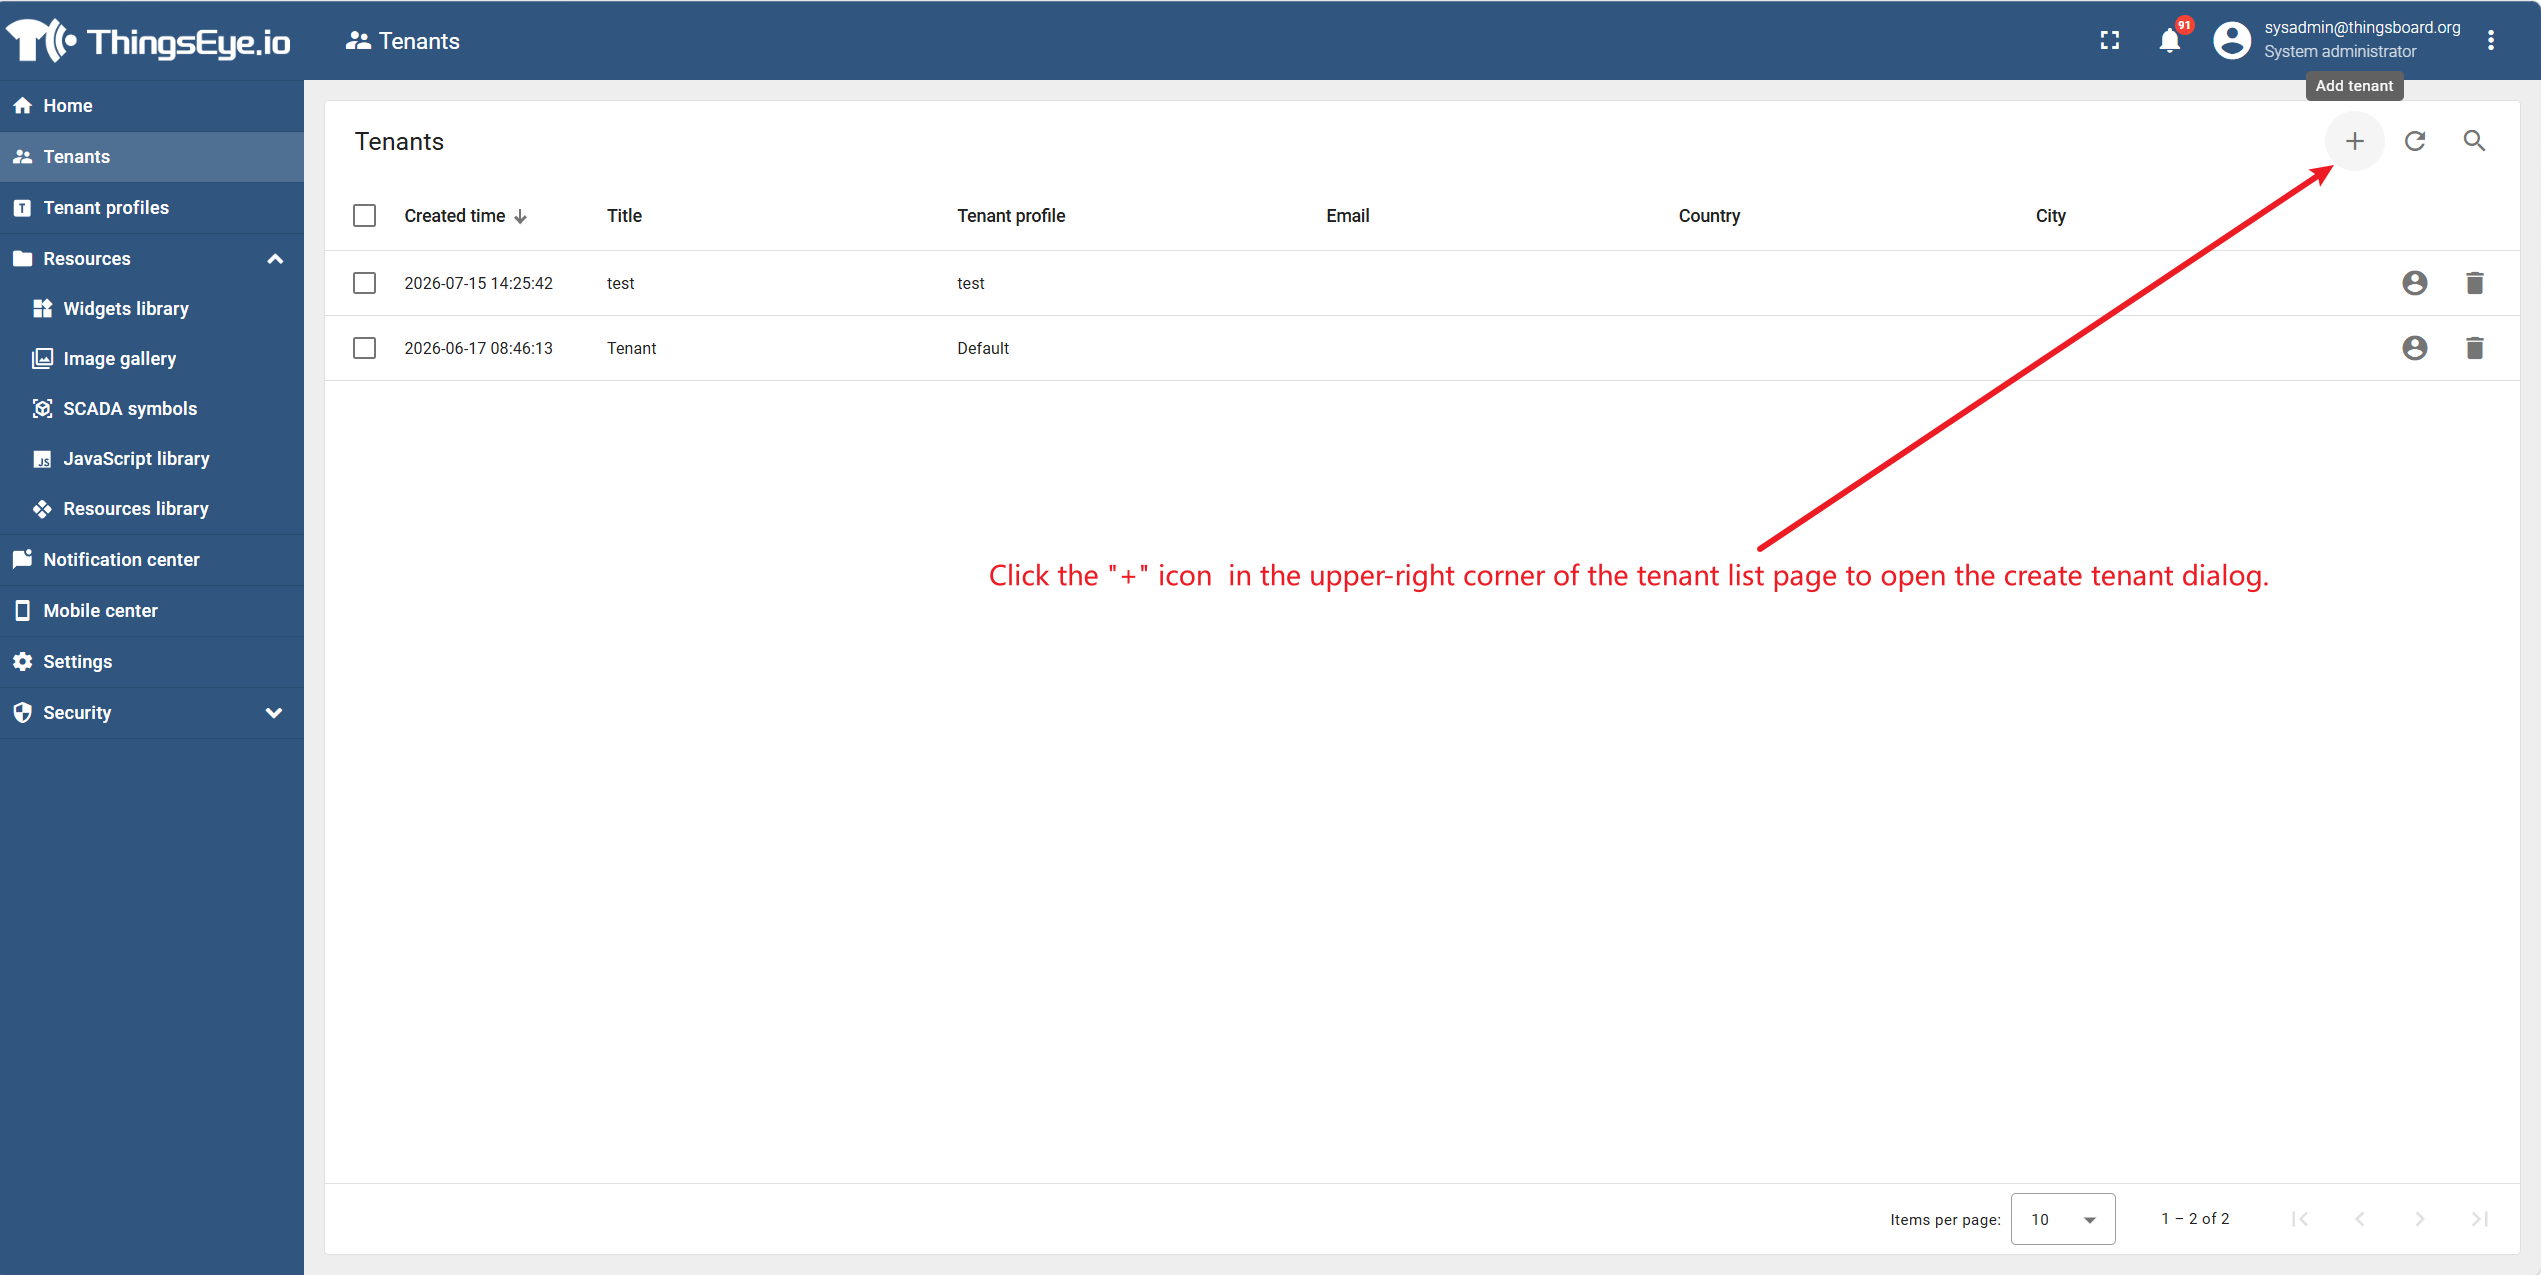
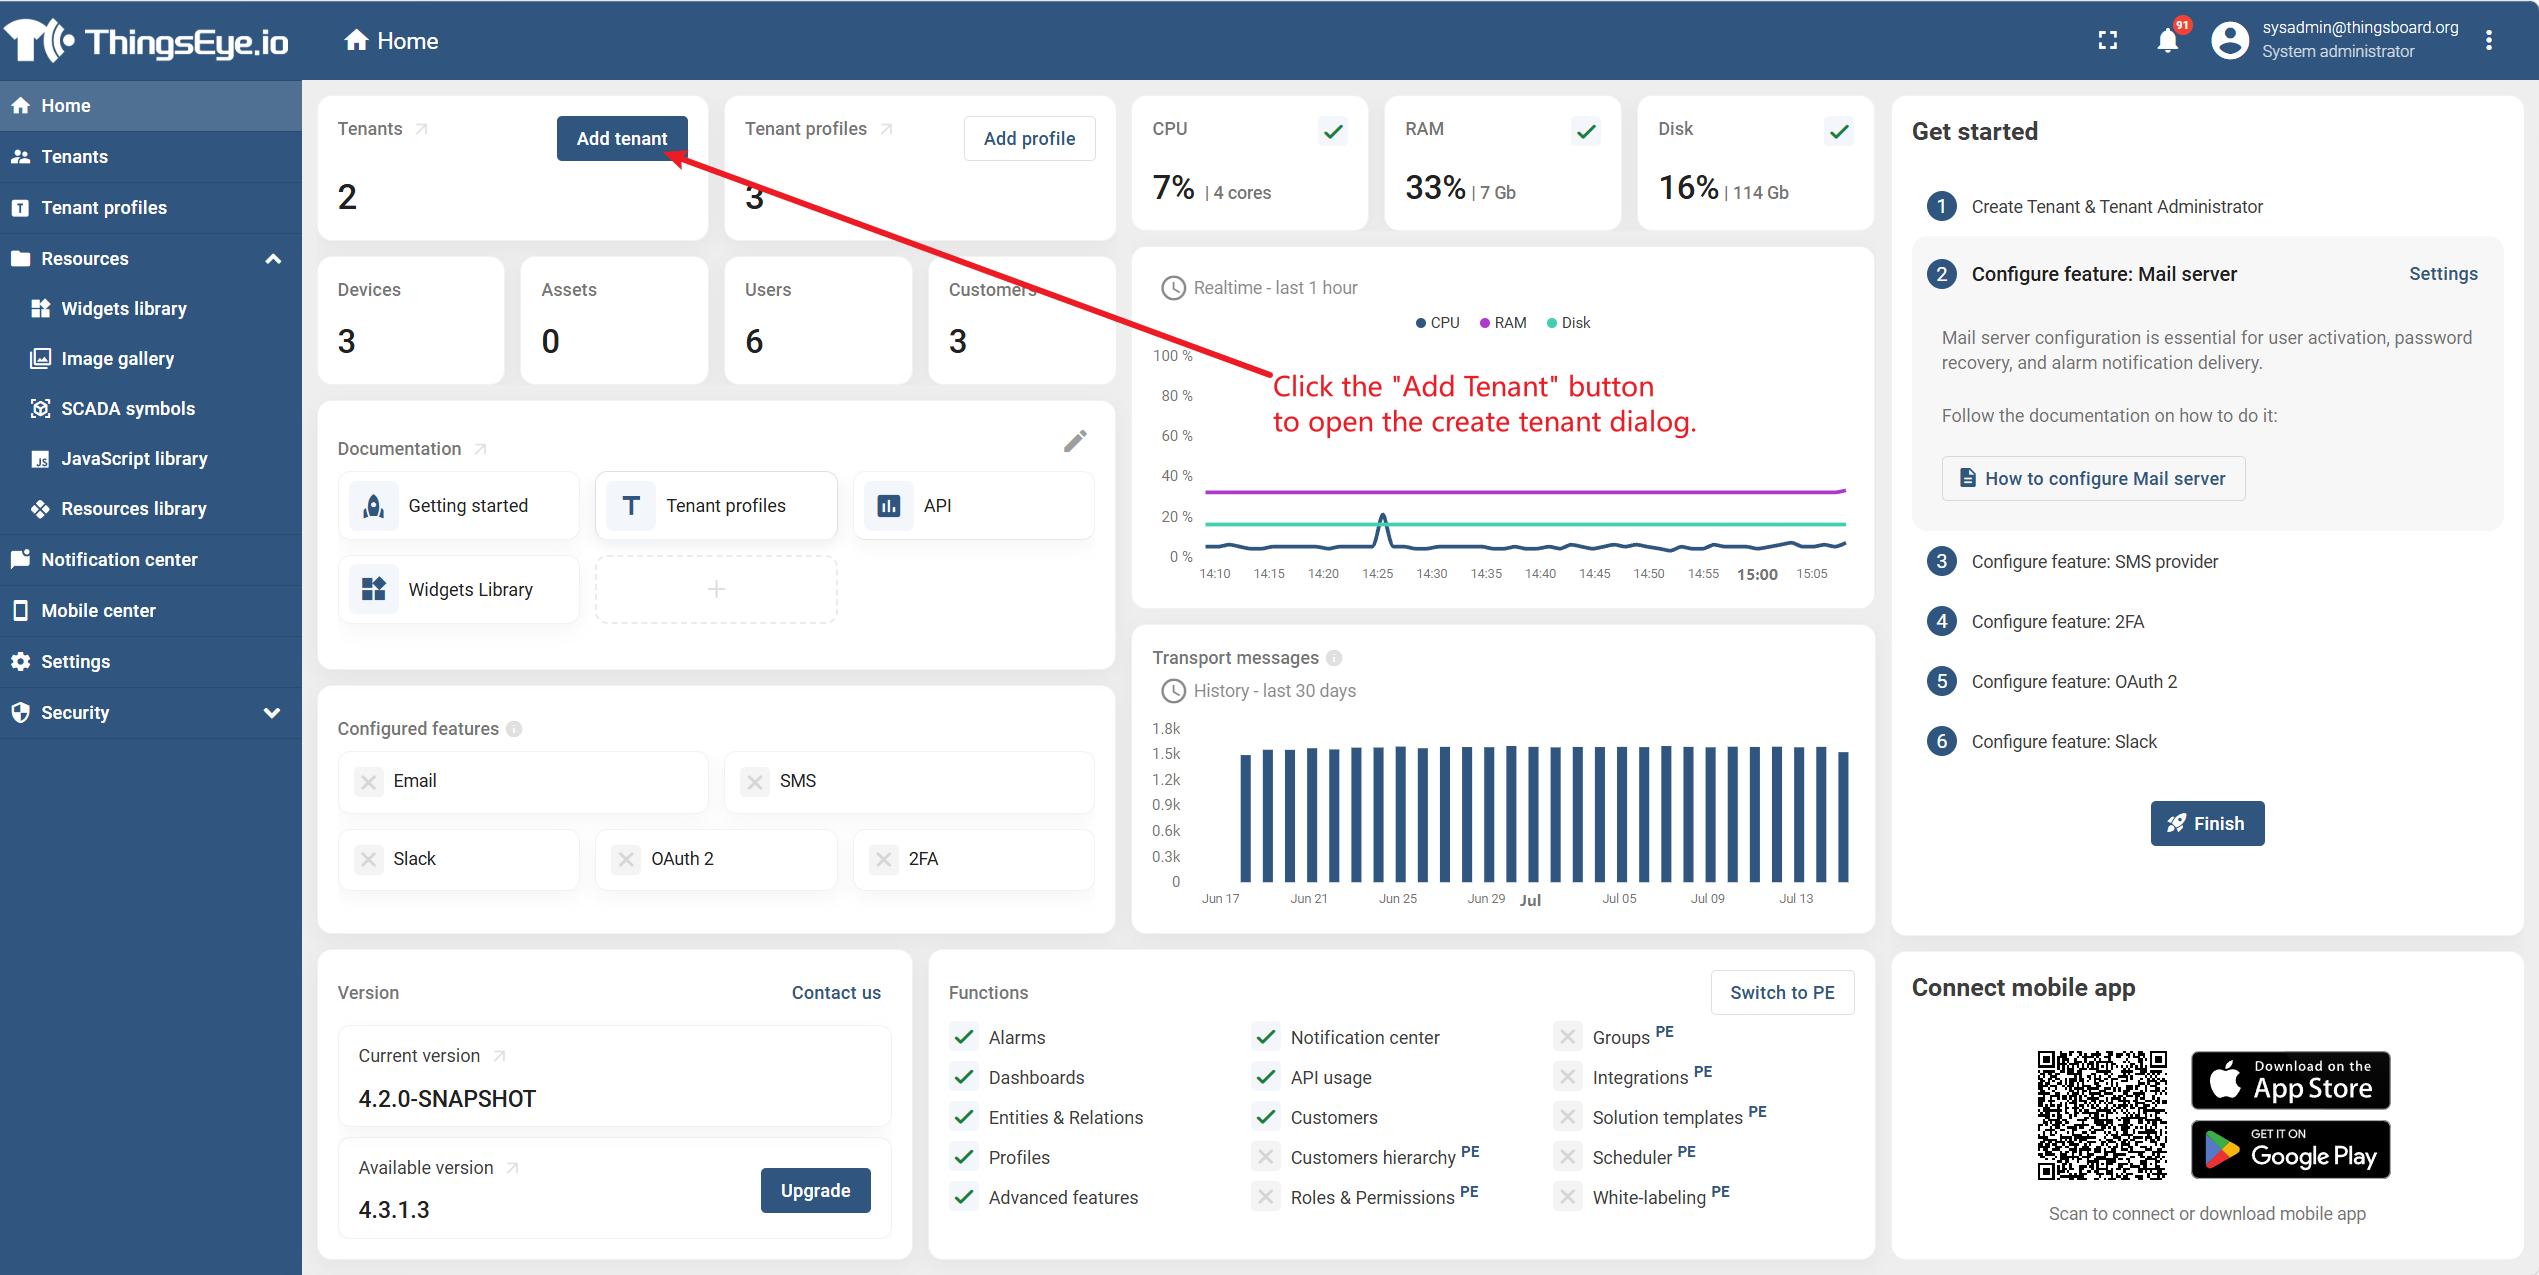
Click the "+" icon or the "Add Tenant" button in the upper‑right corner of the tenant list page to open the Create Tenant dialog.
Step 3: Fill in tenant information
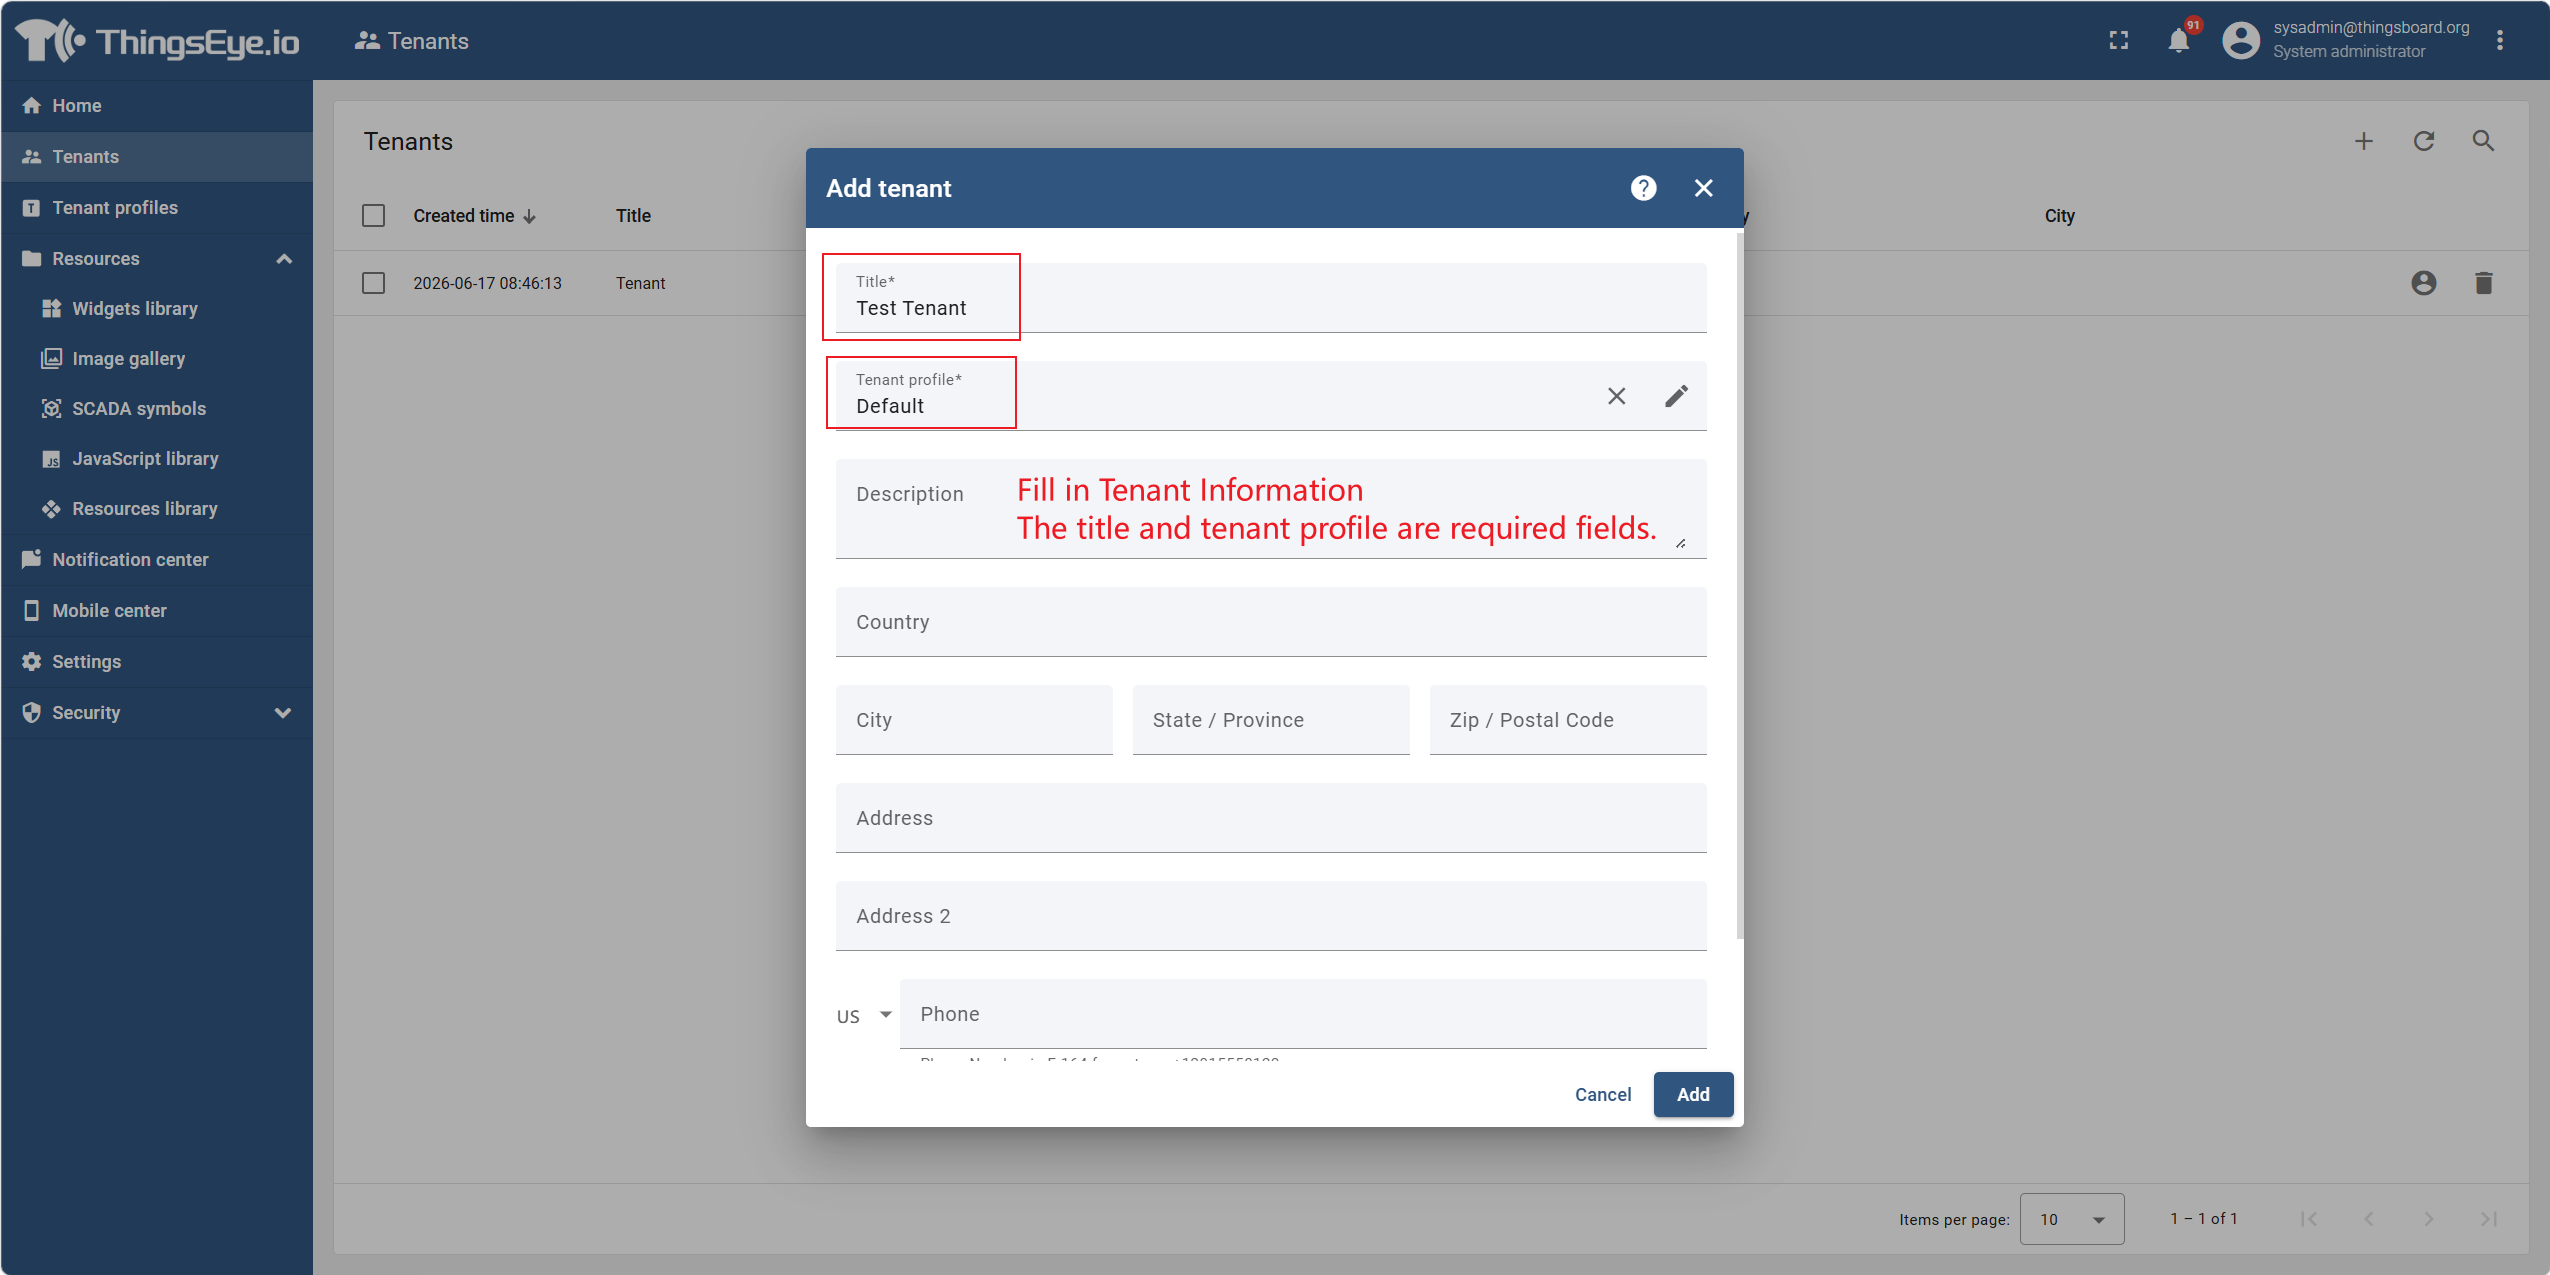
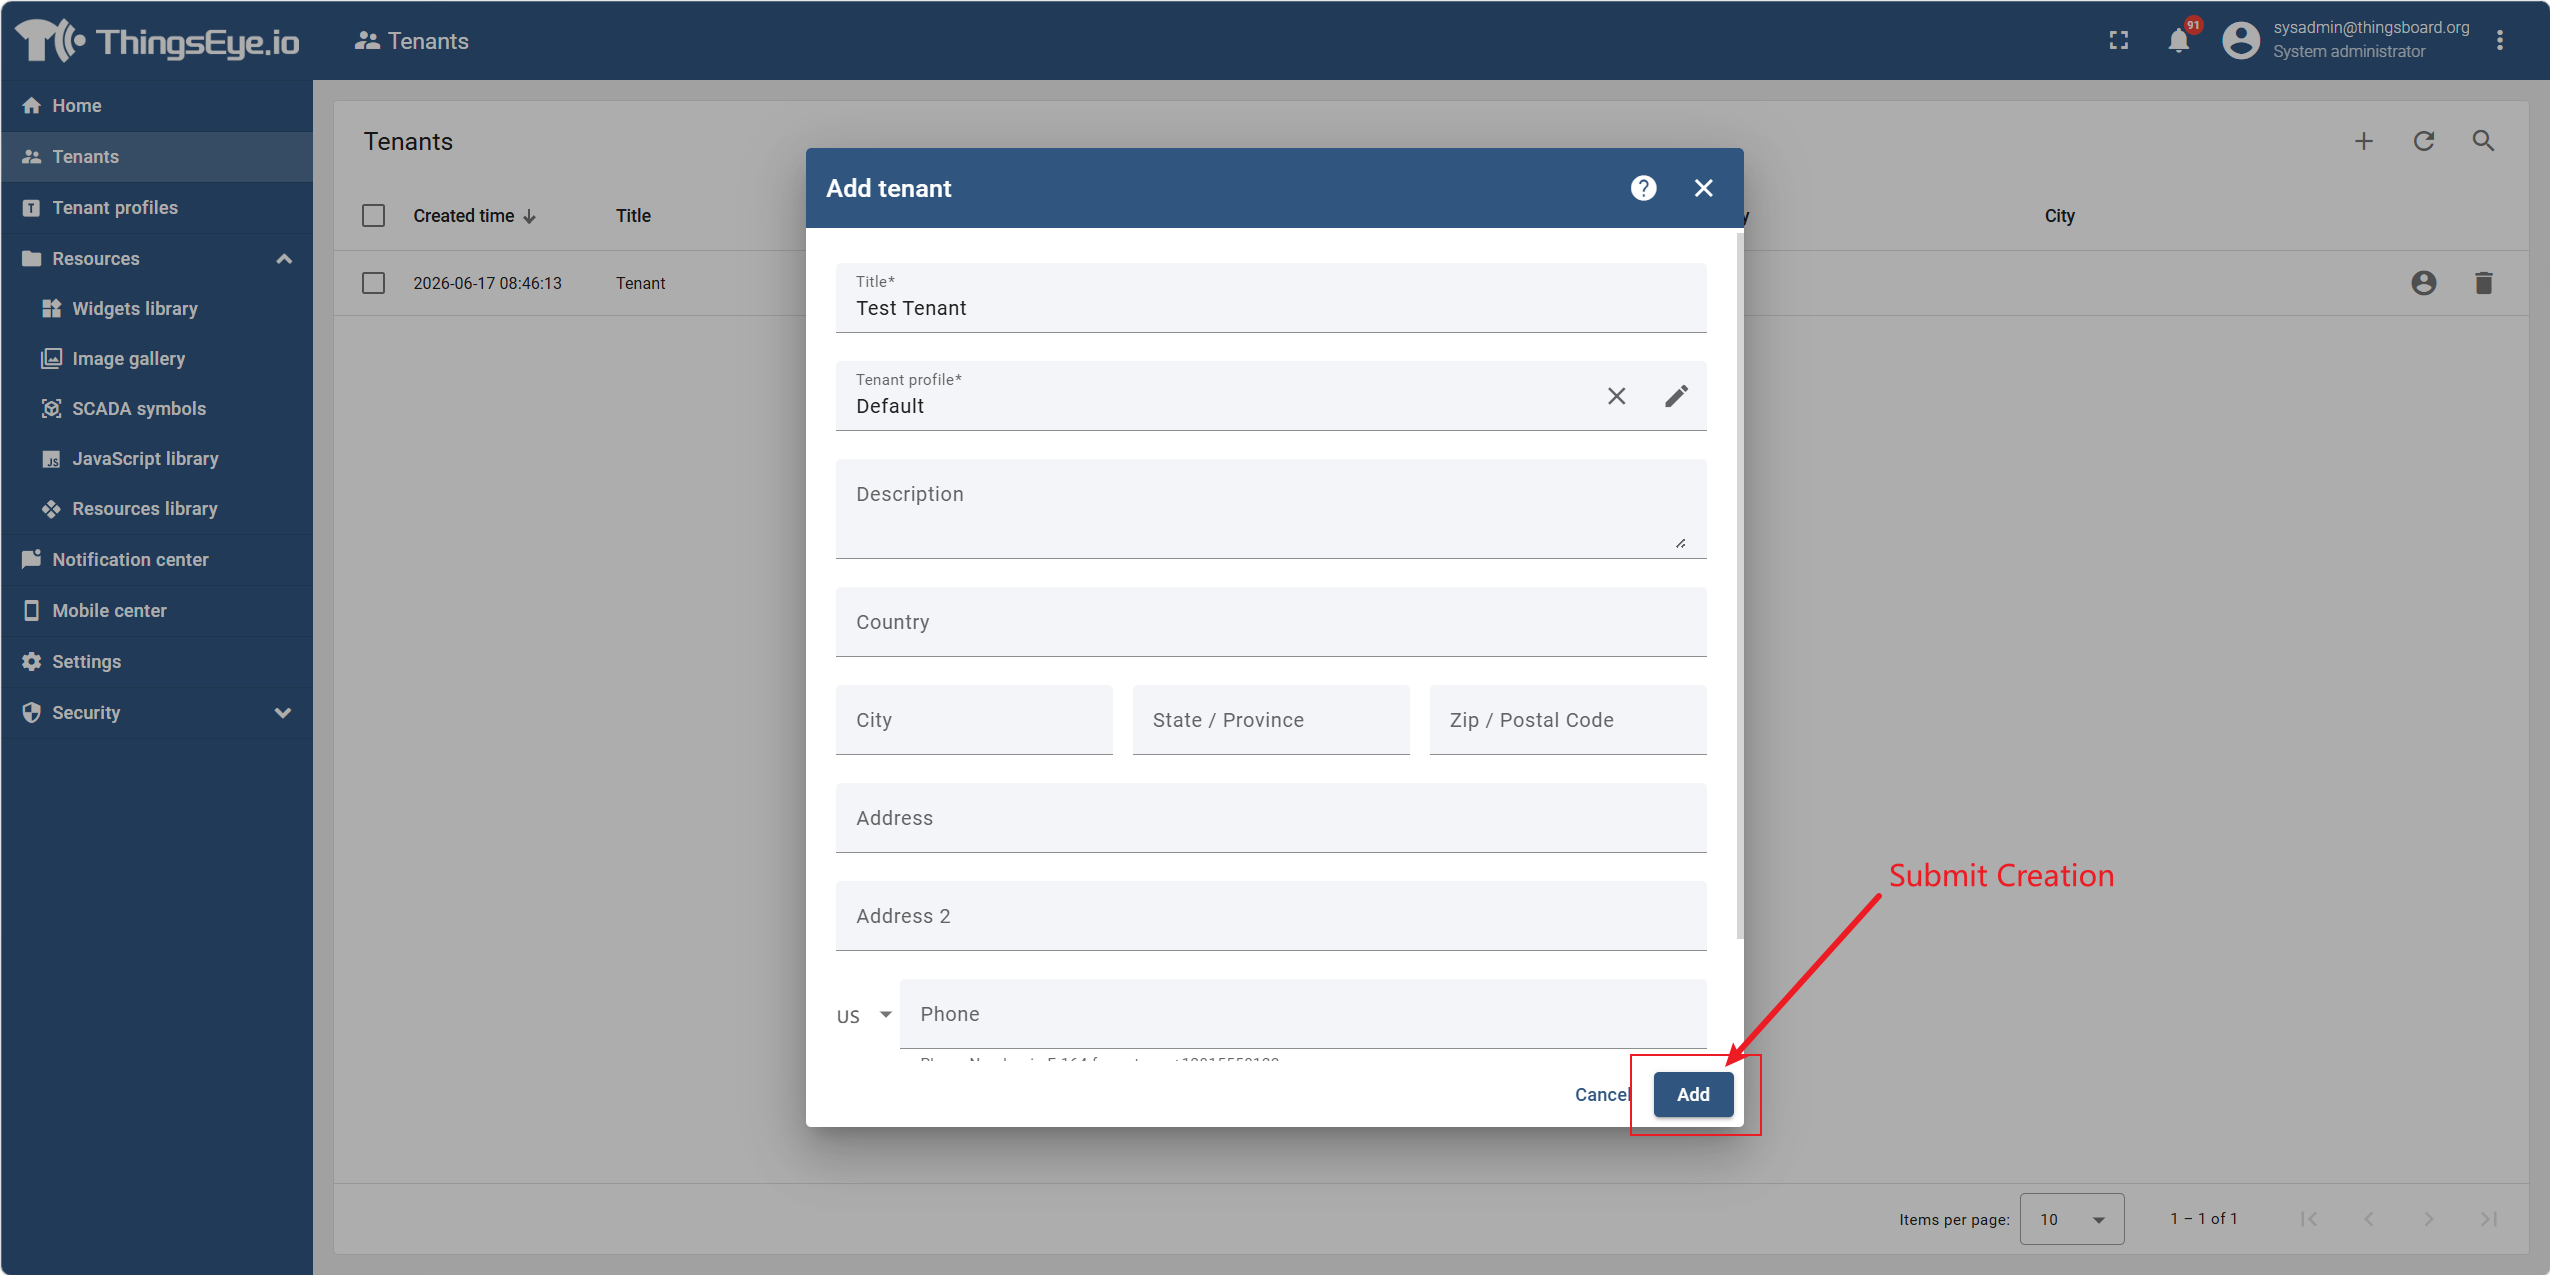
In the Create Tenant dialog, fill in the following information:
| Field | Description | Required |
|---|---|---|
| Tenant Name | The unique display name of the tenant, used for identification in the list | Yes |
| Tenant Profile | Select an existing tenant profile, which determines the tenant's functional quotas and limits (see "Tenant Profiles") | Yes |
| Contact Name | The primary contact person for the tenant | No |
| Contact Phone | The phone number of the contact person | No |
| The email address of the contact person | No | |
| Country/Region | The country or region where the tenant is located | No |
| Address | The detailed address of the tenant | No |
| Additional Info | Other information to be noted, stored in JSON format | No |
Step 4: Submit the creation
After confirming the information is correct, click the "Add" button at the bottom of the dialog to submit.
Once created successfully, the new tenant will appear in the tenant list.
Additional Notes
| Item | Description |
|---|---|
| Tenant Name Uniqueness | Tenant names must be unique across the platform; they cannot duplicate existing tenant names. |
| Role of Tenant Profile | The tenant profile determines the tenant's functional quotas (e.g., maximum number of devices, maximum number of users, etc.). It can be changed after creation (see "2. Edit Tenant"). |
| Tenant ID | The system automatically generates a unique tenant ID (UUID) upon creation, used for API calls and internal system identification; no manual entry is required. |
2. Edit a Tenant
Procedure
Step 1: Go to the tenant management page
Select the "Tenants" menu item from the left navigation bar to go to the tenant list page.
Step 2: Locate the target tenant
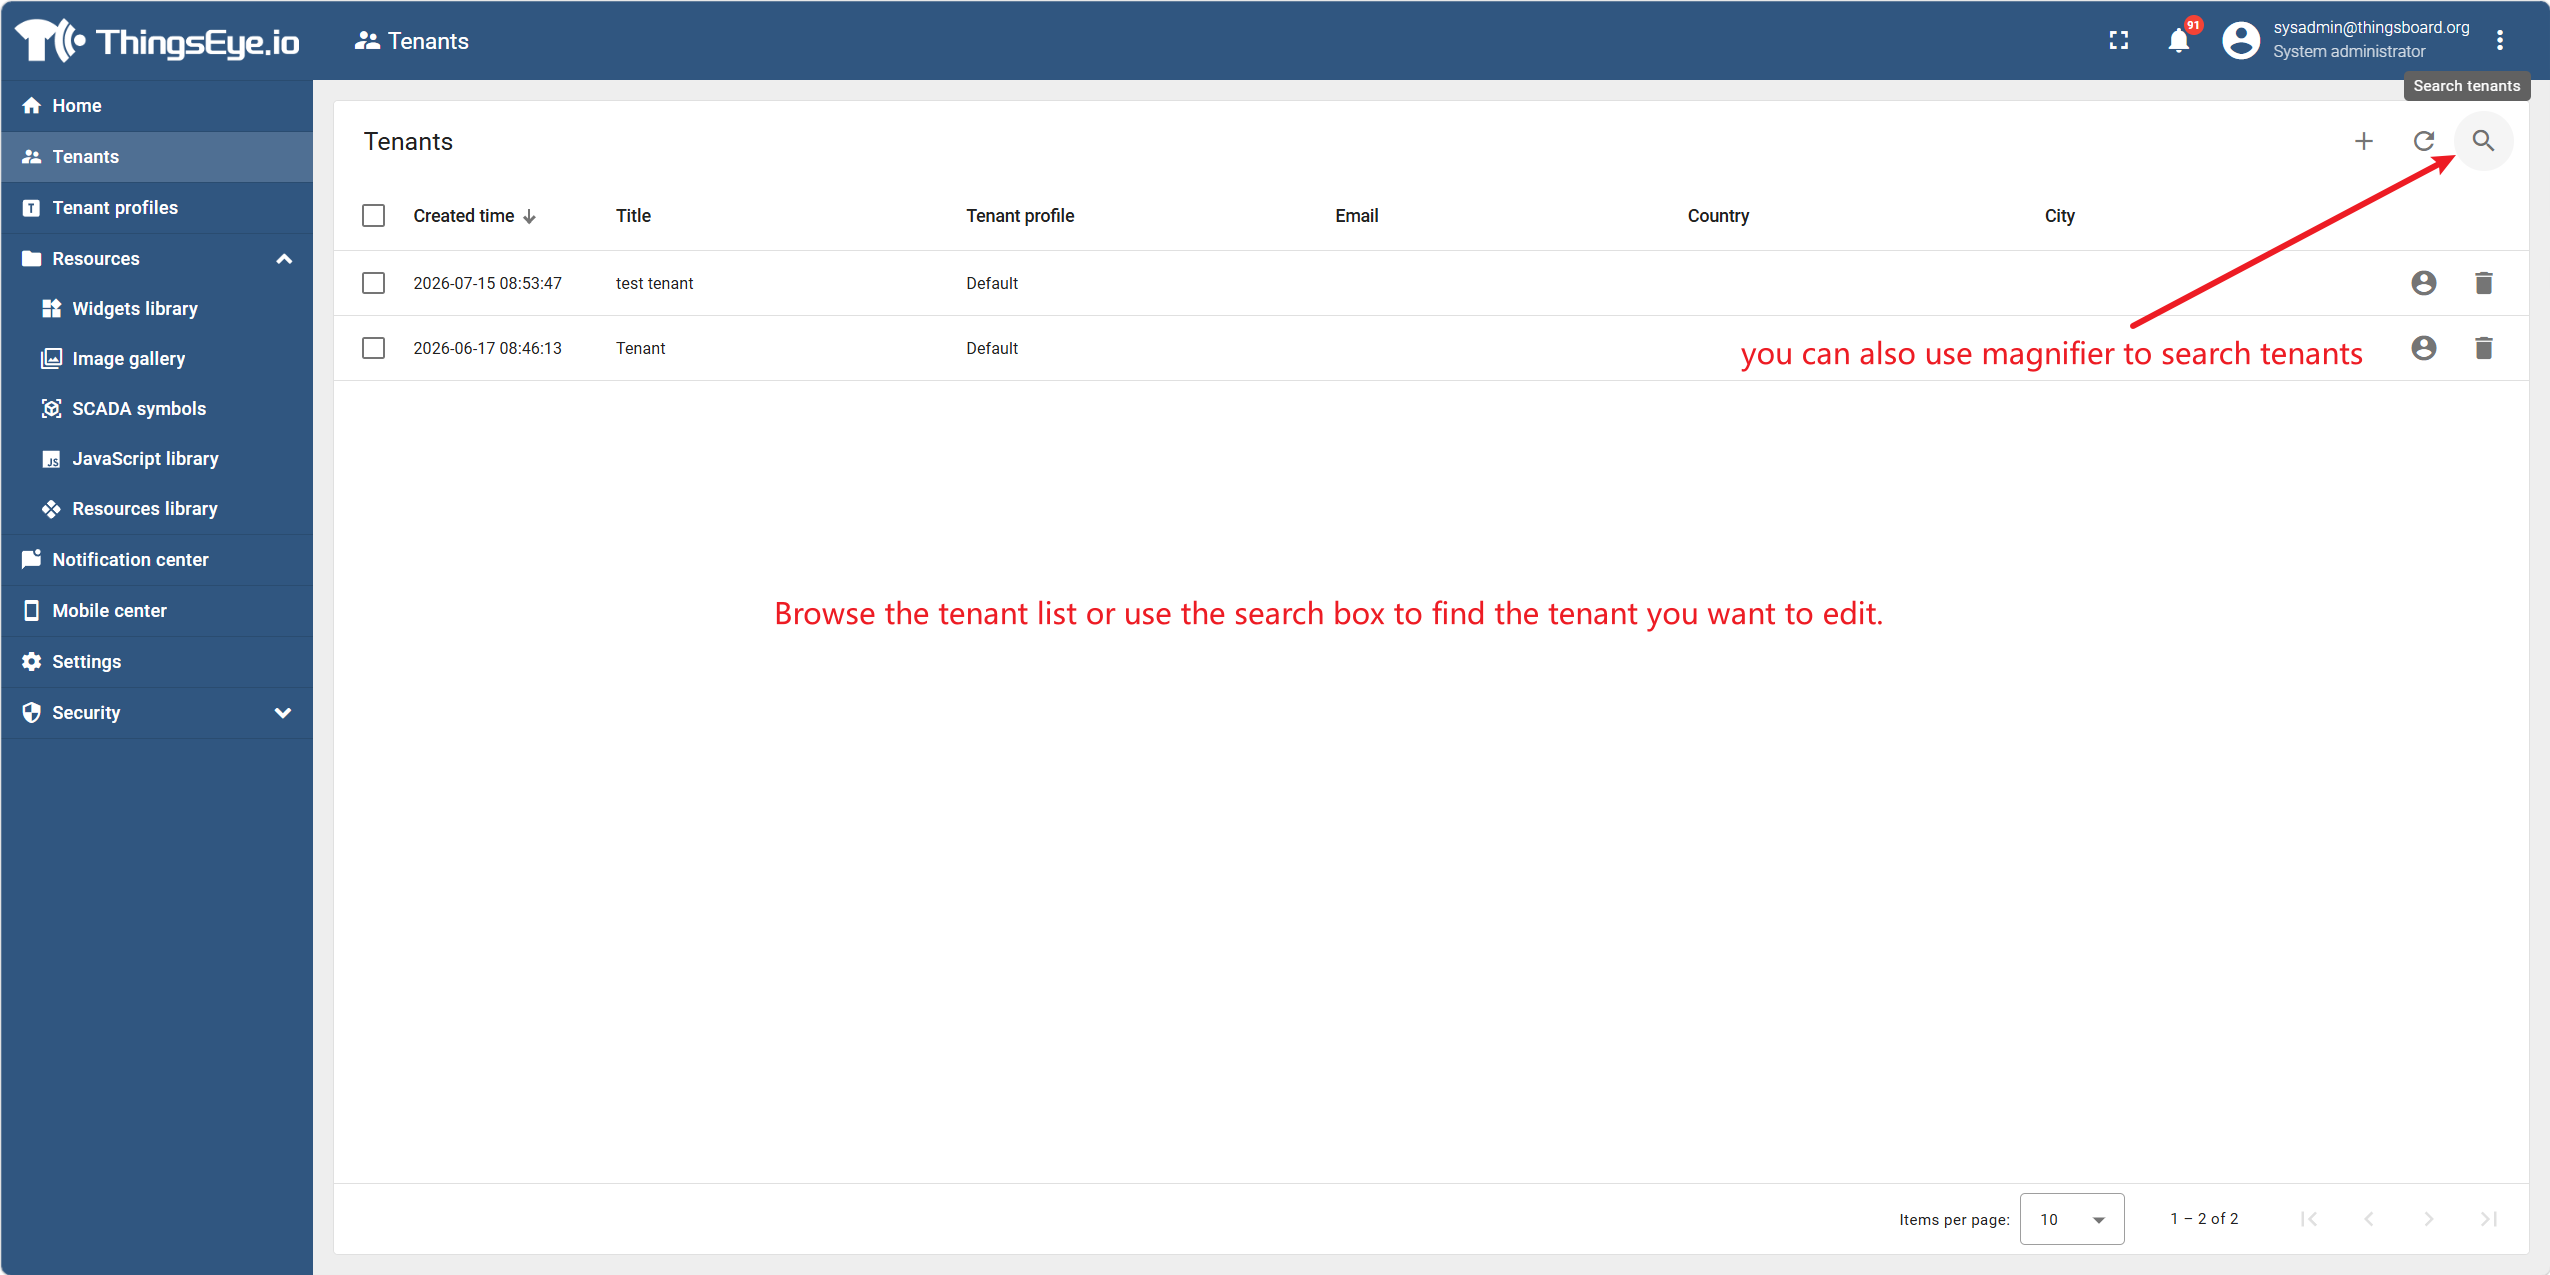
Browse the tenant list or use the search box to find the tenant you want to edit.
| Method | Description |
|---|---|
| Browse the list | Scroll through the tenant list to find the target tenant |
| Search box | Enter the tenant name in the search box (supports fuzzy matching) to quickly filter and locate |
Step 3: Enter edit mode
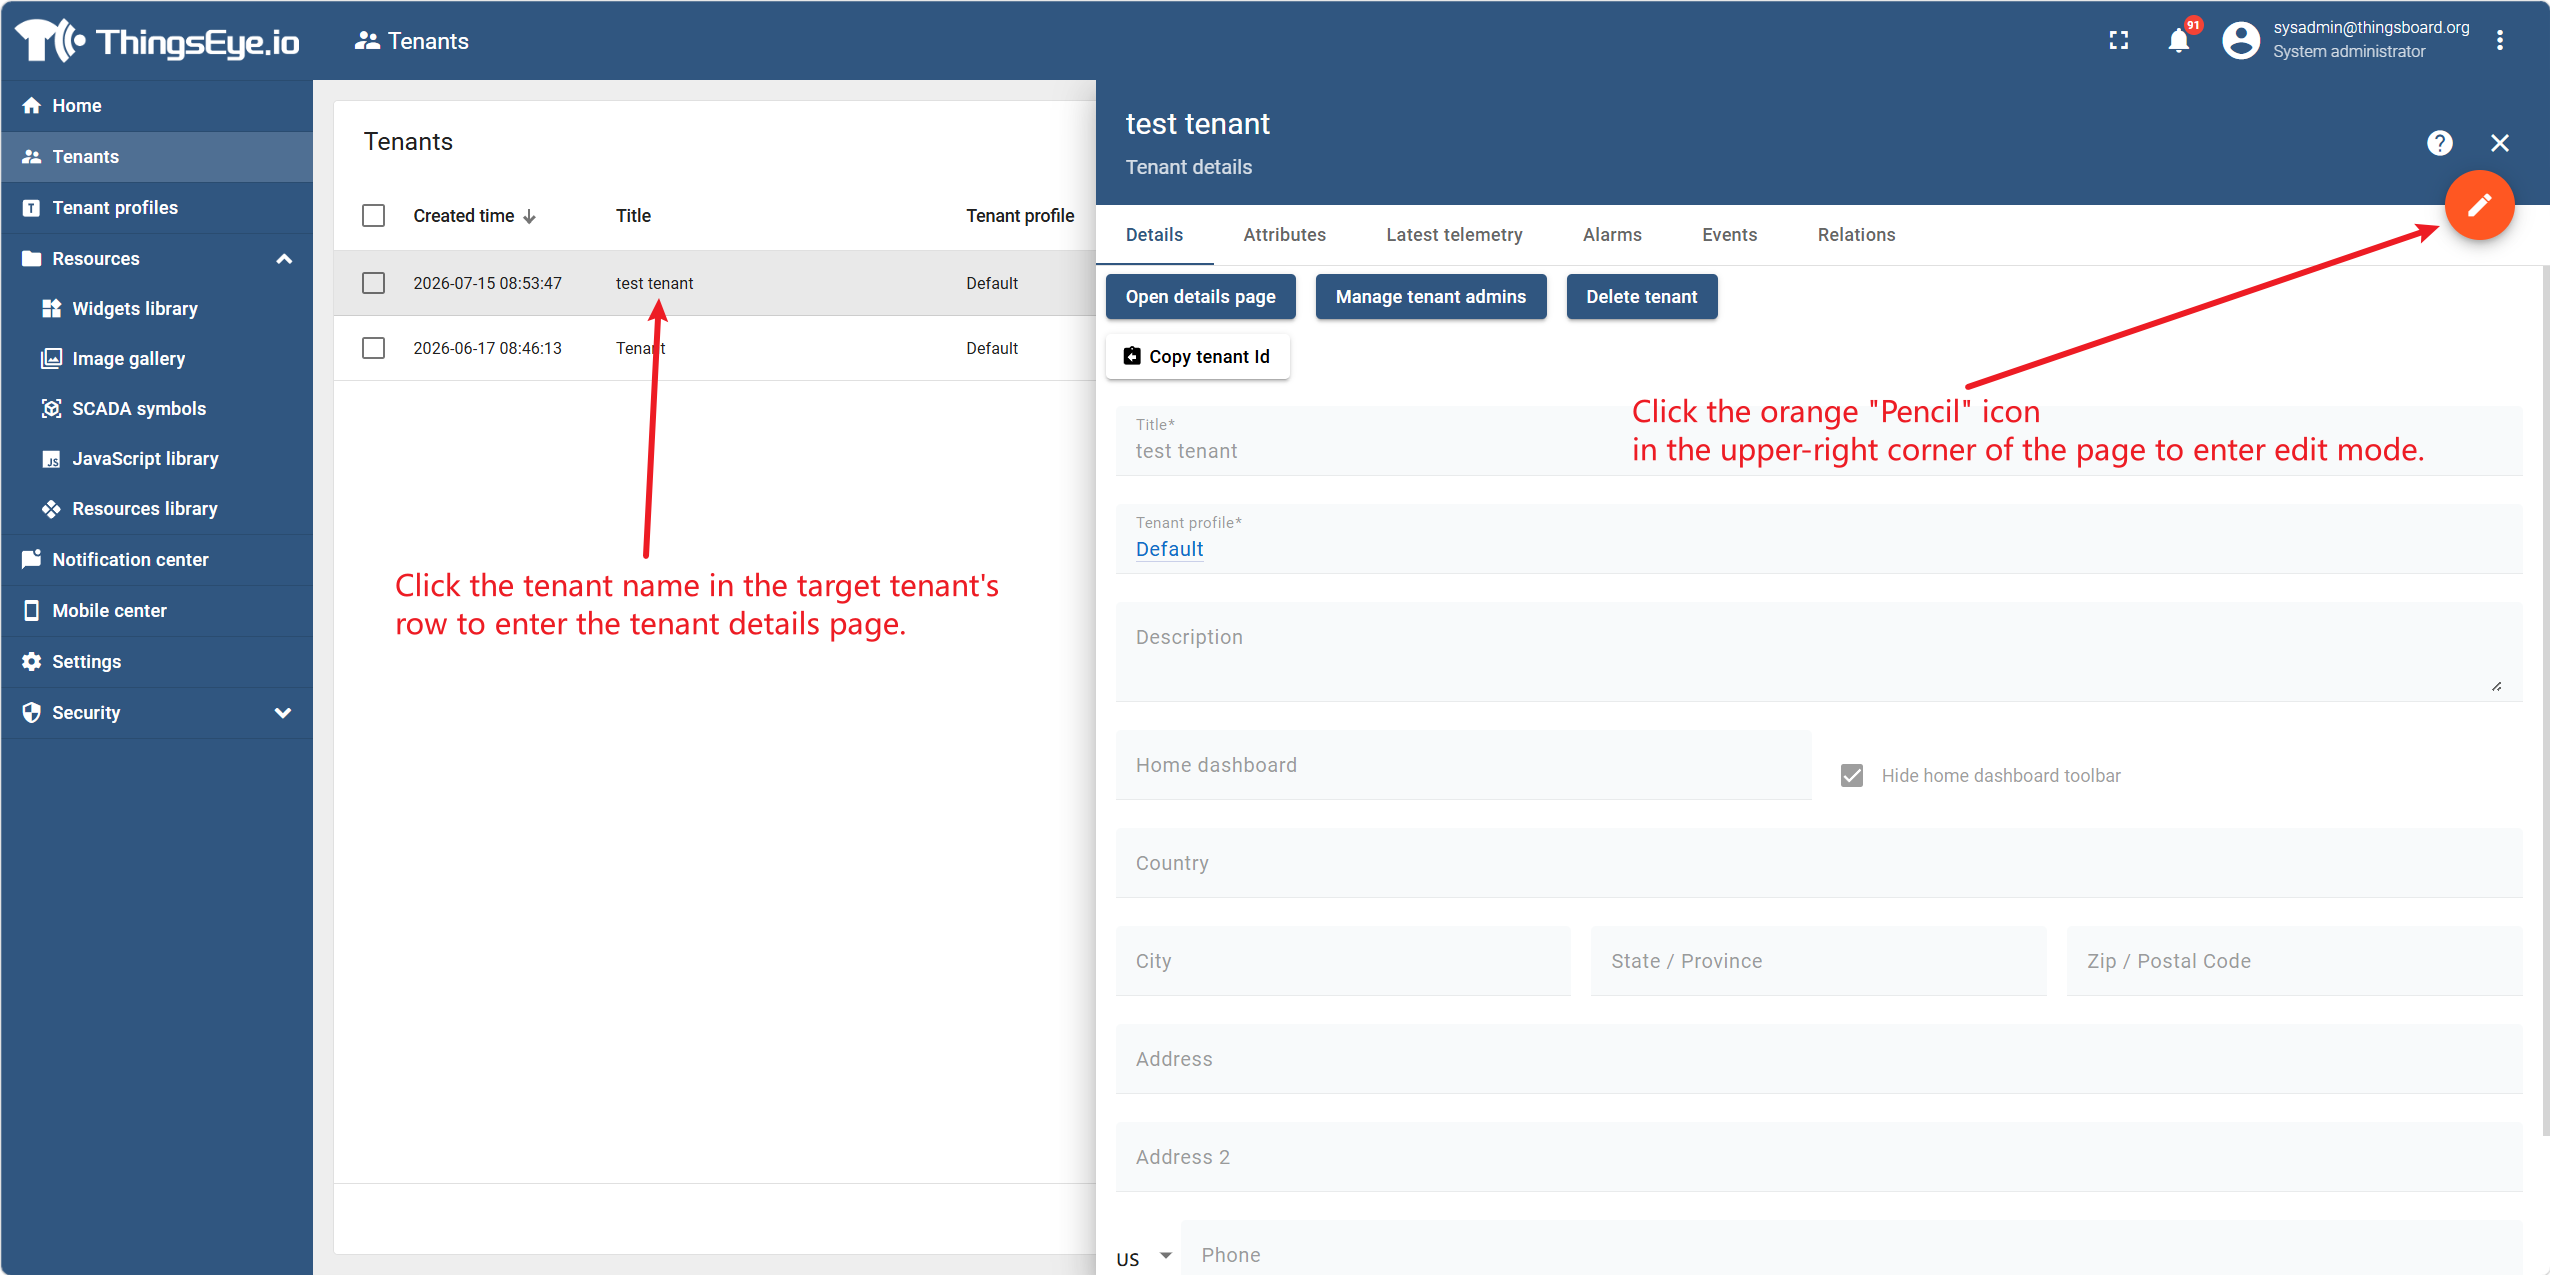
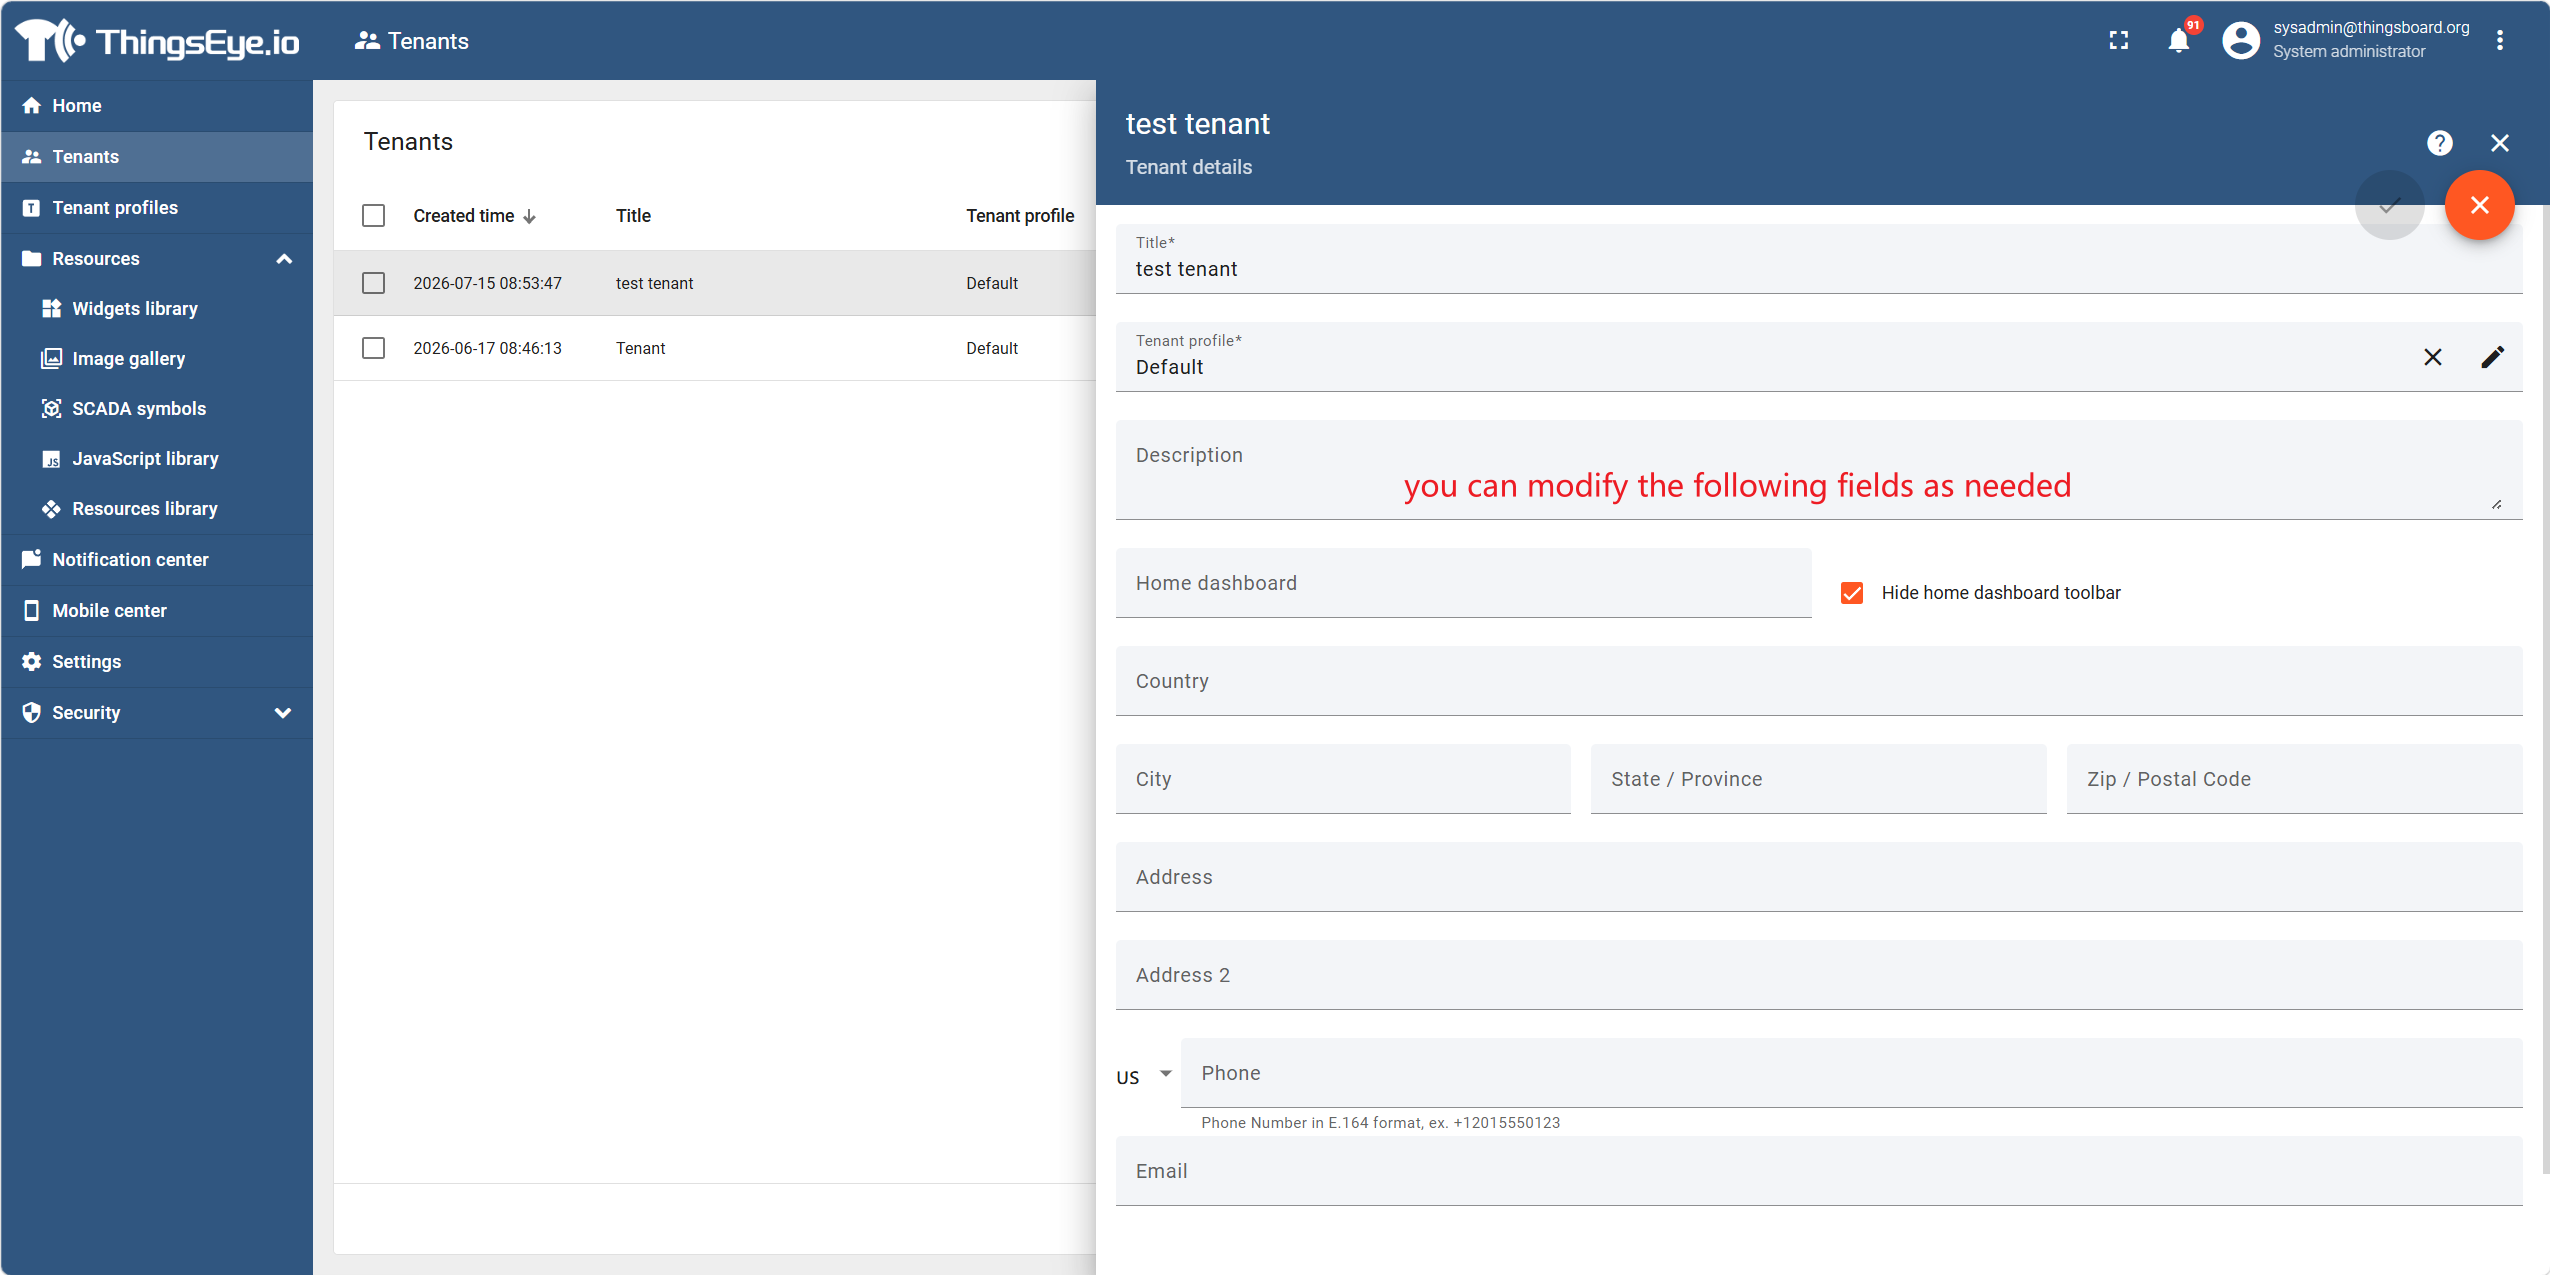
Click the tenant name in the row of the target tenant to go to the tenant details page. Then click the orange pencil icon in the upper‑right corner of the page to enter edit mode.
Step 4: Modify tenant information
In edit mode, modify the following fields as needed:
| Field | Description | Editable |
|---|---|---|
| Tenant Name | The unique display name of the tenant; the list will update immediately after modification | Yes |
| Tenant Profile | Change the profile used by the tenant, which affects functional quotas | Yes |
| Contact Name | The primary contact person for the tenant | Yes |
| Contact Phone | The phone number of the contact person | Yes |
| The email address of the contact person | Yes | |
| Country/Region | The country or region where the tenant is located | Yes |
| Address | The detailed address of the tenant | Yes |
| Additional Info | Other remarks | Yes |
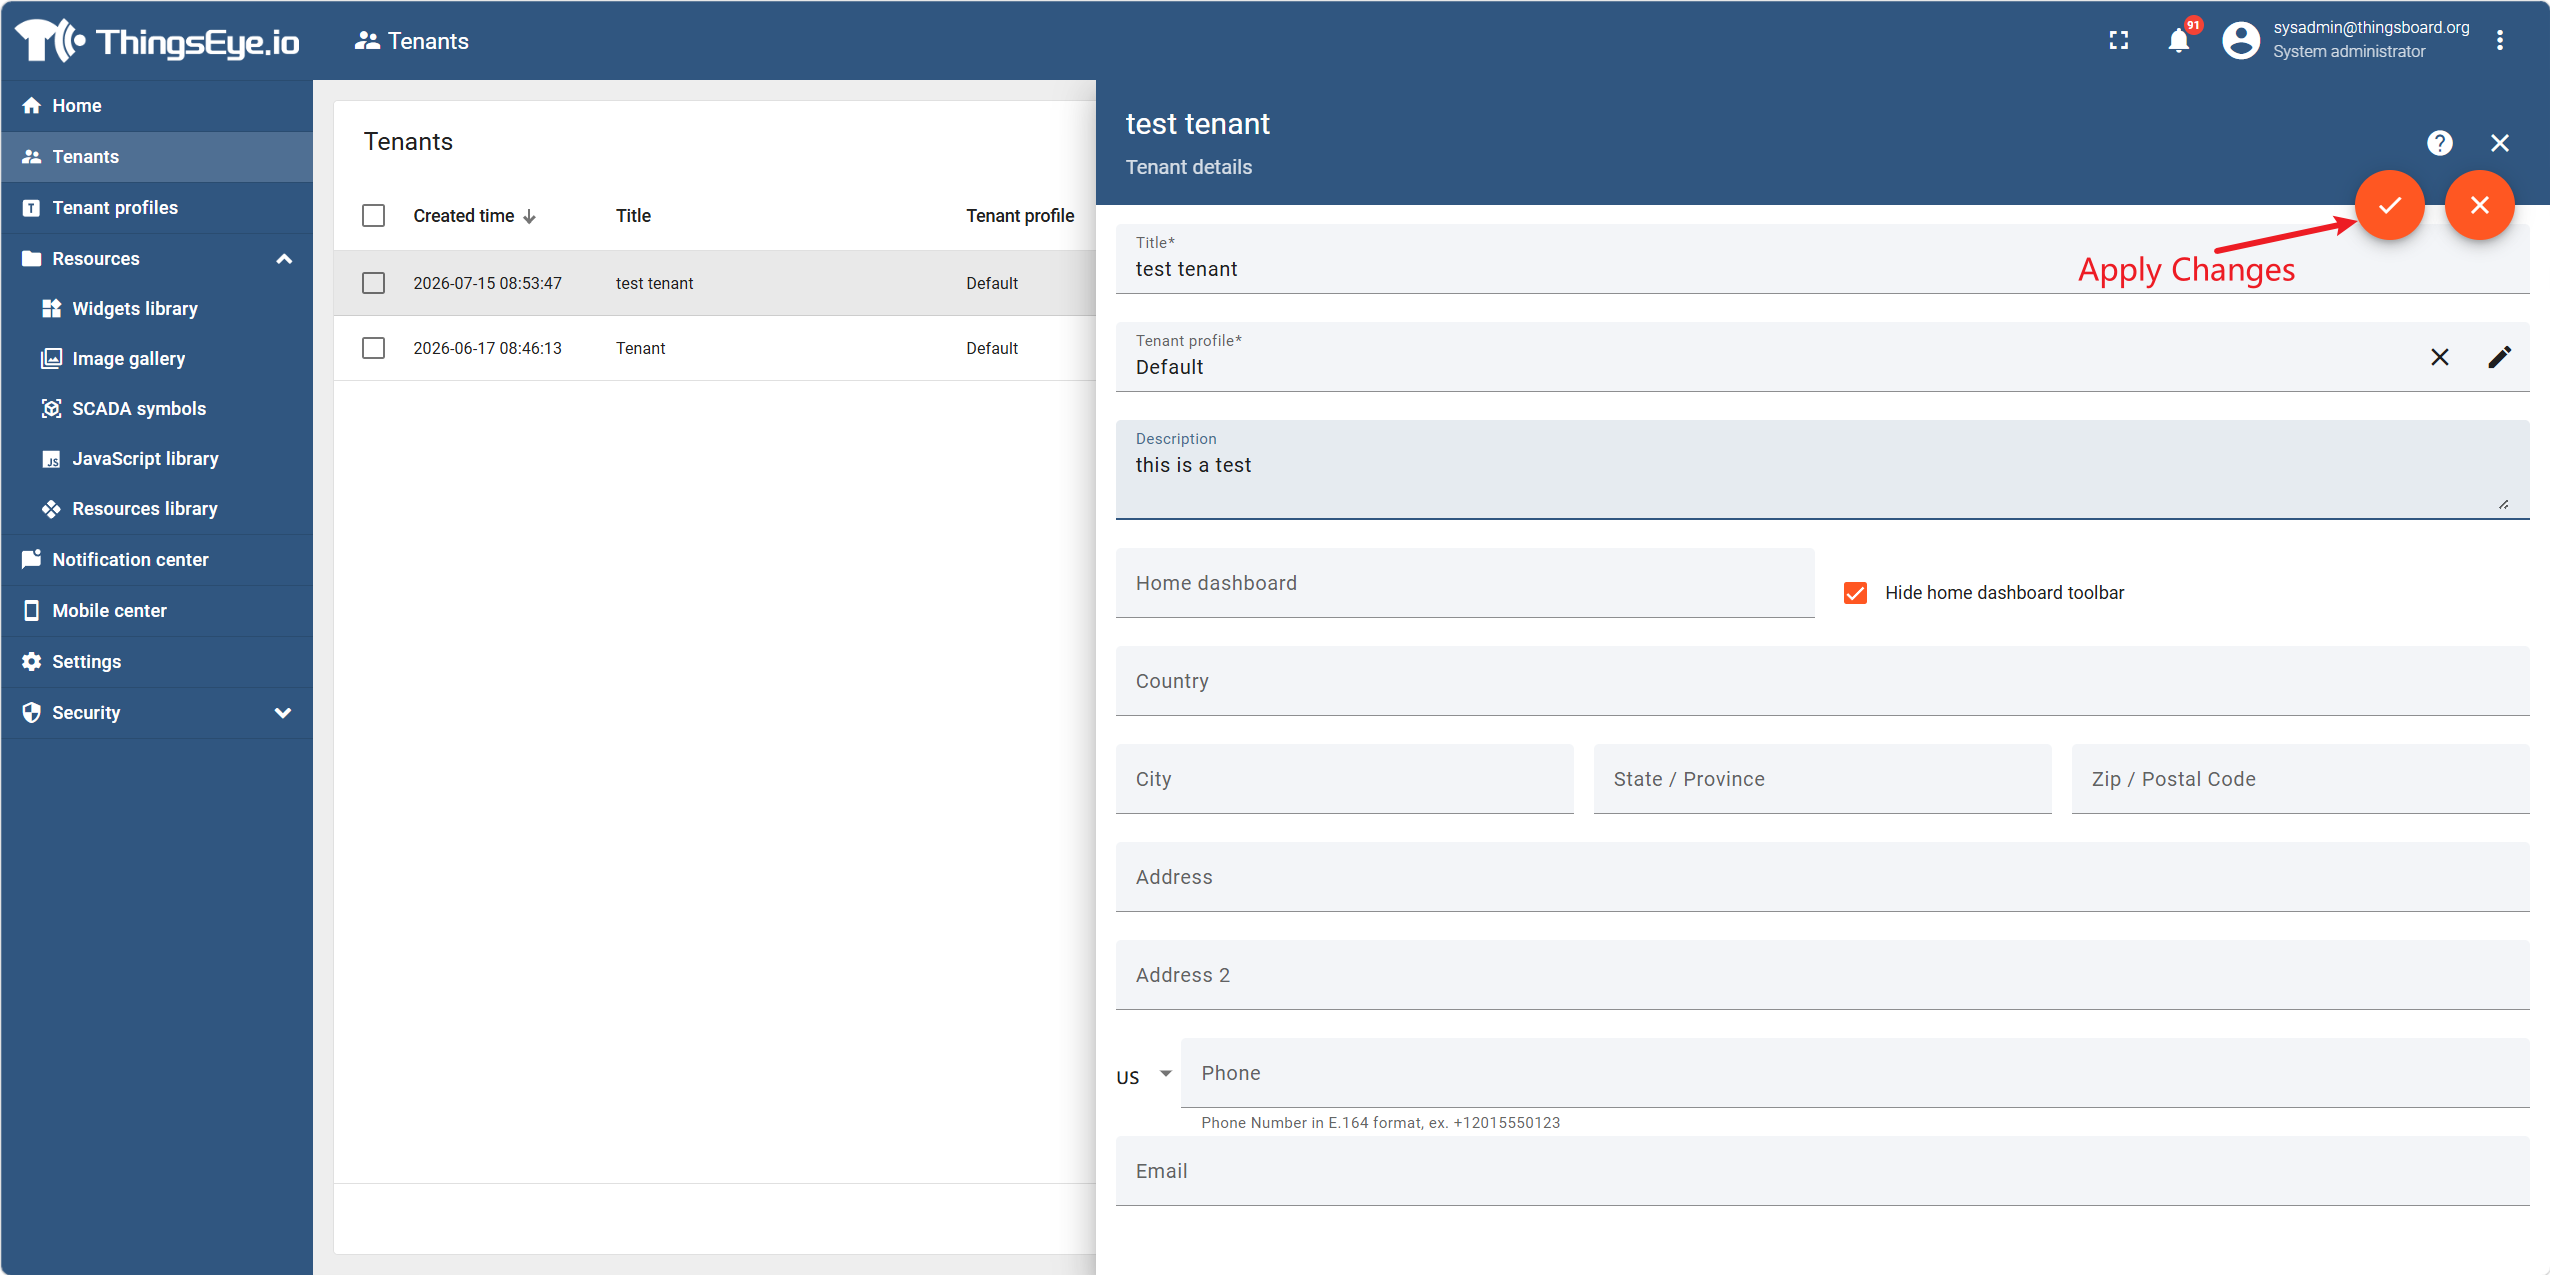
Step 5: Save changes
- After modifying the information, click the "Apply Changes" button in the upper‑right corner of the page to submit the update.
- The system will save the changes and refresh the tenant information. If the tenant profile is changed, the new quota limits will take effect immediately.
Edit Considerations
| Consideration | Description |
|---|---|
| Tenant Name Uniqueness | The modified tenant name must not duplicate any existing tenant name; otherwise, the system will report a conflict error. |
| Quota Impact After Changing Profile | If you switch to a profile with lower quotas and the current usage exceeds the new limits, the system will issue a warning. The excess resources will not be deleted, but new operations (such as adding devices or users) will be restricted. |
| Use of Contact Information | The contact name, phone number, and email are primarily for administrative reference and are not used for automatic system notifications by default (unless otherwise configured). |
| Modification Audit | All modifications to tenant information are recorded in the audit log (see Appendix A "Role and Permission Quick Reference" for audit log permissions). |
3. Delete a Tenant
Warning:
Deleting a tenant is an irreversible operation. Please proceed with caution.
Procedure
Step 1: Go to the tenant management page
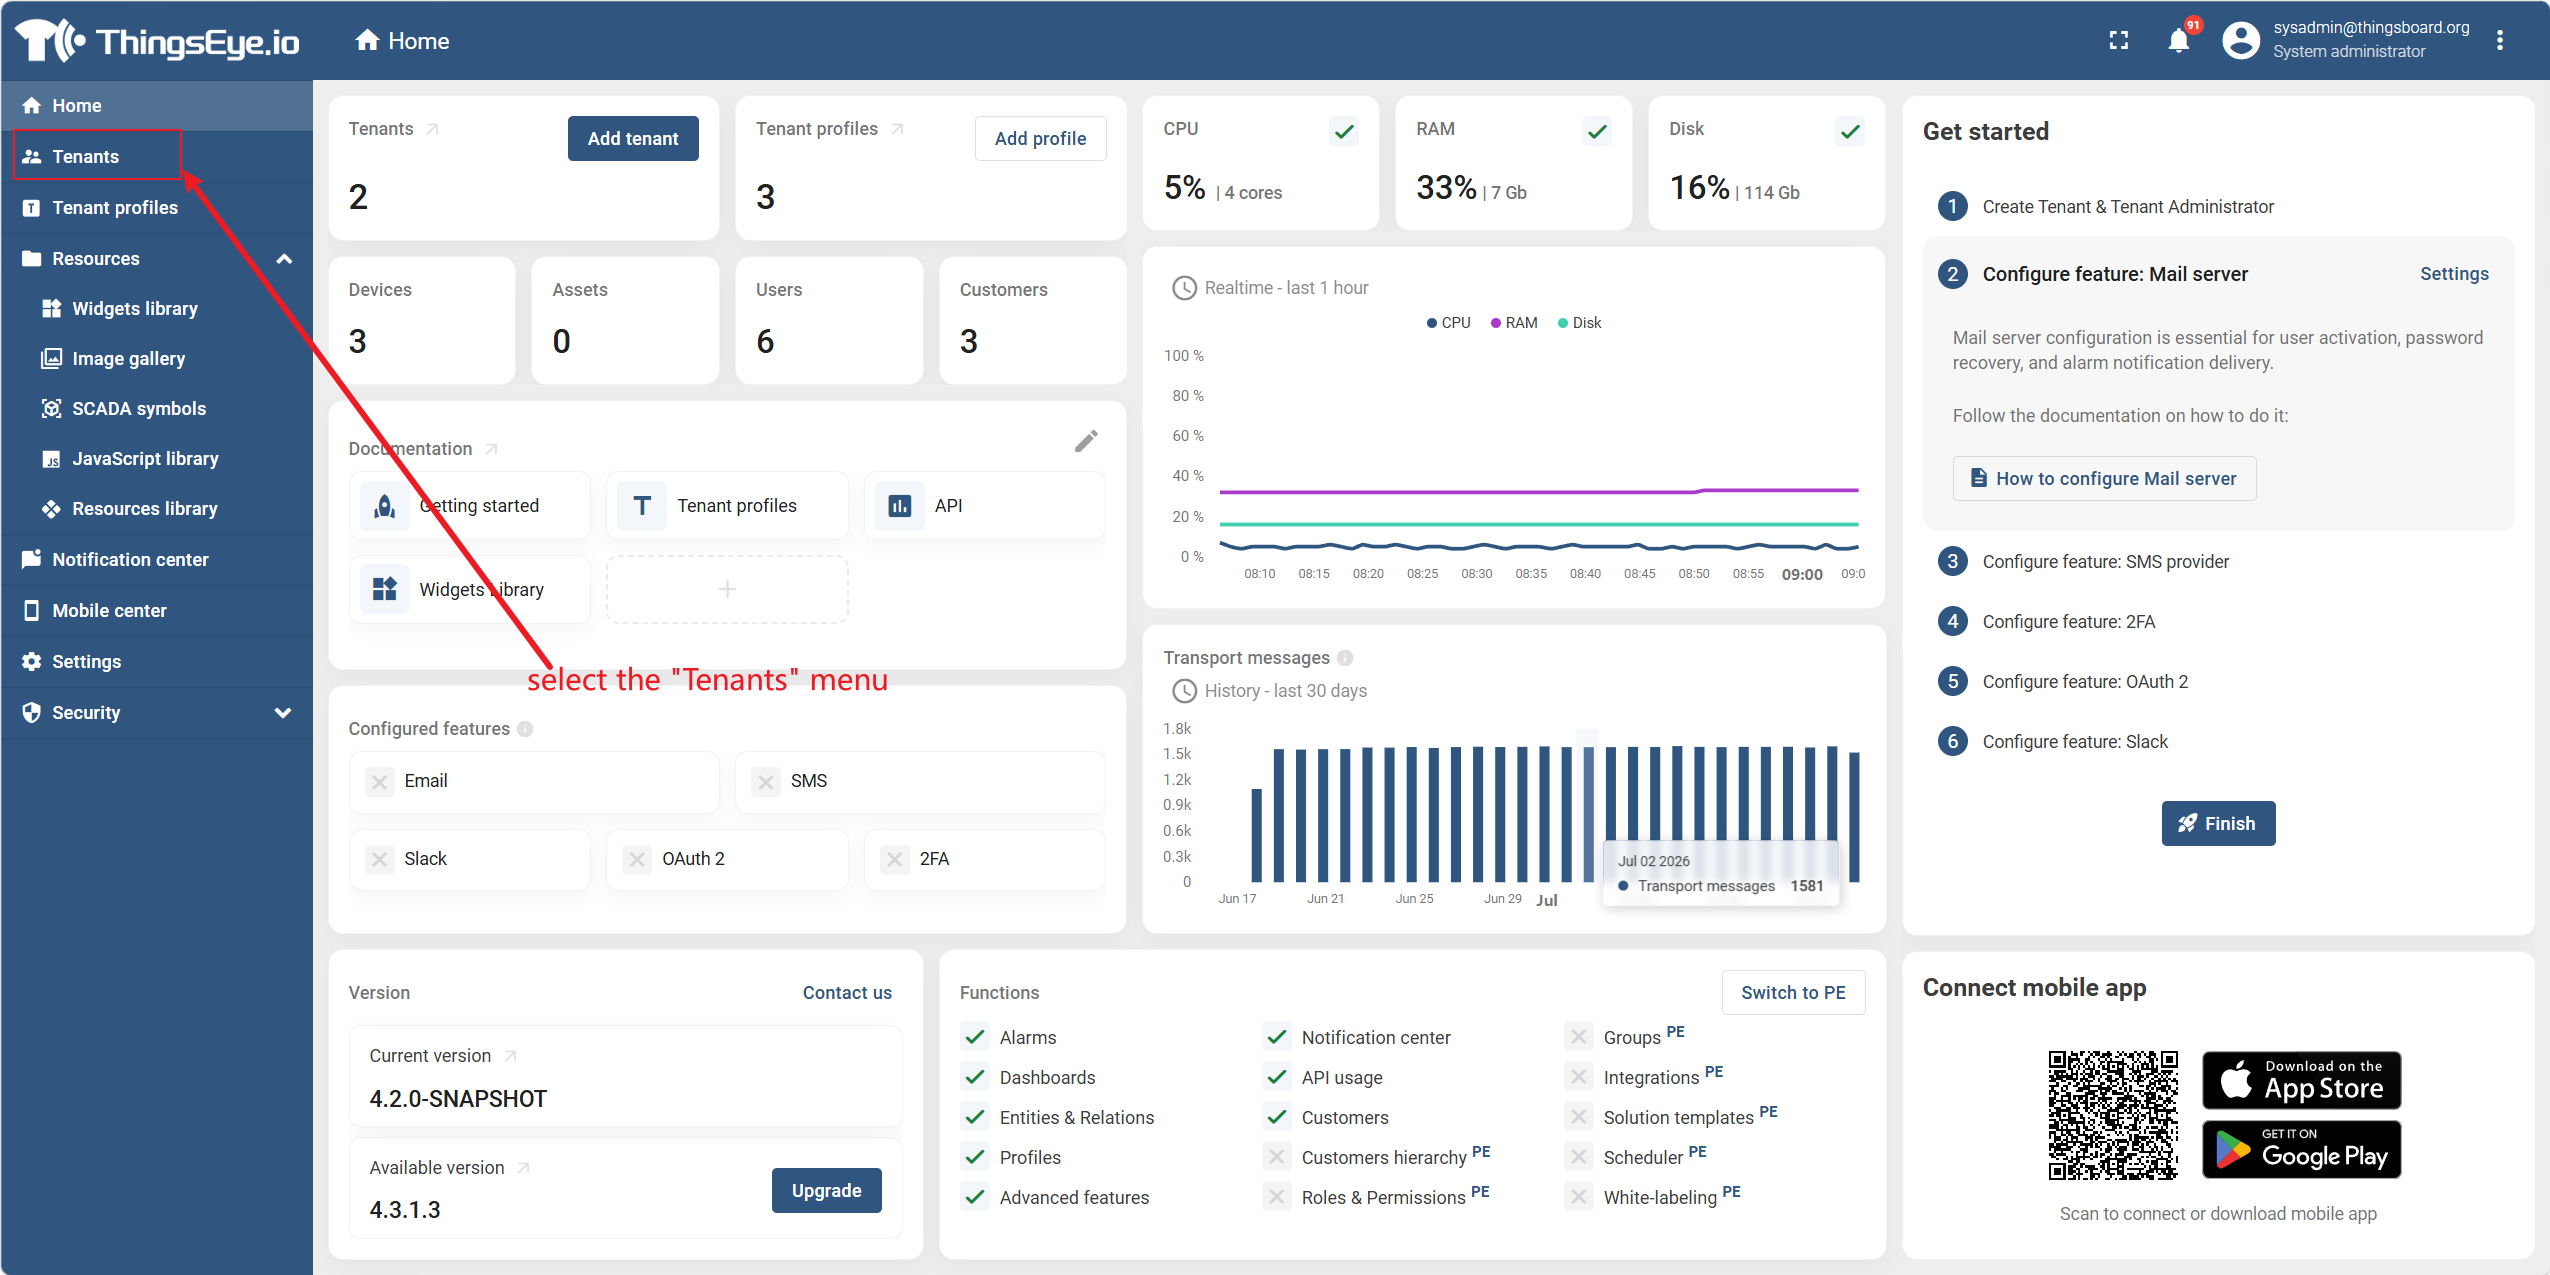
Select the "Tenants" menu item from the left sidebar to go to the tenant list page.
Step 2: Locate the target tenant
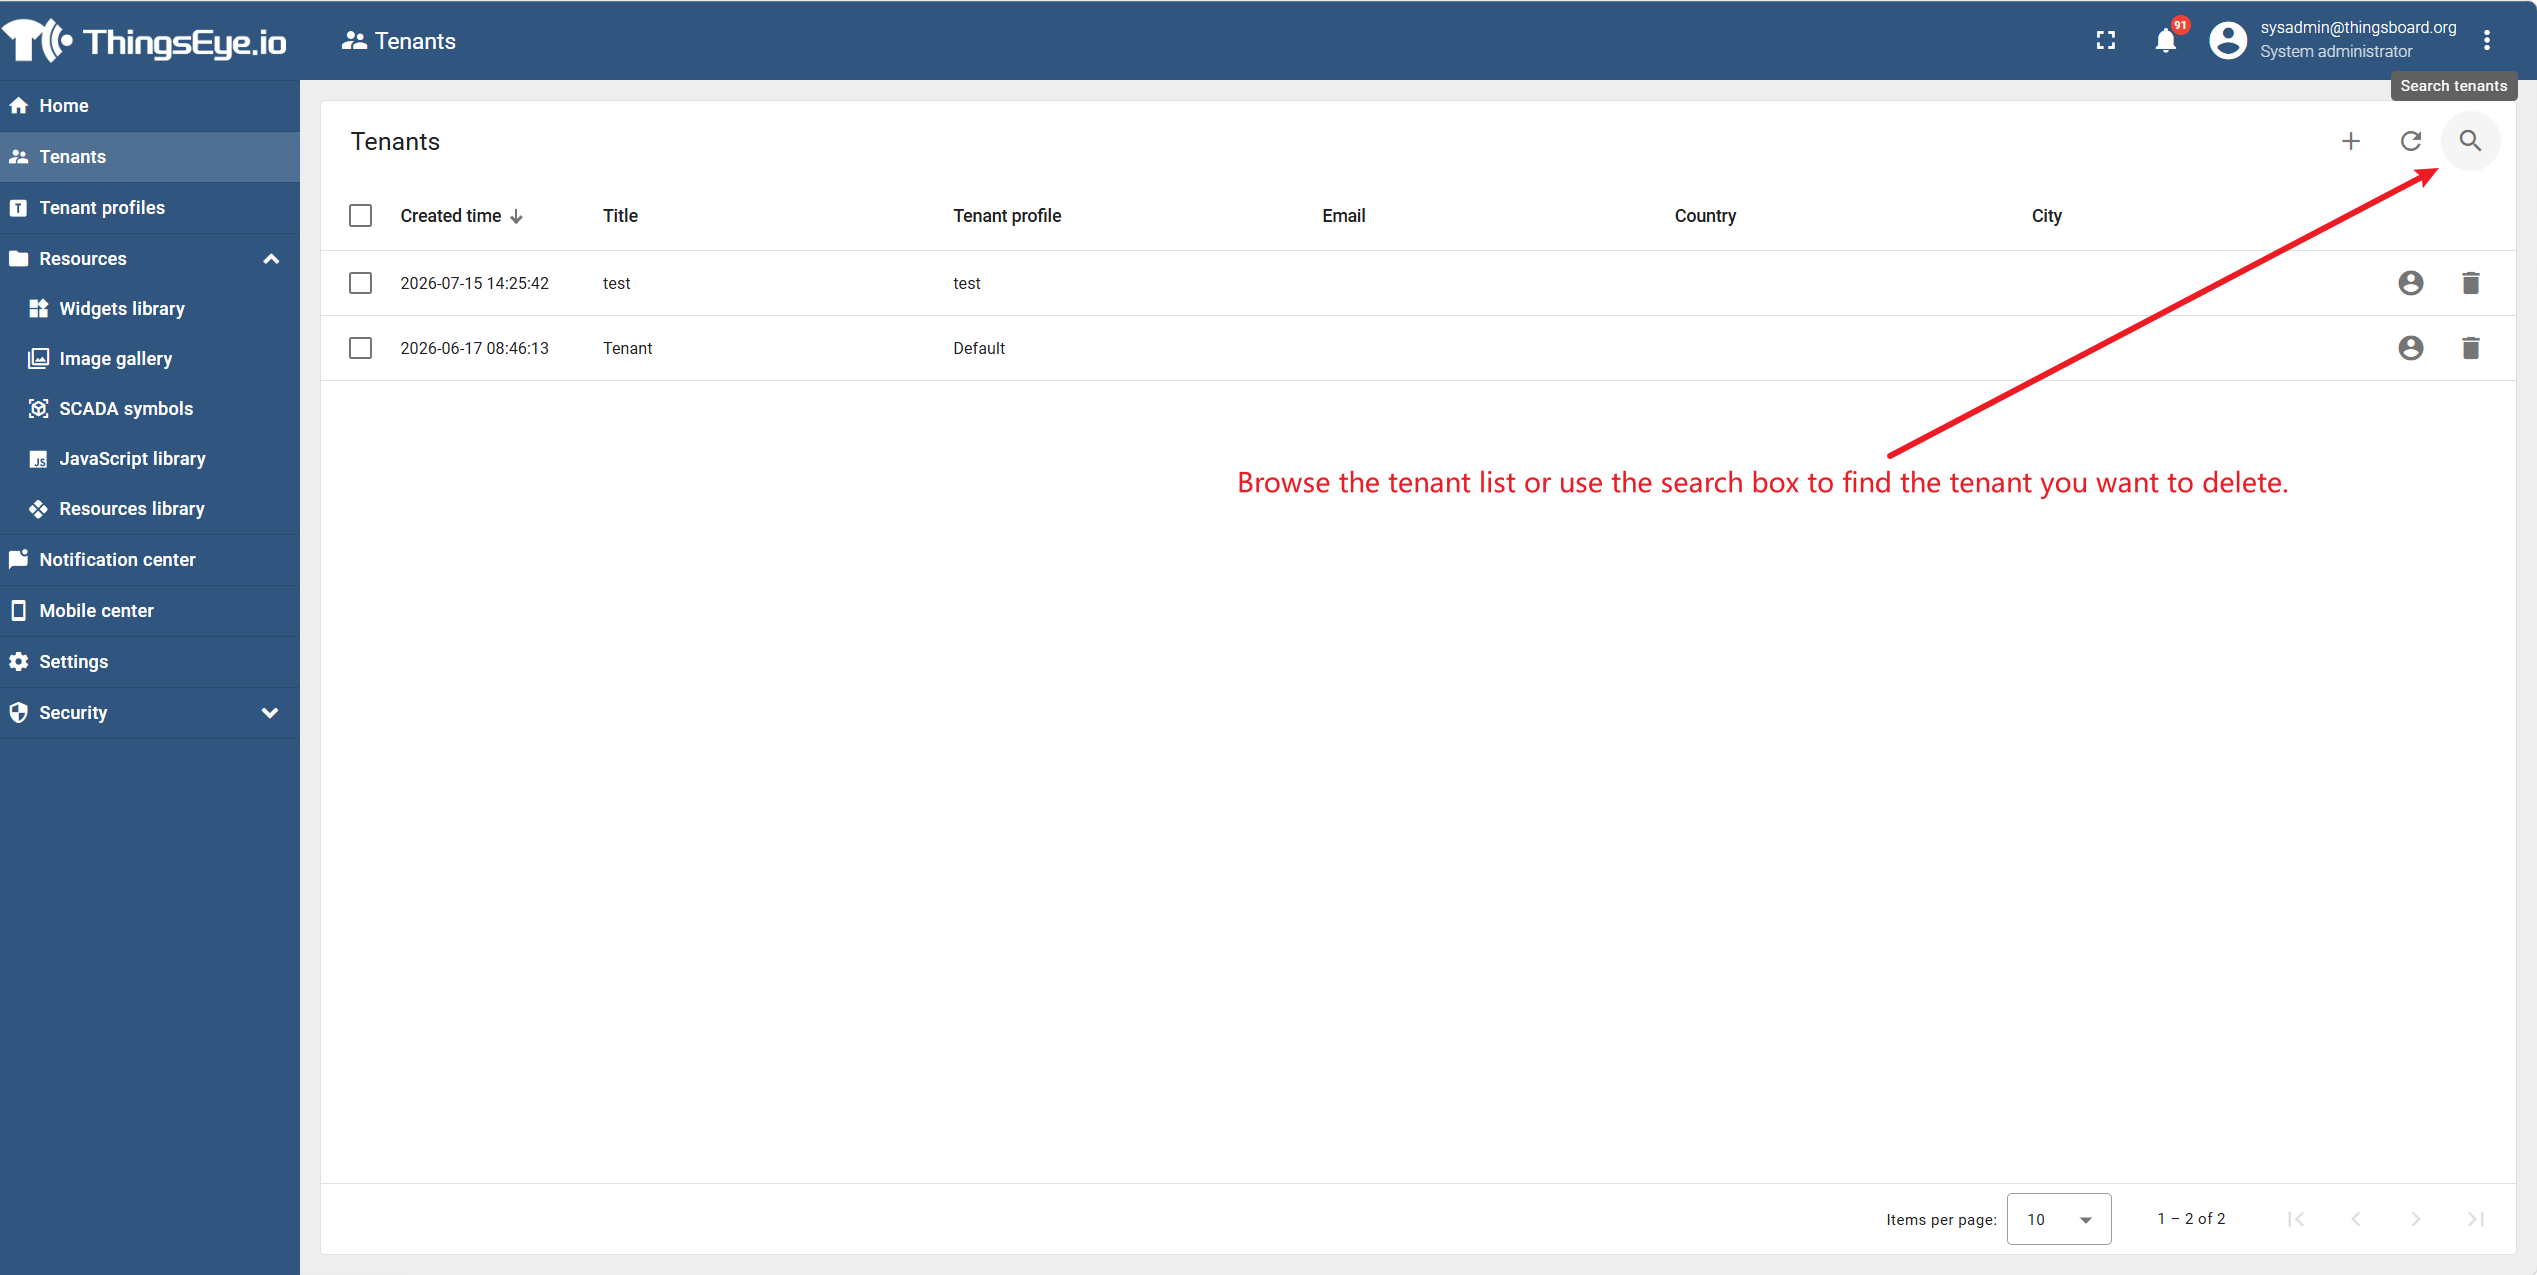
Browse the tenant list or use the search box to find the tenant you want to delete.
Step 3: Open the deletion confirmation dialog
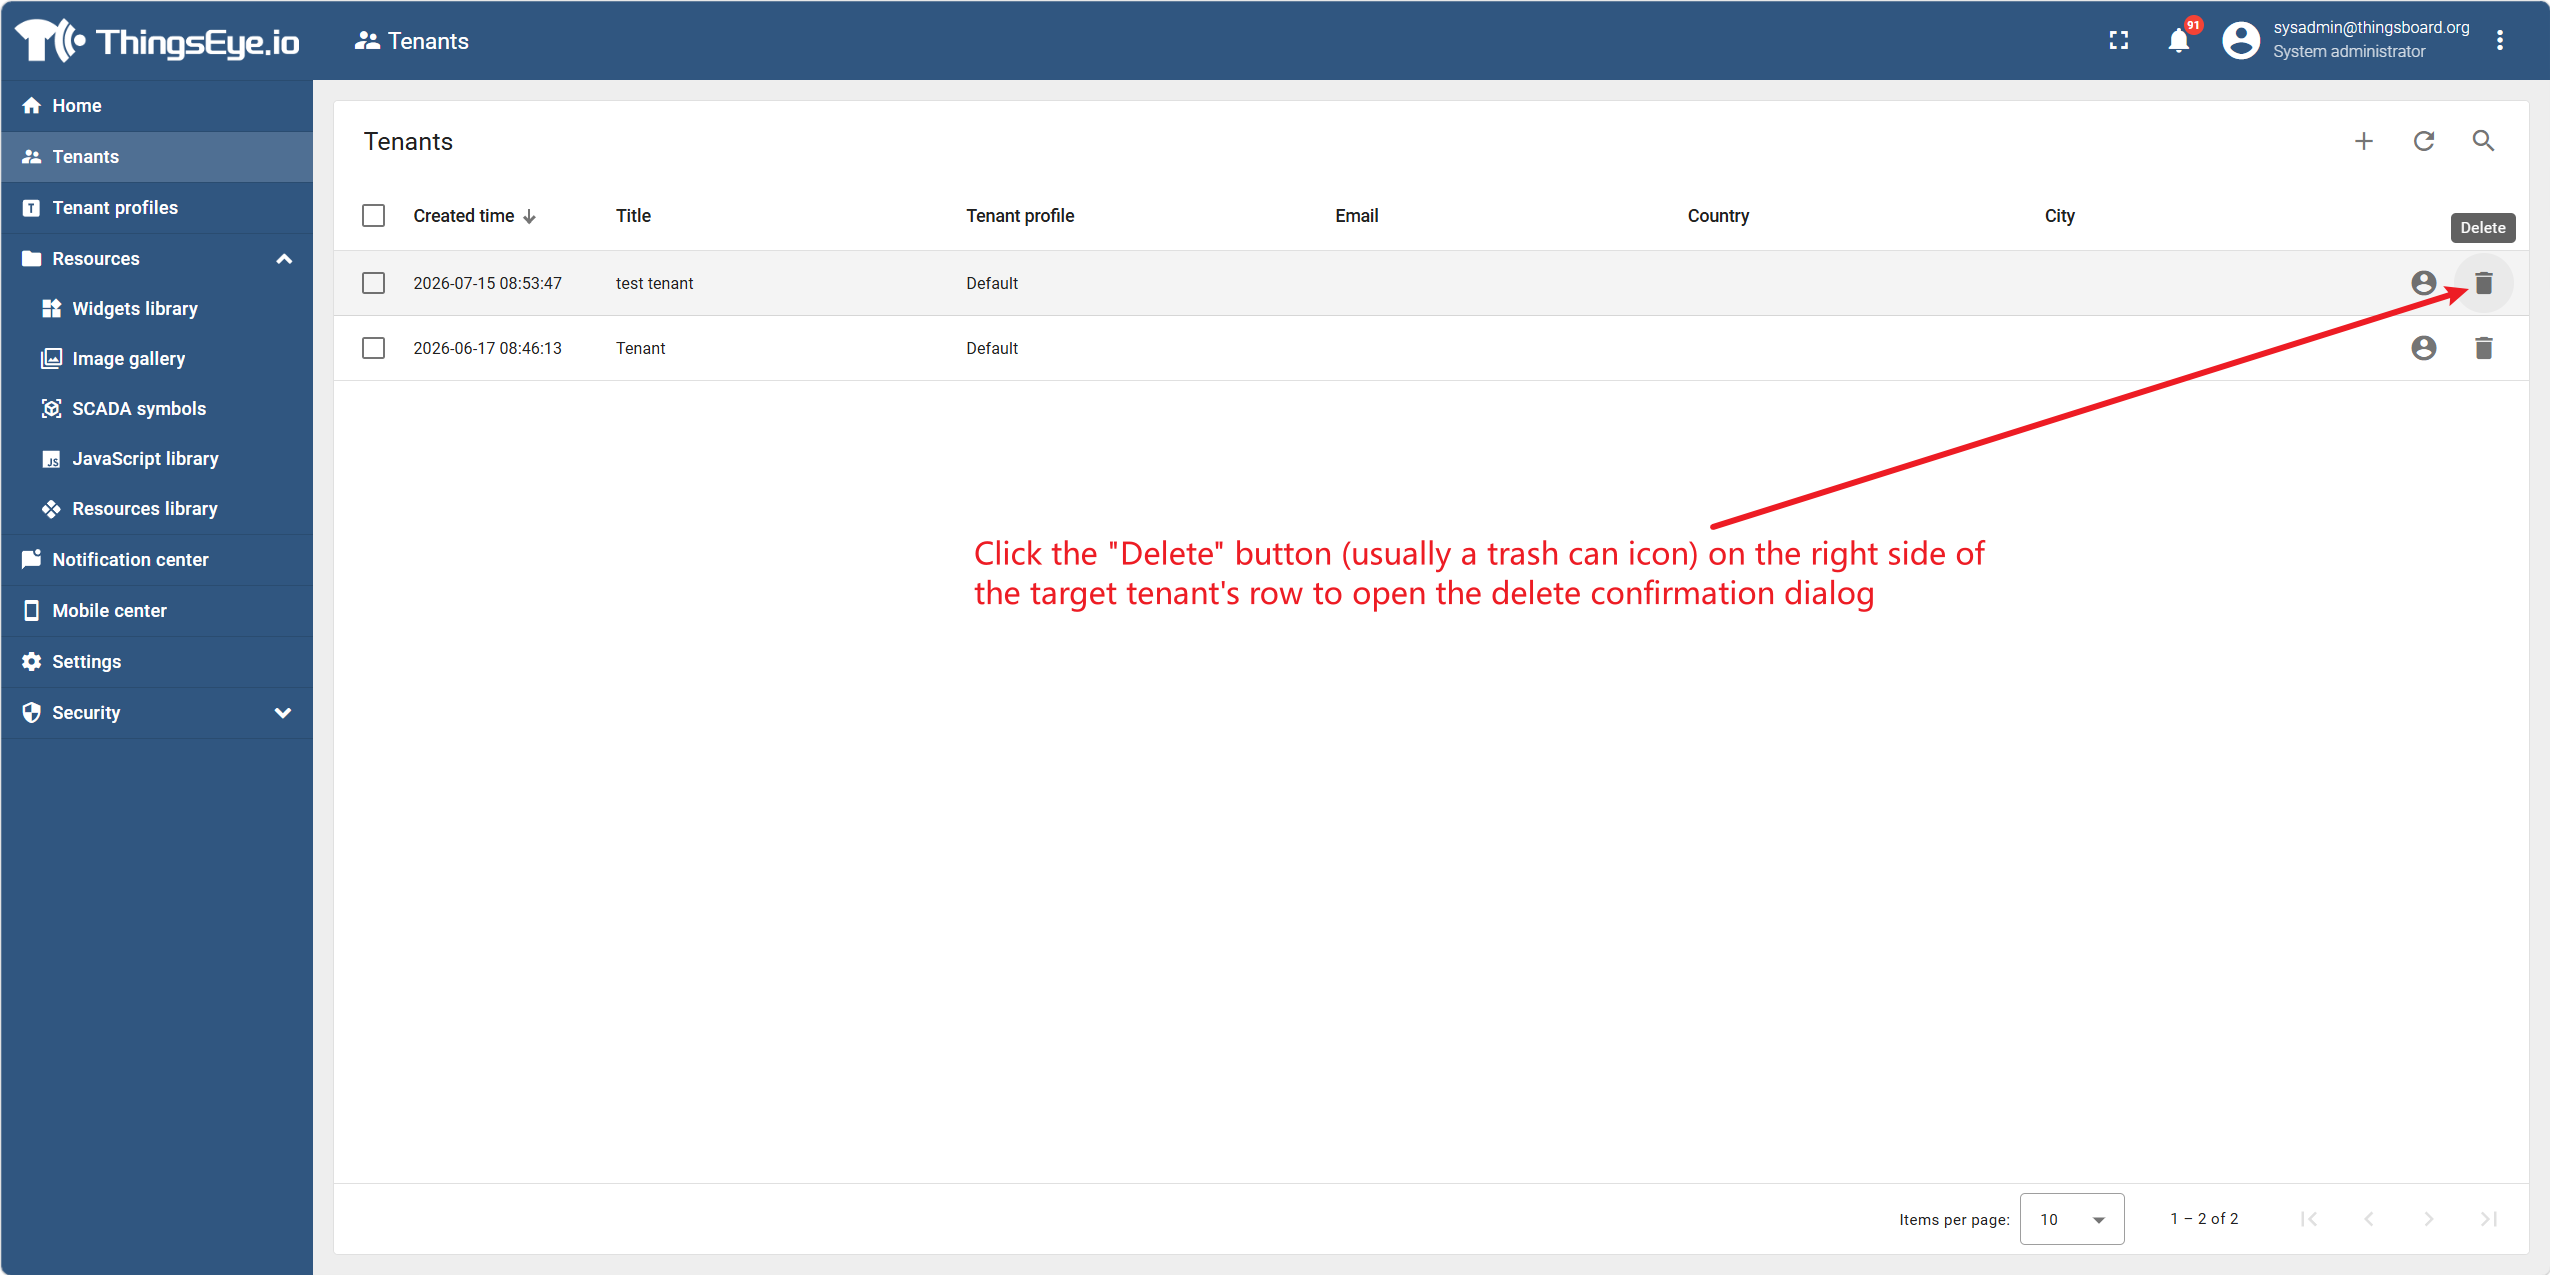
Click the "Delete" button (usually a trash can icon) on the right side of the target tenant row to open the deletion confirmation dialog.
Step 4: Confirm the deletion
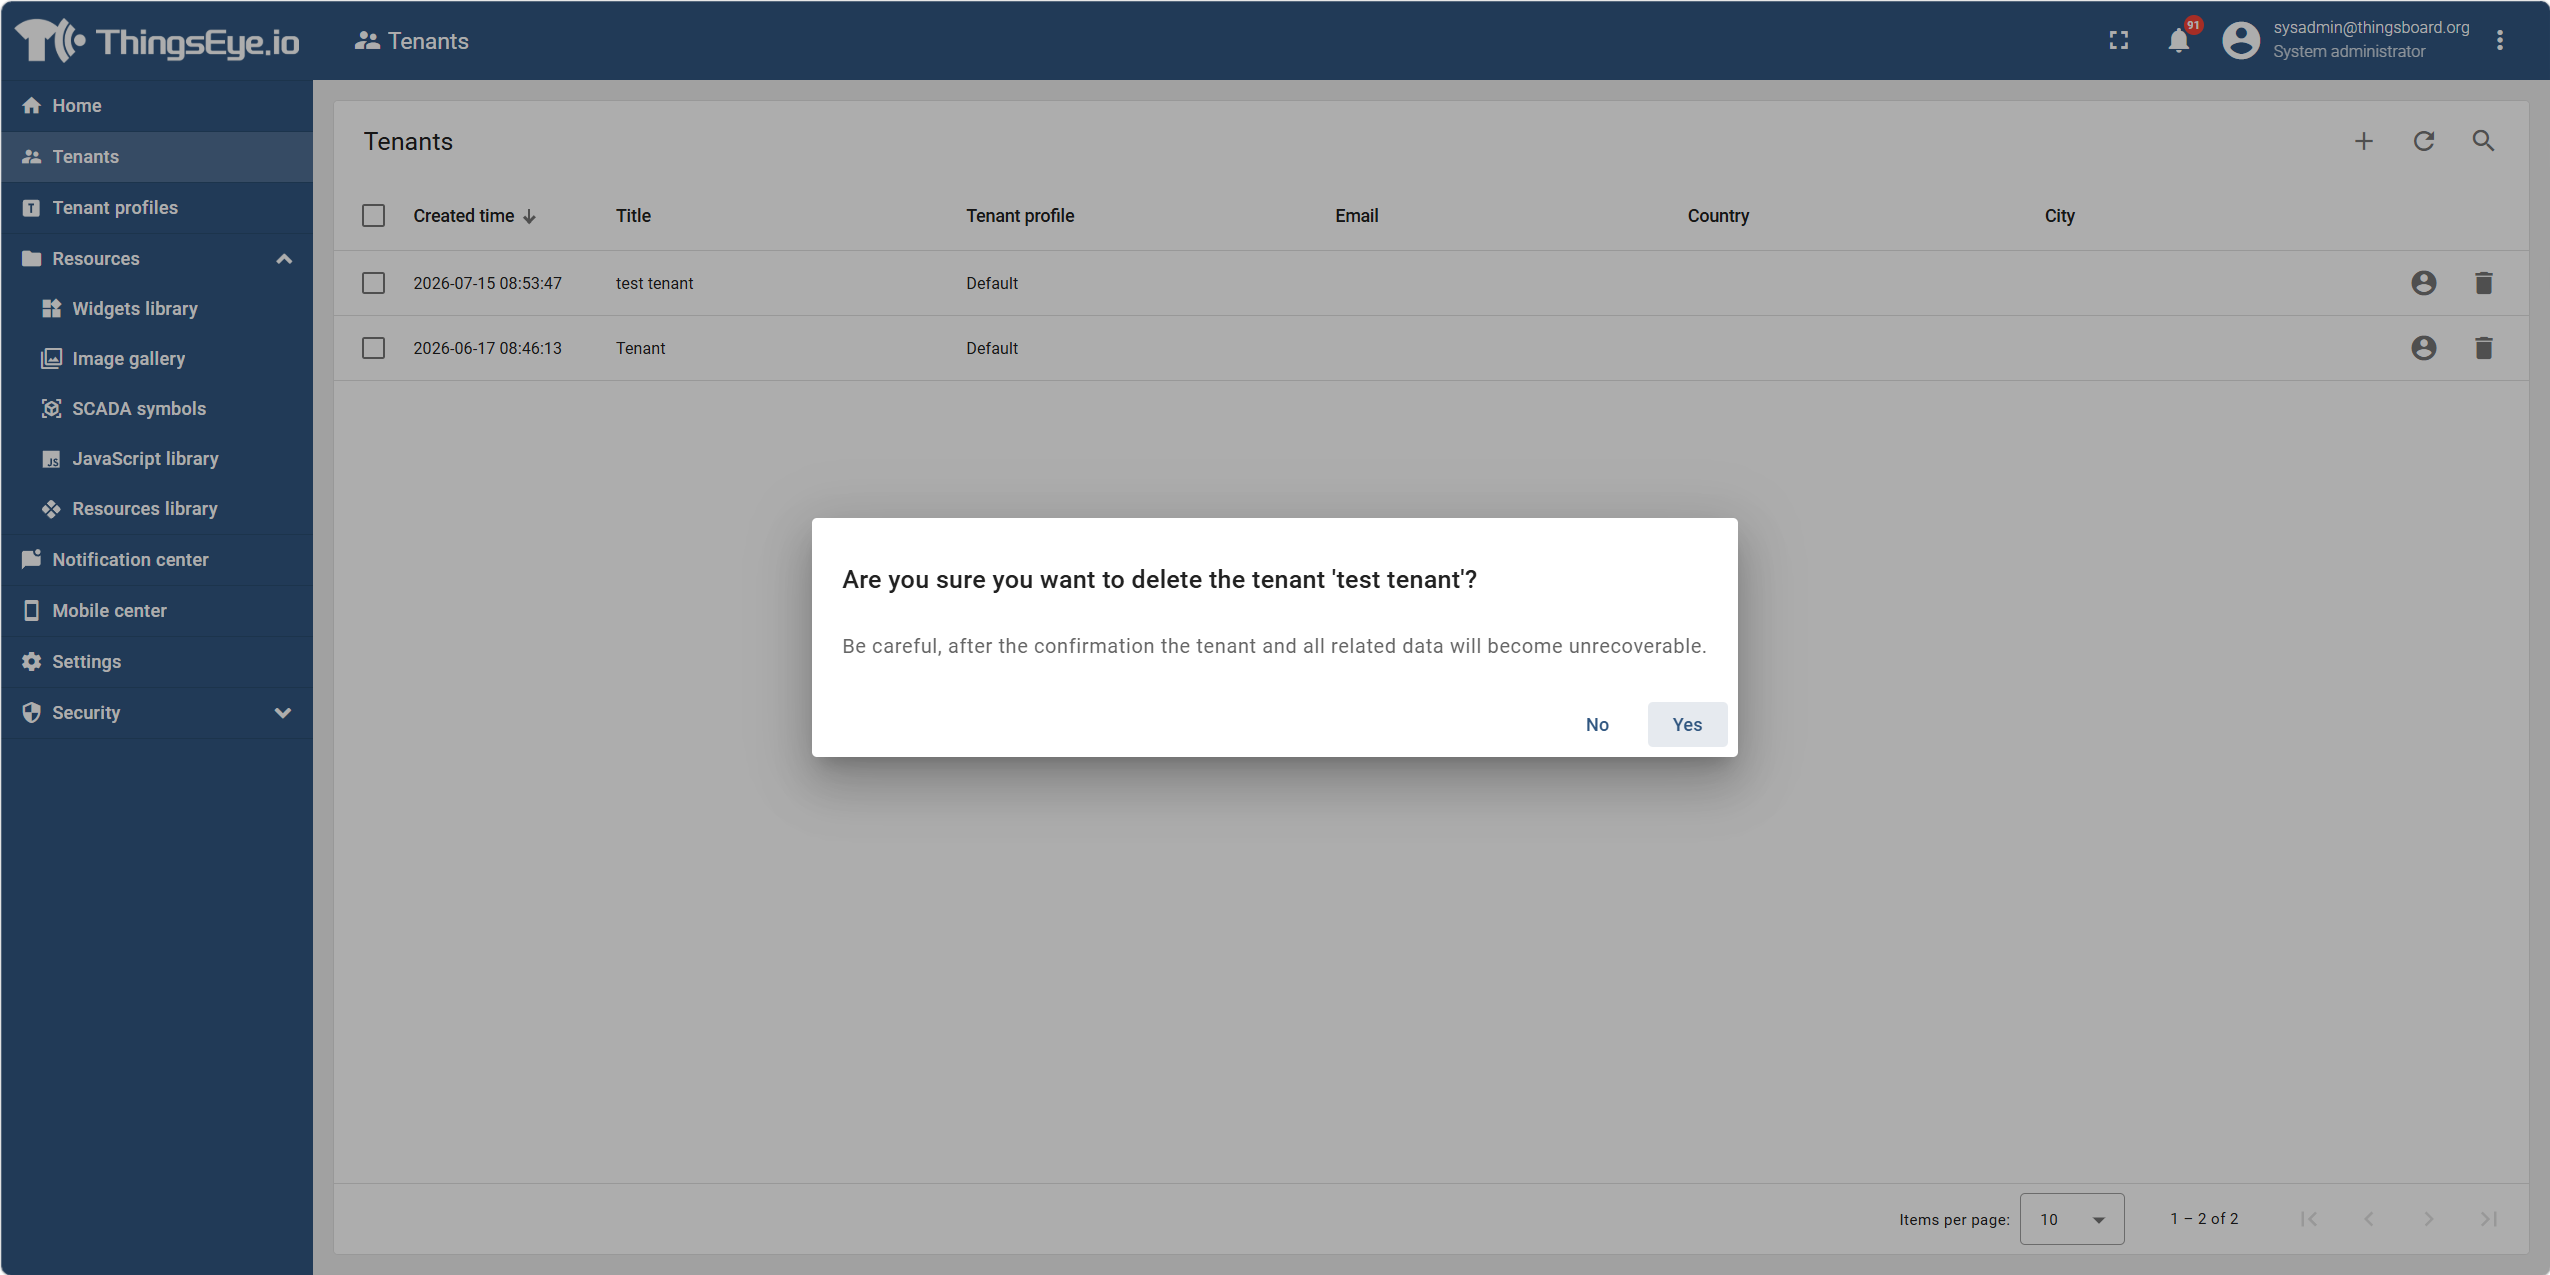
In the deletion confirmation dialog, the system will display the tenant name and a prompt about the associated resources. After confirming, click the "Yes" button.
Warning
Deleting a tenant will permanently remove all data under that tenant, including but not limited to:
- Tenant Administrator accounts and all user accounts
- All devices, device credentials, and telemetry data
- All assets and their associations
- All dashboards (both published and unpublished)
- All rule chains and configurations
- All alarm records
- All audit logs (the portion associated with this tenant)
The above data cannot be recovered after deletion. Please proceed with extreme caution.
Step 5: Deletion completed
After clicking confirm, the system executes the deletion operation.
Pre‑deletion Checklist
Before performing the deletion, it is recommended to verify the following items:
| Check Item | Status |
|---|---|
| Confirmed that the tenant no longer has any business requirements | ☐ |
| Notified the Tenant Administrator and confirmed that they understand the consequences of deletion | ☐ |
| All important data within the tenant has been backed up | ☐ |
| Confirmed that there are no ongoing business processes under the tenant (such as device data collection, alarm processing, etc.) | ☐ |
Important Considerations
| Consideration | Description |
|---|---|
| Irreversibility | The deletion operation is irreversible; all data is permanently lost. It is recommended to back up critical data (such as exporting rule chains and dashboards) before deletion. |
| Cascading Deletion Scope | All associated entities under the tenant will be cascade‑deleted; there is no need to clean them up one by one. The system handles all associated resources in a single operation. |
| Deletion Duration | The time required for deletion depends on the amount of data under the tenant; it may take from a few seconds to several minutes for large data volumes. |
| Concurrent Deletion Restriction | The platform does not support deleting multiple tenants simultaneously; only one tenant can be deleted at a time. |
| Audit Retention | The deletion operation itself is recorded in the system‑level audit log, but all detailed historical data of that tenant will be cleared. |