Tenant Profiles
Overview
Applicable Role: System Administrator.
The Tenant Profiles module enables System Administrators to pre‑define configuration templates for tenants, including resource quotas, feature toggles, and default settings. Through configuration templates, System Administrators can quickly apply standardised configurations when creating tenants, improving creation efficiency and ensuring configuration consistency. Templates support create, edit, and delete operations.
1. Create a Configuration Template
Procedure
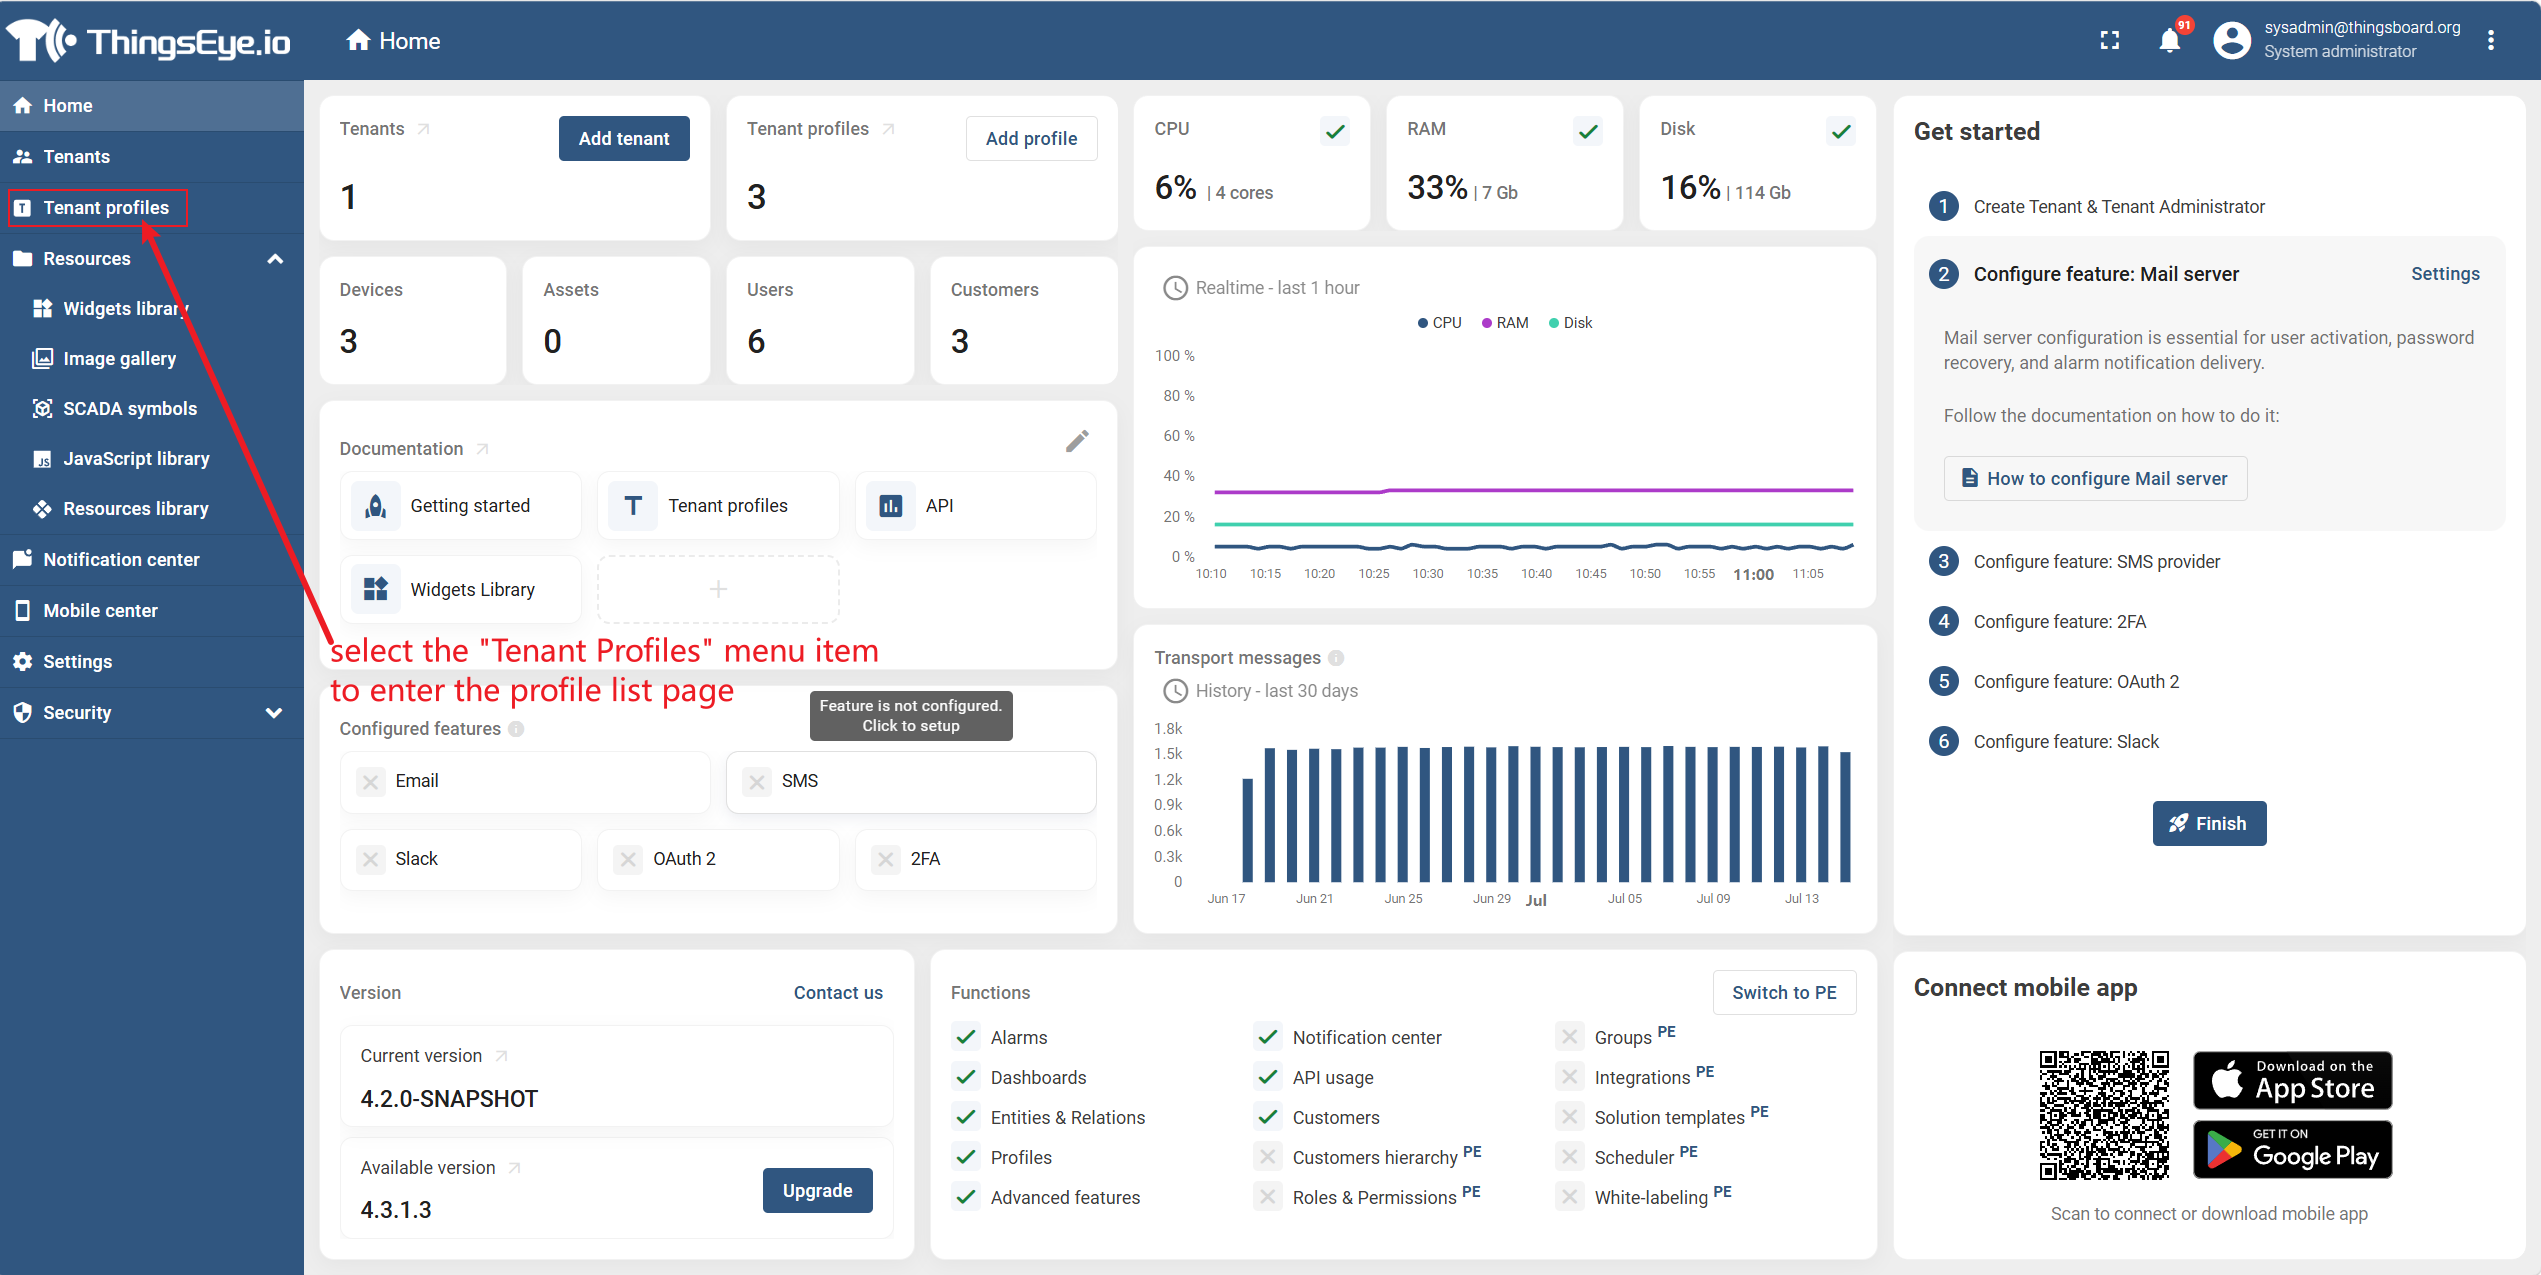
Step 1: Go to the tenant profiles page
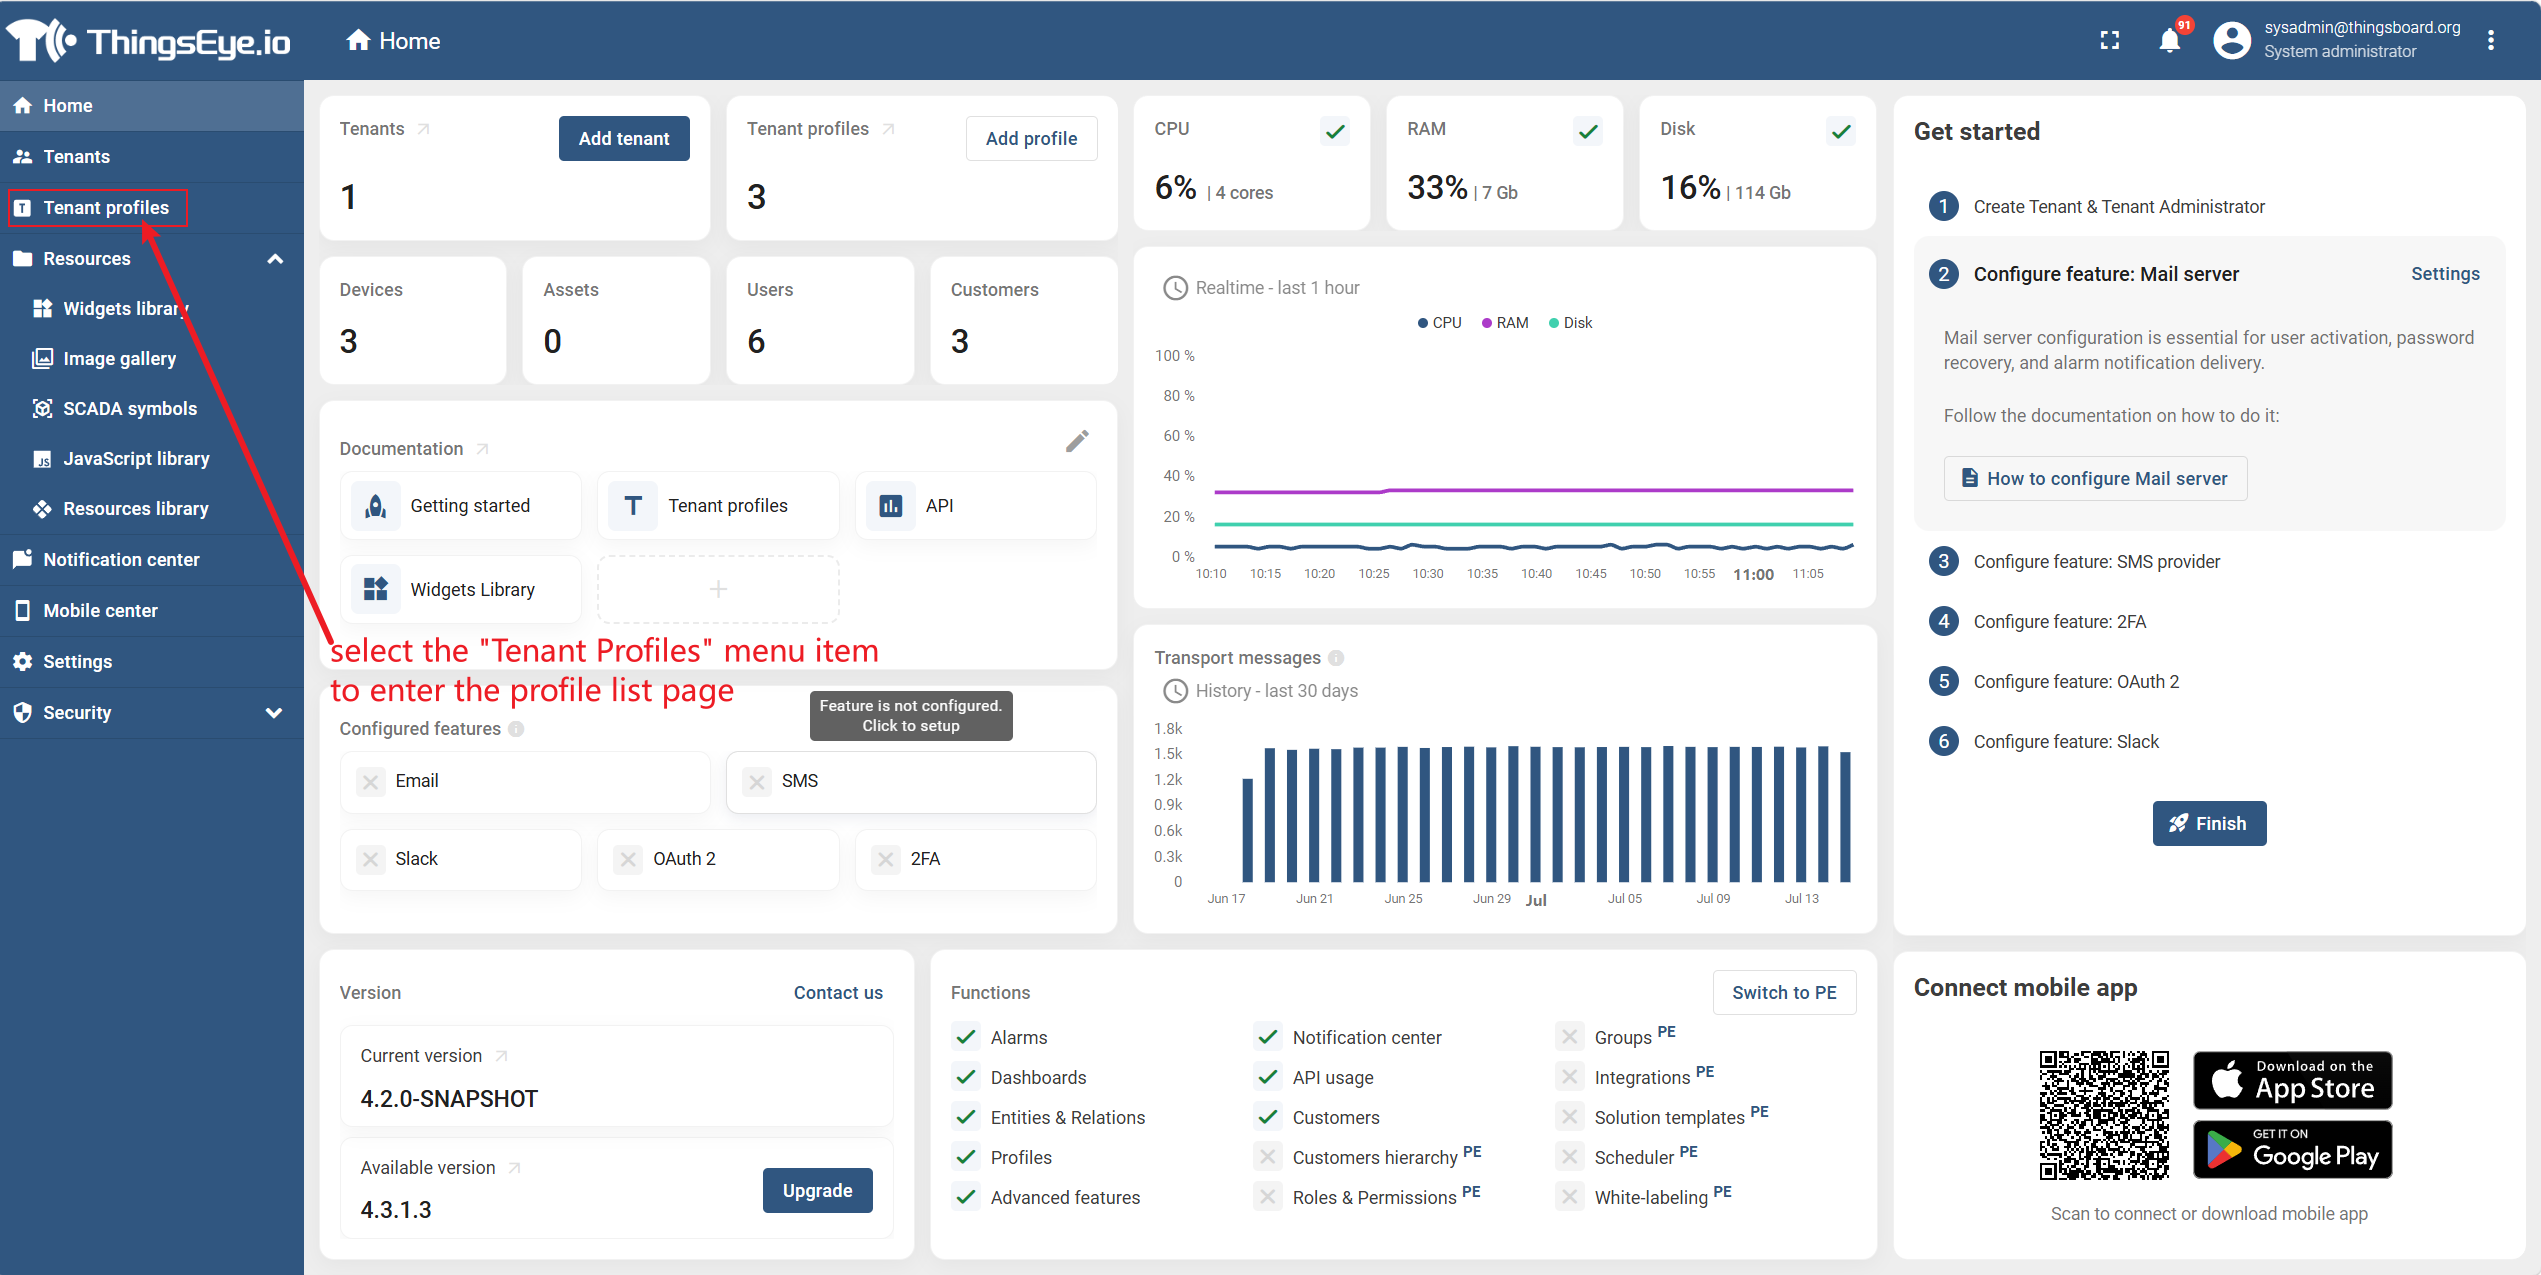
Select the "Tenant Profiles" menu item from the left sidebar to go to the template list page.
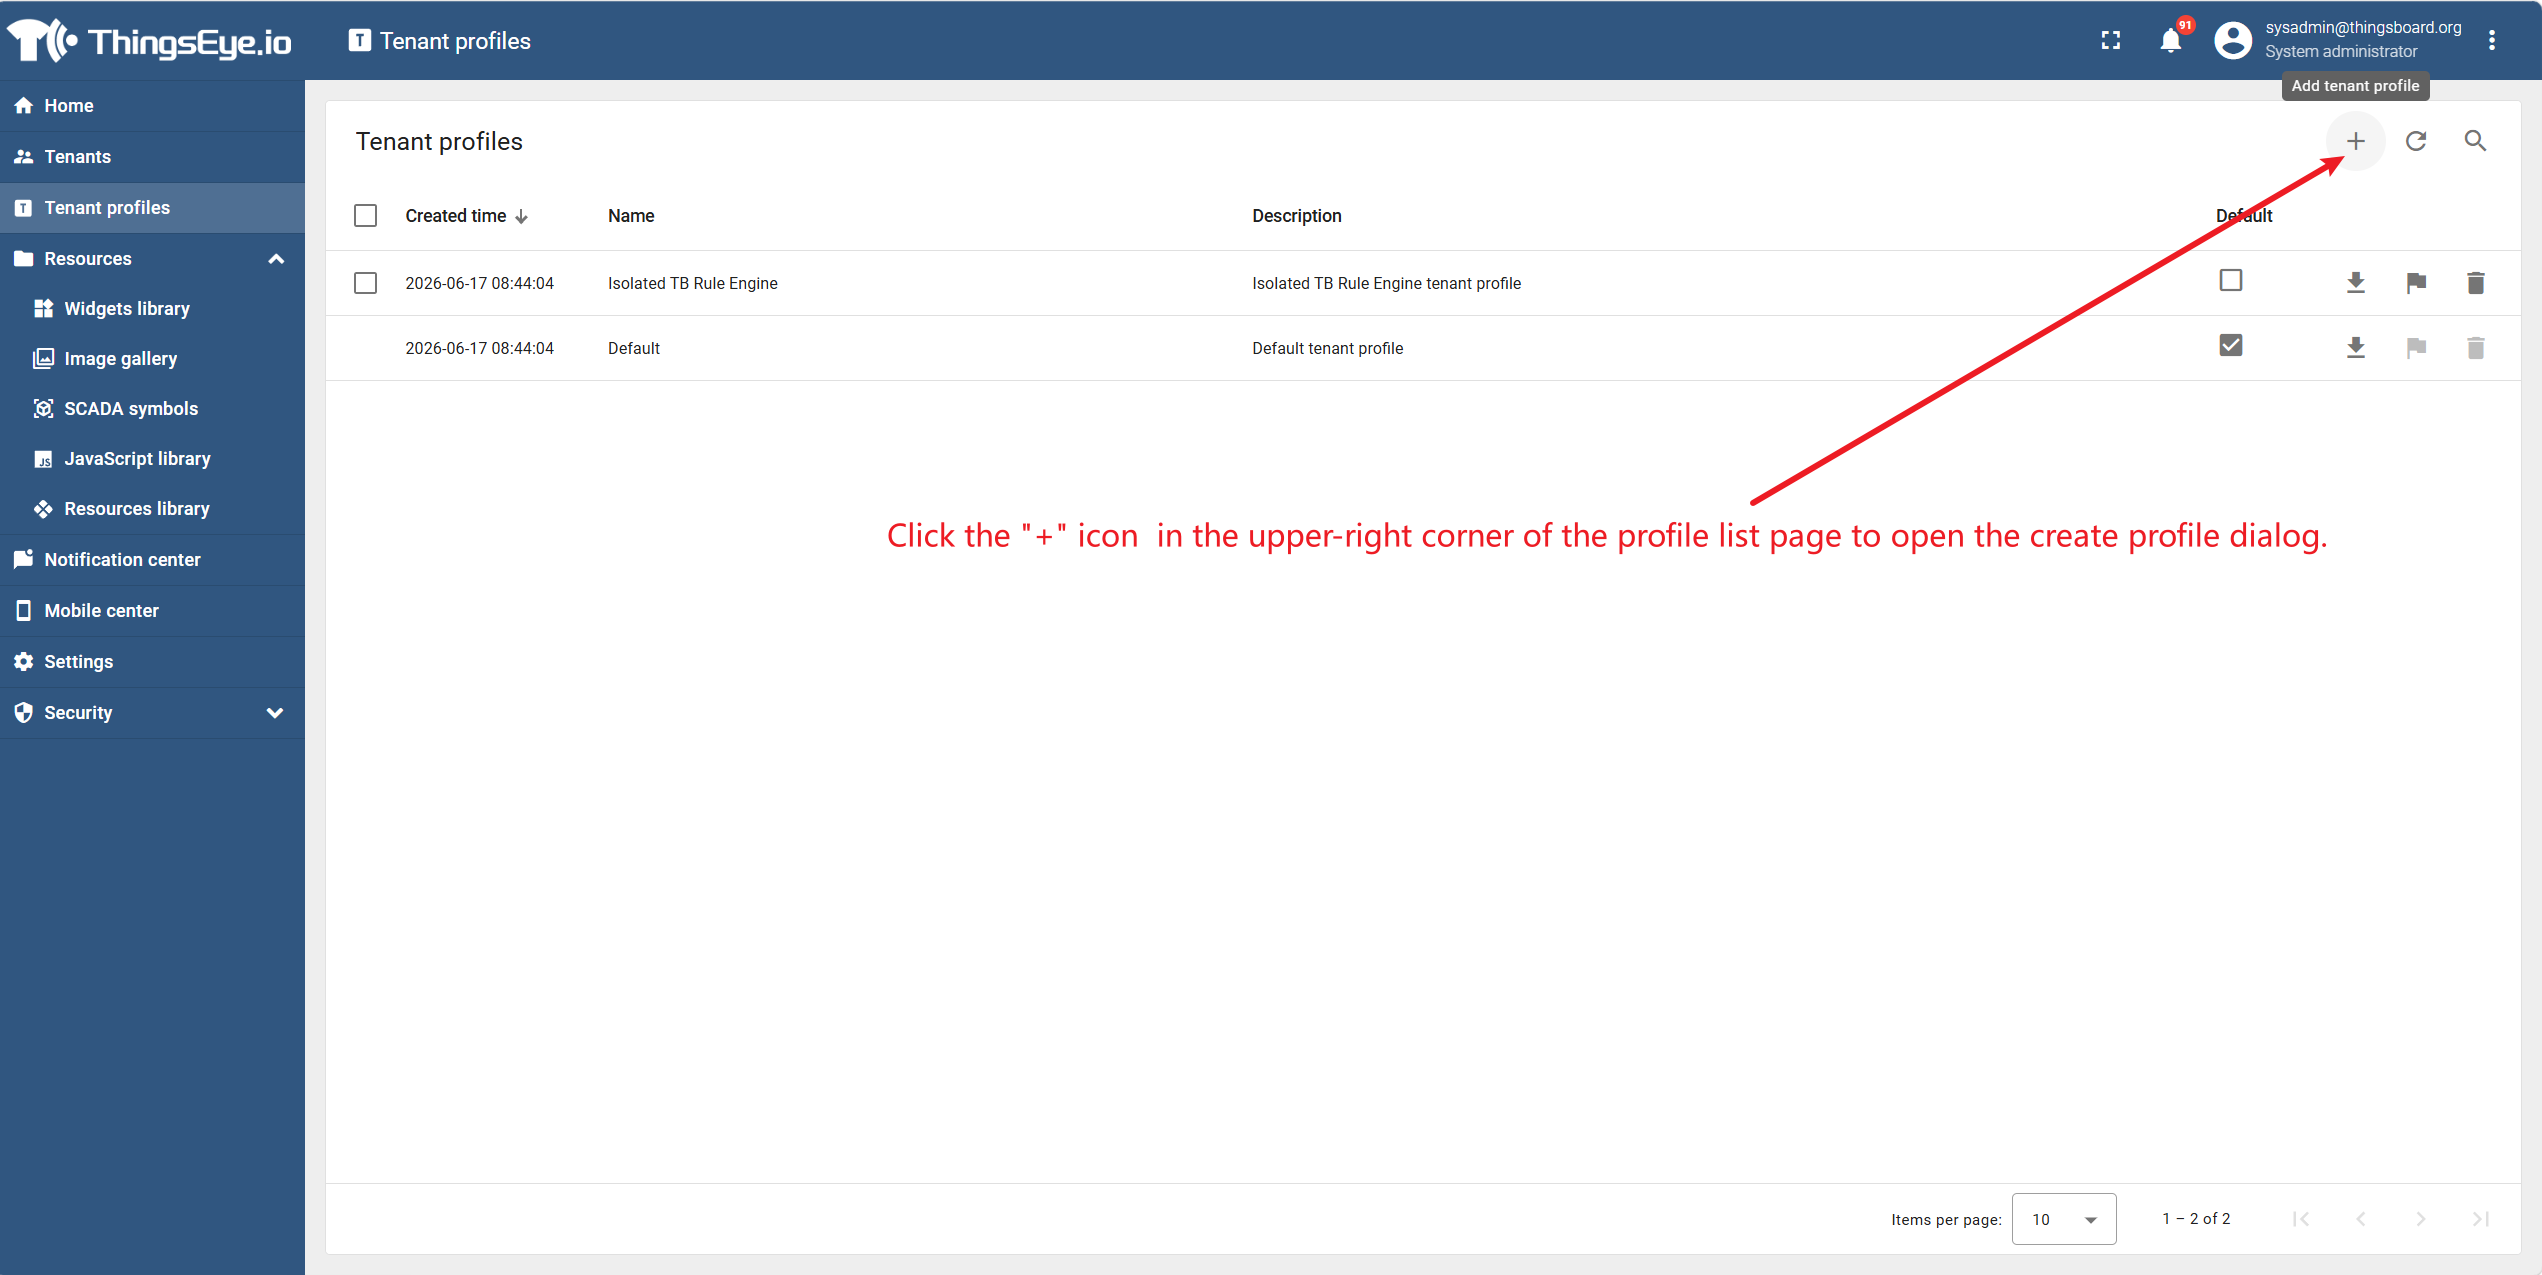
Step 2: Open the Create Template dialog
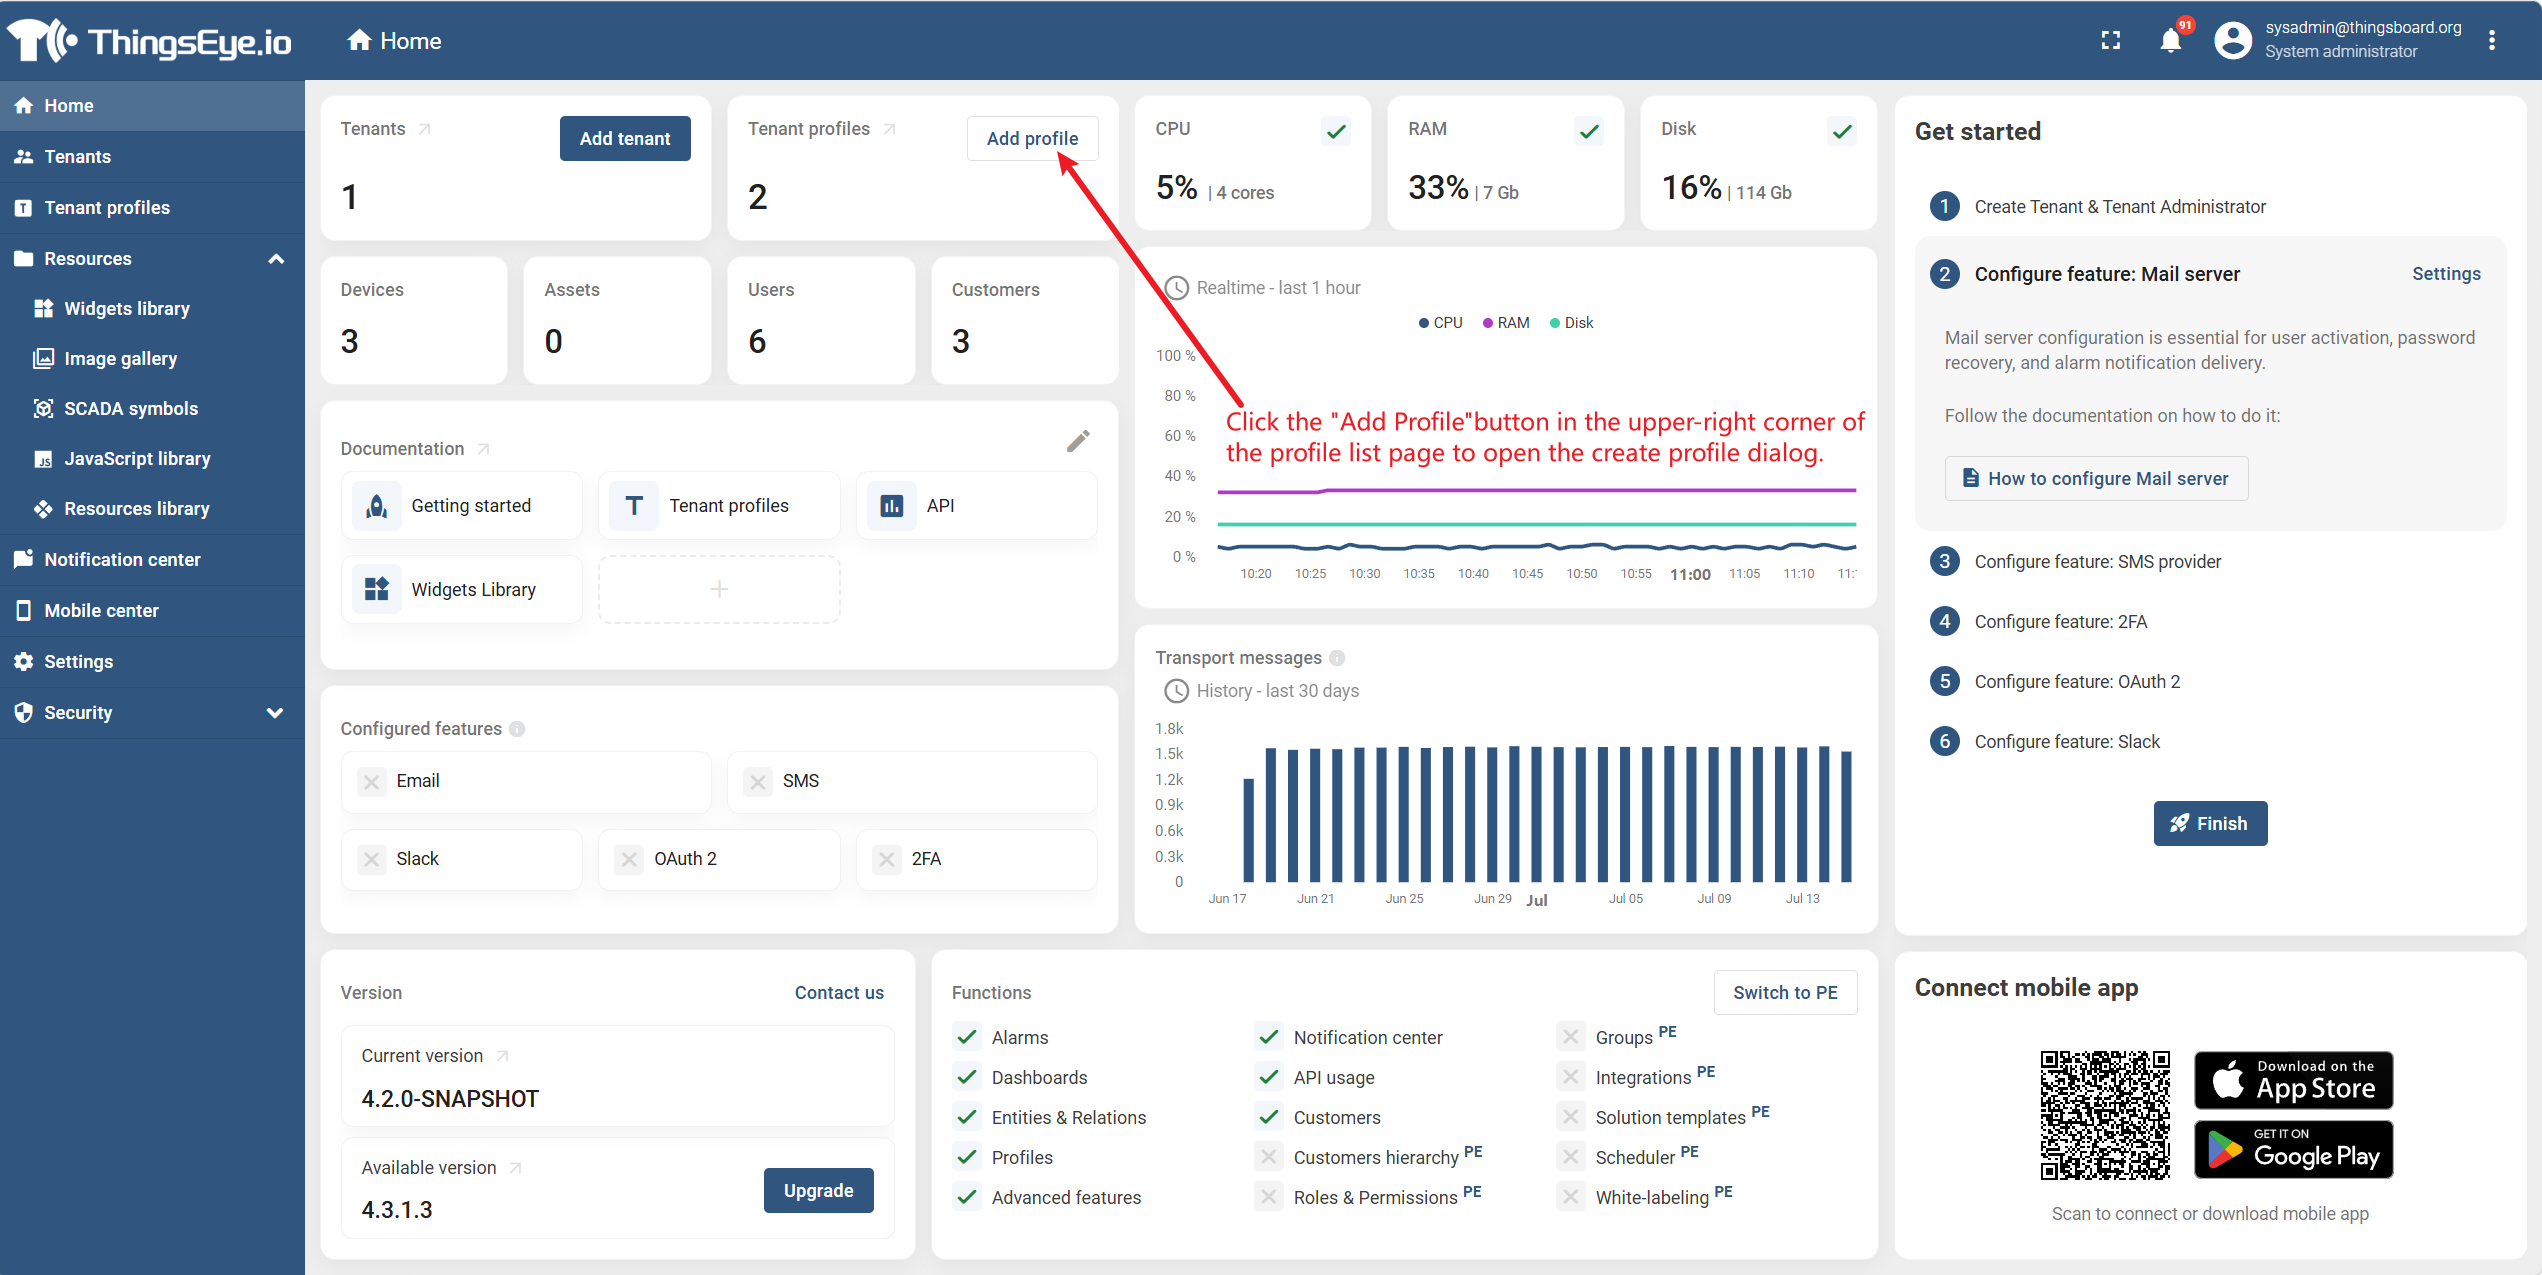
Click the "+" icon or the "Add Profile" button in the upper‑right corner of the template list page to open the Create Template dialog.
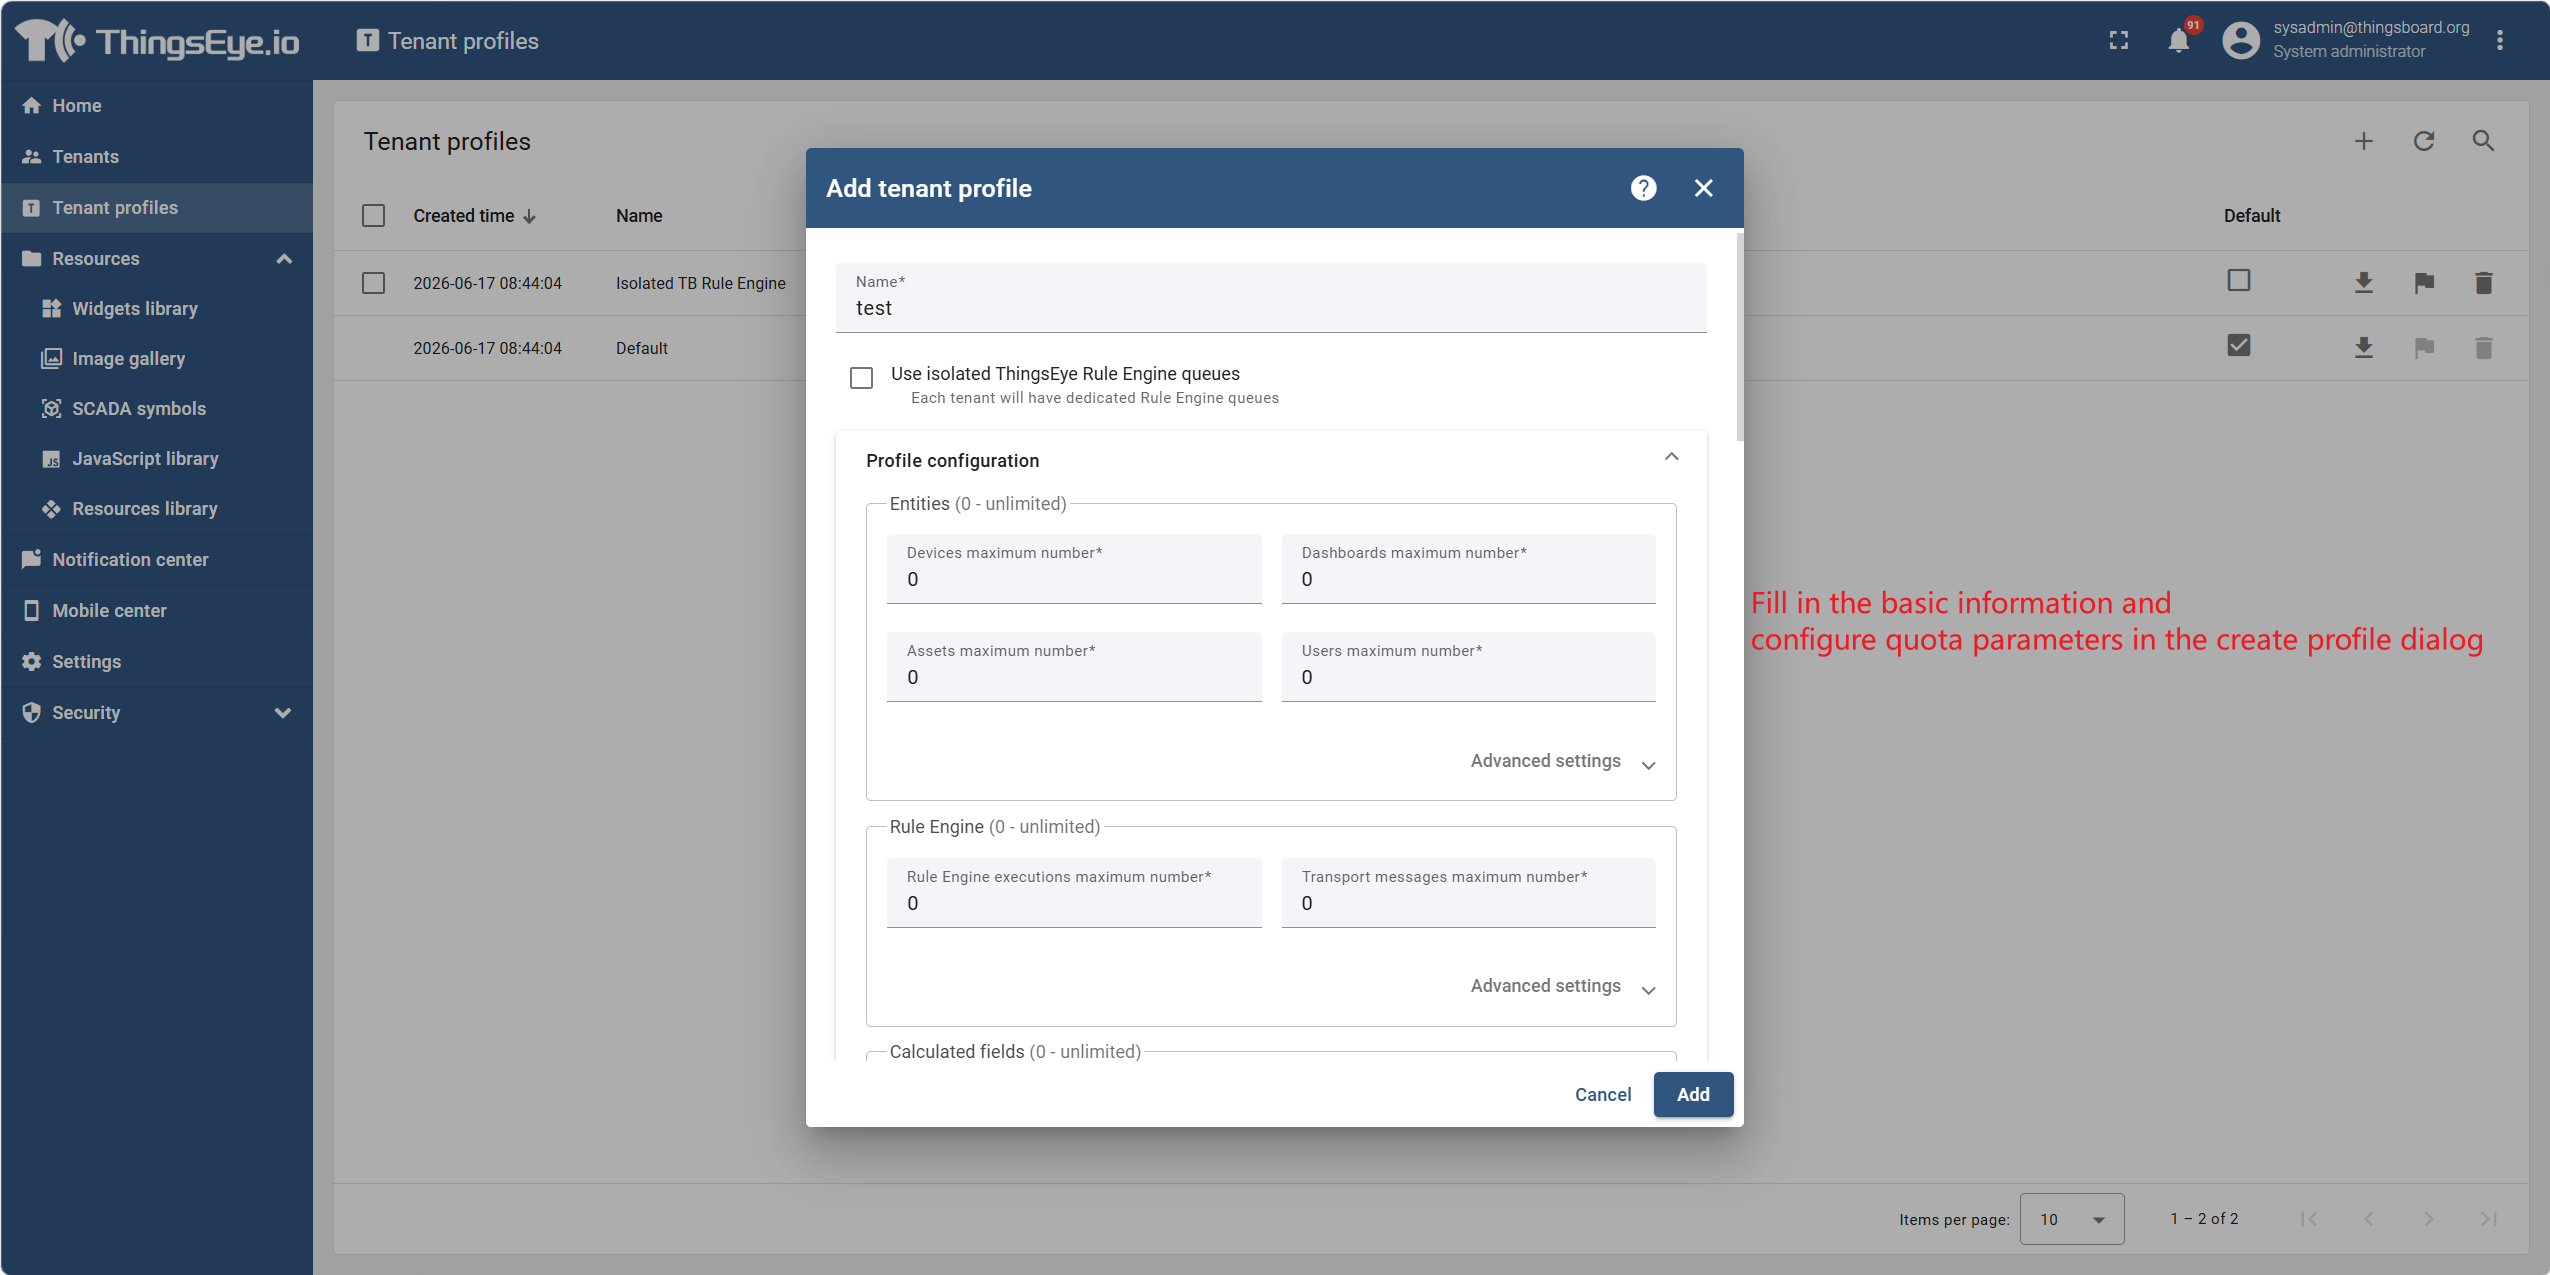
Step 3: Fill in basic information and configure feature quotas
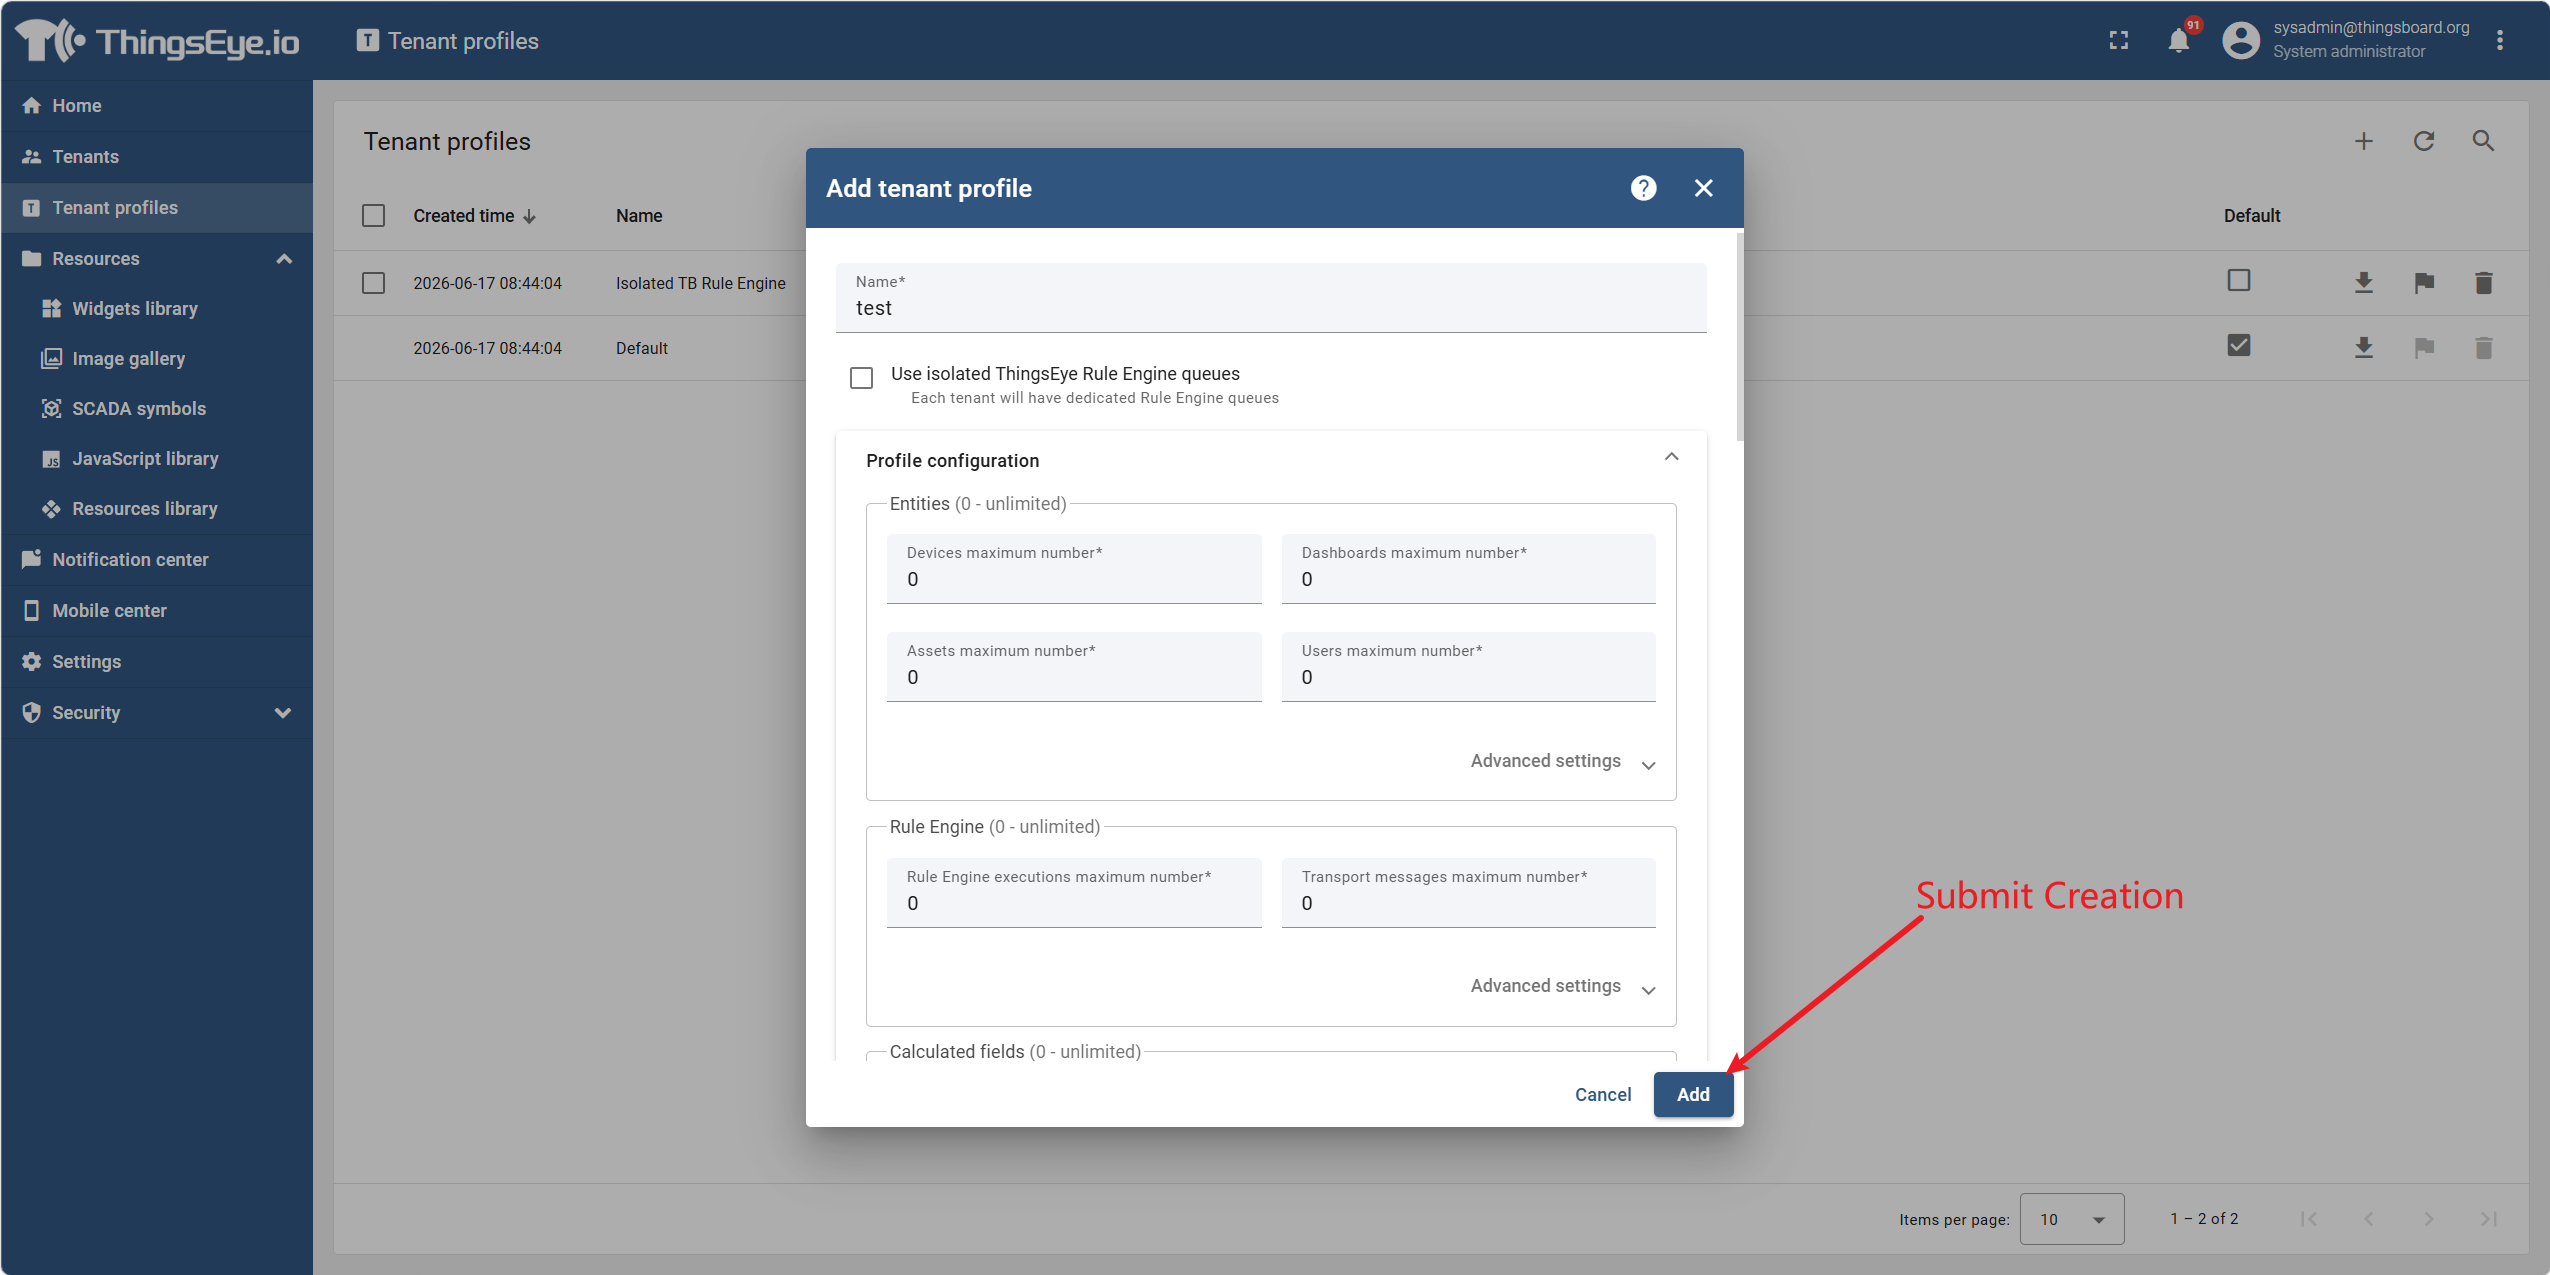
In the Create Template dialog, fill in the basic information and configure the quota parameters.
Step 4: Submit the creation
After confirming all configurations are correct, click the "Add" button at the bottom of the dialog to submit.
Once created successfully, the new template will appear in the template list and can be referenced when creating tenants.
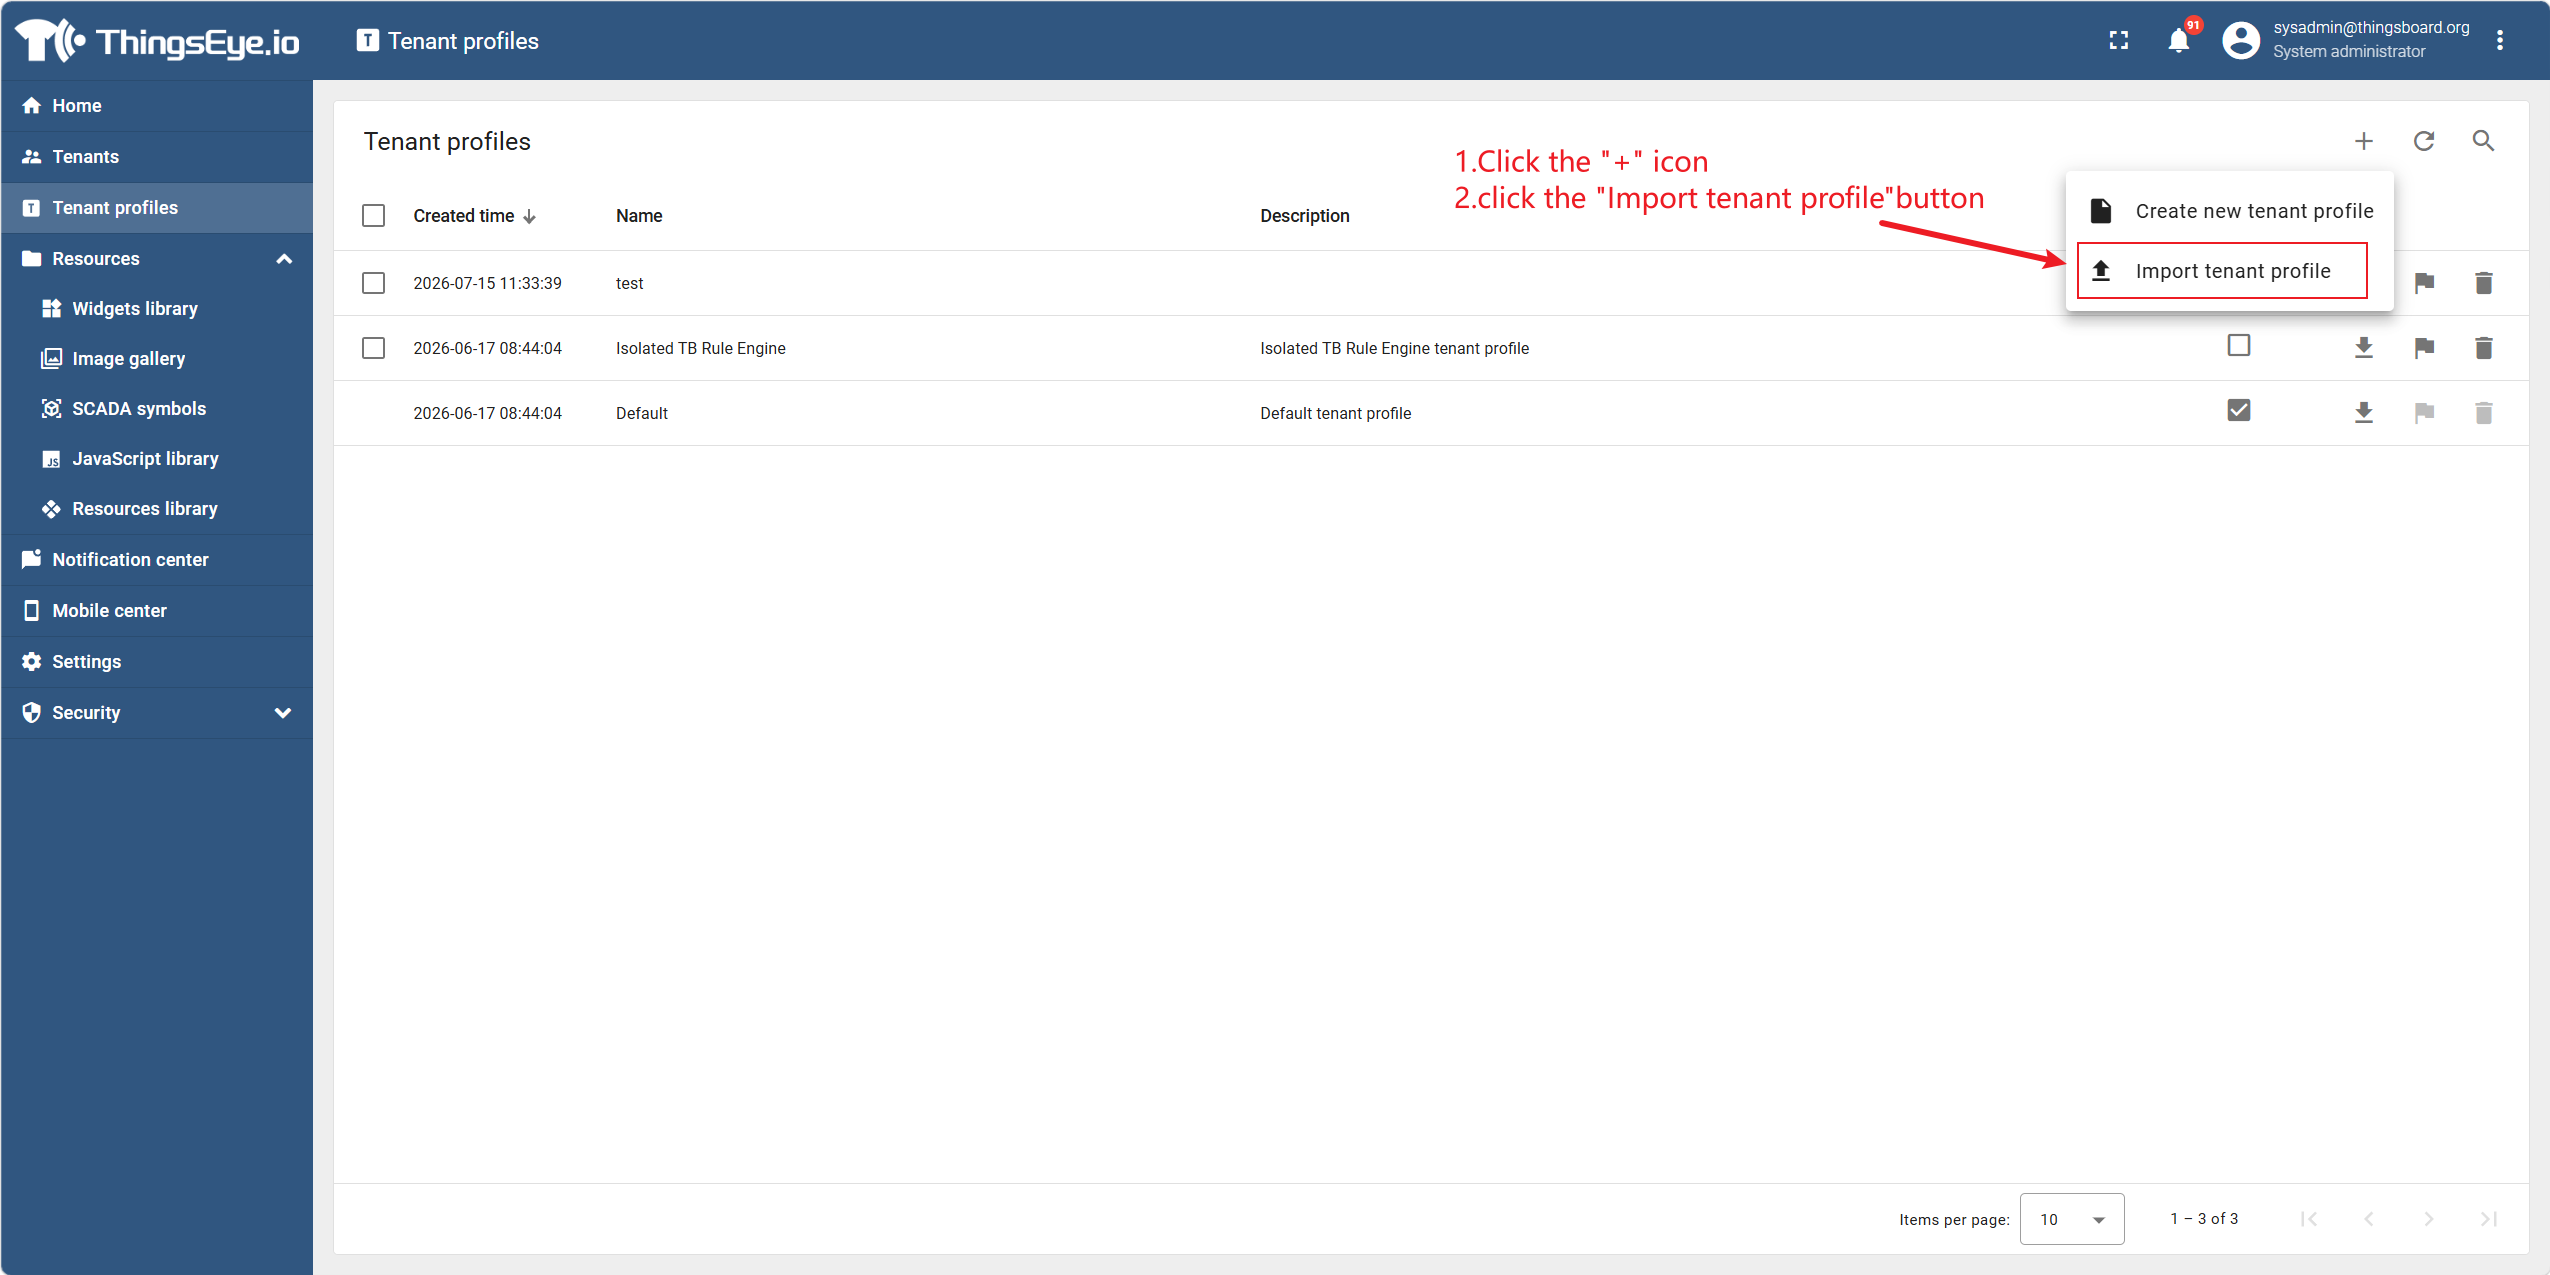
Import Template Configuration (Optional)
To import a complete configuration via a JSON file, click the "Import Tenant Profile" button in the dialog and select the prepared JSON template file. All fields will be auto‑filled after import.
Relationship Between Configuration Templates and Tenants
| Relationship Type | Description |
|---|---|
| Reference at creation | A tenant must reference an existing configuration template at creation; the template's quotas take effect immediately. |
| Changeable later | The configuration template used by a tenant can be changed when editing the tenant (see "Tenant Management > 2. Edit Tenant"). |
| Shared by multiple tenants | The same template can be used by multiple tenants simultaneously; each tenant's quotas are independent and do not affect each other. |
| Deletion restriction | If a template is currently used by at least one tenant, it cannot be deleted (see "3. Delete a Configuration Template"). |
2. Edit a Configuration Template
Procedure
Step 1: Go to the tenant profiles page
Select the "Tenant Profiles" menu item from the left sidebar to go to the template list page.
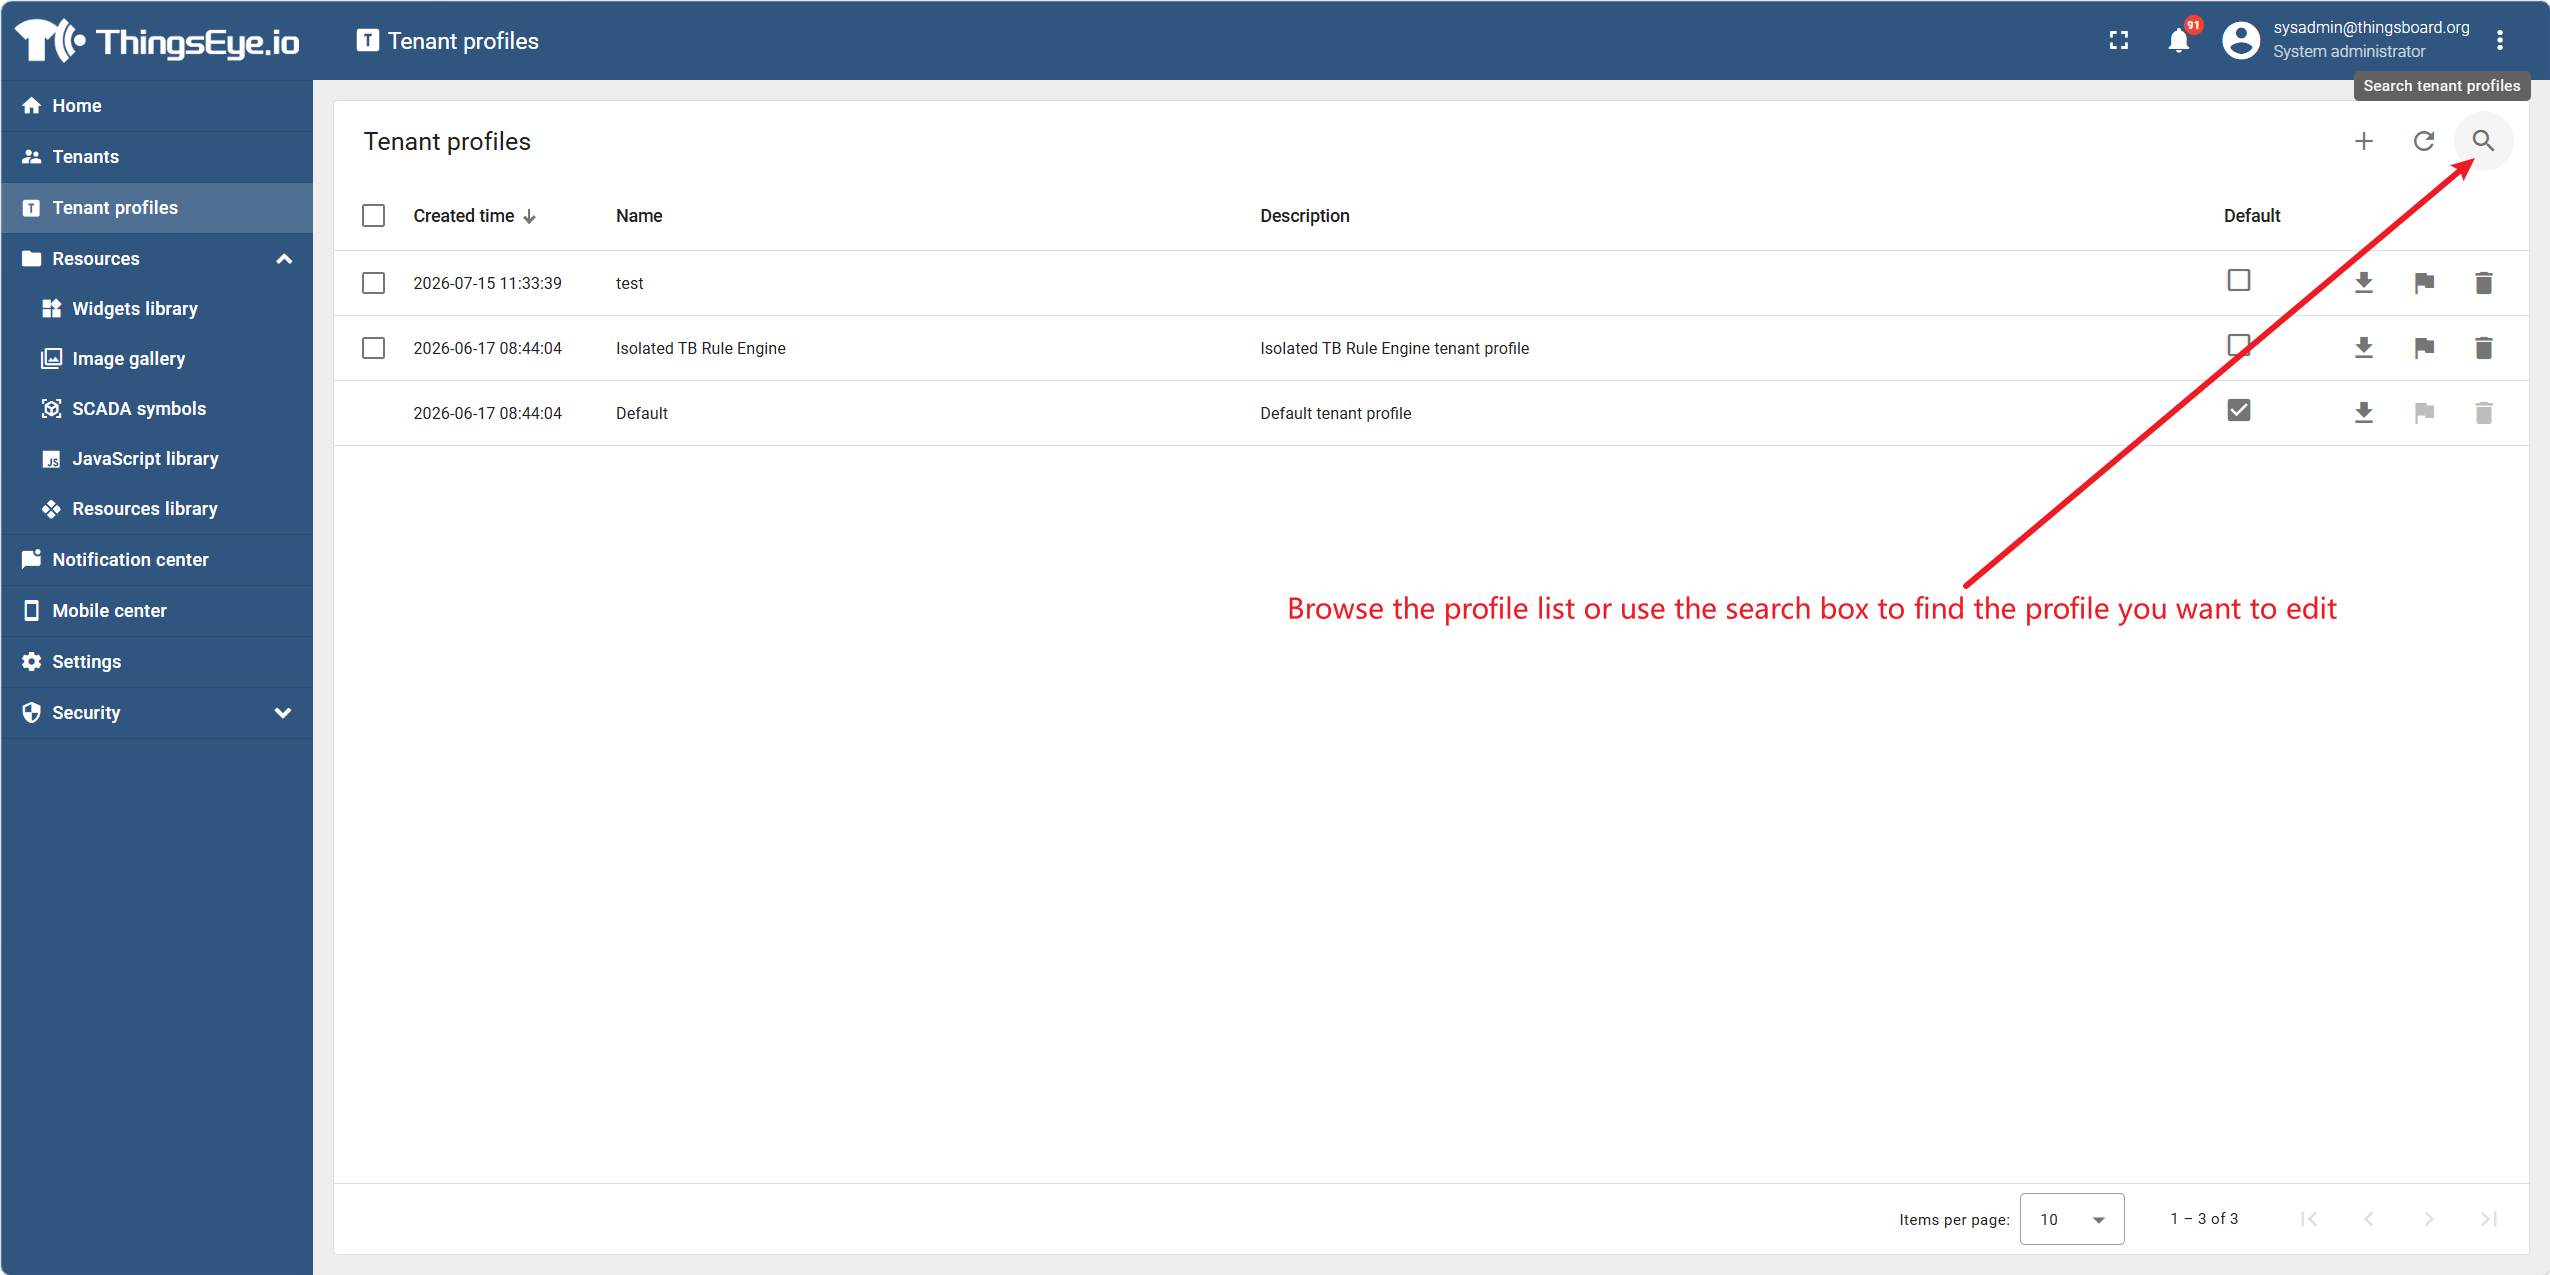
Step 2: Locate the target template
Browse the template list or use the search box to find the template you want to edit.
Step 3: Enter edit mode
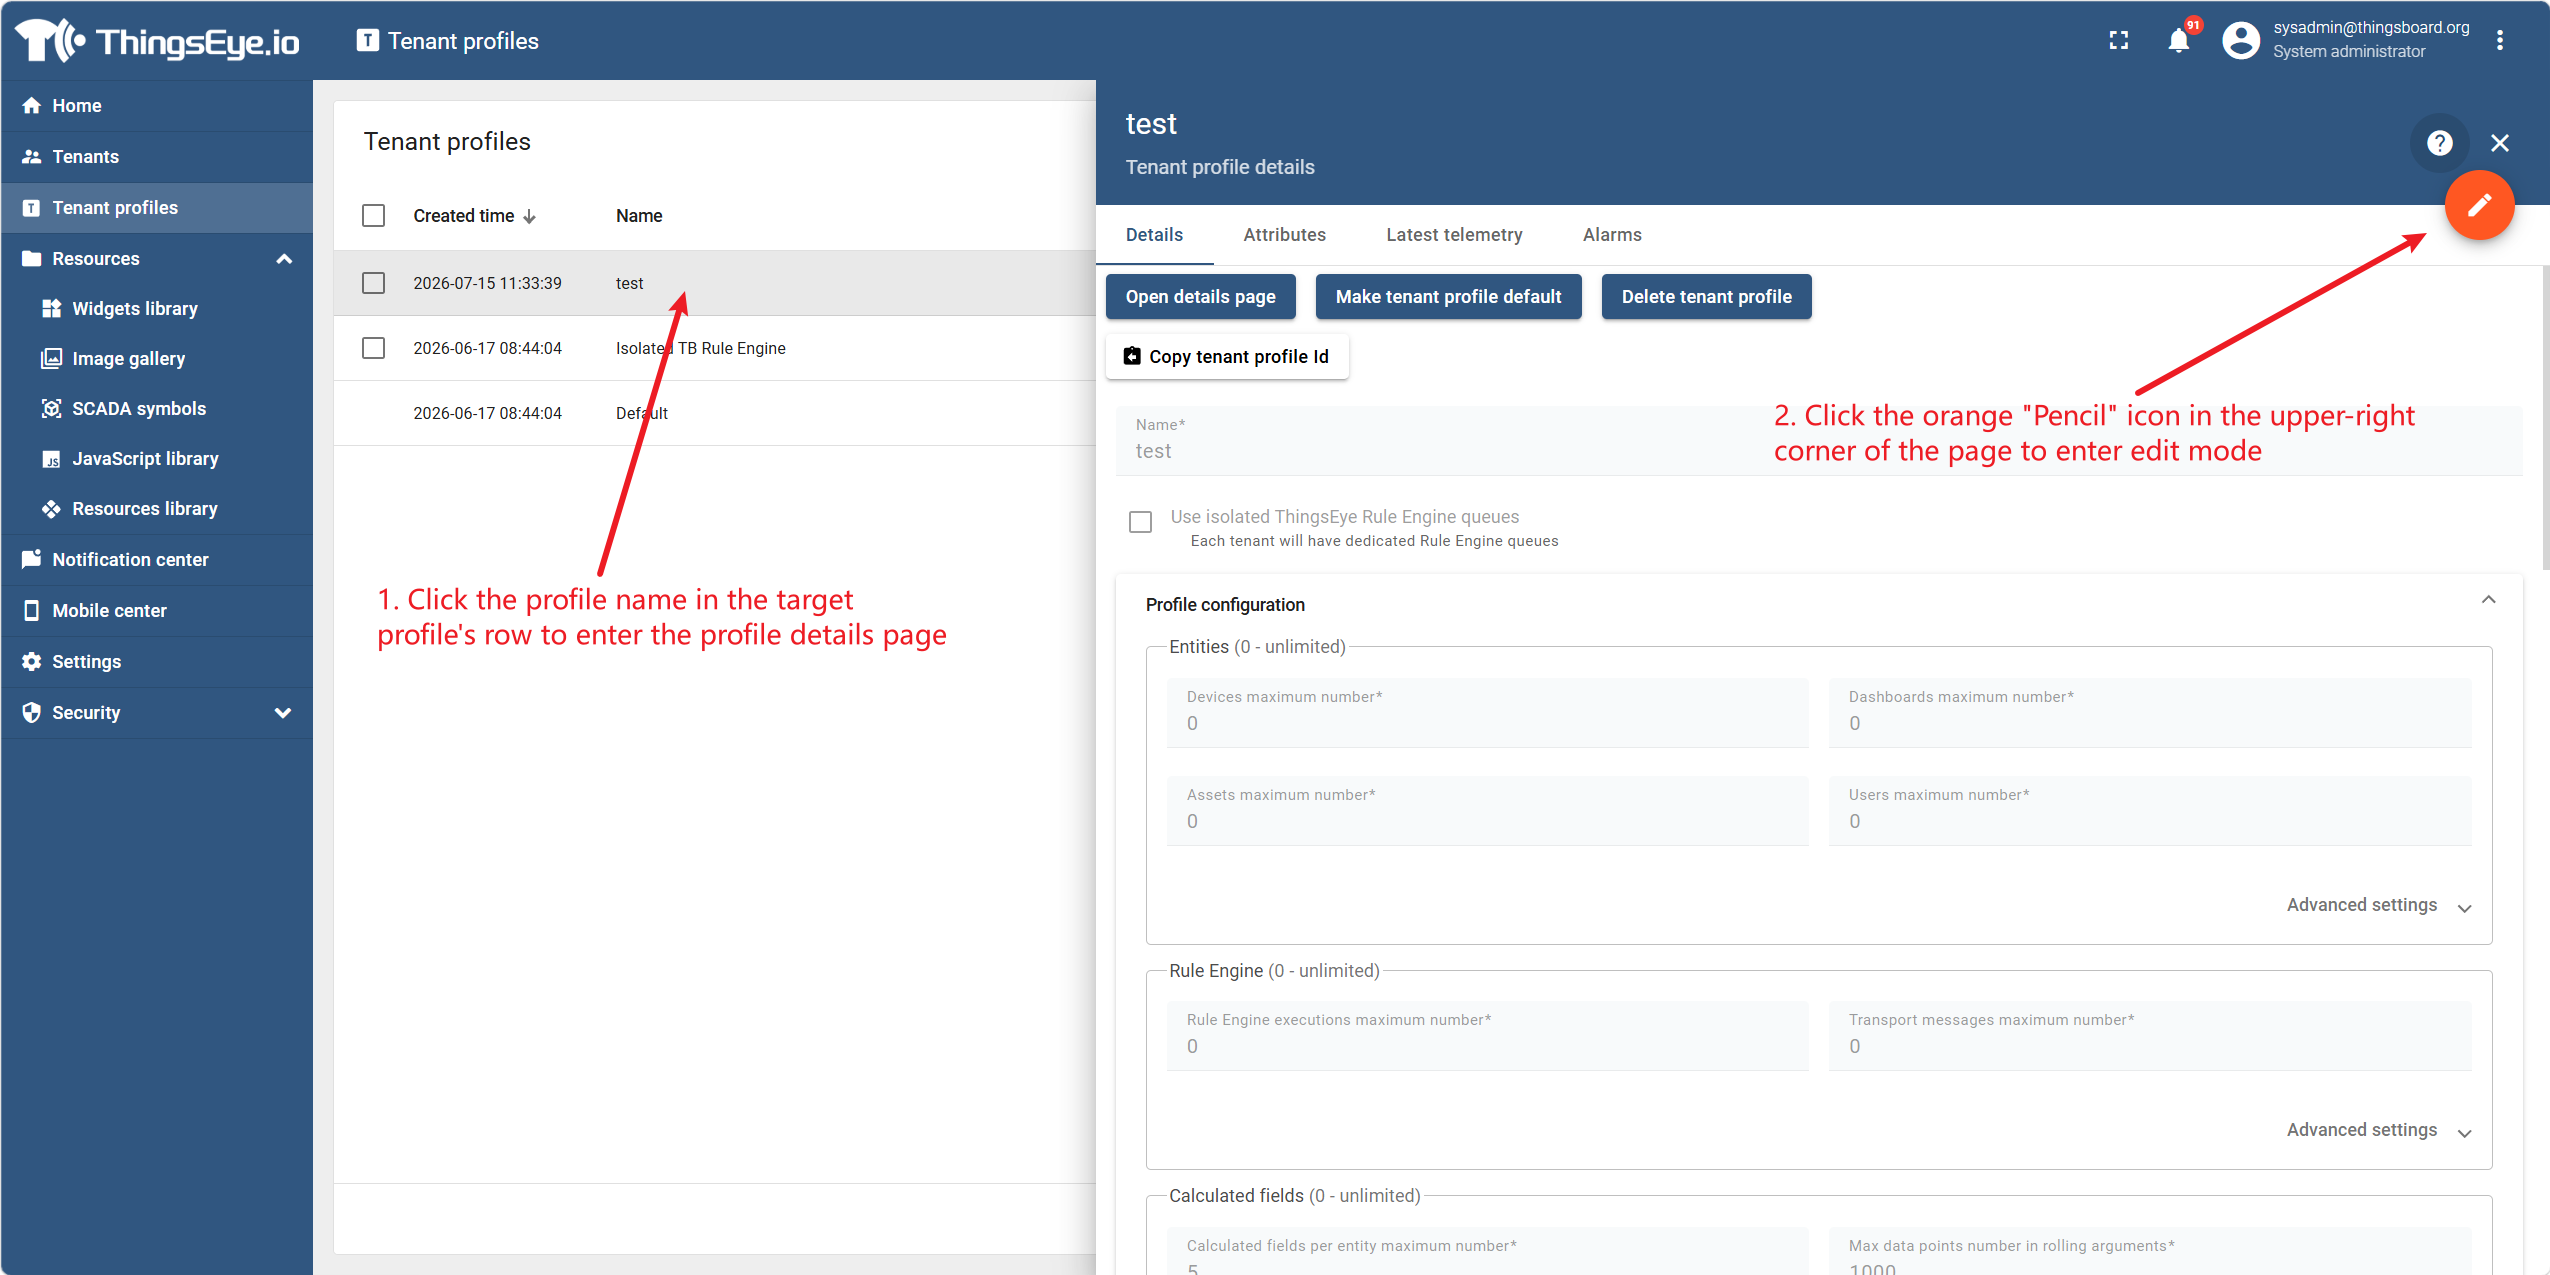
Click the template name in the row of the target template to go to the template details page. Then click the orange pencil icon in the upper‑right corner of the page to enter edit mode.
Step 4: Modify template information and quotas
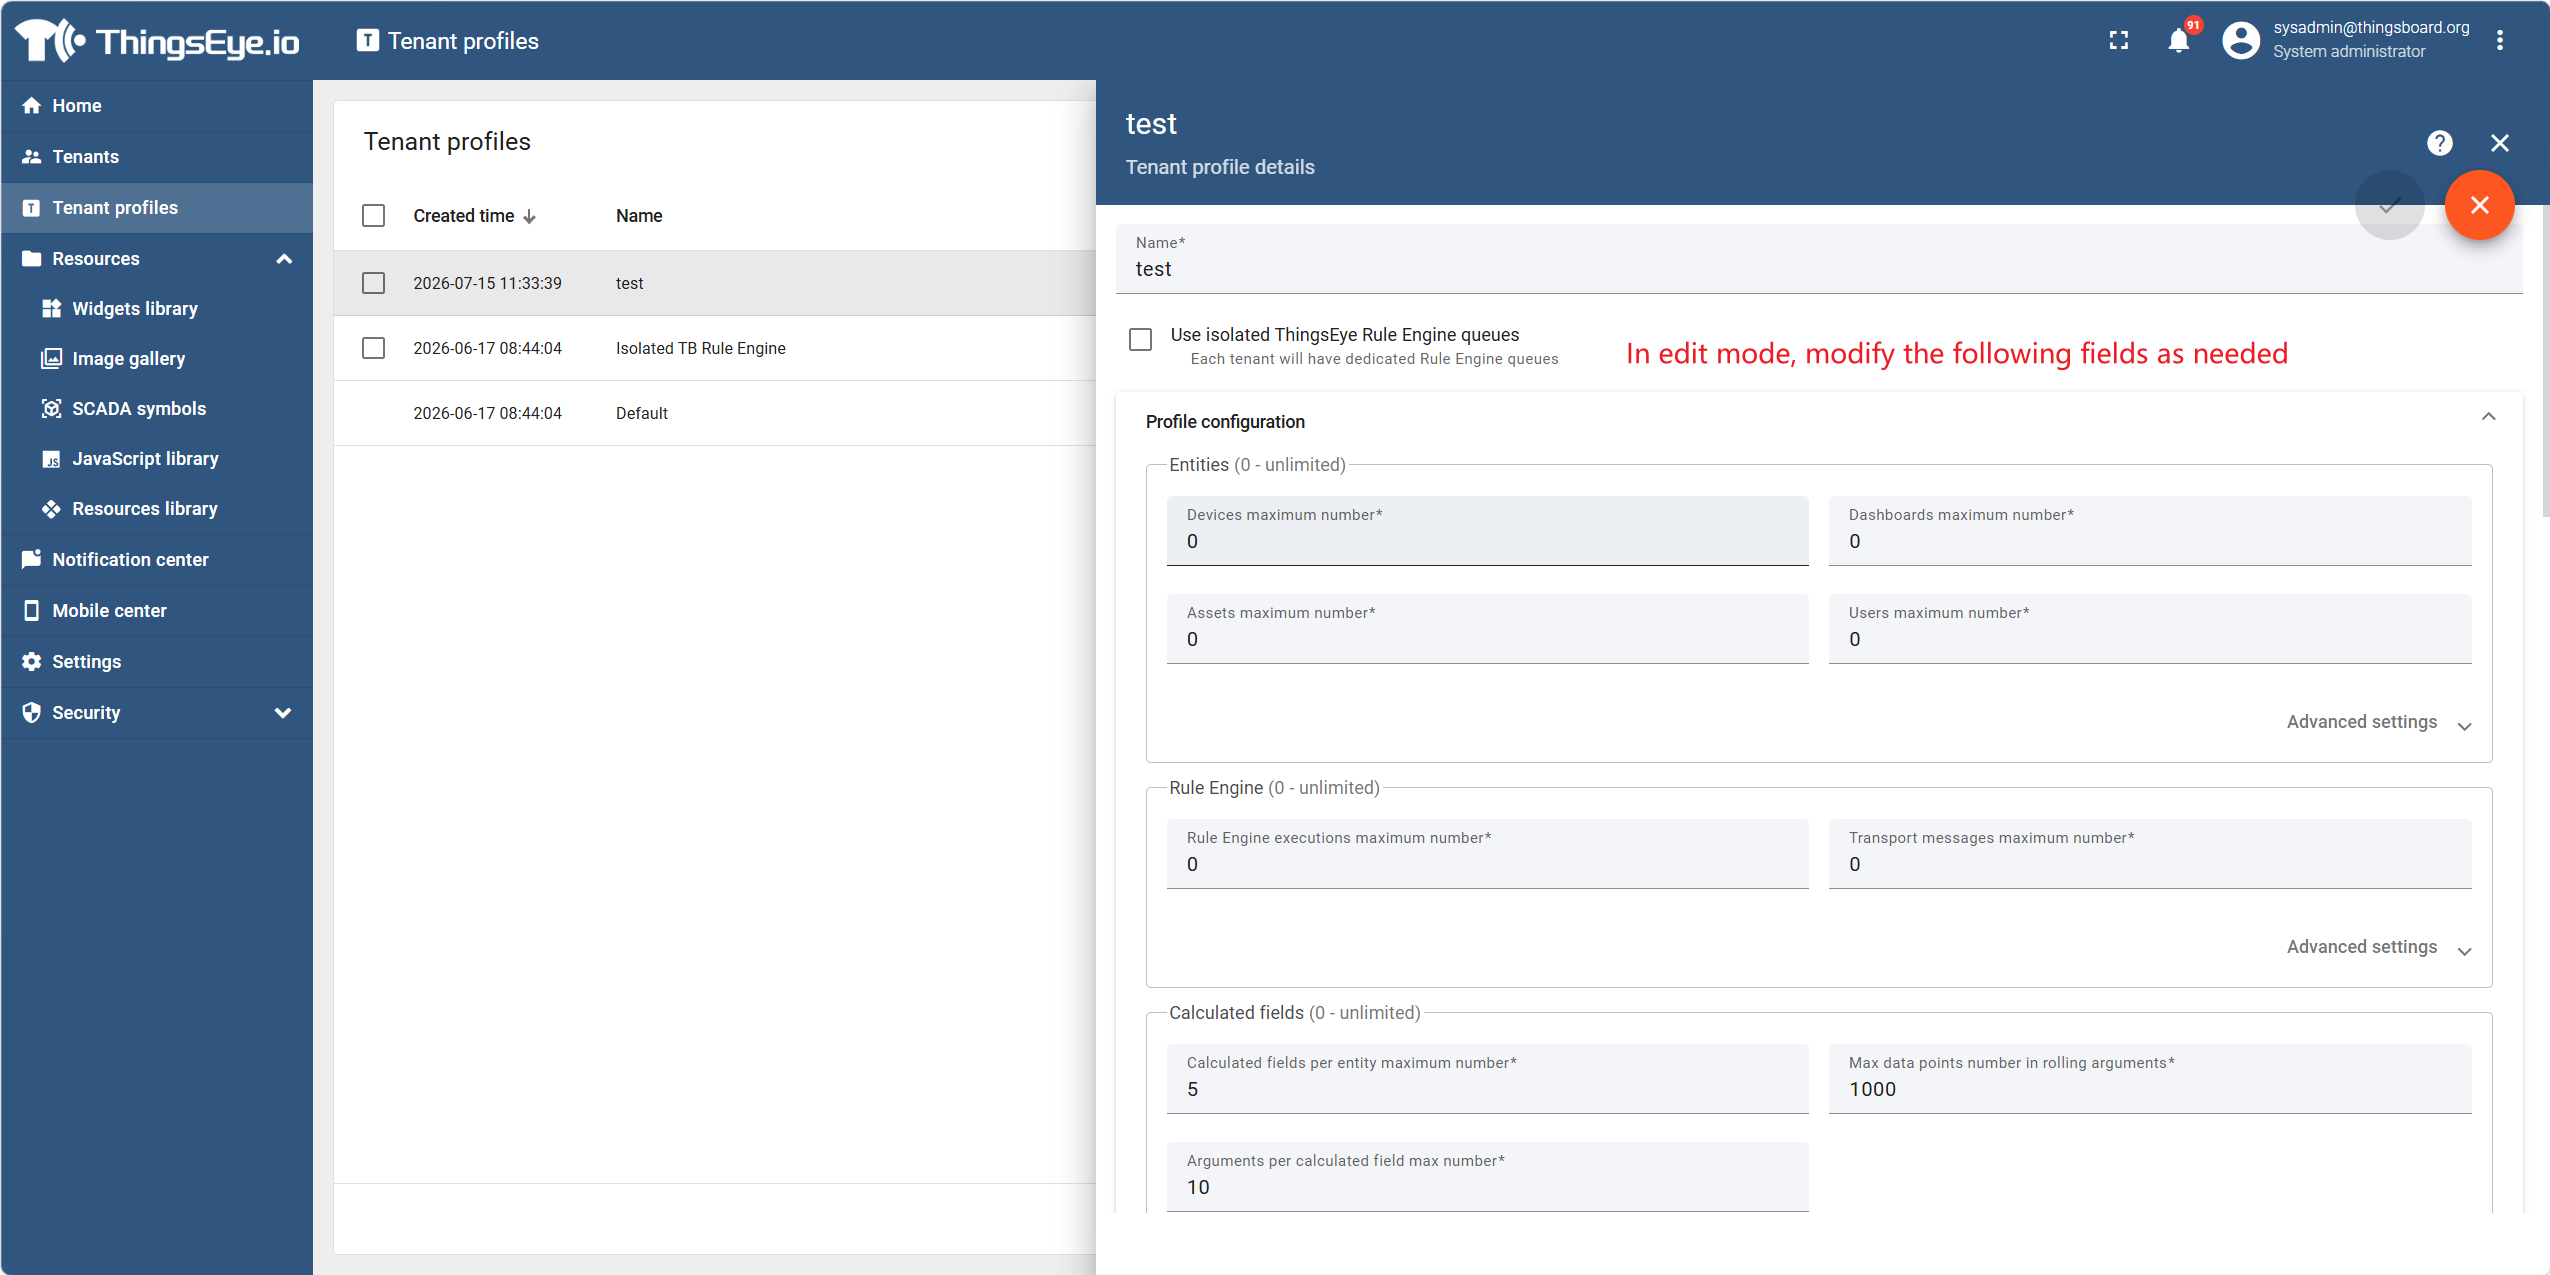
In edit mode, modify the following fields as needed.
Step 5: Save changes
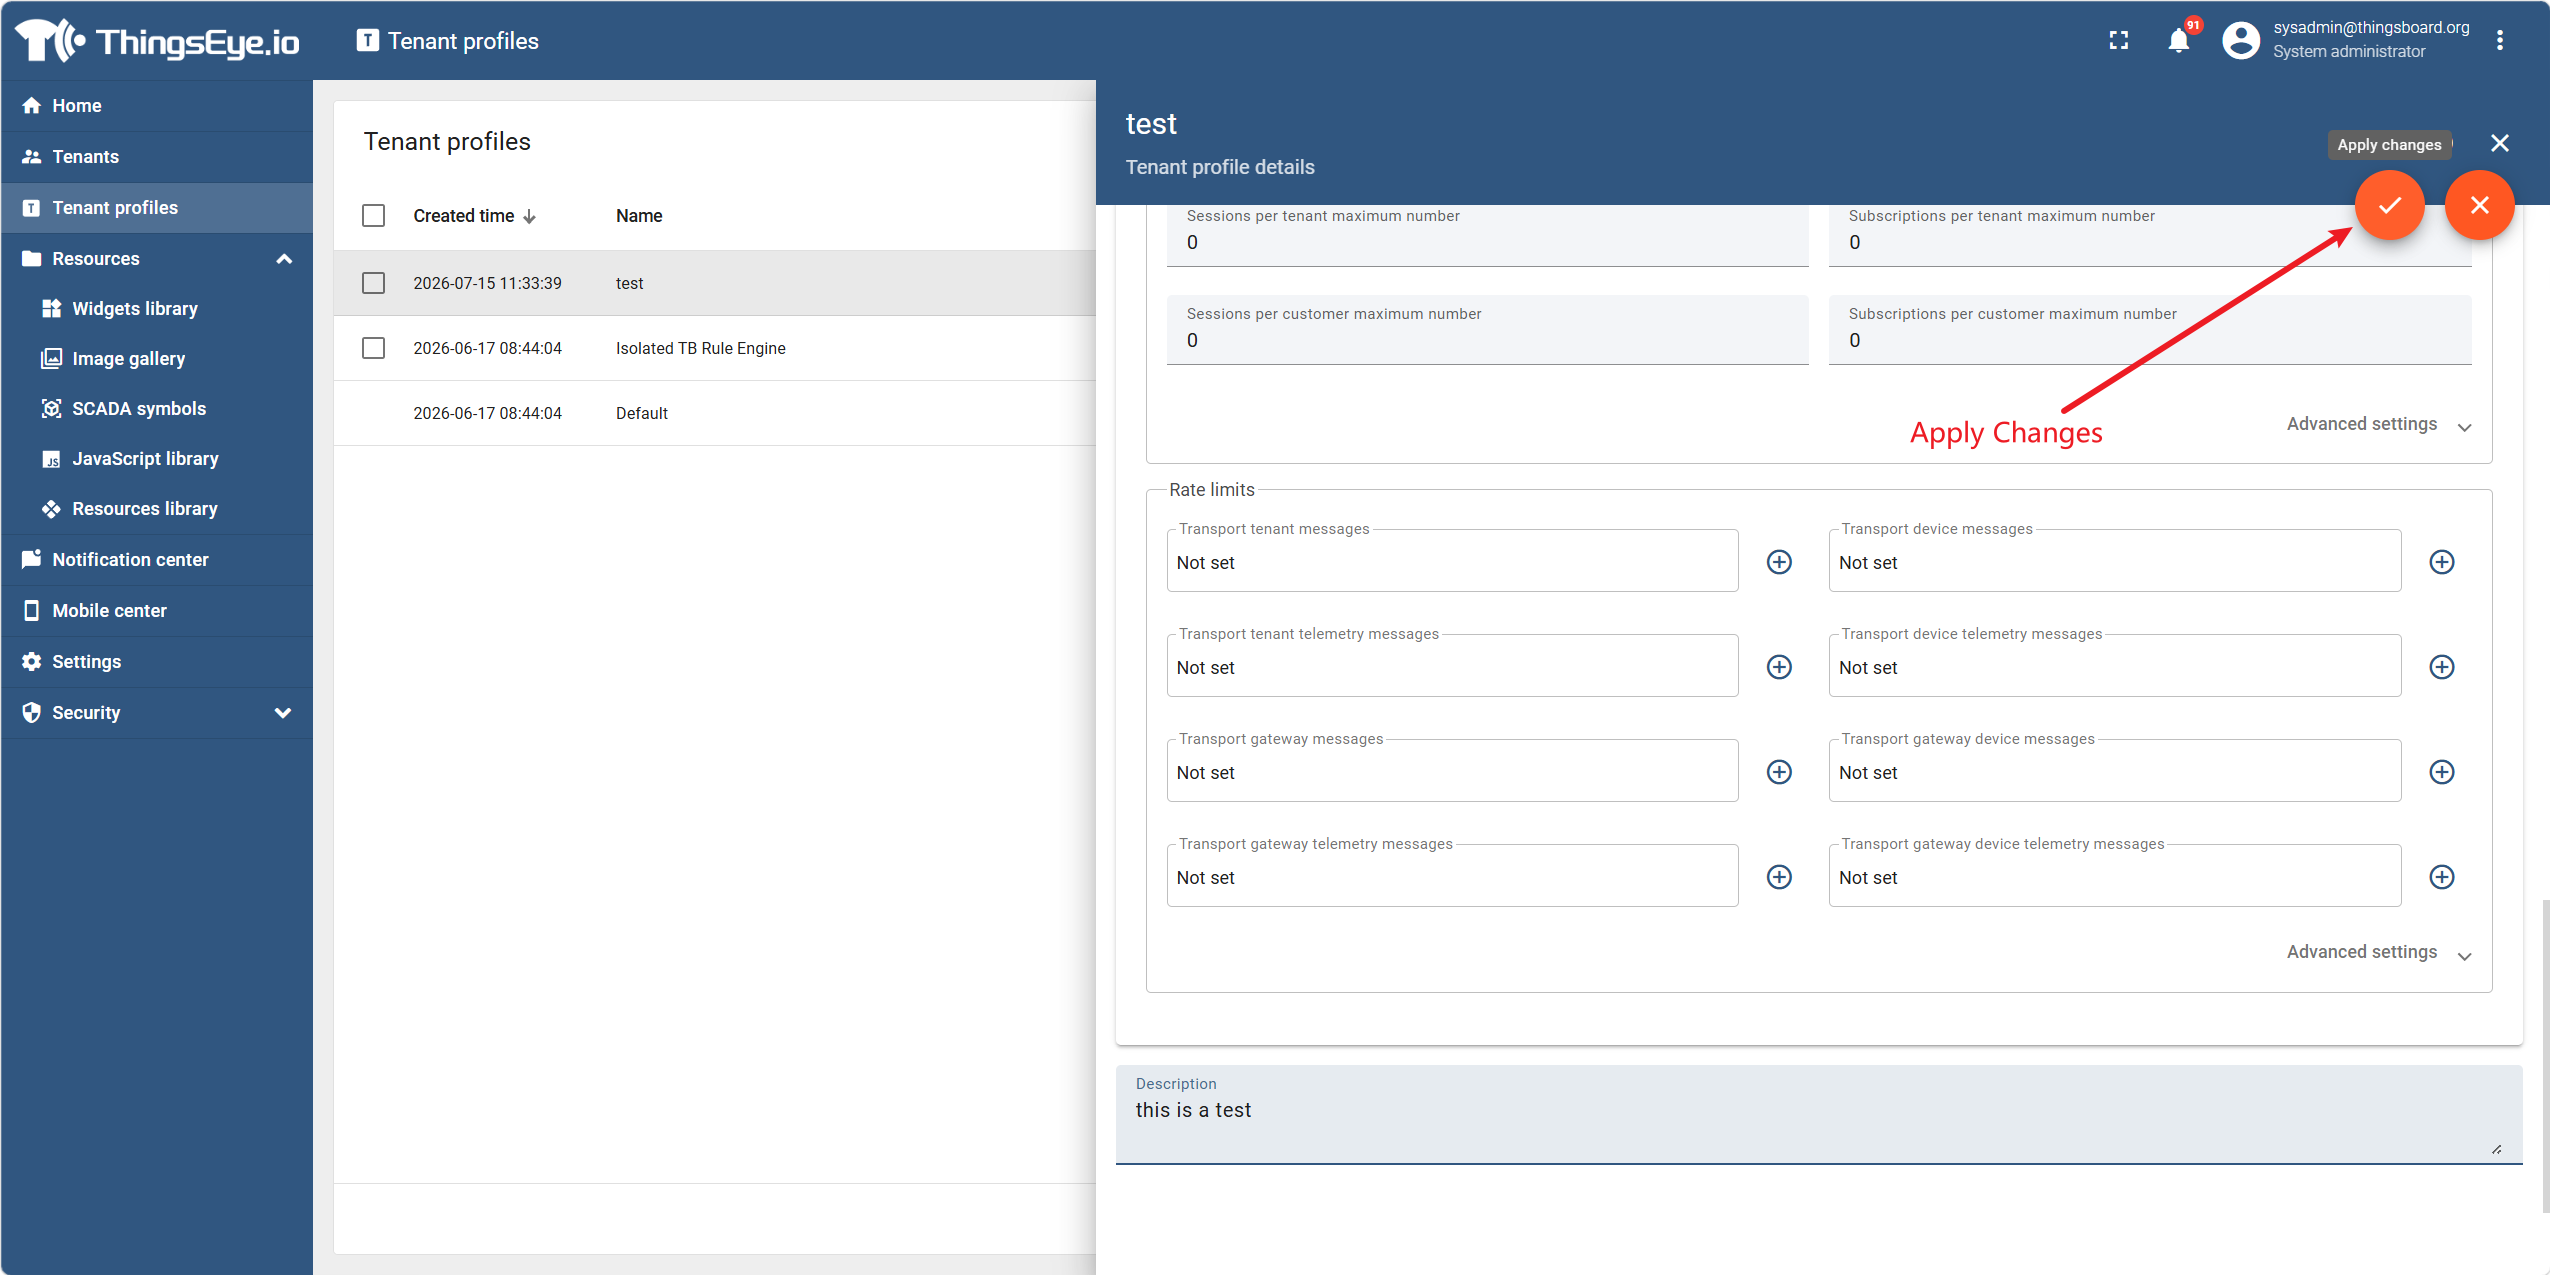
After modification, click the "Apply Changes" button in the upper‑right corner of the page to submit the update.
The system will save the changes and refresh the template information.
Important Considerations
| Consideration | Description |
|---|---|
| Uniqueness of default template | There can be only one default template in the system. When you set a template as default, the default status of the previous default template is automatically removed. |
| Impact on existing tenants | After modifying a template's quotas, all tenants that reference this template will be immediately subject to the new quota limits. If the current usage exceeds the new limits, the system will issue a warning and block new creation operations, but existing data will not be affected. |
| Purpose of description | The template description is for administrative reference only and does not affect system functionality. |
| Modification audit | All modifications to template information are recorded in the audit log (see Appendix A "Role and Permission Quick Reference" for audit log permissions). |
3. Delete a Configuration Template
Procedure
Step 1: Go to the tenant profiles page
Select the "Tenant Profiles" menu item from the left sidebar to go to the template list page.
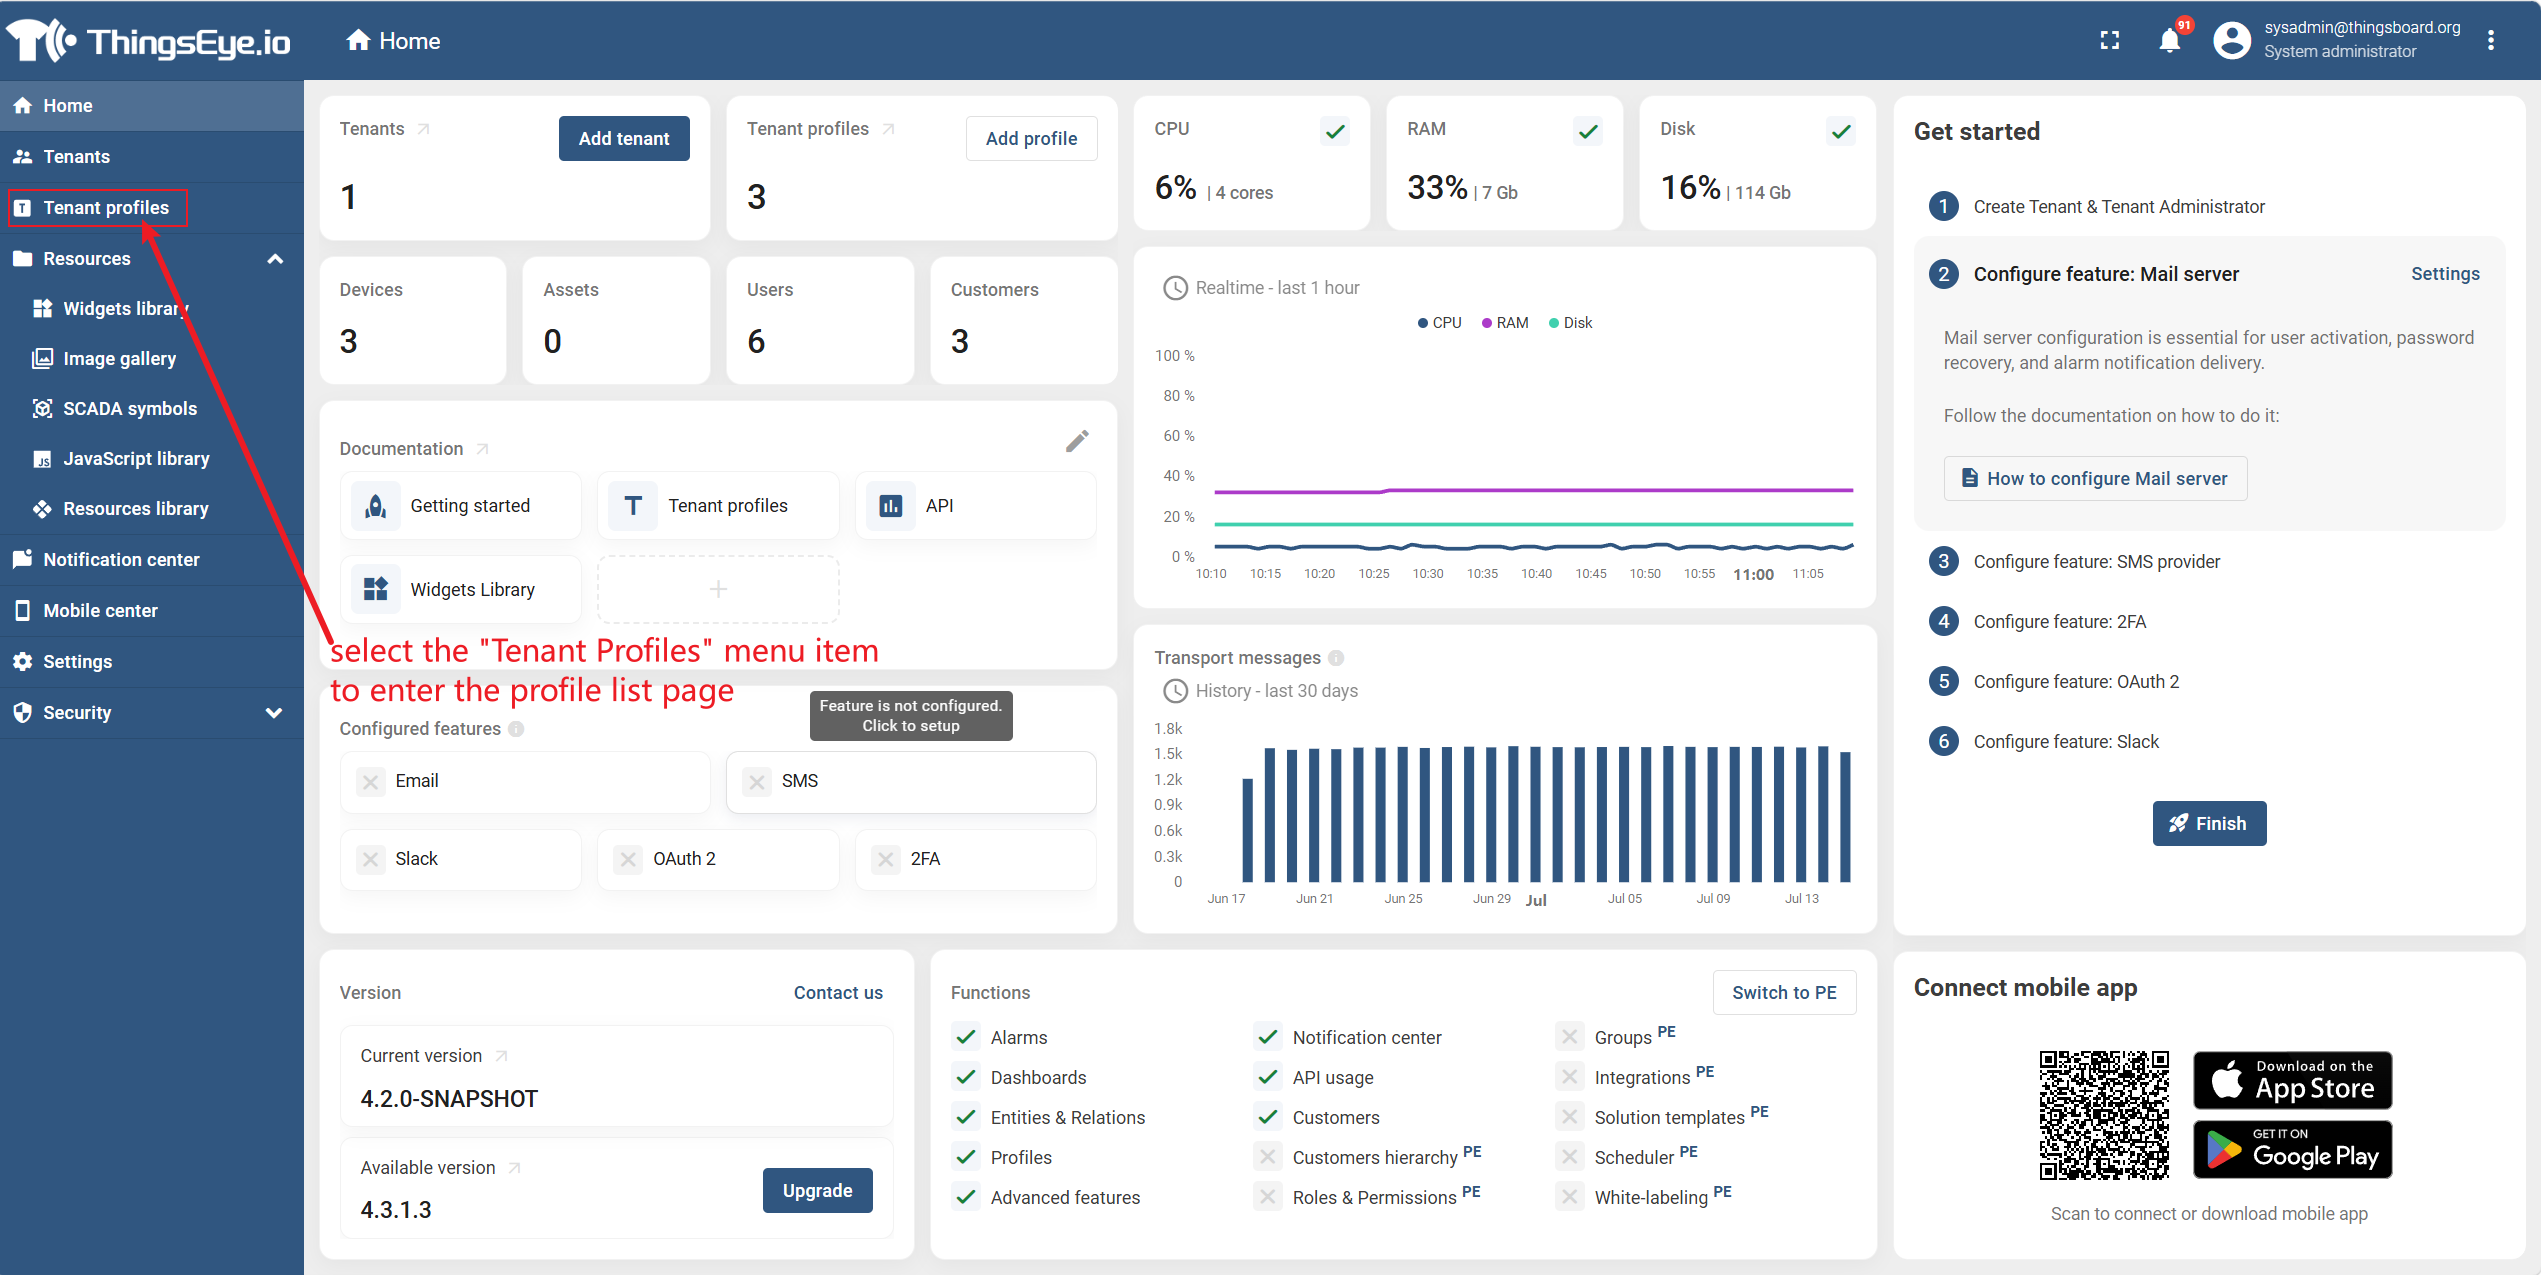
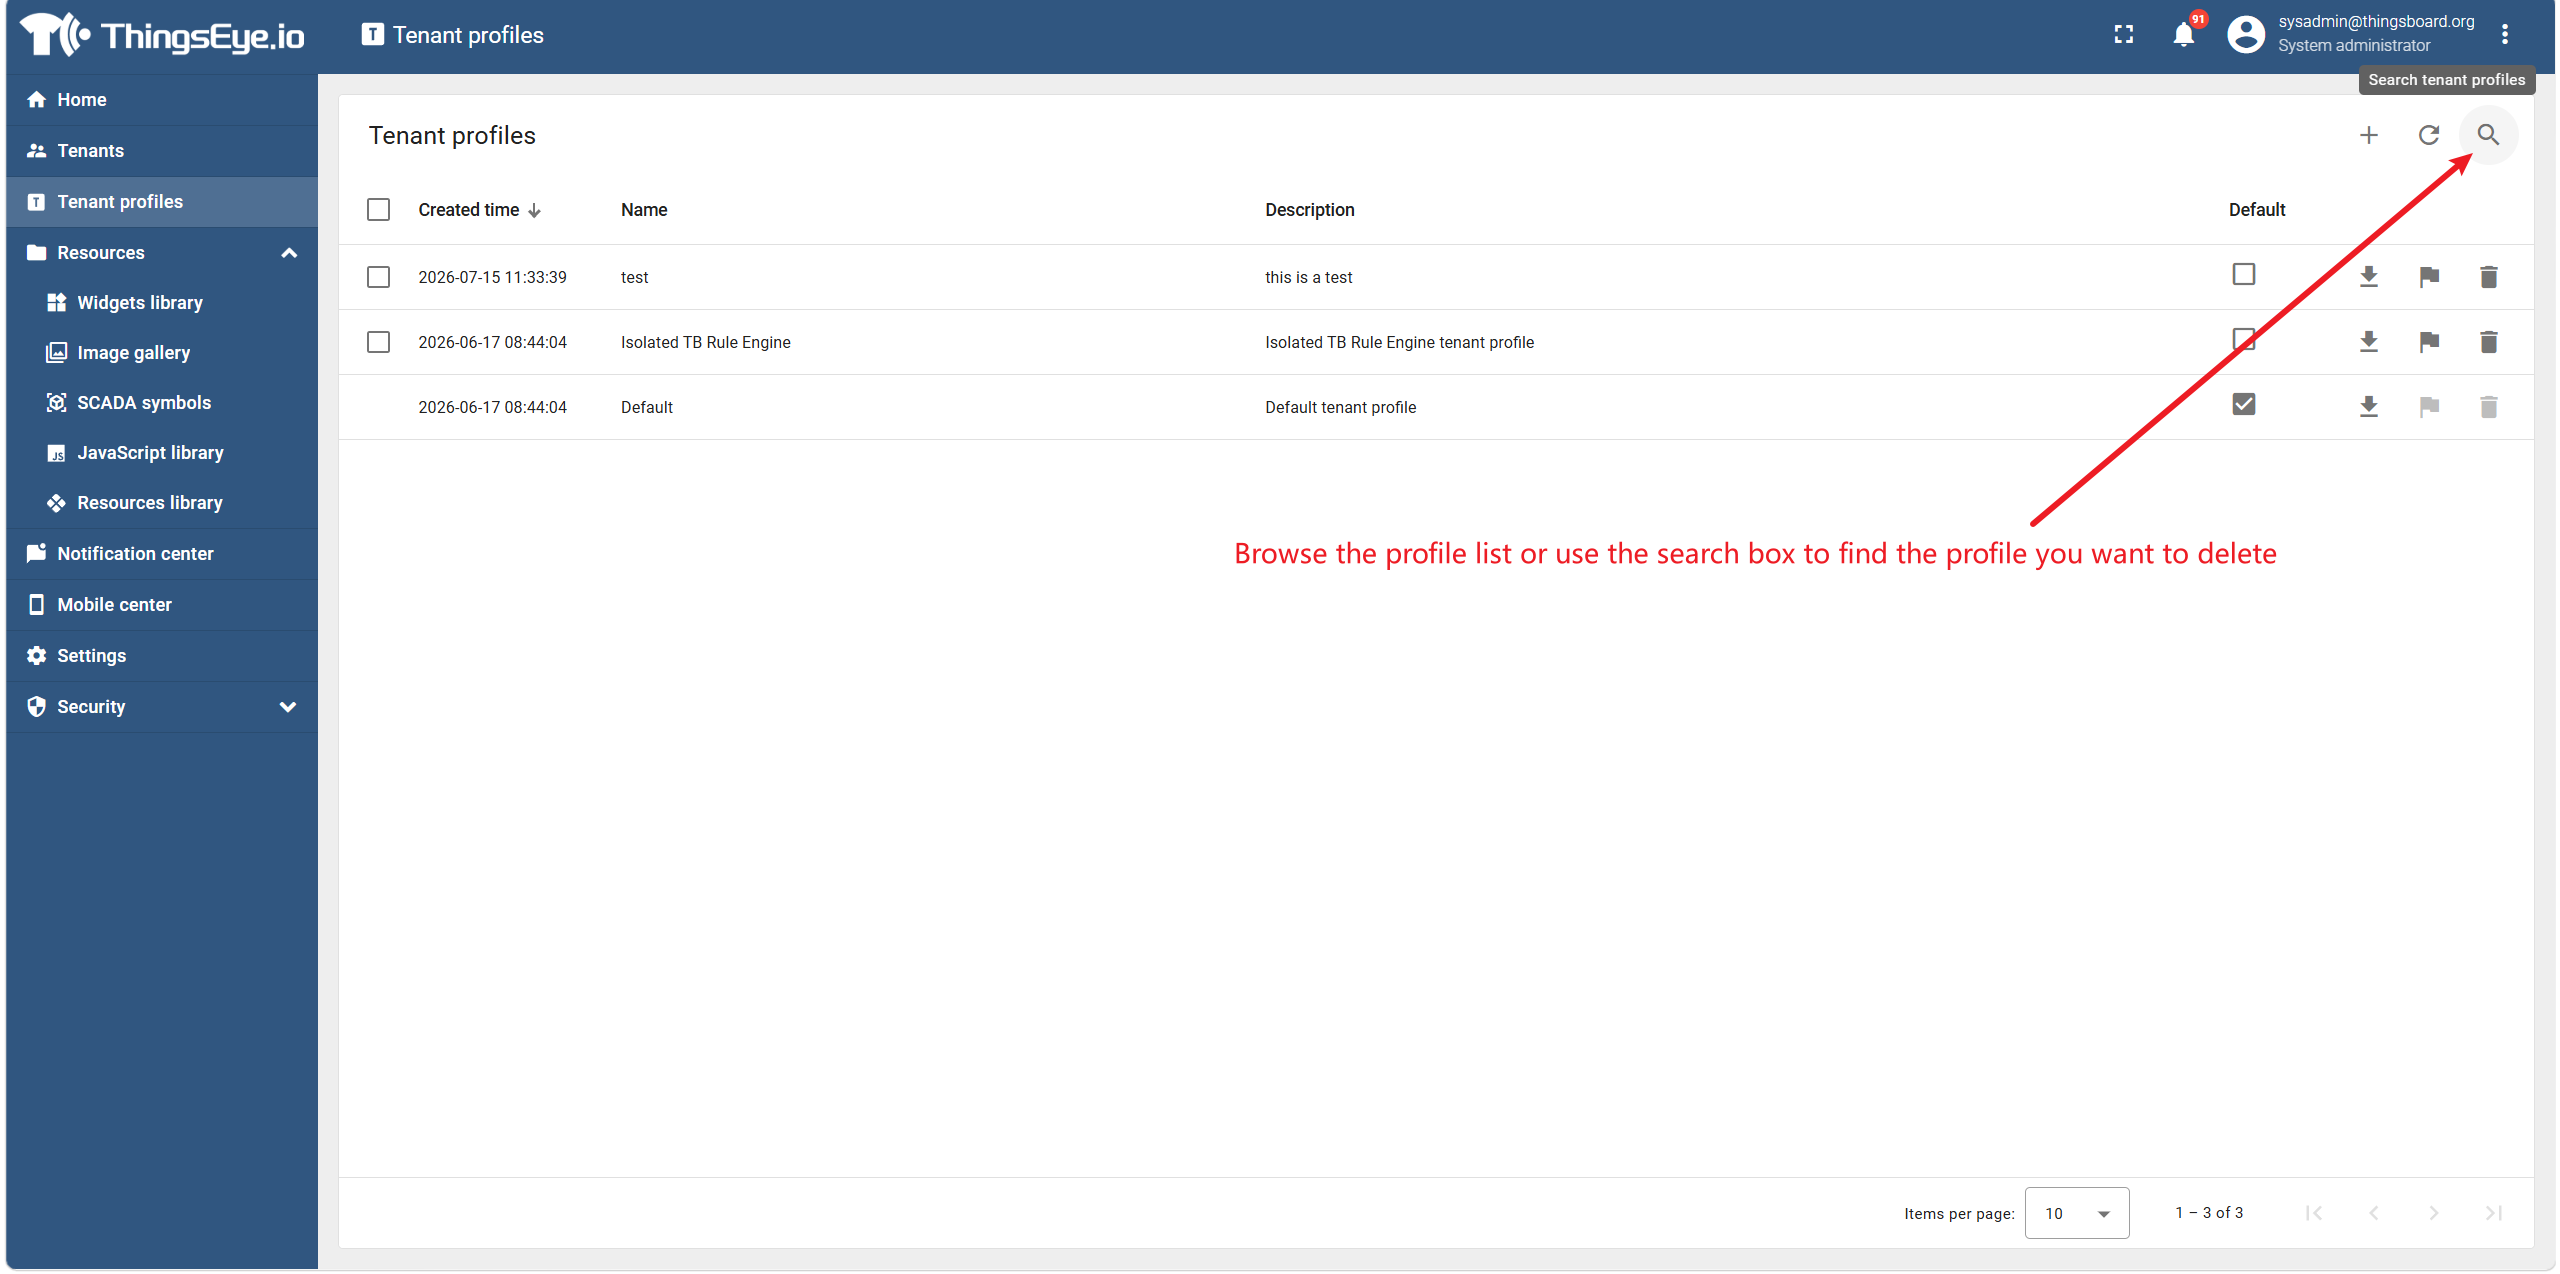
Step 2: Locate the target template
Browse the template list or use the search box to find the template you want to delete.
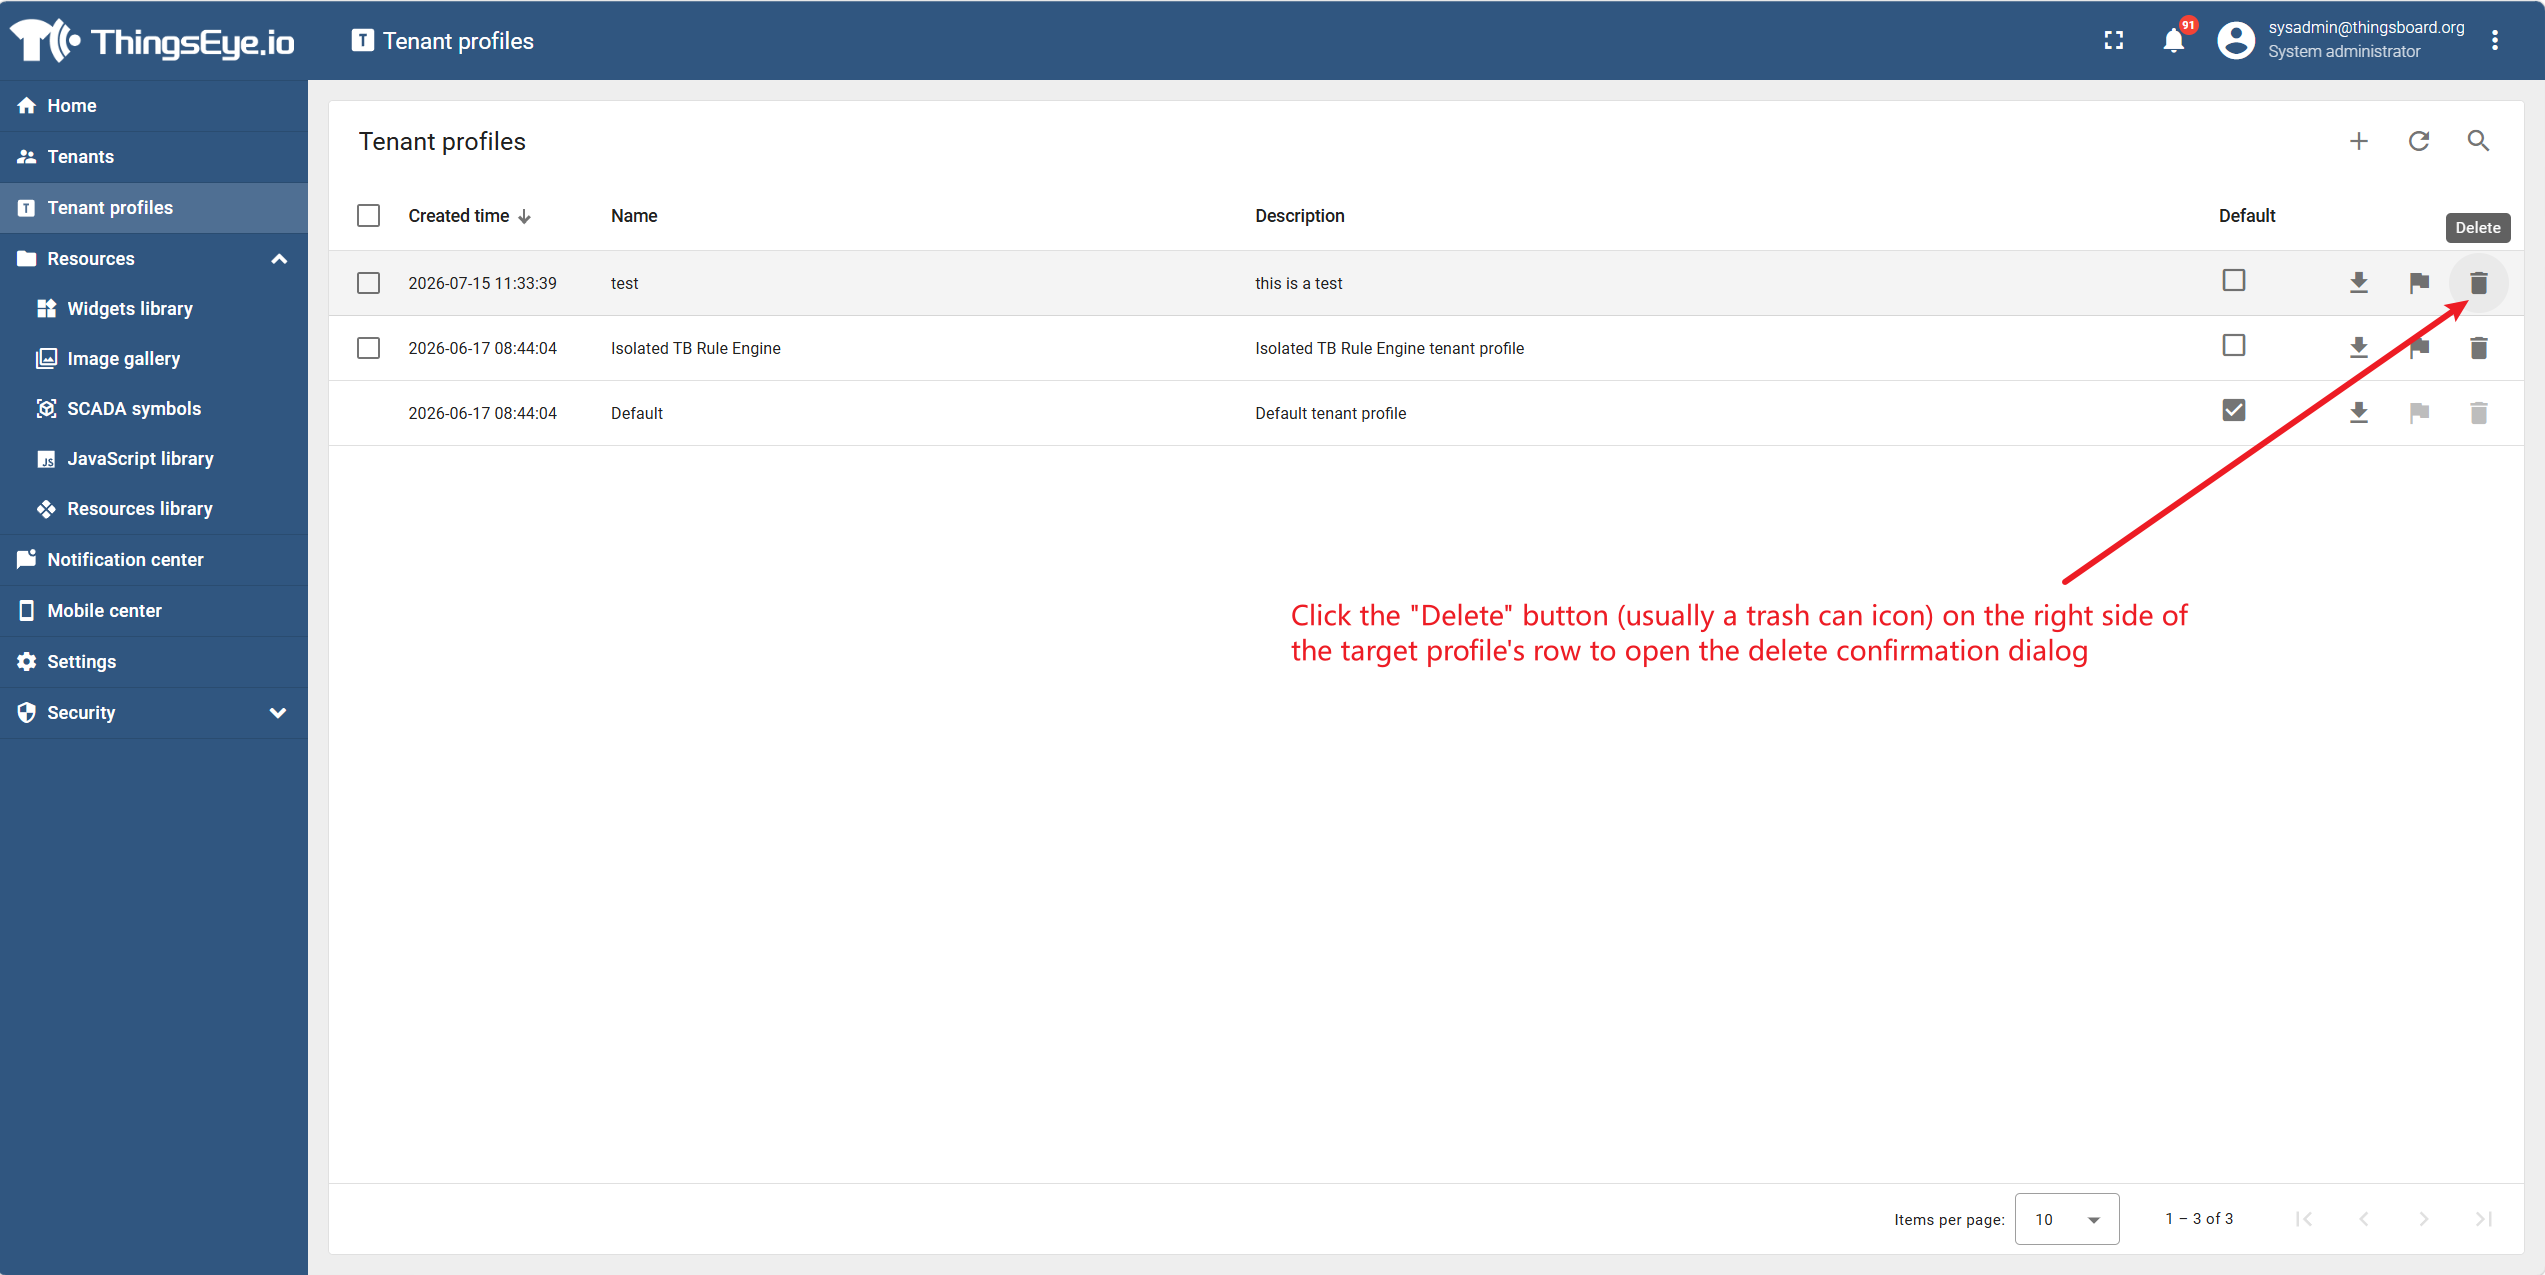
Step 3: Open the deletion confirmation dialog
Click the "Delete" button (usually a trash can icon) on the right side of the target template row to open the deletion confirmation dialog.
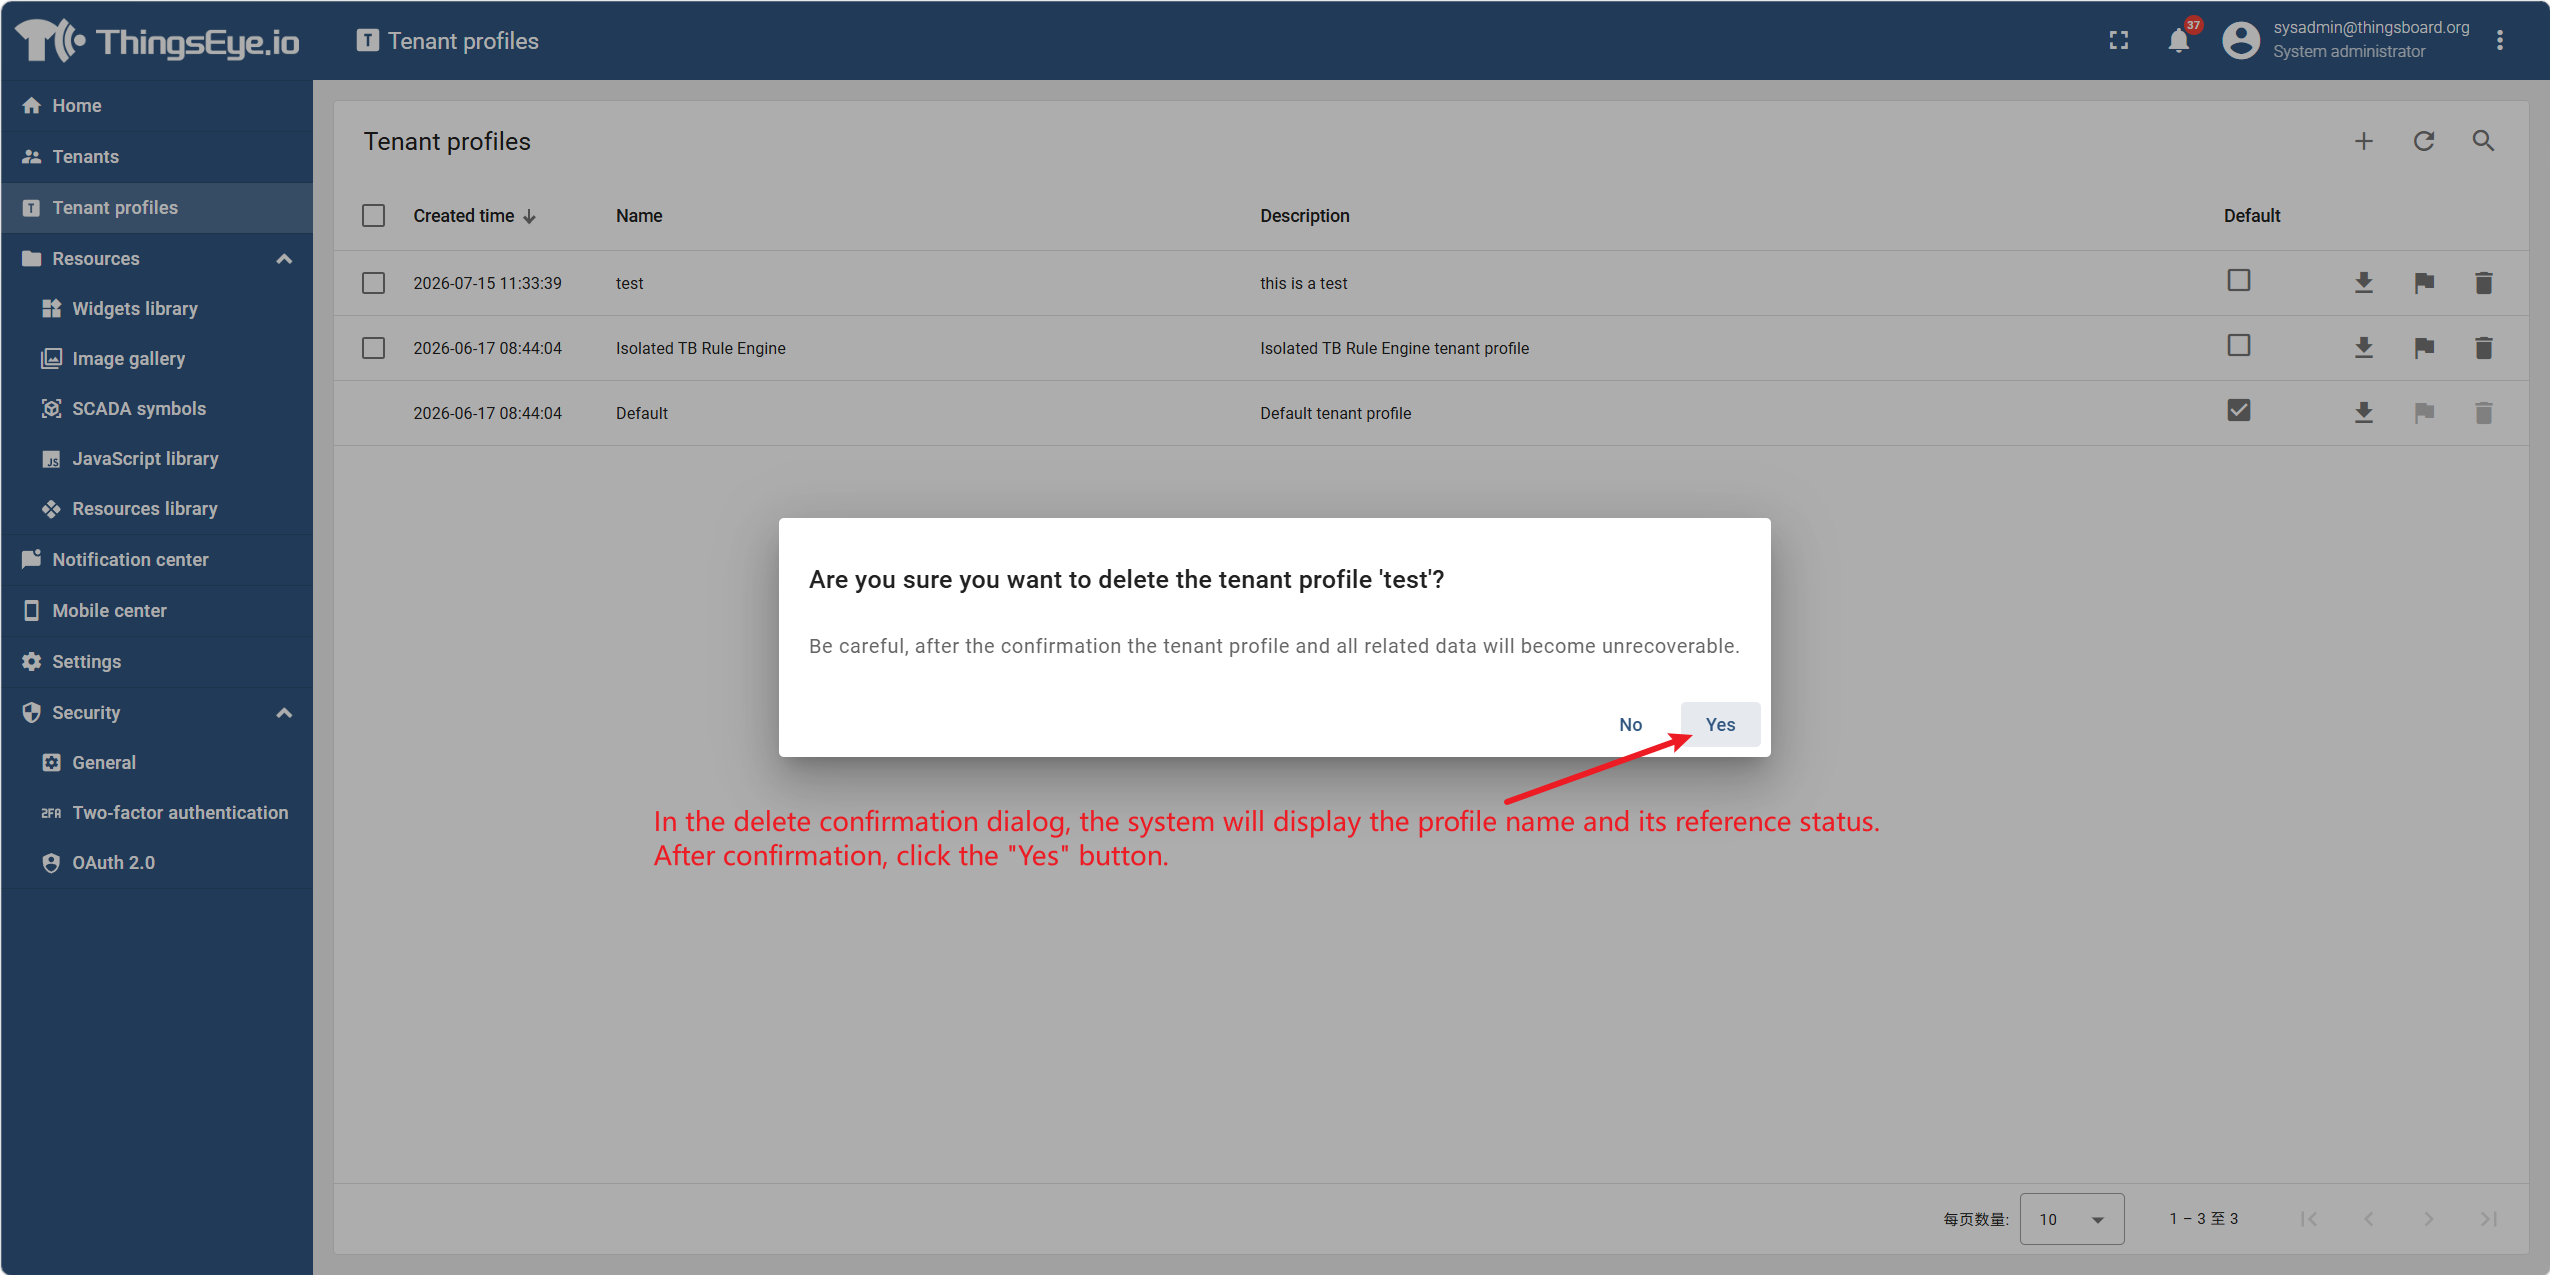
Step 4: Confirm the deletion
In the deletion confirmation dialog, the system will display the template name and its reference status. After confirming, click the "Yes" button.
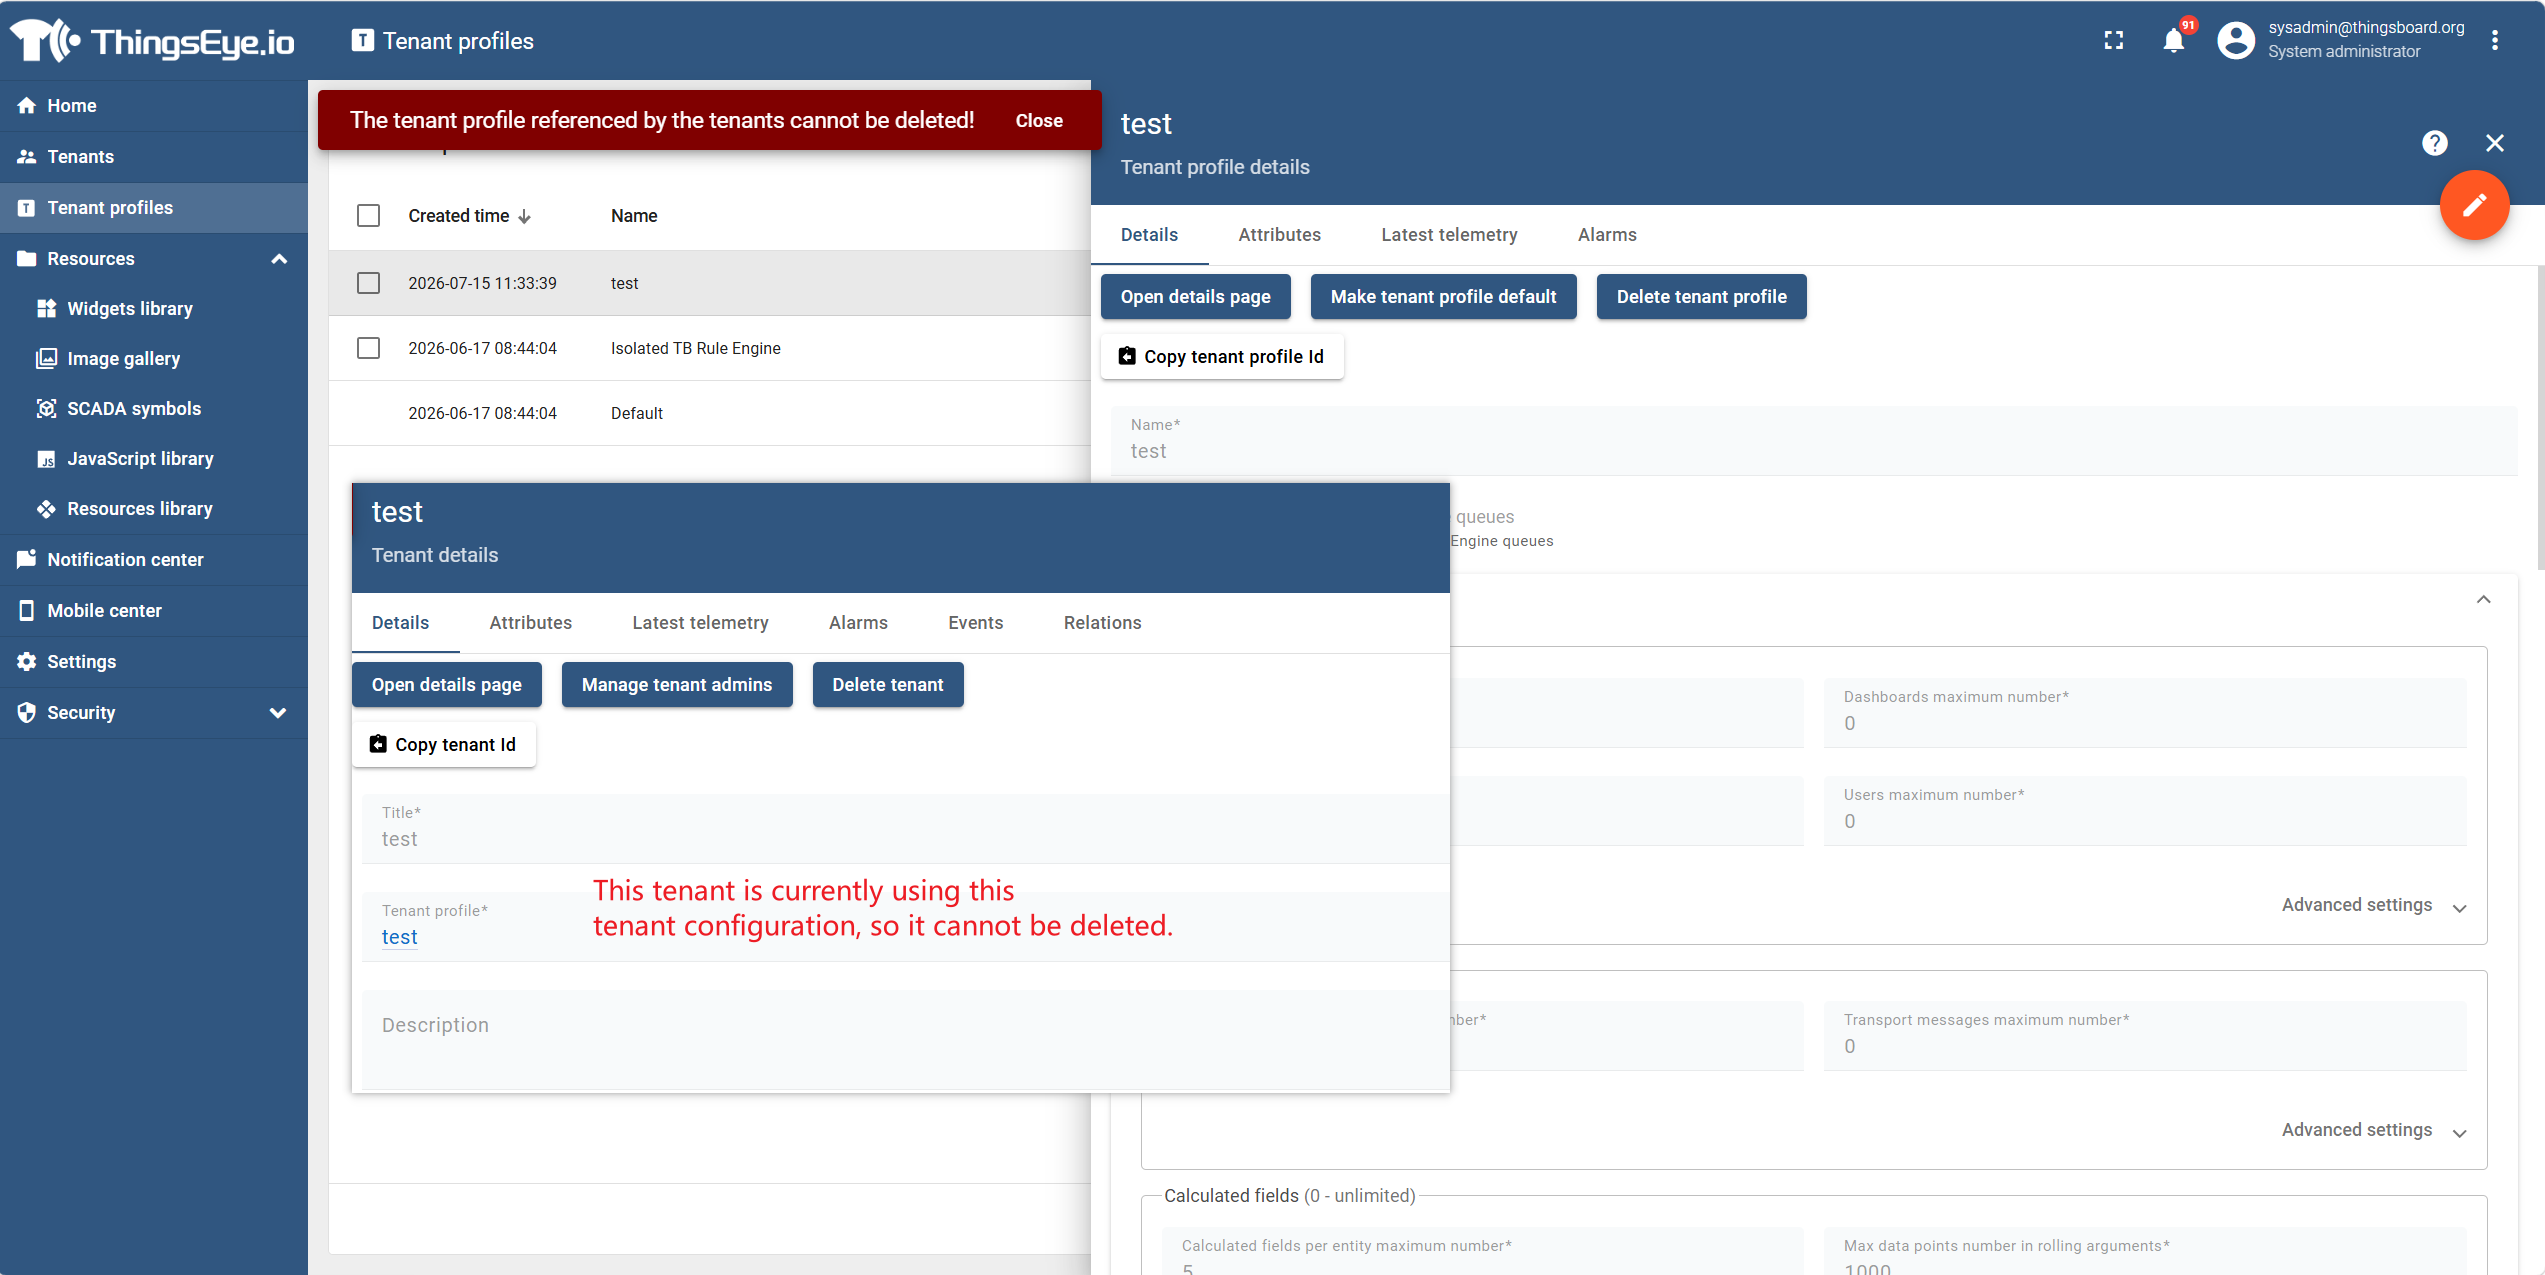
Reference Check
If the template is currently used by at least one tenant, the system will block the deletion and display the message: "This configuration template is referenced by tenants. Please change the configuration template of those tenants before deleting."
To continue with deletion, you must first edit each tenant that references this template and change its configuration template to another one (see "Tenant Management > 2. Edit Tenant"). The template can be deleted only after it is no longer referenced by any tenant.
Pre‑deletion Checklist
| Check Item | Status |
|---|---|
| Confirmed that the template no longer has any business requirements | ☐ |
| Confirmed that the template is not referenced by any tenant | ☐ |
| If referenced, all tenants that reference the template have been switched to other templates | ☐ |
Important Considerations
| Consideration | Description |
|---|---|
| Reference restriction | A template with existing references cannot be deleted; all references must be removed first. |
| System default template | The built‑in system default template (if any) may not be deletable, depending on the platform implementation. |
| Impact on tenants | Deleting a template does not affect the existing quotas of tenants that referenced it, but those tenants will no longer be able to reference the deleted template when editing (they must choose another template). |
| Audit retention | The deletion operation will be recorded in the audit log. |