Dragino GE Version NB Device Quick Configuration Guide
1. Configure a General NB-IoT Device to Connect to the Network (Skip This Section for 1T Devices)
To connect an NB-IoT sensor to the network:
- Obtain an NB-IoT SIM card from your service provider. A standard mobile-phone SIM card may not support NB-IoT.
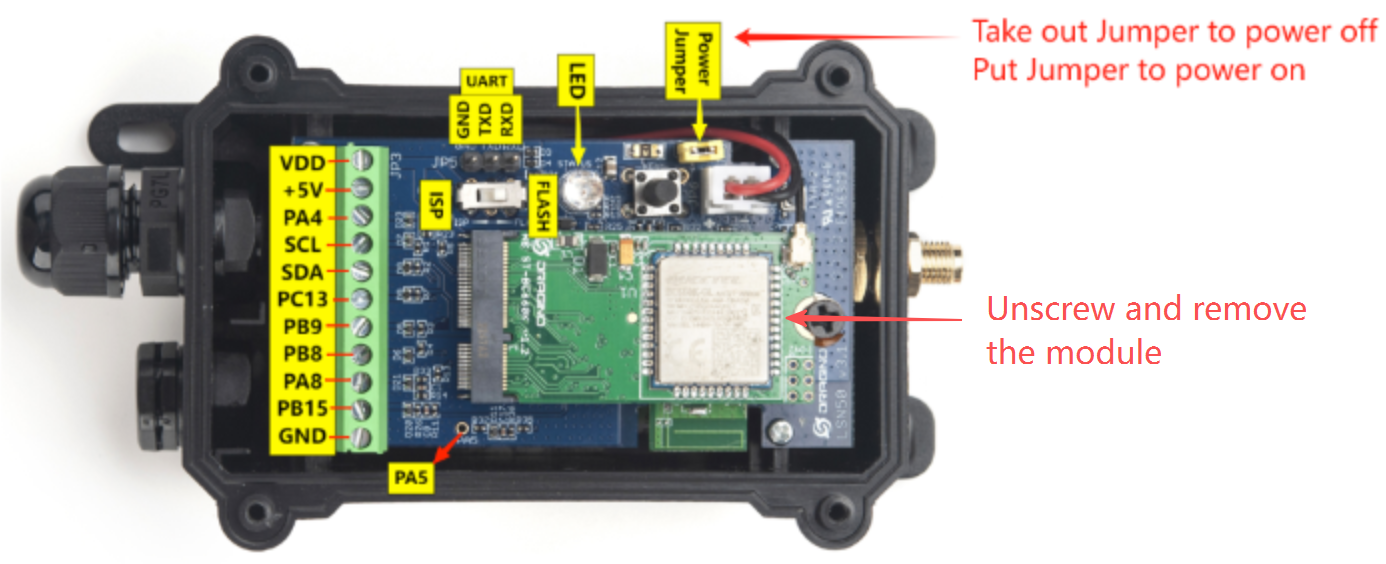
- Open the cover and power off the end node by removing the jumper.
- Unscrew and remove the module.
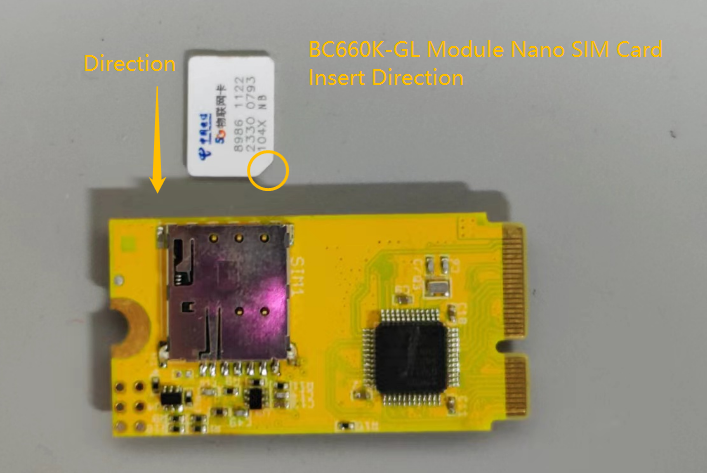
- Insert the SIM card into the sensor in the direction shown below.
- Reinstall the module and tighten the screws. Then power on the end node by reinstalling the jumper.
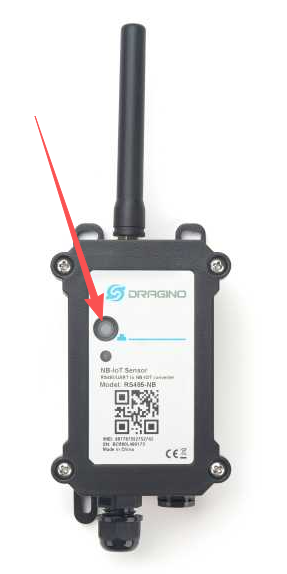
- Close the cover, then press and hold the push button for 5 seconds to restart the device.
2. Configure the Device with the Mobile App
2.1 Download the App
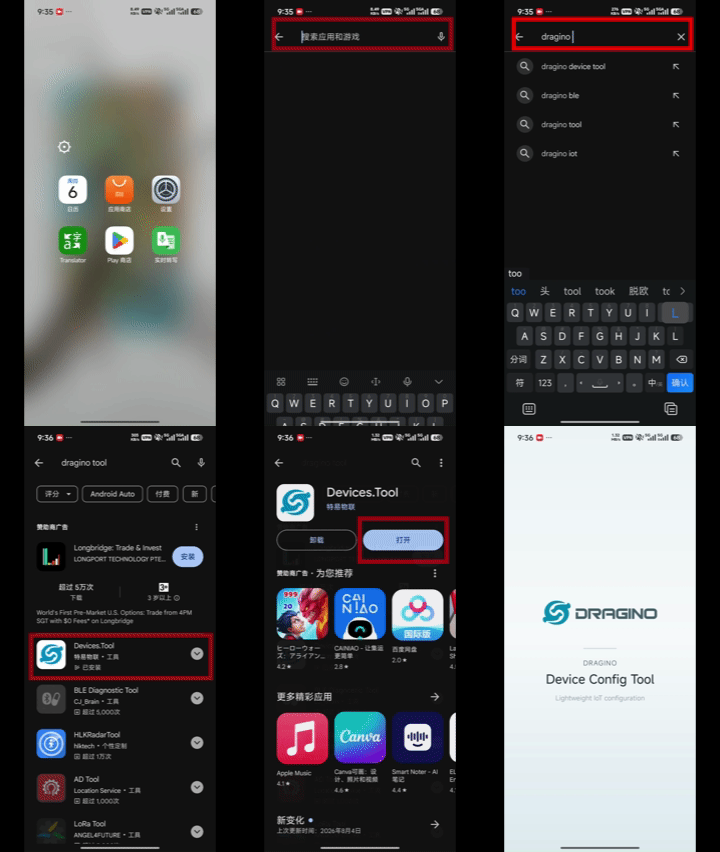
Download the app from Google Play or the App Store.
Open Google Play or the App Store, search for Devices.Tool, and install it. If you cannot find it, search for Dragino instead.
2.2 Use BLE to Configure the Sensor
Video instructions: Use BLE to Configure Sensors
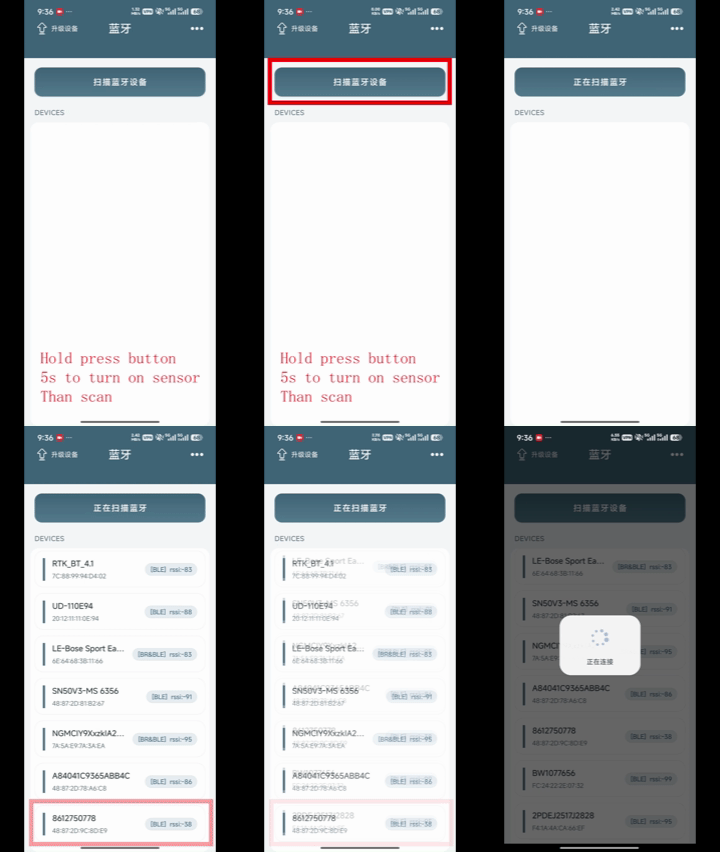
Install and open the app. Press the reset button on the device, then tap SCAN BLUETOOTH DEVICES. Find and connect to the device whose Bluetooth name matches its DevEUI.
Enter the six-digit AT PIN printed inside the packaging box, and then tap Send. Tap DIALOGBOX
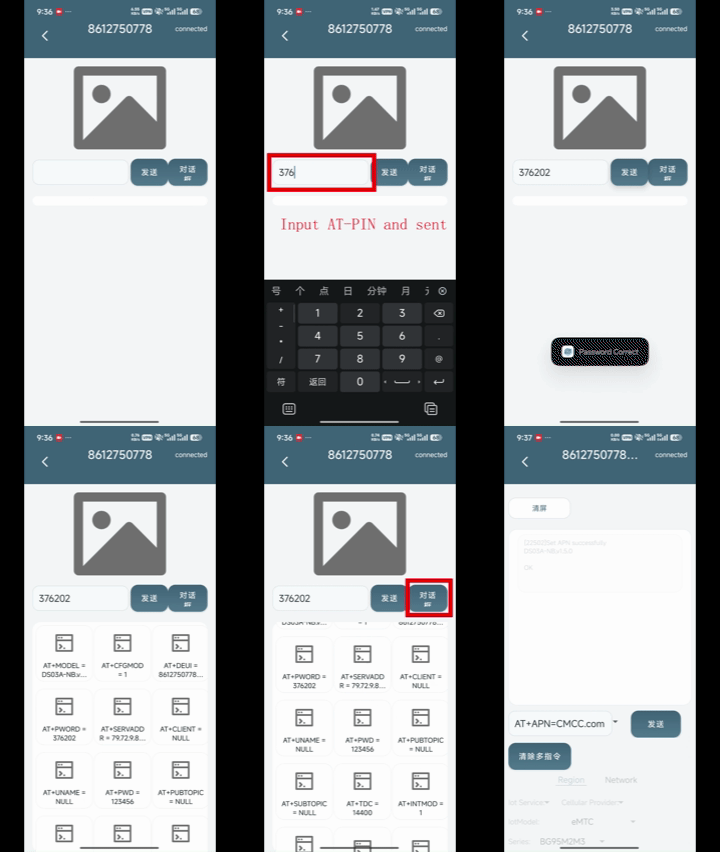
Note: Devices.Tool can send commands without line breaks and supports sending multiple AT commands at once. It also saves each command automatically. Tap a command in the history to load it into the input box.
2.3 Configure the APN, Server Address, and Data Format
Note: Quick Configuration is not available in the iOS version of the app. Enter each complete AT command manually.
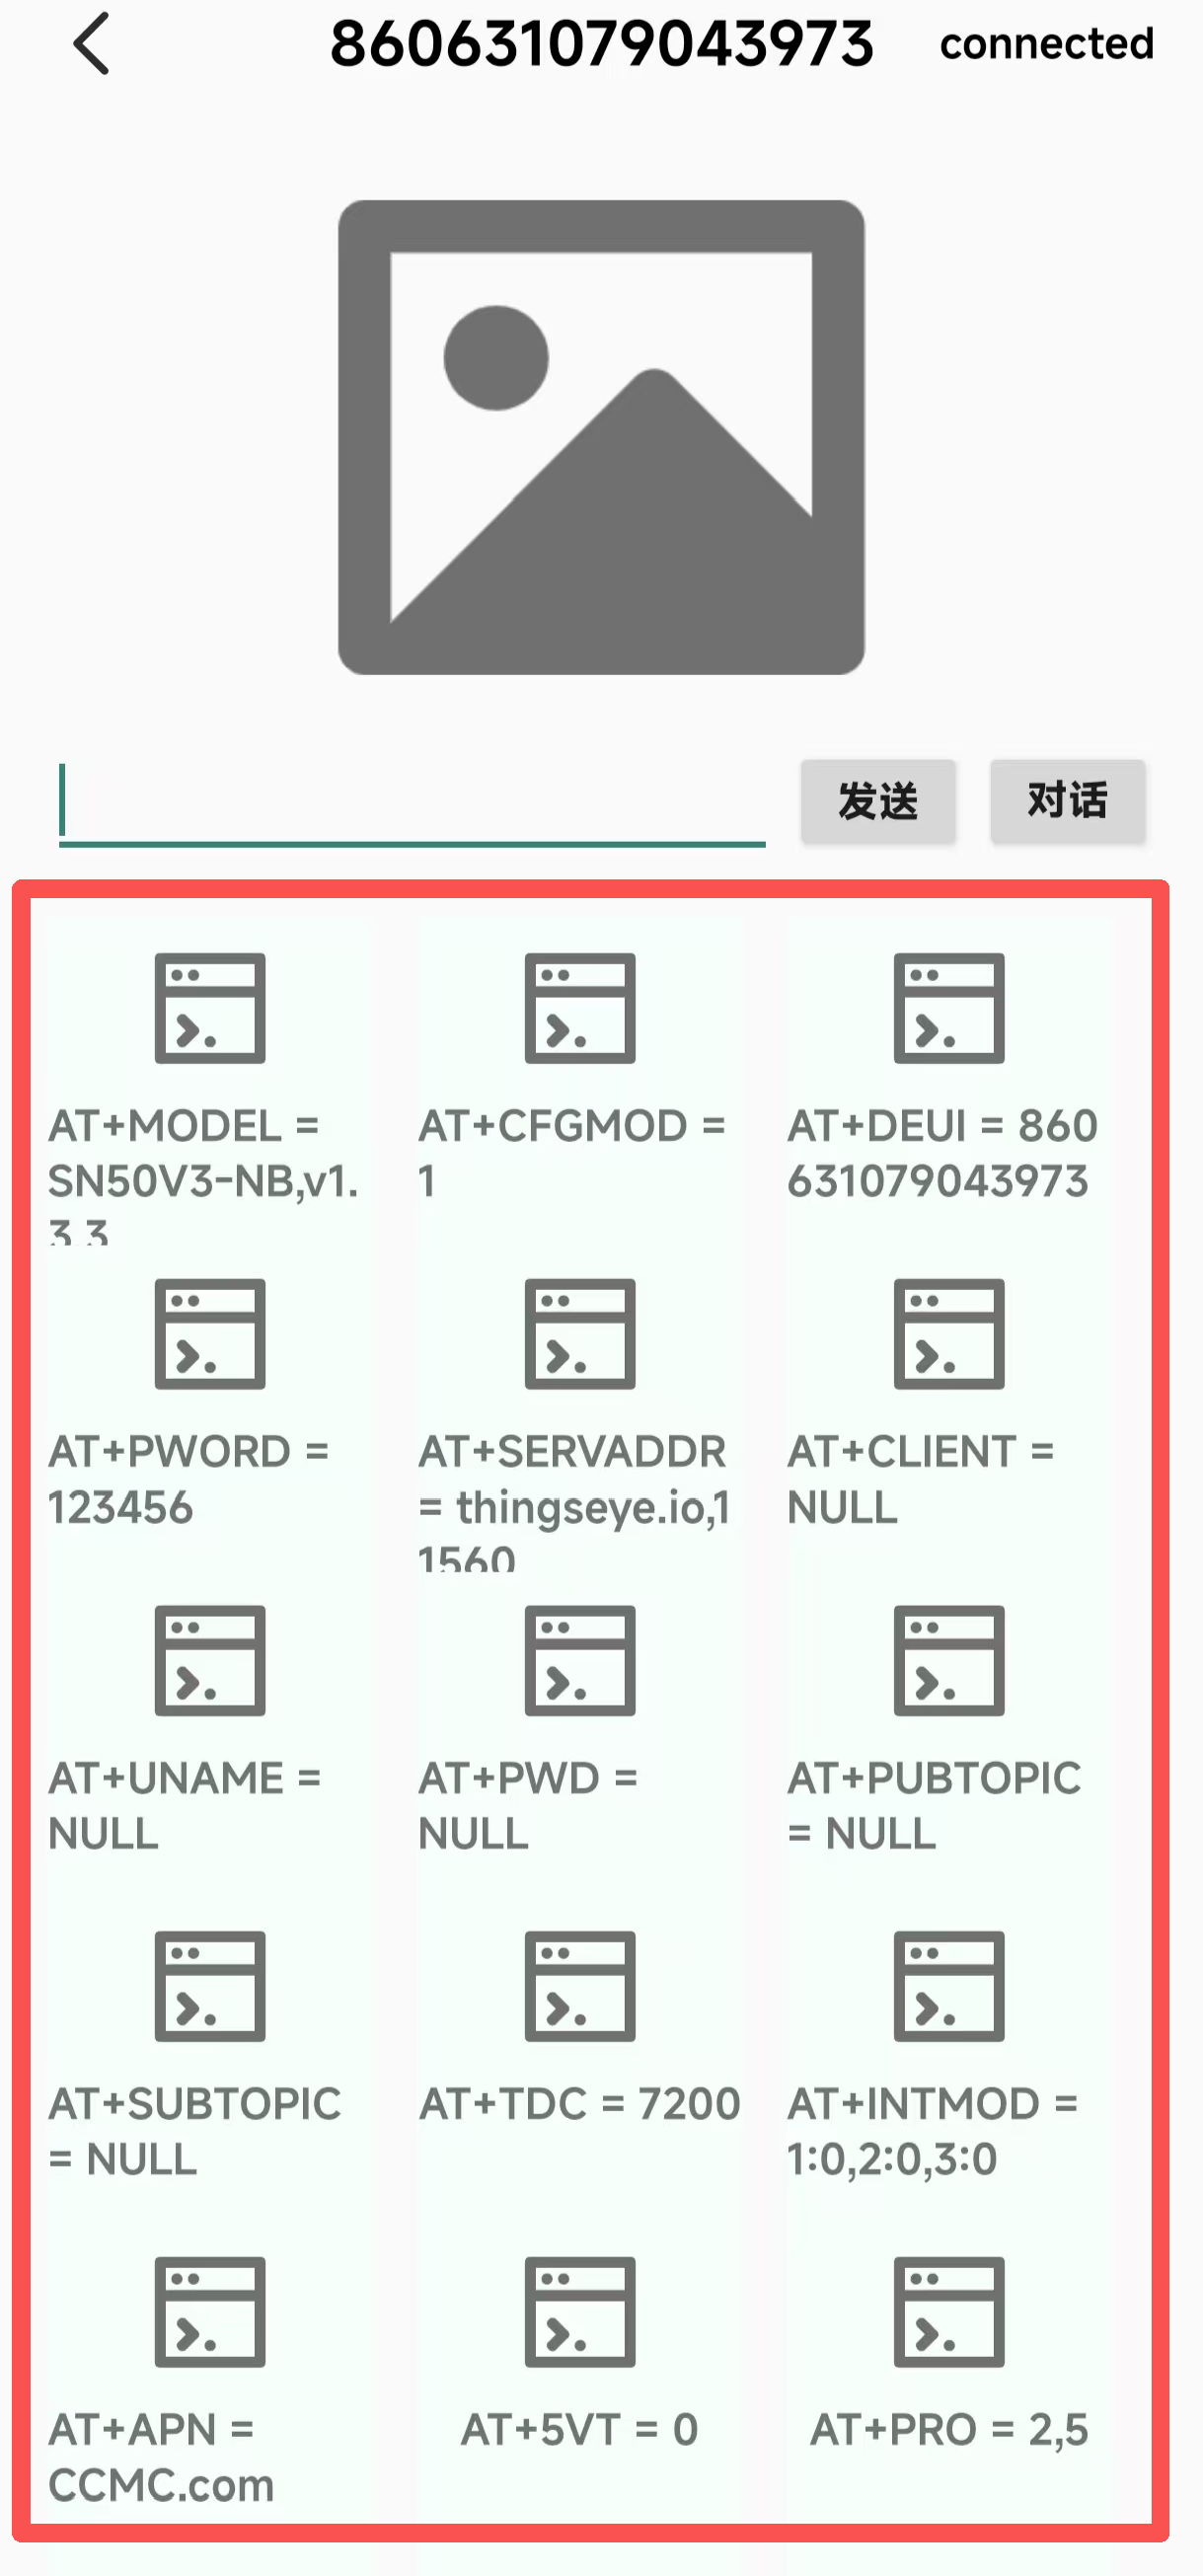
1) Configure the SIM Card APN
If you are using a Dragino-supplied 1NCE SIM card, enter:
AT+APN=iot.1nce.net
If you are using another SIM card, obtain the correct APN from your network operator.
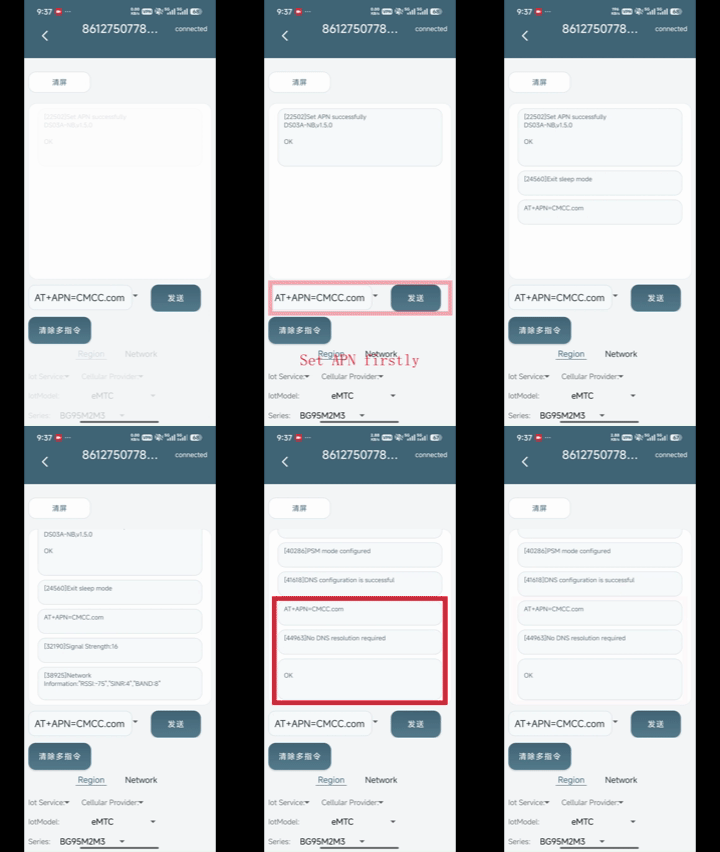
2) Configure the Server Address
To send data to ThingsEye, enter:
AT+SERVADDR=server1.thingseye.io,11560
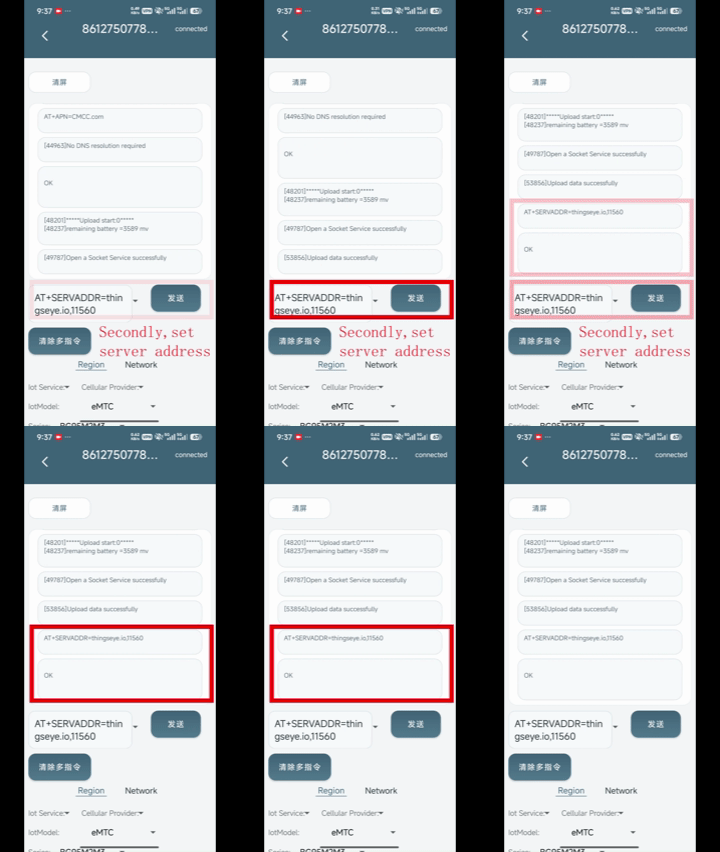
3) Configure the Data Sending Format
Enter:
AT+PRO=2,5
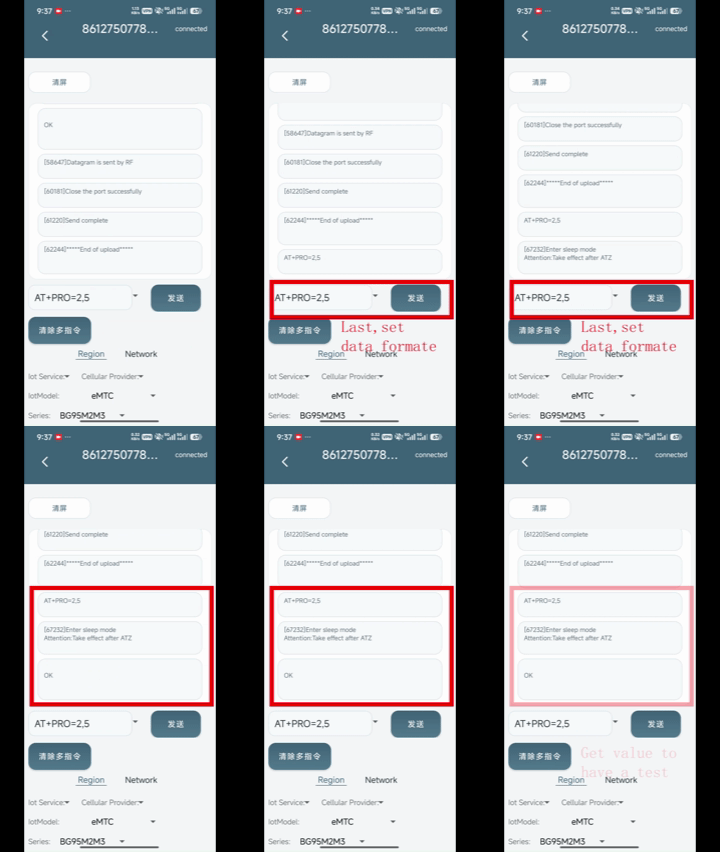
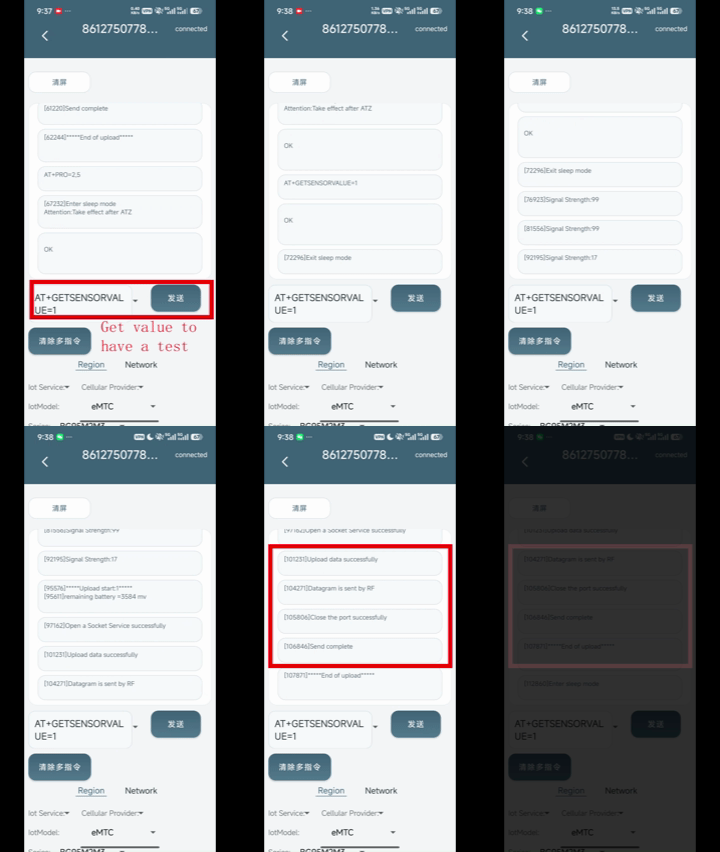
4) Verify Device Connectivity
Send the following command to verify the connection:
AT+GETSENSORVALUE=1
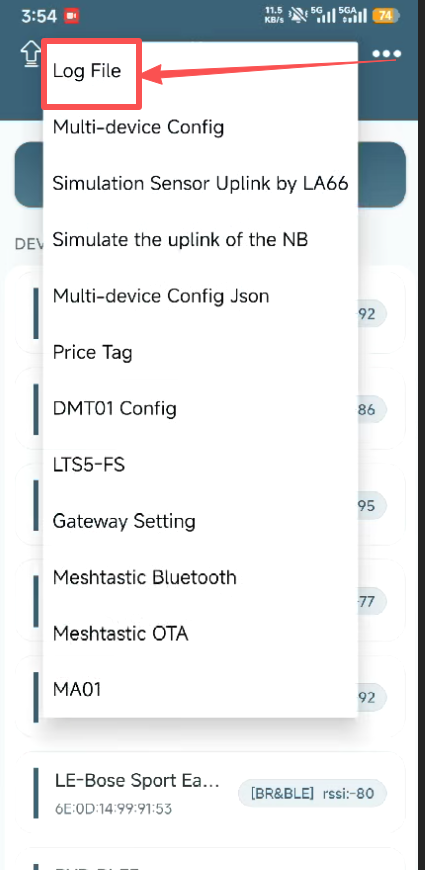
If the device returns Failed, save the complete log and email it to support@dragino.cc for assistance.
3. Visualize Data in ThingsEye
The following steps assume that you already have a ThingsEye (TE) account.
Log in to ThingsEye: https://thingseye.io/
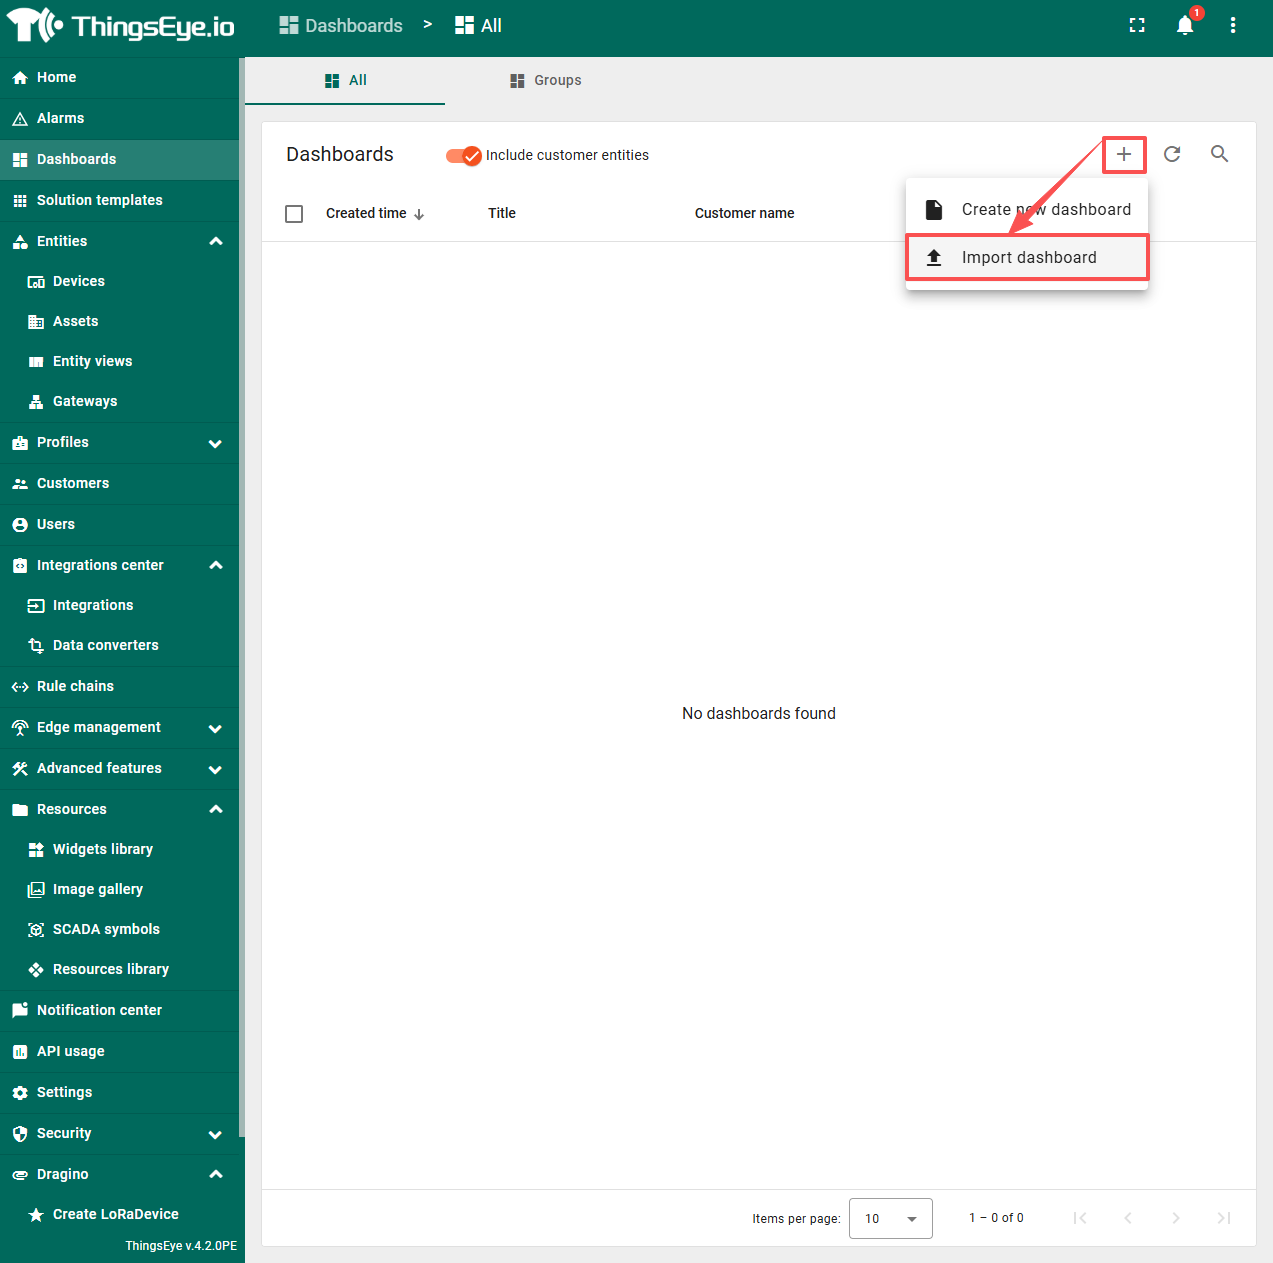
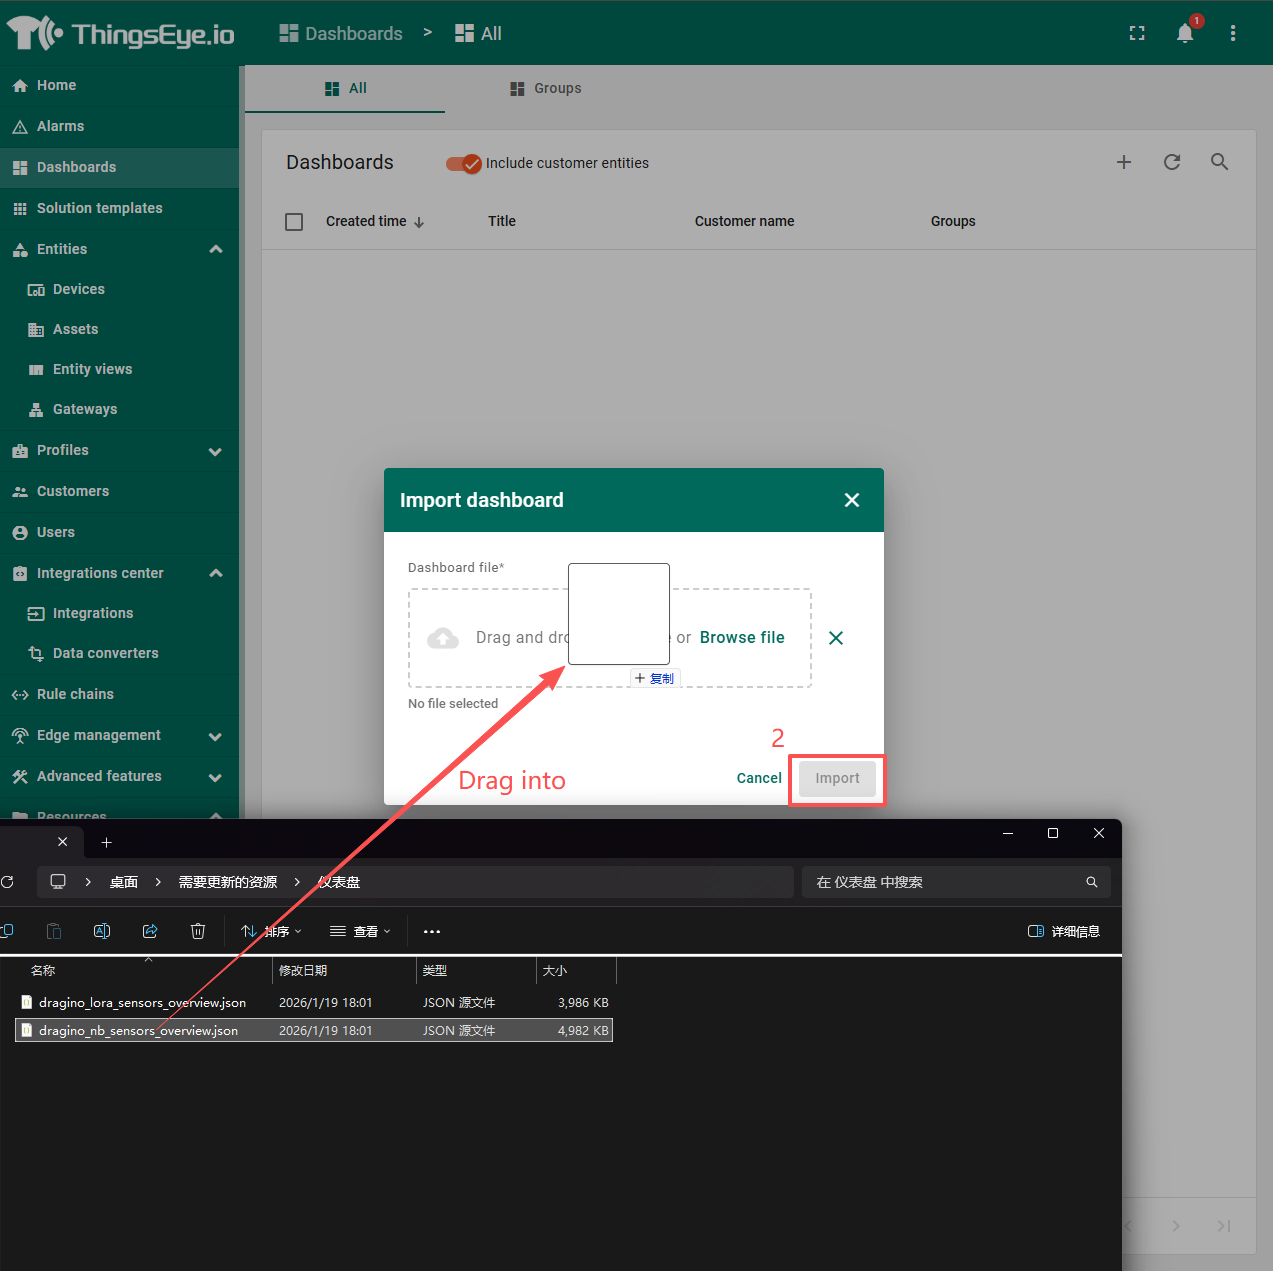
Download the dashboard template: dragino_nb_sensors_overview.json
Import the downloaded dashboard.
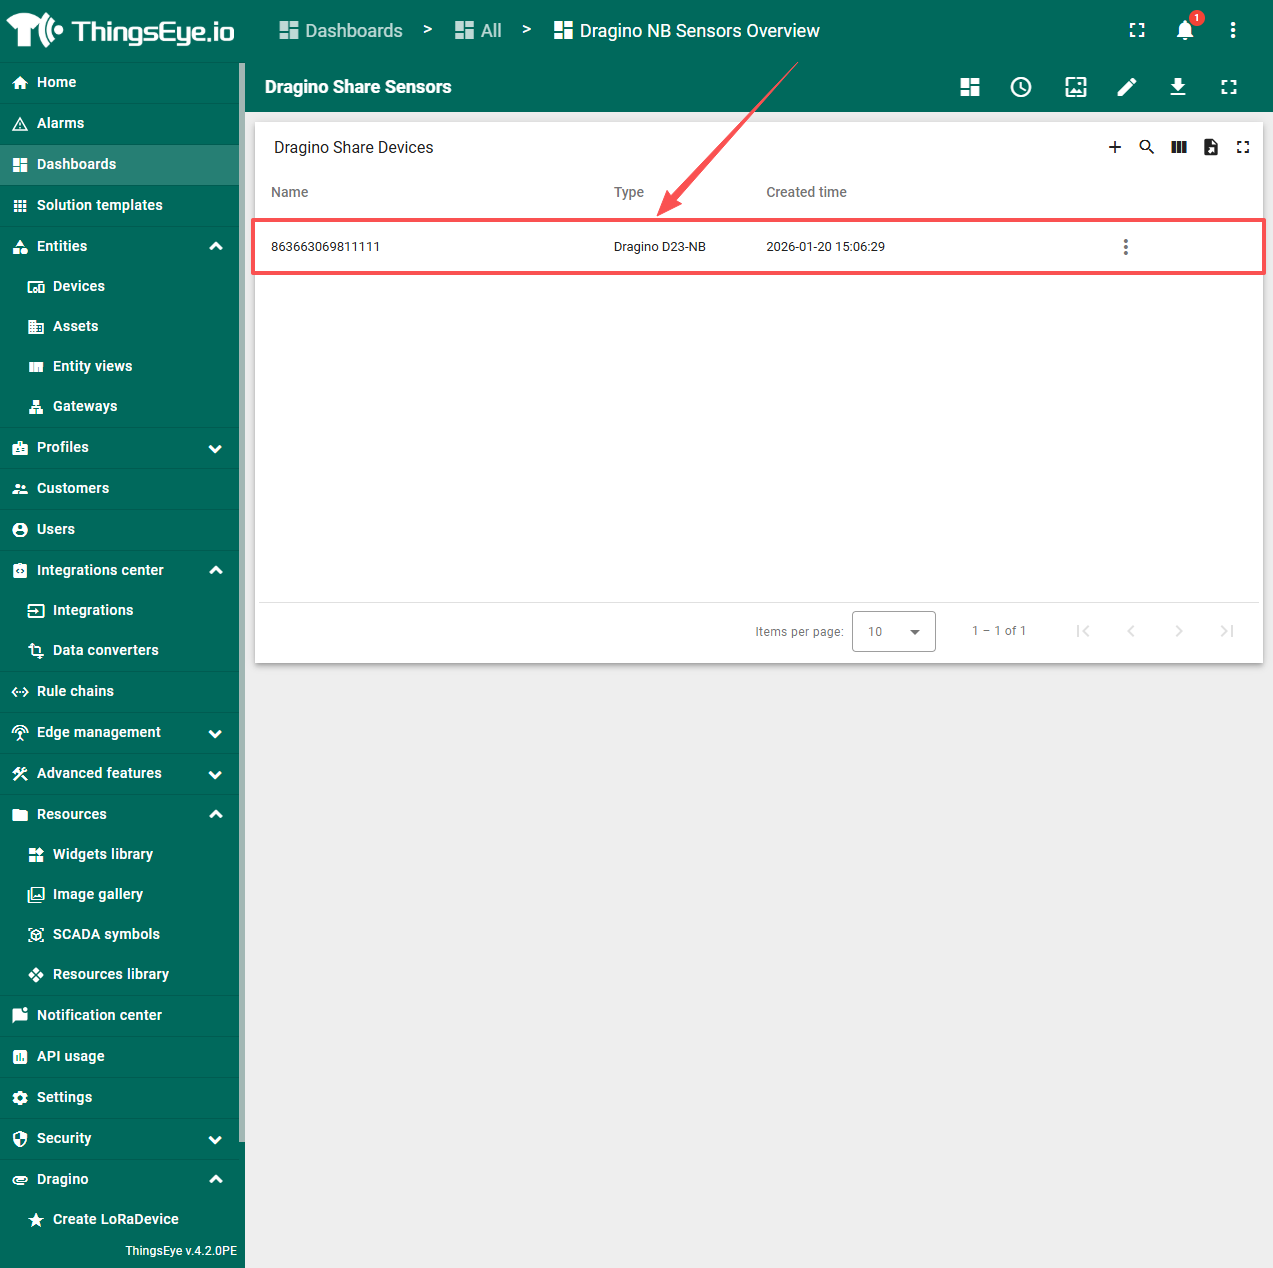
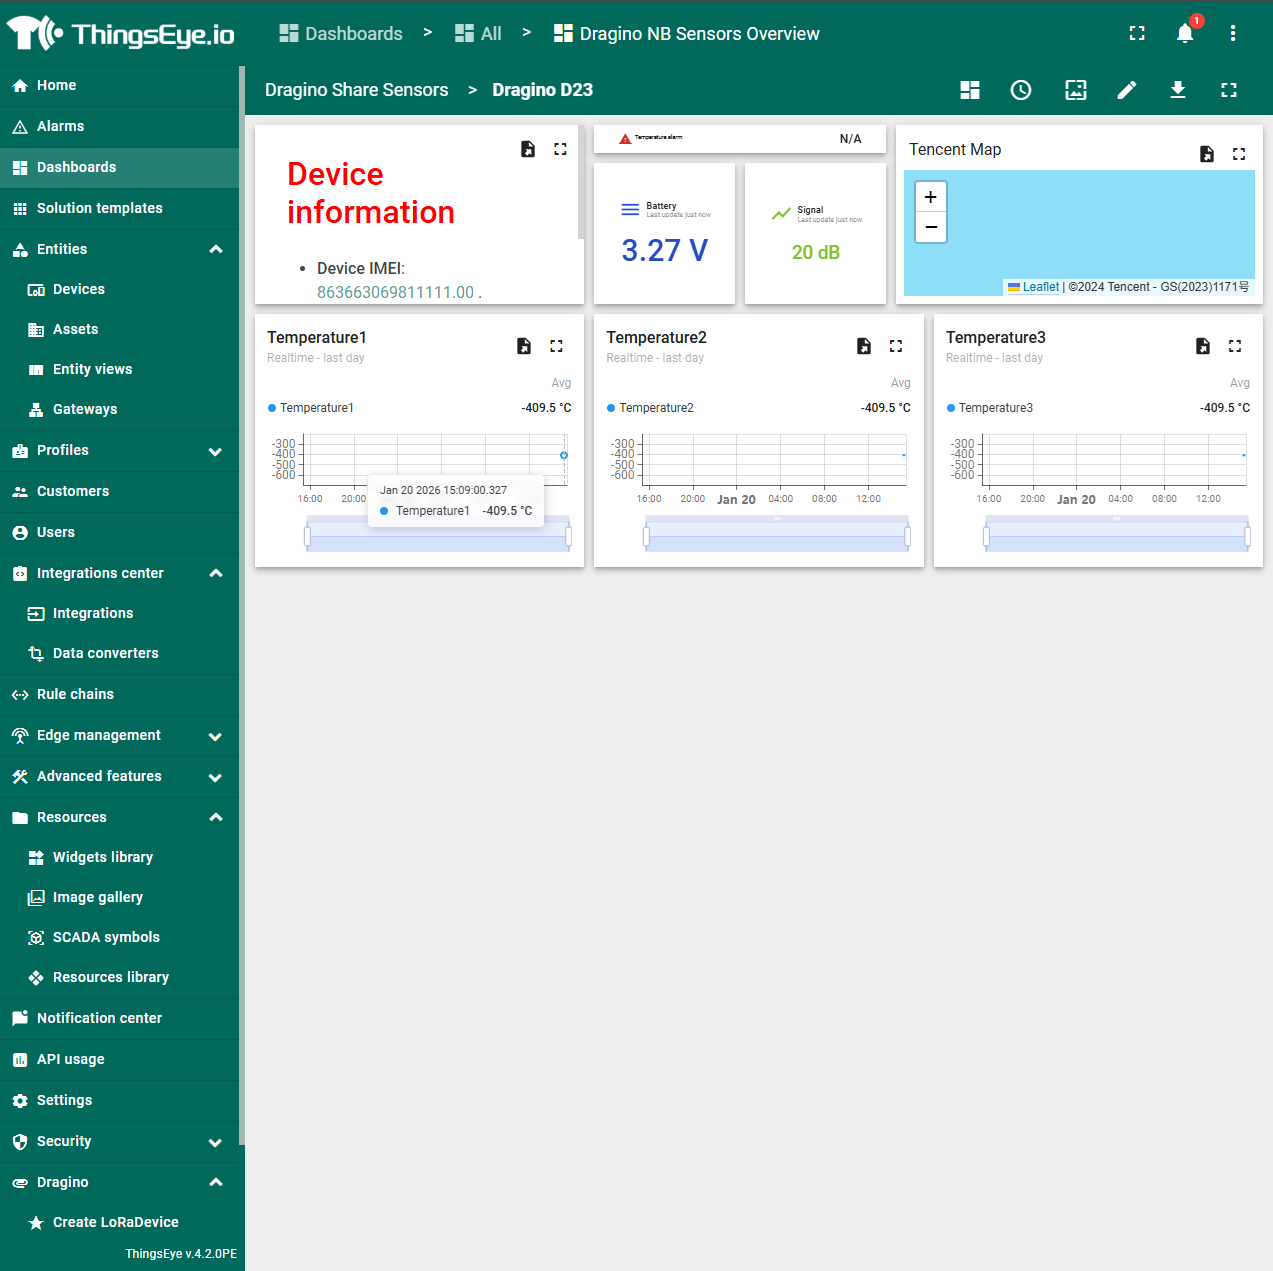
Open the dashboard and select a device.