Dragino Gateway & LoRaWAN Device Quick Configuration Guide
Overview
This page is migrated from the old guide How to register gateway to server. It covers local gateway setup, server configuration, ThingsEye registration, and basic dashboard import.
Before you begin
- Make sure the gateway is powered on
- Make sure the gateway frequency band matches the end devices you plan to use
- ThingsEye only receives uplinks after both the gateway and end devices are registered
- If you do not have a platform account yet, read ThingsEye Account
Step 1: Connect to gateway Wi-Fi
When the gateway starts for the first time, it creates a Wi-Fi network named dragino-xxxxxx.
- Wi-Fi name:
dragino-xxxxx - Password:
dragino+dragino
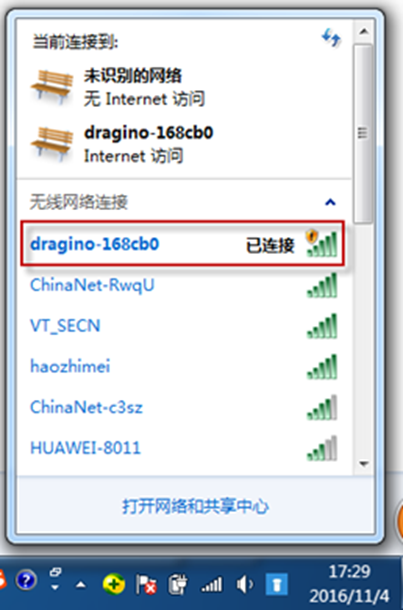
Step 2: Open the gateway management page
After connecting to the gateway Wi-Fi, open the local management page in a browser.
- Address:
http://10.130.1.1/ - Username:
root - Password:
dragino
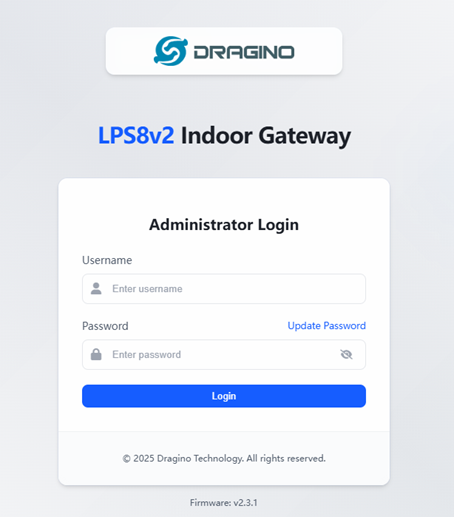
Step 3: Configure network access
If the gateway uses Wi-Fi uplink, complete the Wi-Fi configuration in the gateway management page.
The old guide reminds you to click Save after each configuration change.
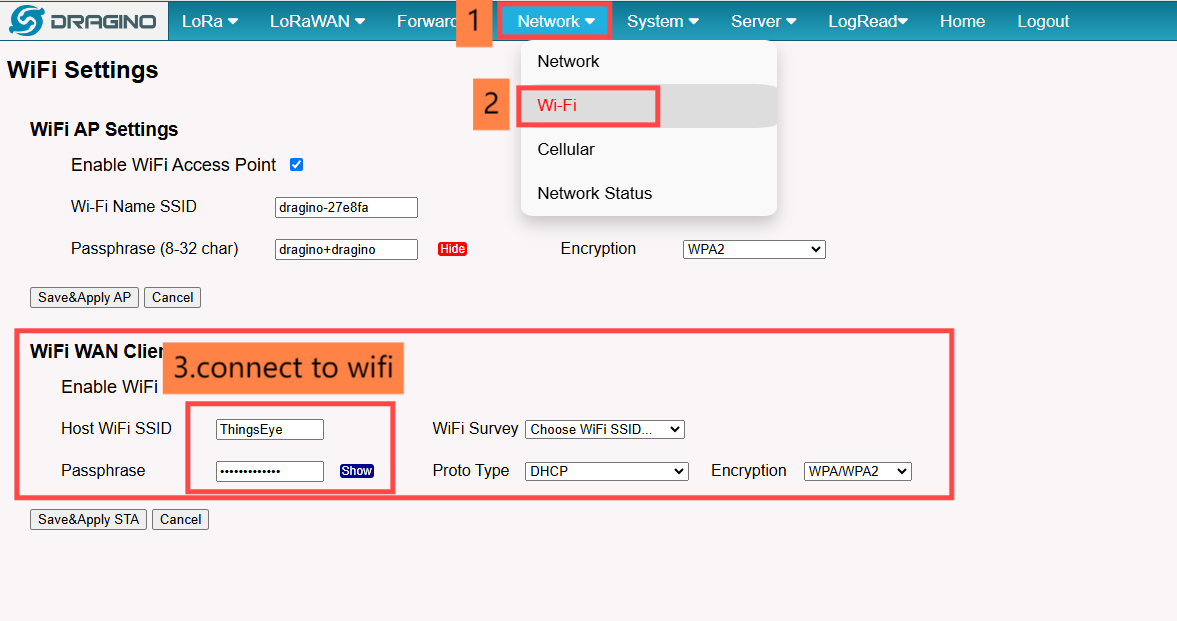
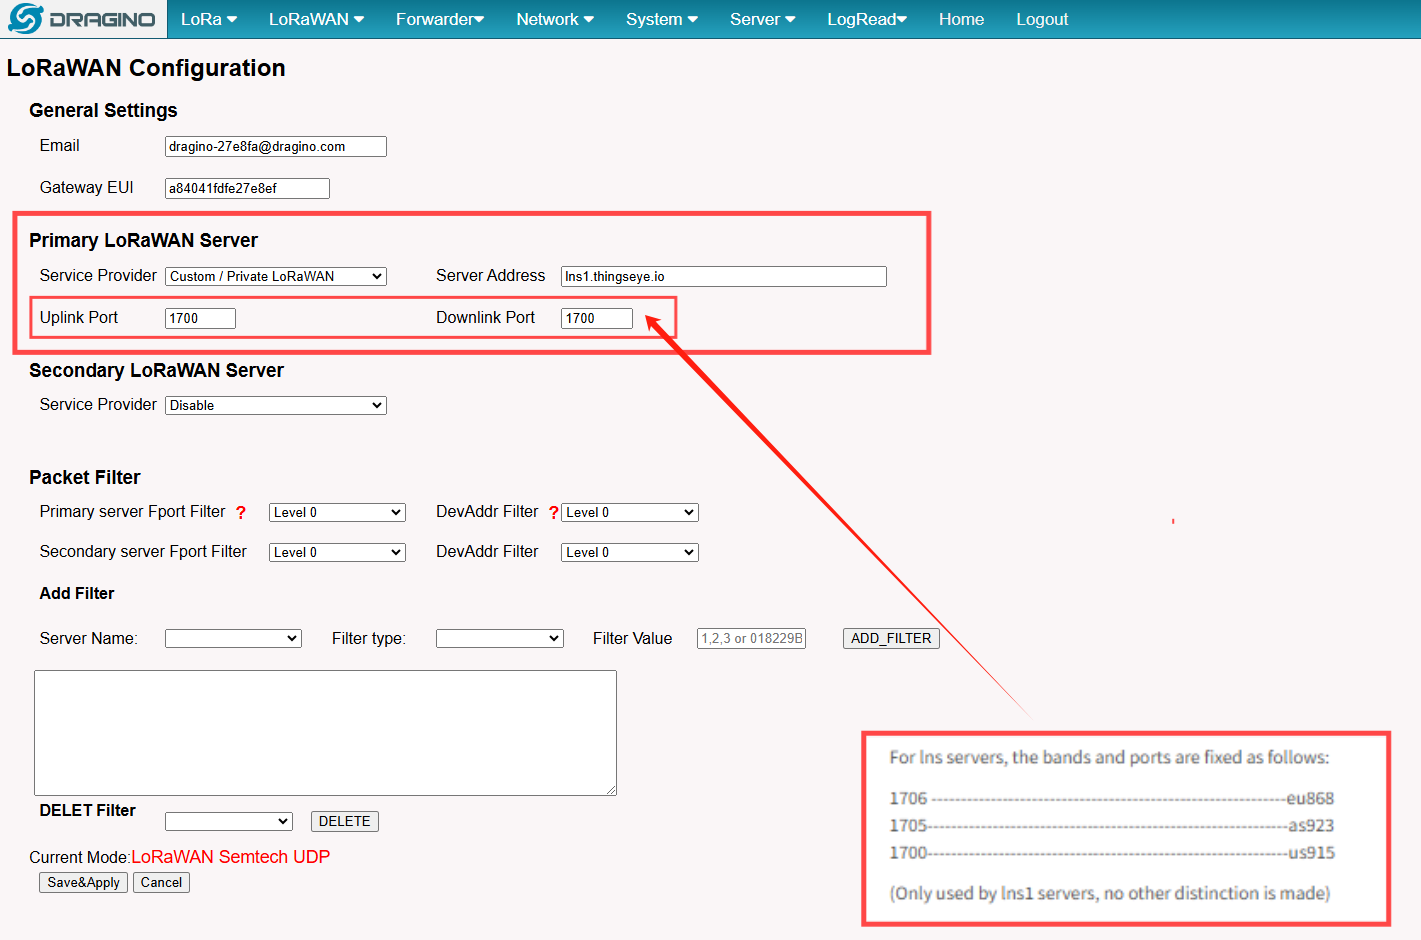
Step 4: Configure server address and port
Server address
The old guide shows the fixed server address setup for INS servers:
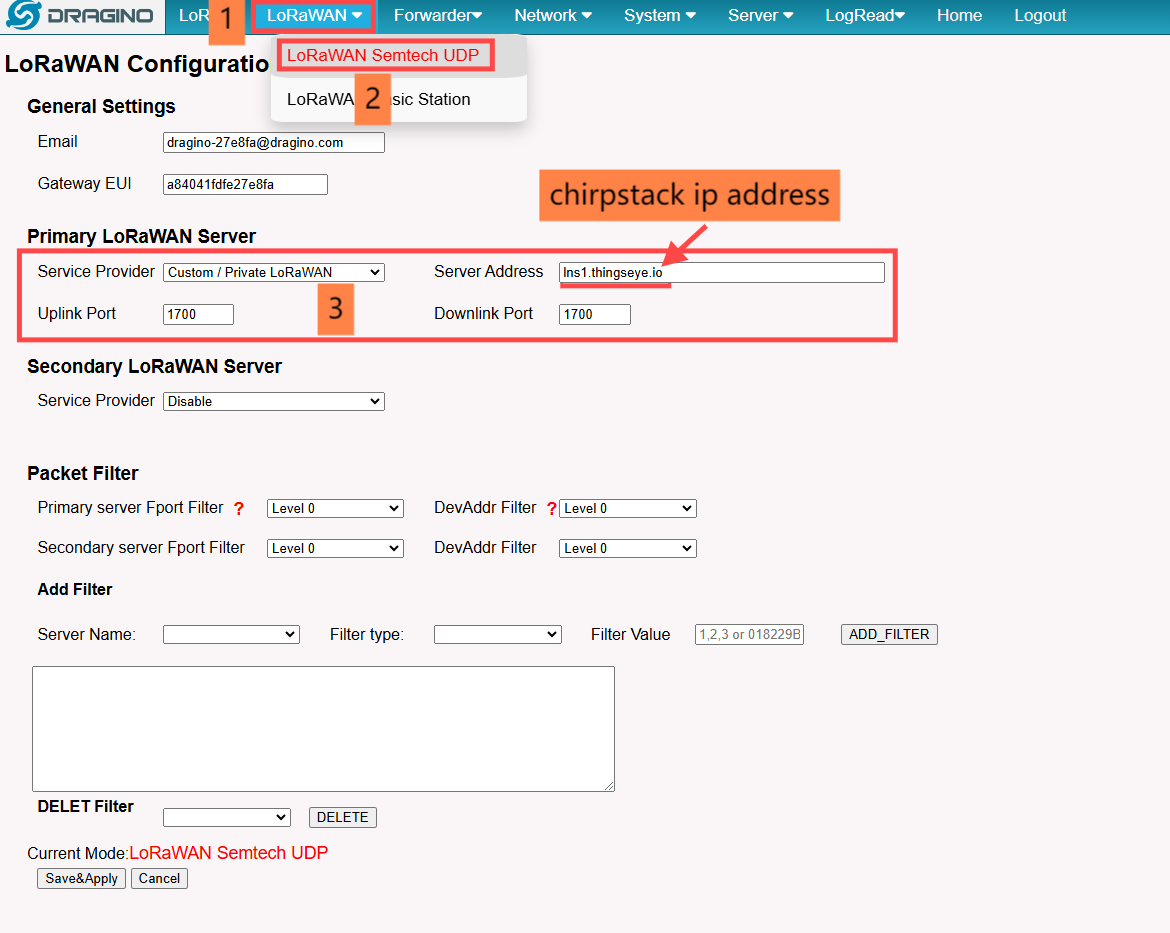
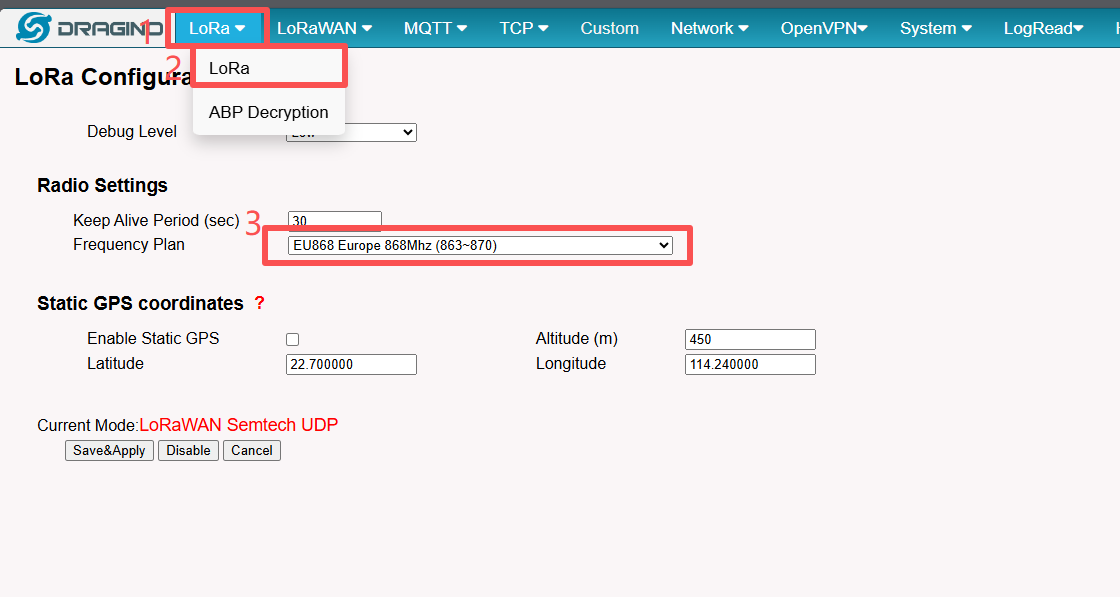
Port and frequency band
The gateway frequency band must match the end devices. If you are unsure, confirm the correct band with the Dragino team.
For the lns1 server, the old page lists these port mappings:
1706->eu8681705->as9231700->us915
Related screenshots:
Step 5: Register the gateway in ThingsEye
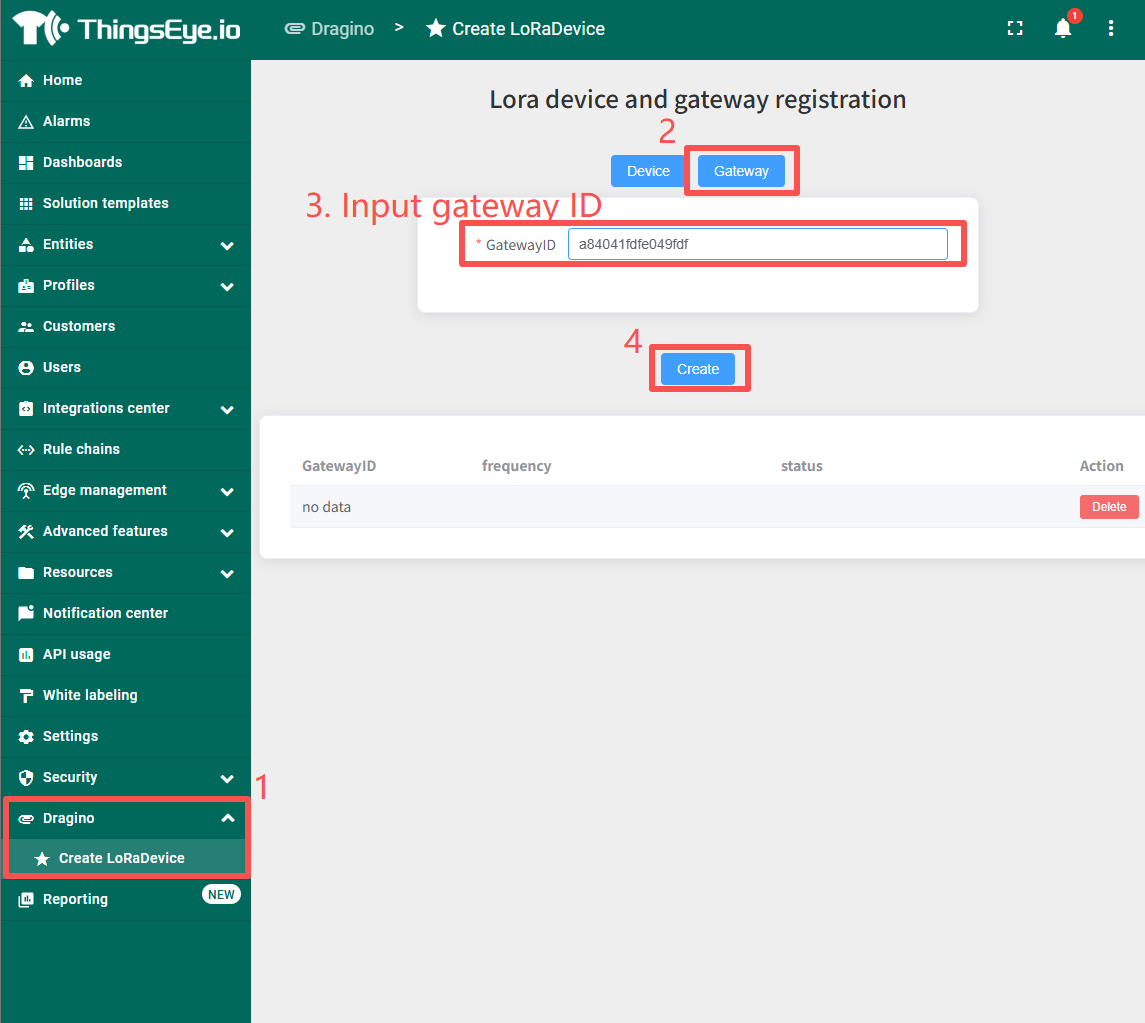
The old guide notes that ThingsEye only accepts uplink data after the gateway and devices are registered, which helps avoid unknown or invalid device traffic.
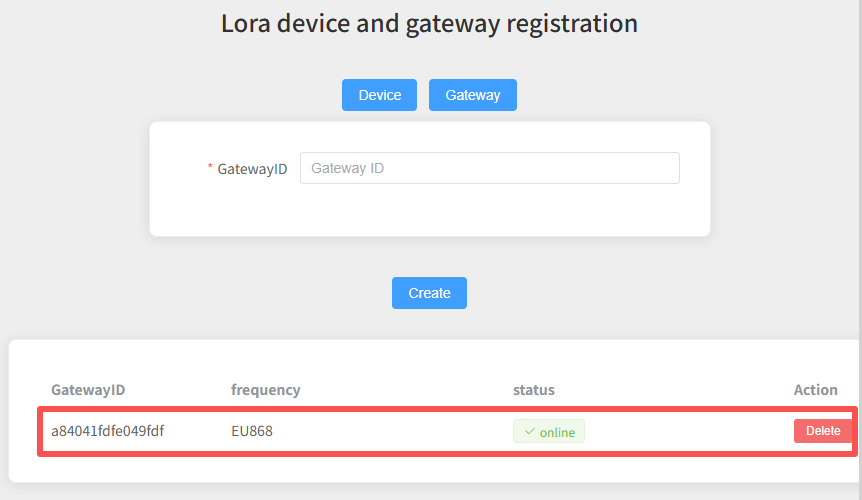
When registering the gateway:
- Enter the gateway ID in ThingsEye.
- Restart the gateway.
- Confirm that the gateway becomes online.
Step 6: Register LoRa devices
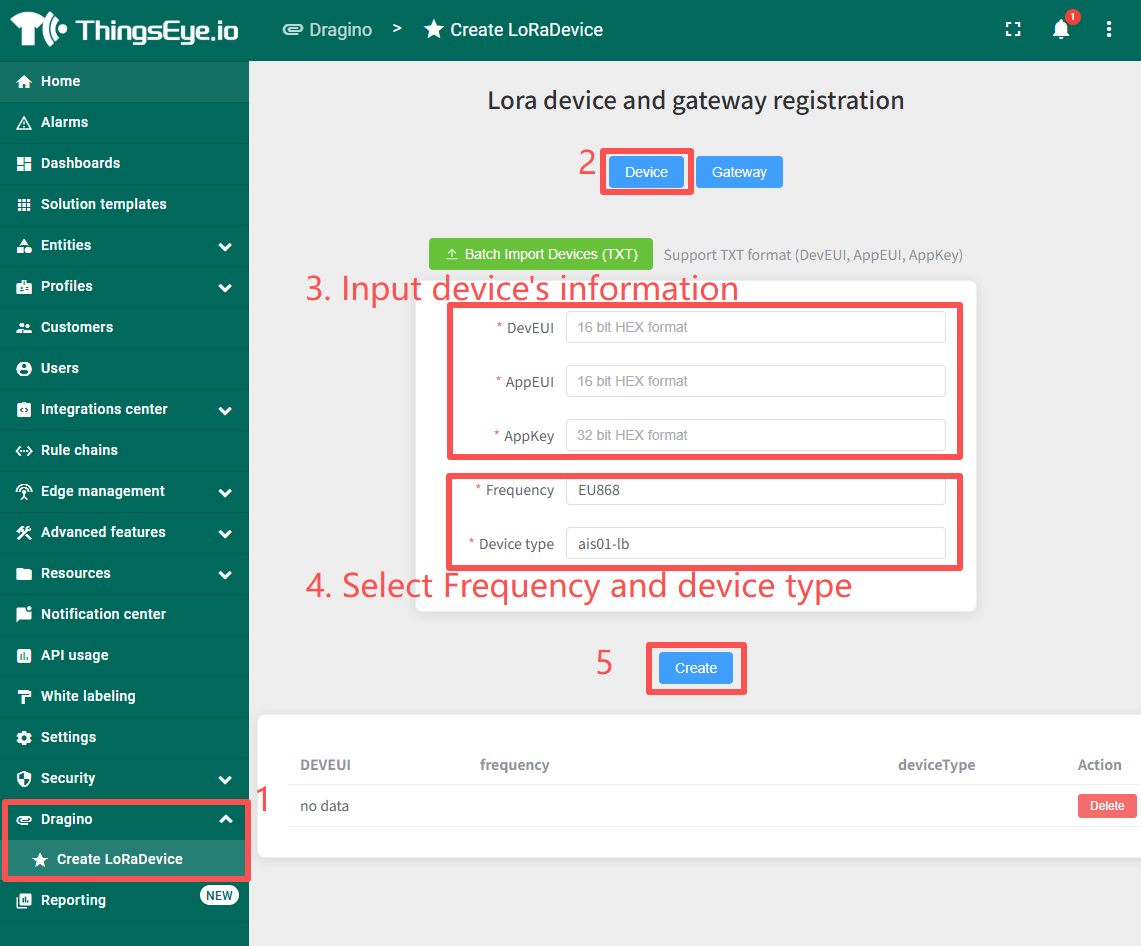
Single-device registration
For a single device:
- Fill in the device information.
- Select the frequency band and device type.
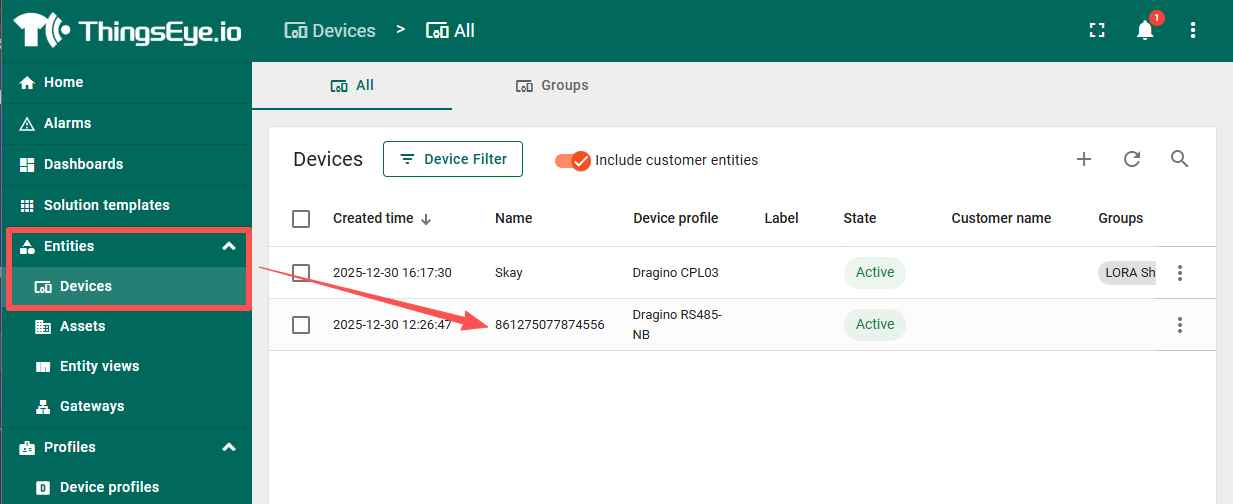
- Restart the device.
- Confirm that the device becomes online.
Batch registration
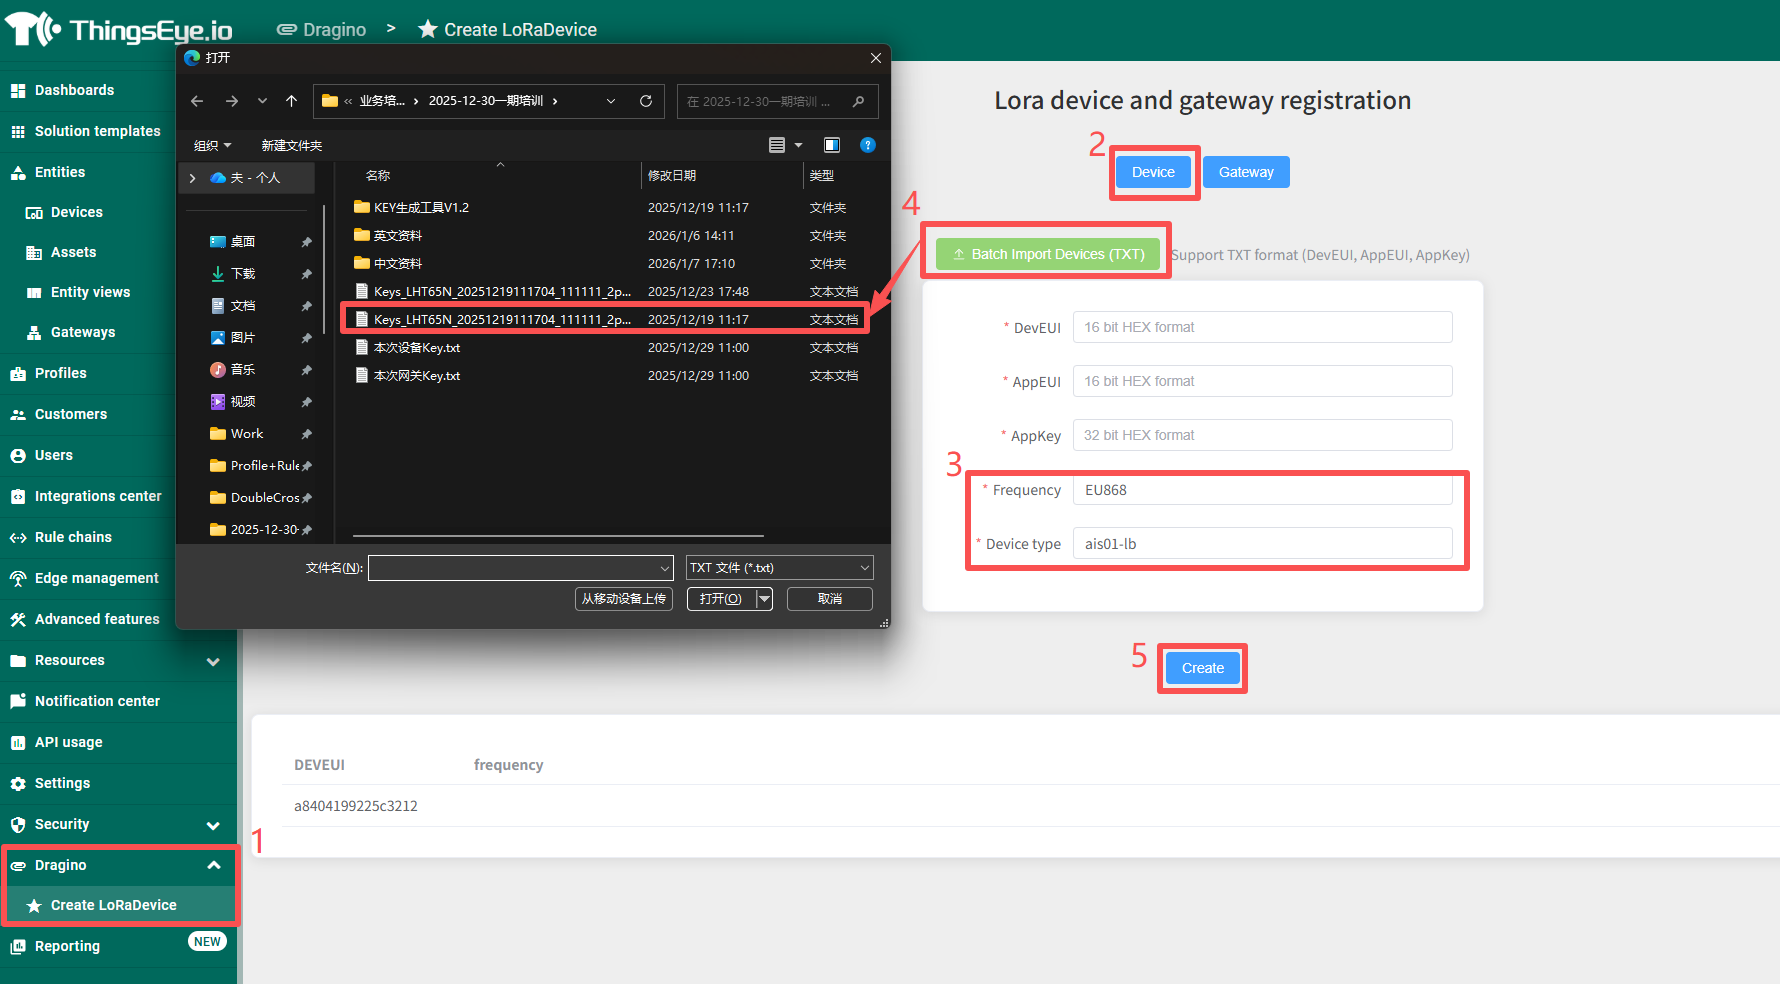
For batch registration:
- Import the device key file.
- Select the frequency band and device type.
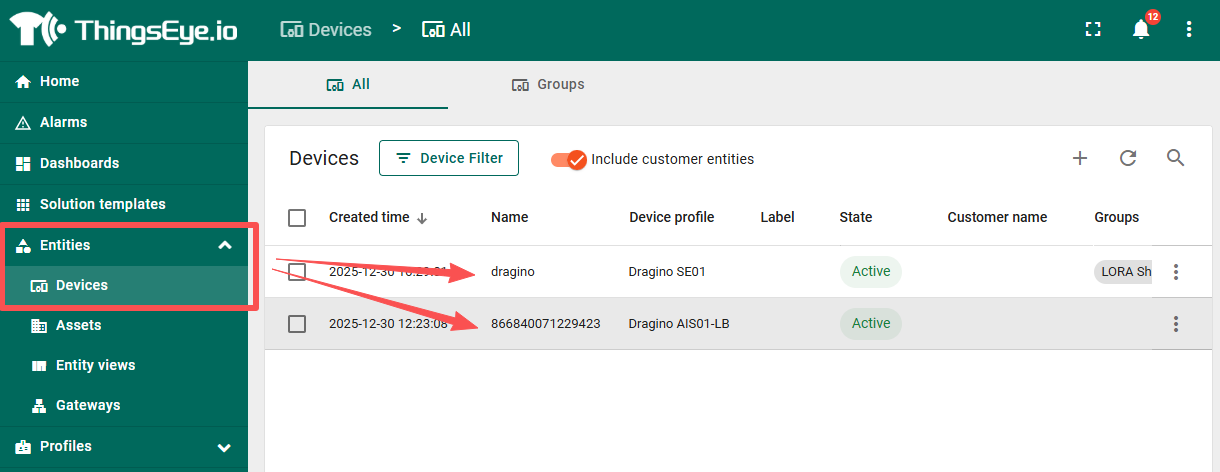
- Restart the devices.
- Confirm that the devices become online.
Data visualization
If you already have a ThingsEye account:
- Log in to https://thingseye.io/
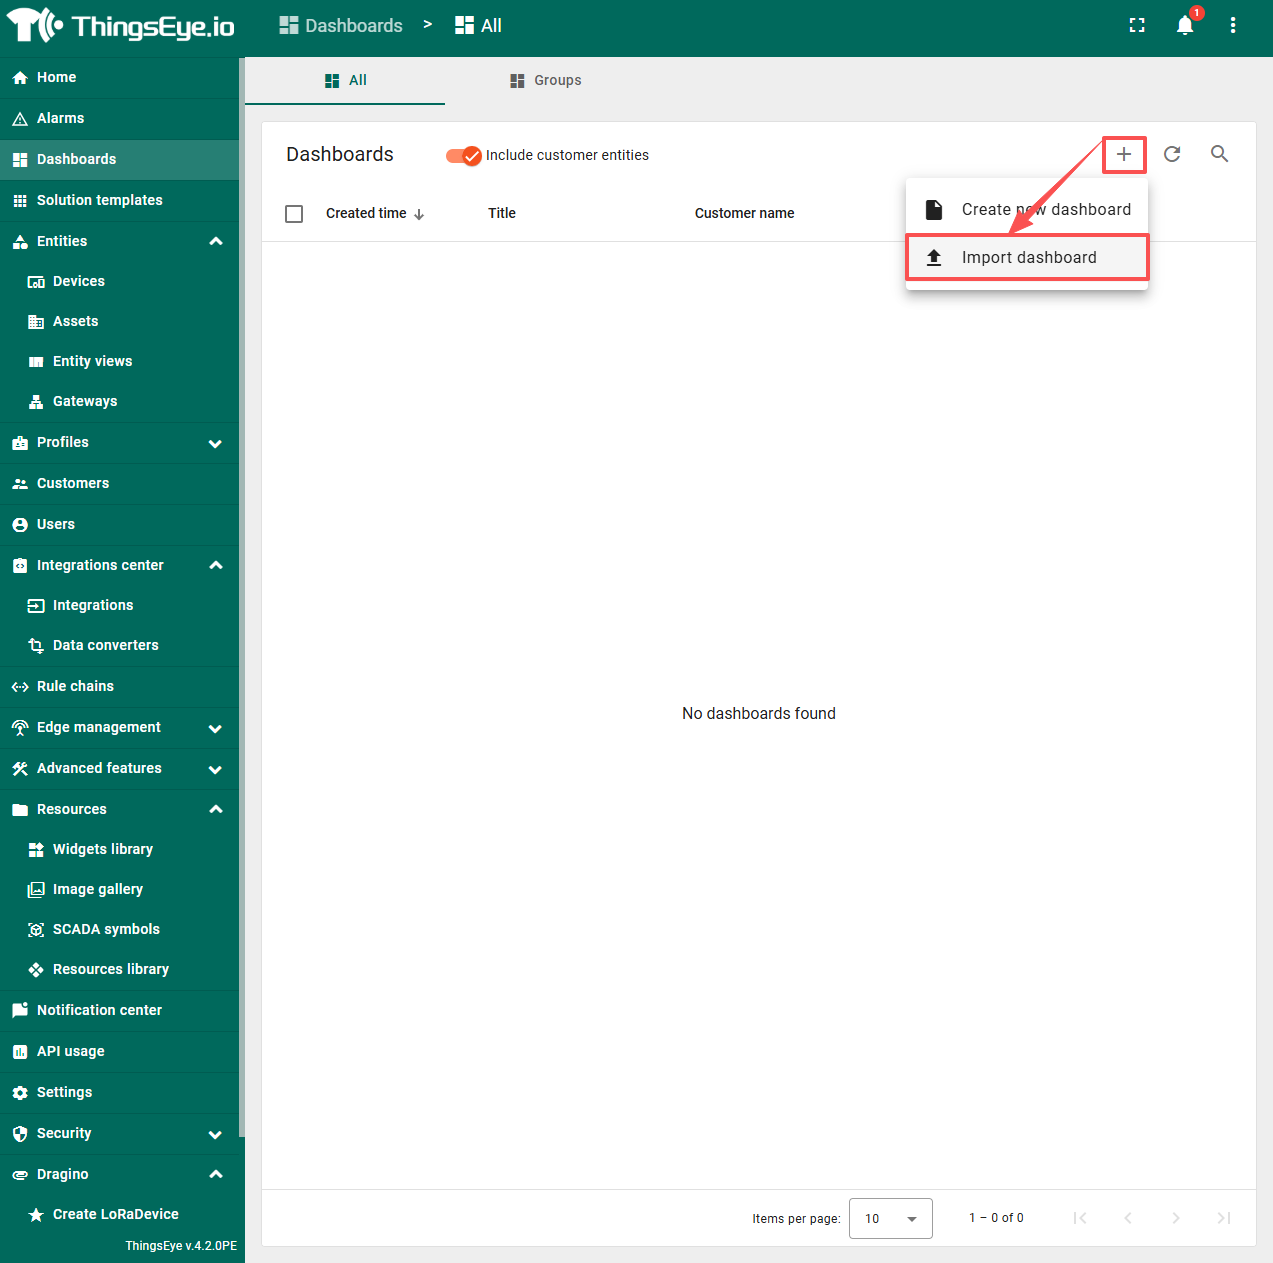
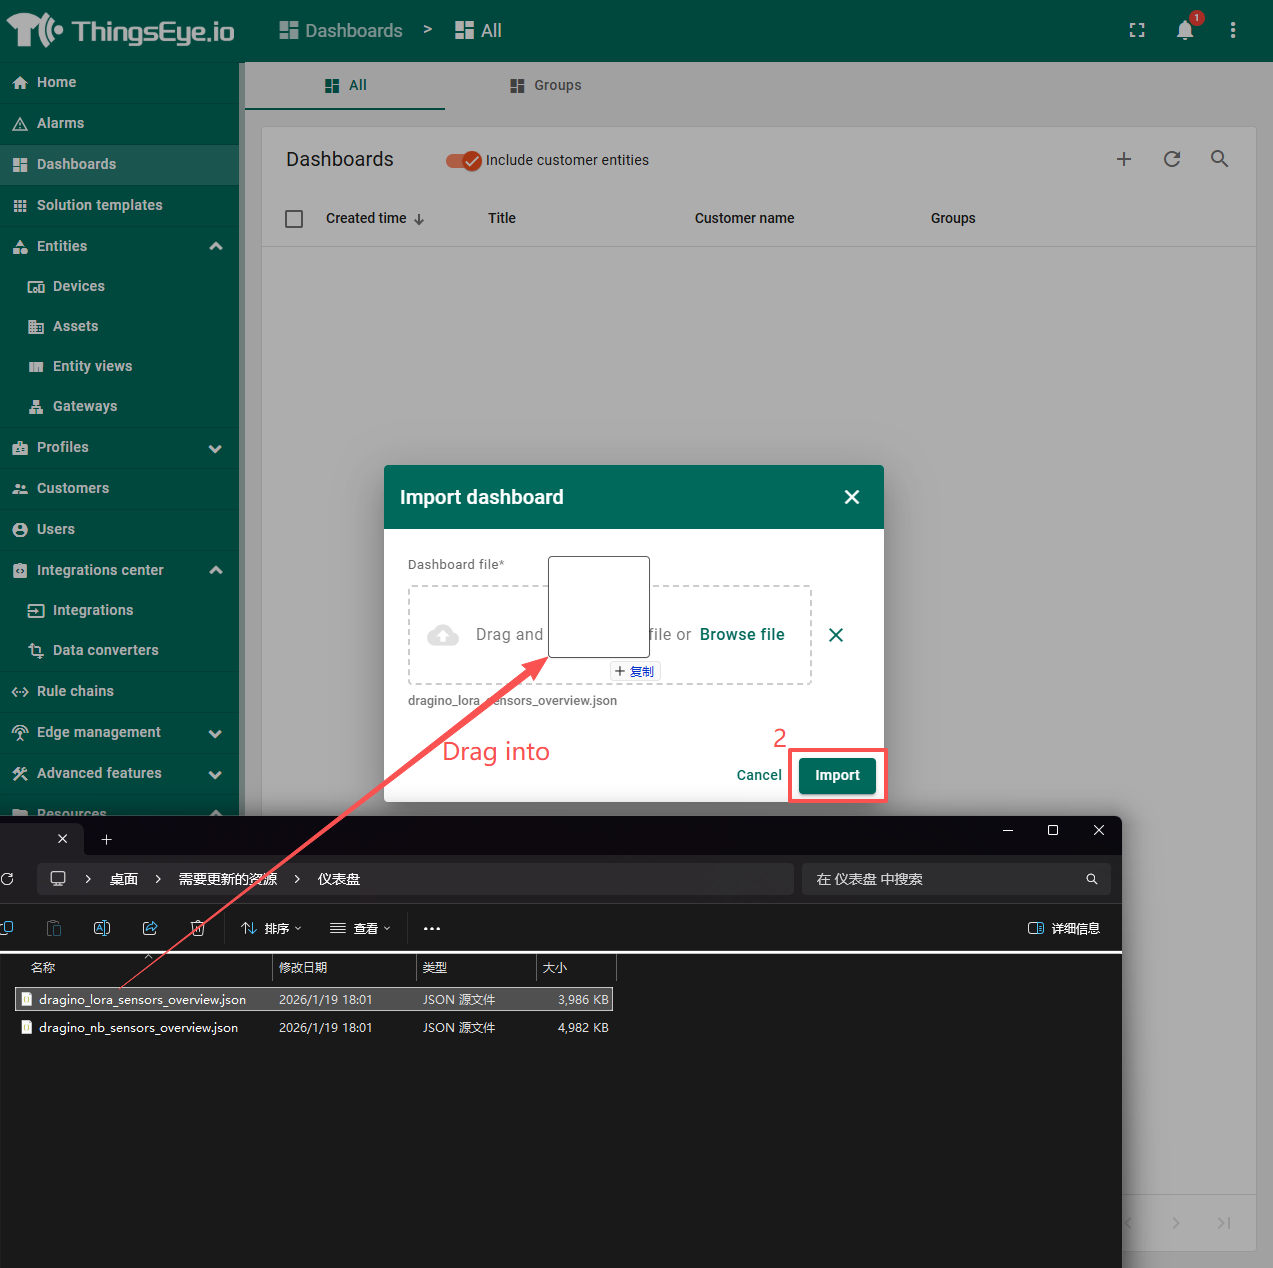
- Download the dashboard JSON file
- Import the dashboard
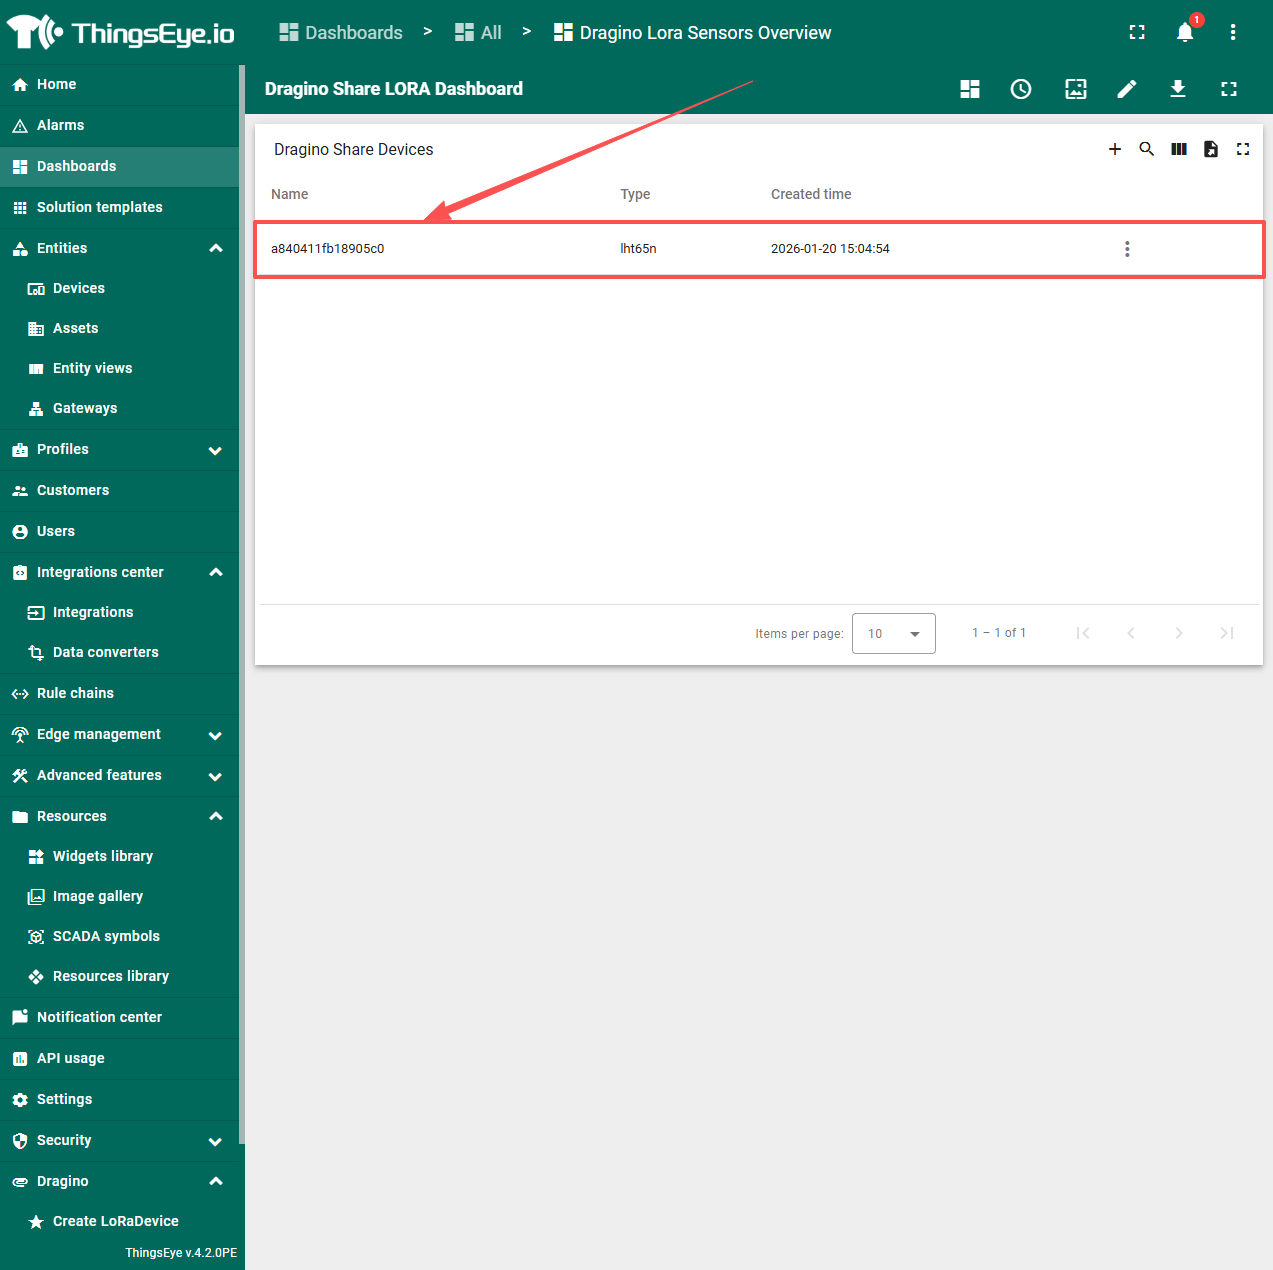
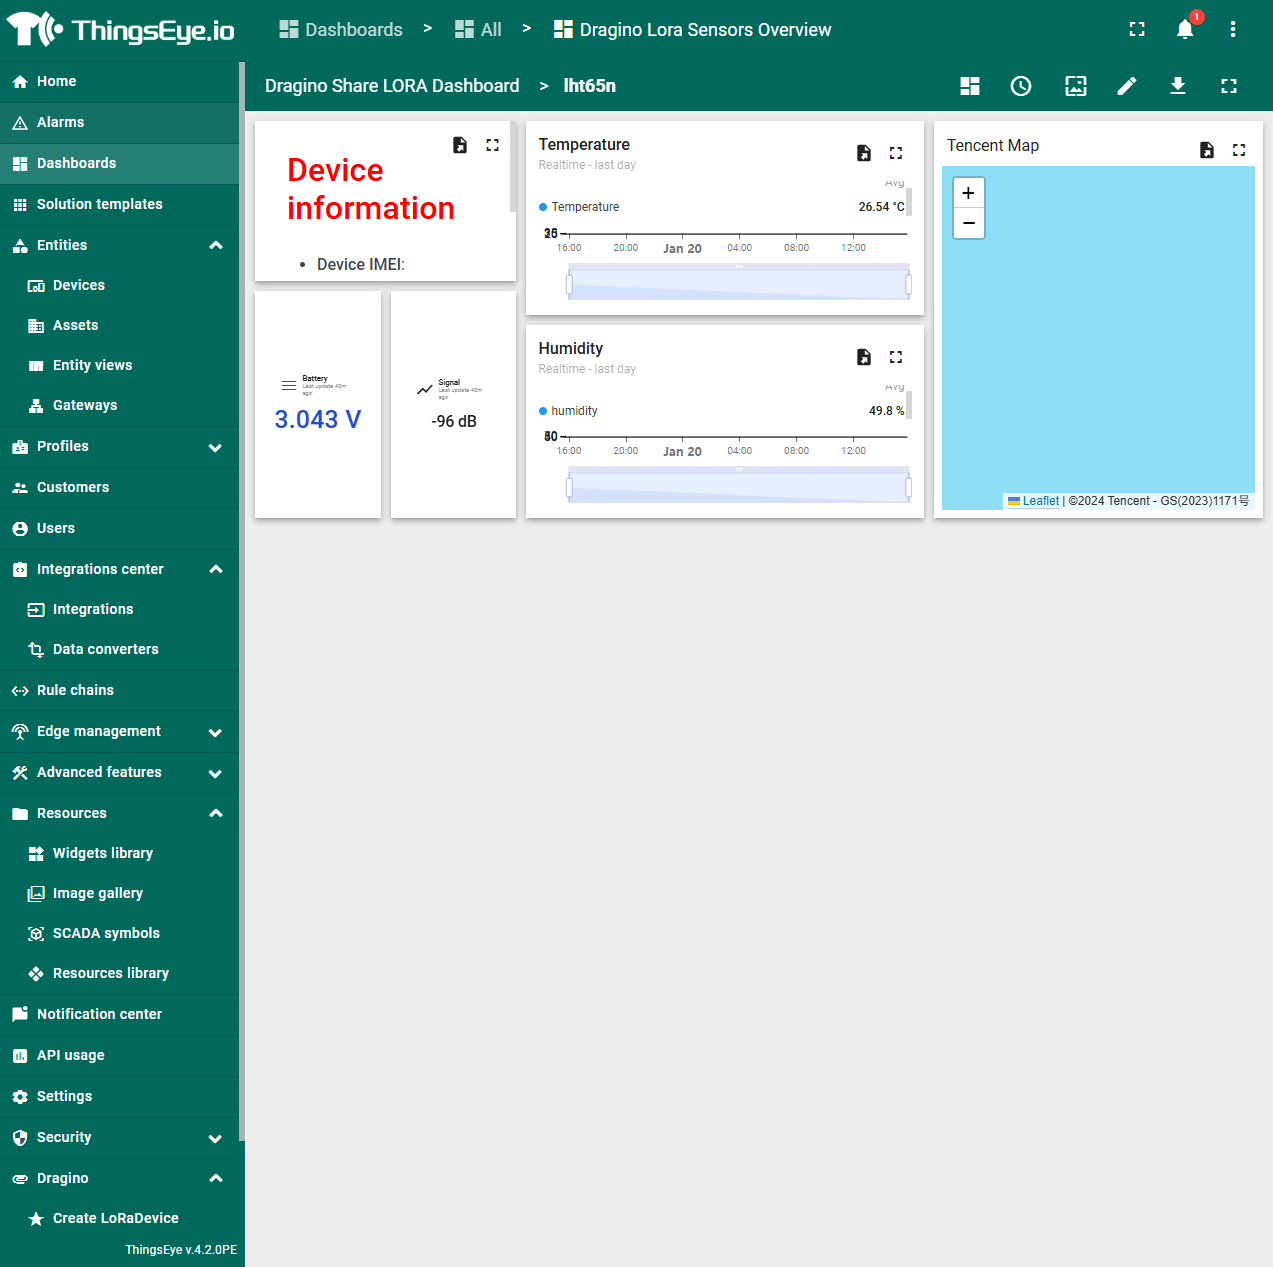
- Open the dashboard and click a device to view details
Dashboard file from the old guide:
Related screenshots: