How to set threshold alarm and get Email notification
This tutorial aims to guide ONLY tenant-level userson how to configure alarm rules and set up email notifications for each device without writing code or modifying the rule chain.
1. Import dashboard
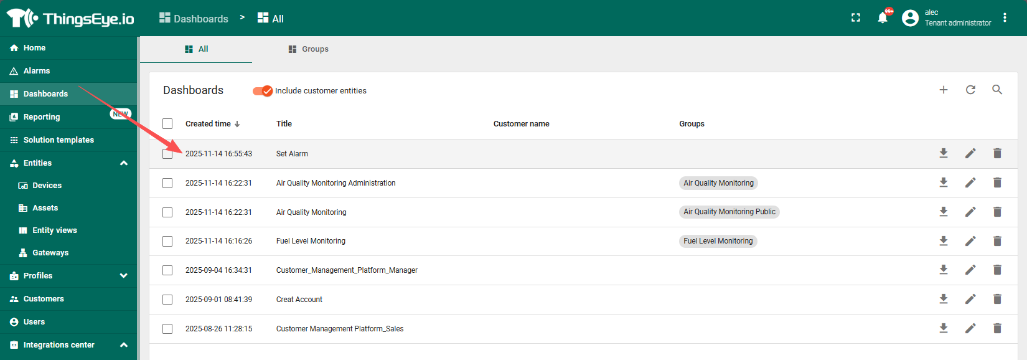
Import this dashboard:set_alarm_dashboard.json
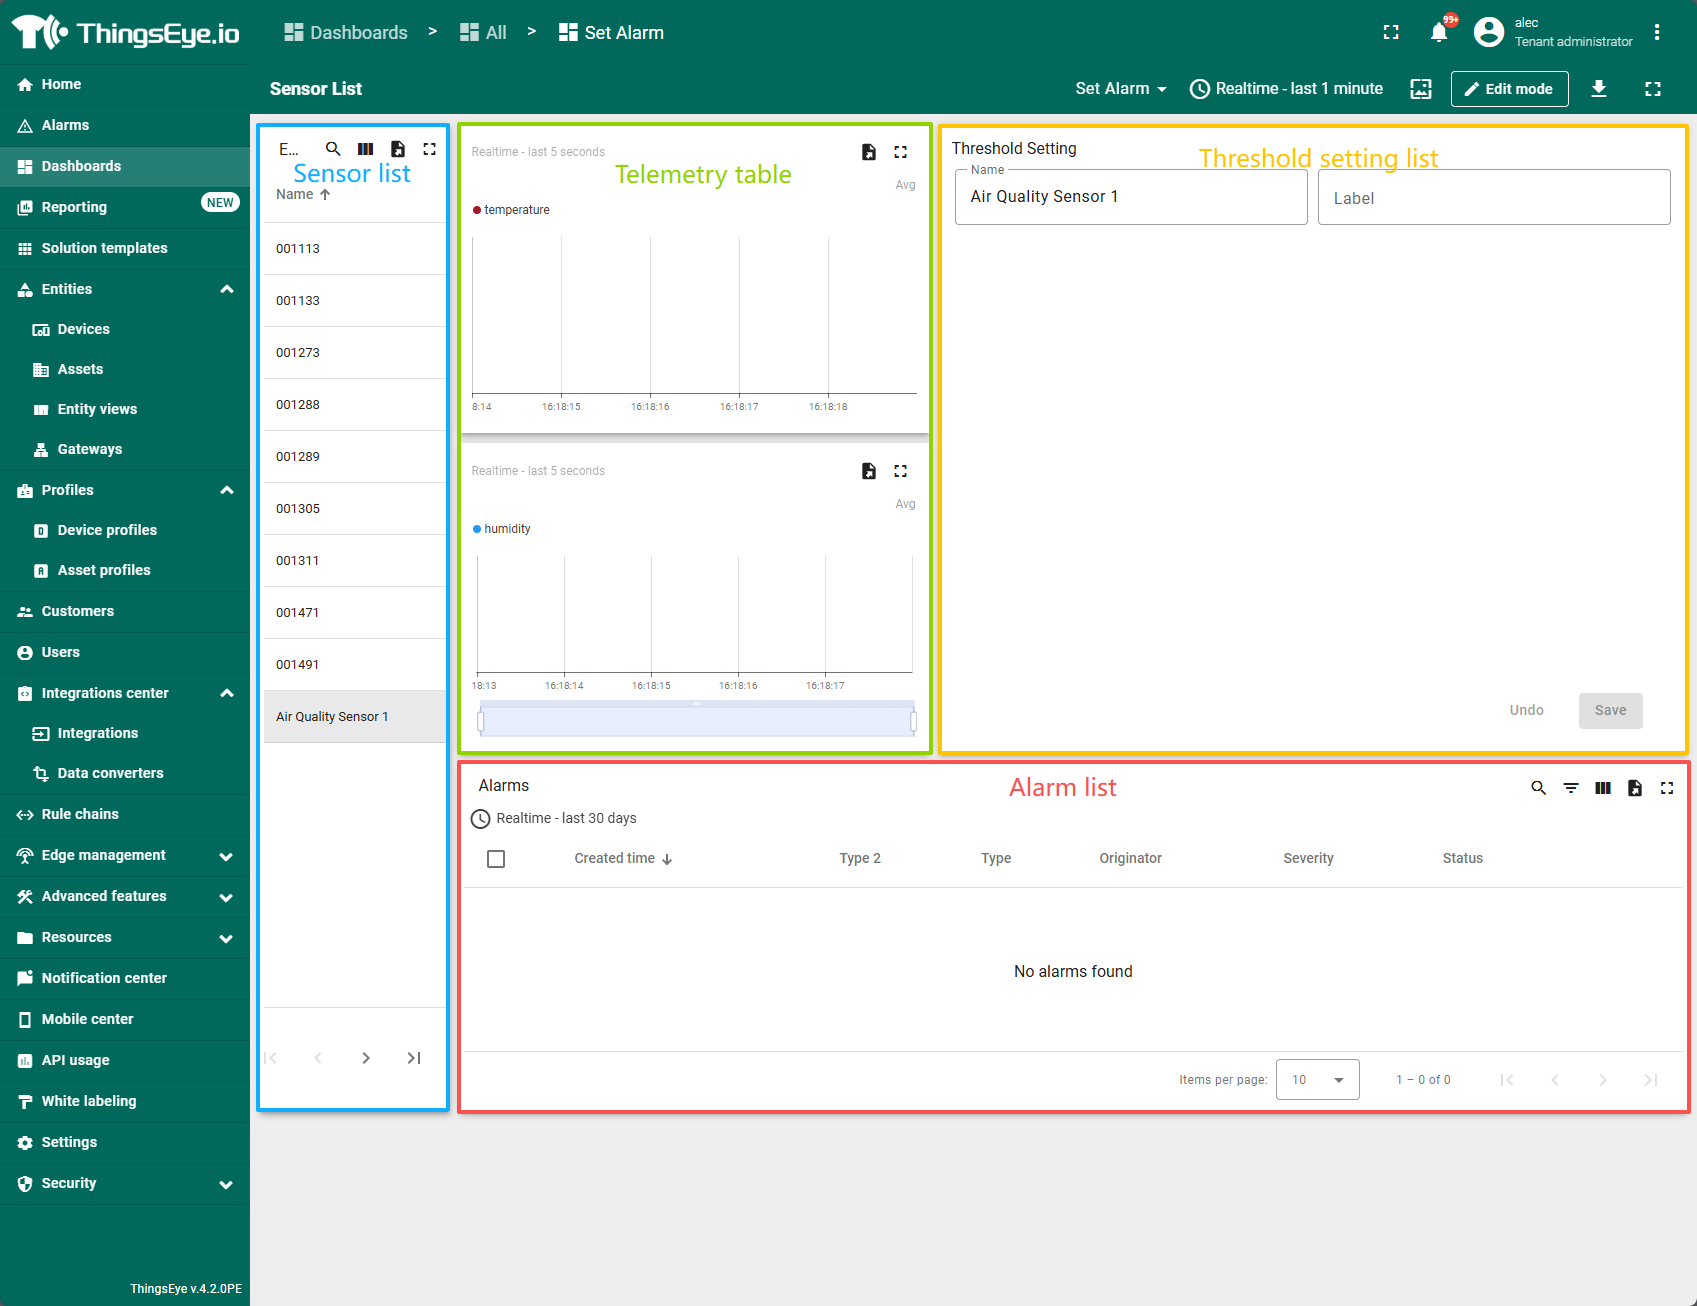
The Dashboard shown below displays all devices by default.
Each device's threshold are managed separately. Clicking on a device in the device list on the left will display the current device status and preset thresholds/email addresses on the right.
2. Configure profile rules
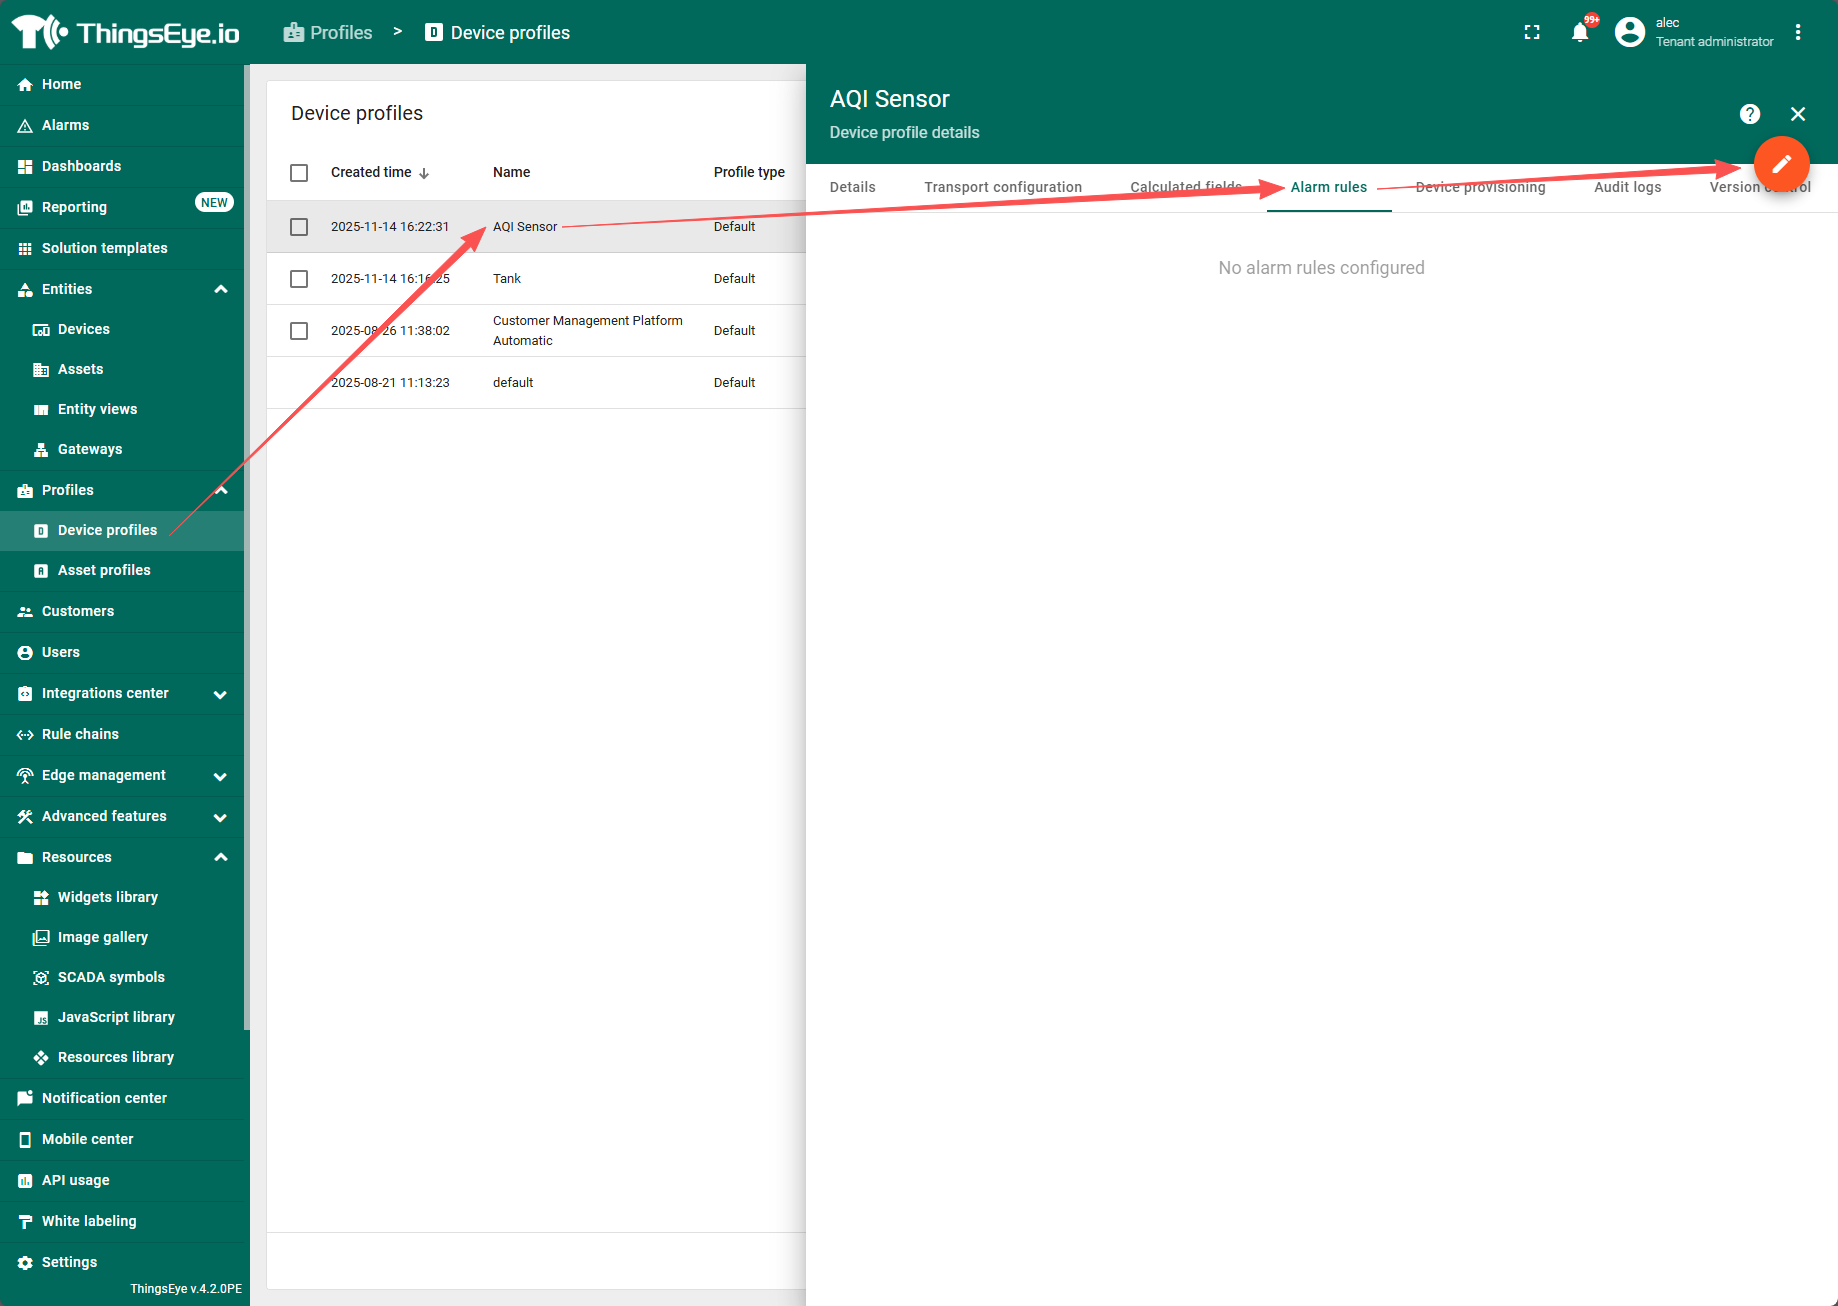
2.1 Create a condition to trigger an alarm when a threshold is reached.
Click the edit icon to enter edit mode and create a new alarm rule.
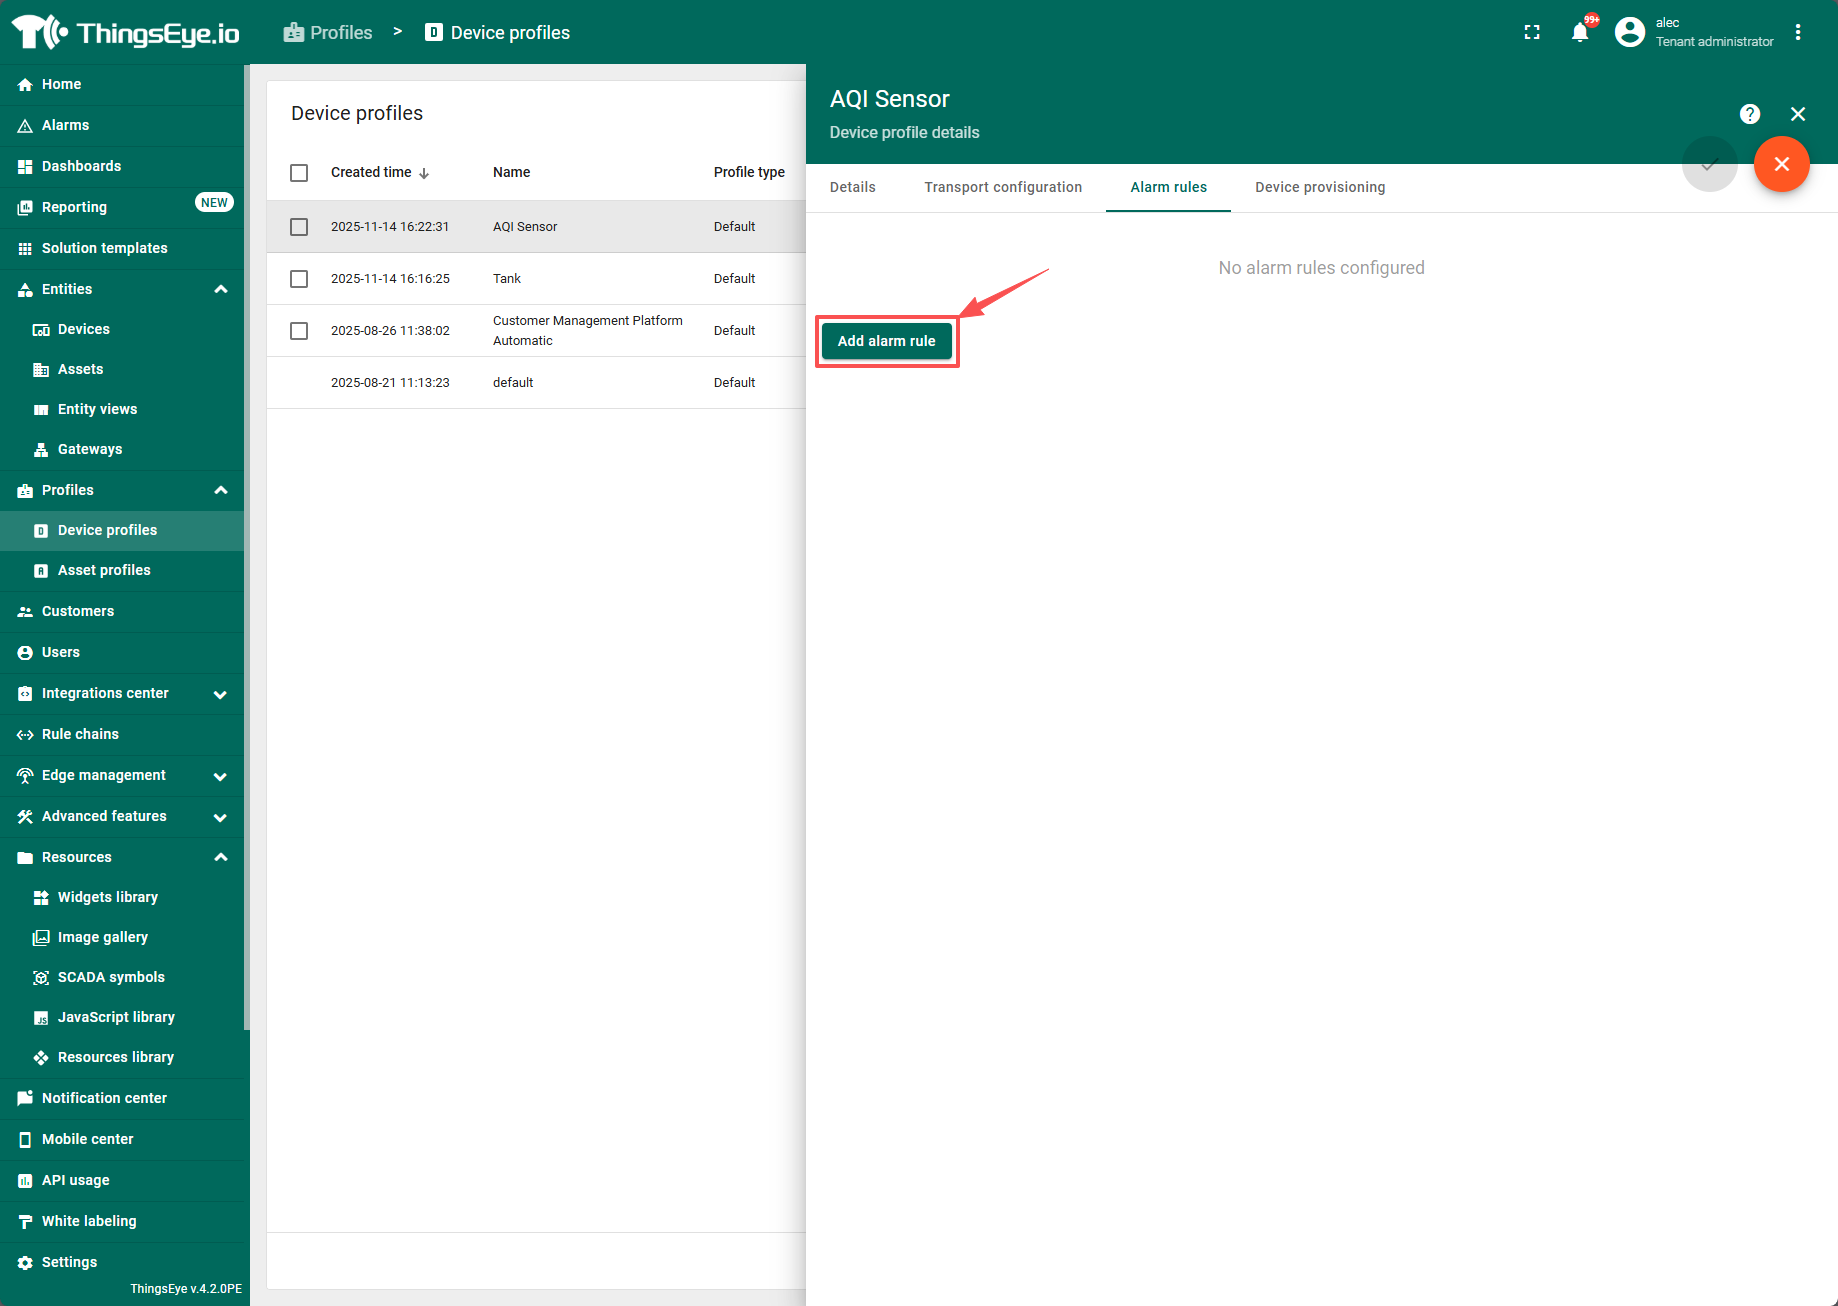
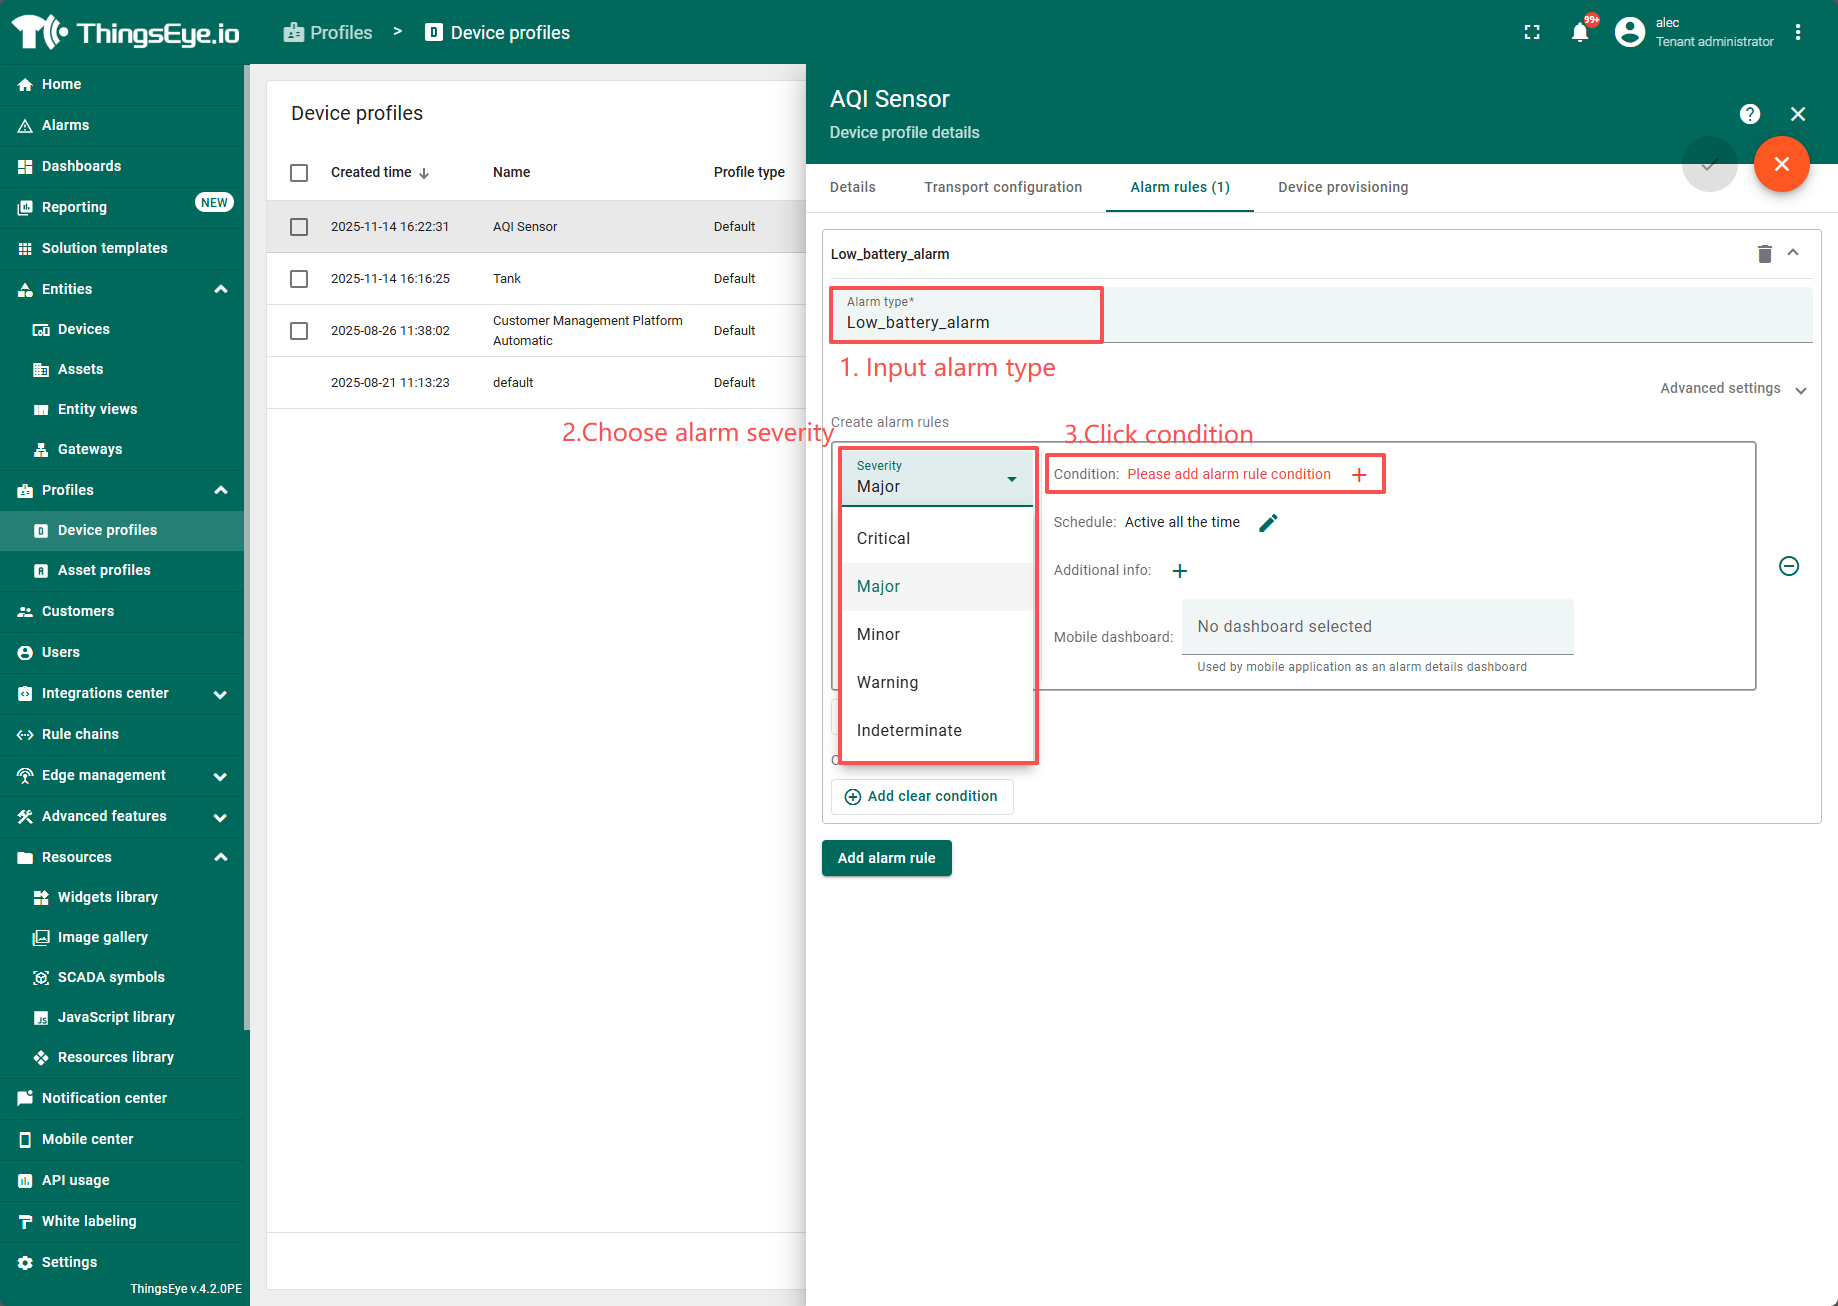
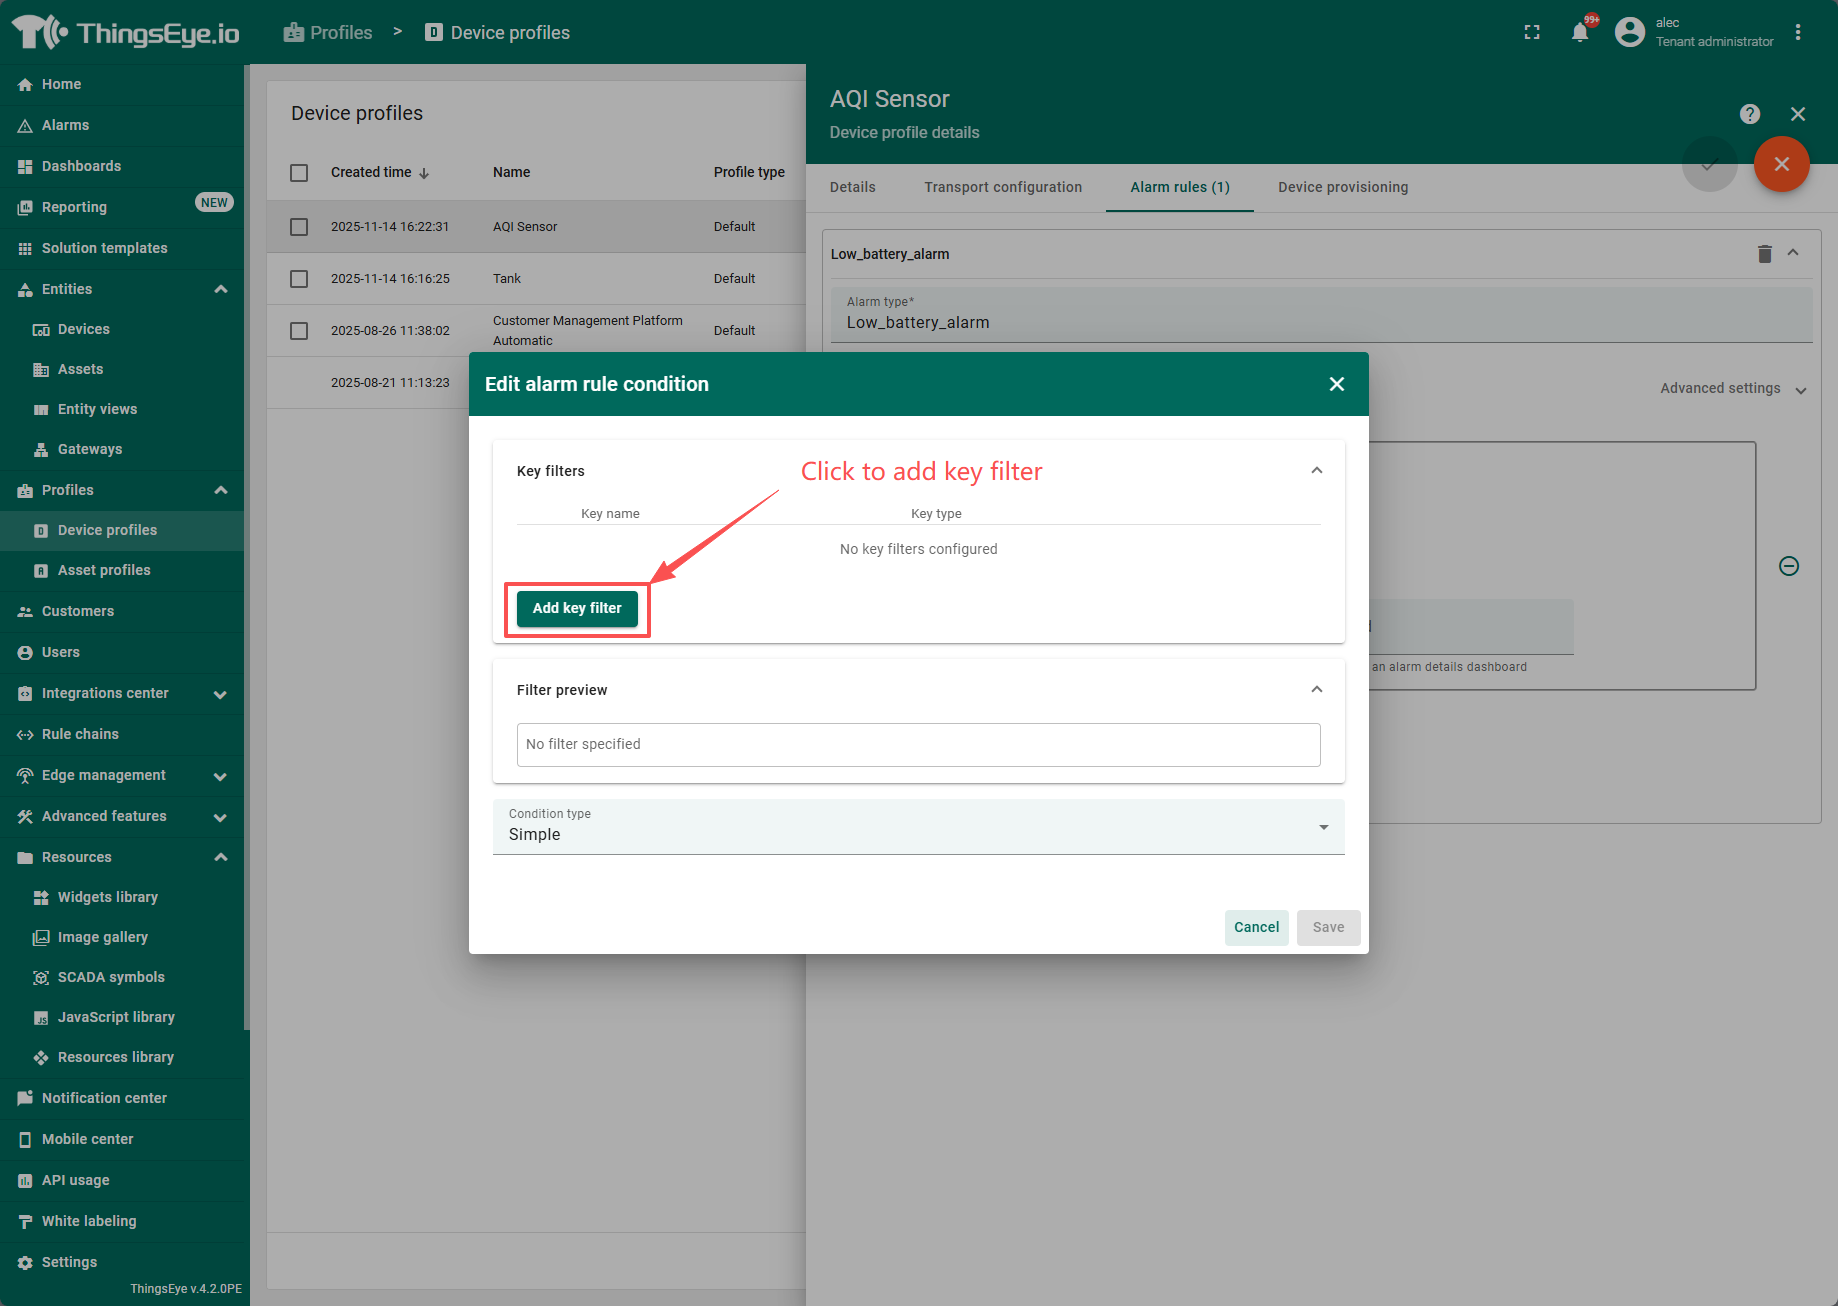
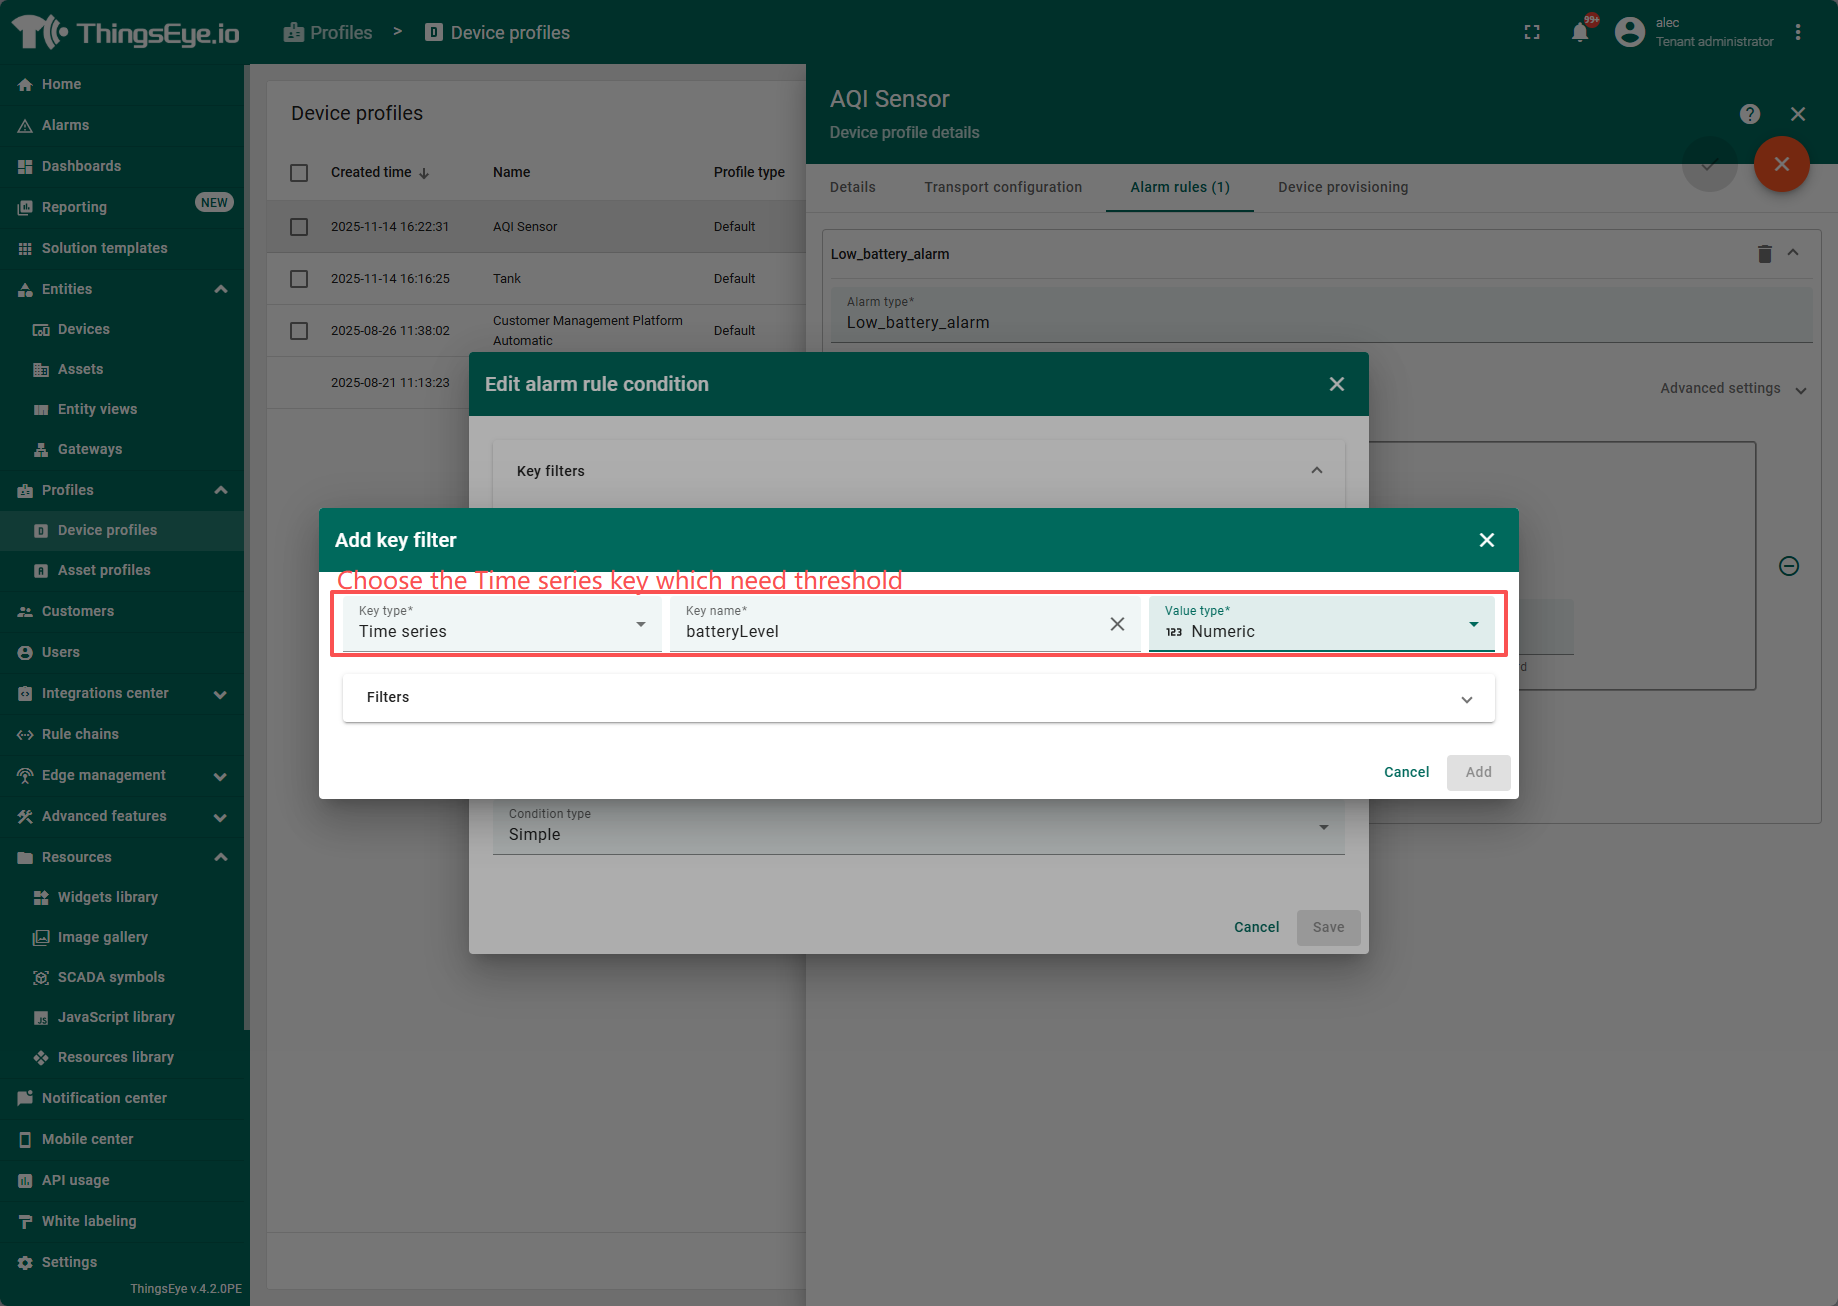
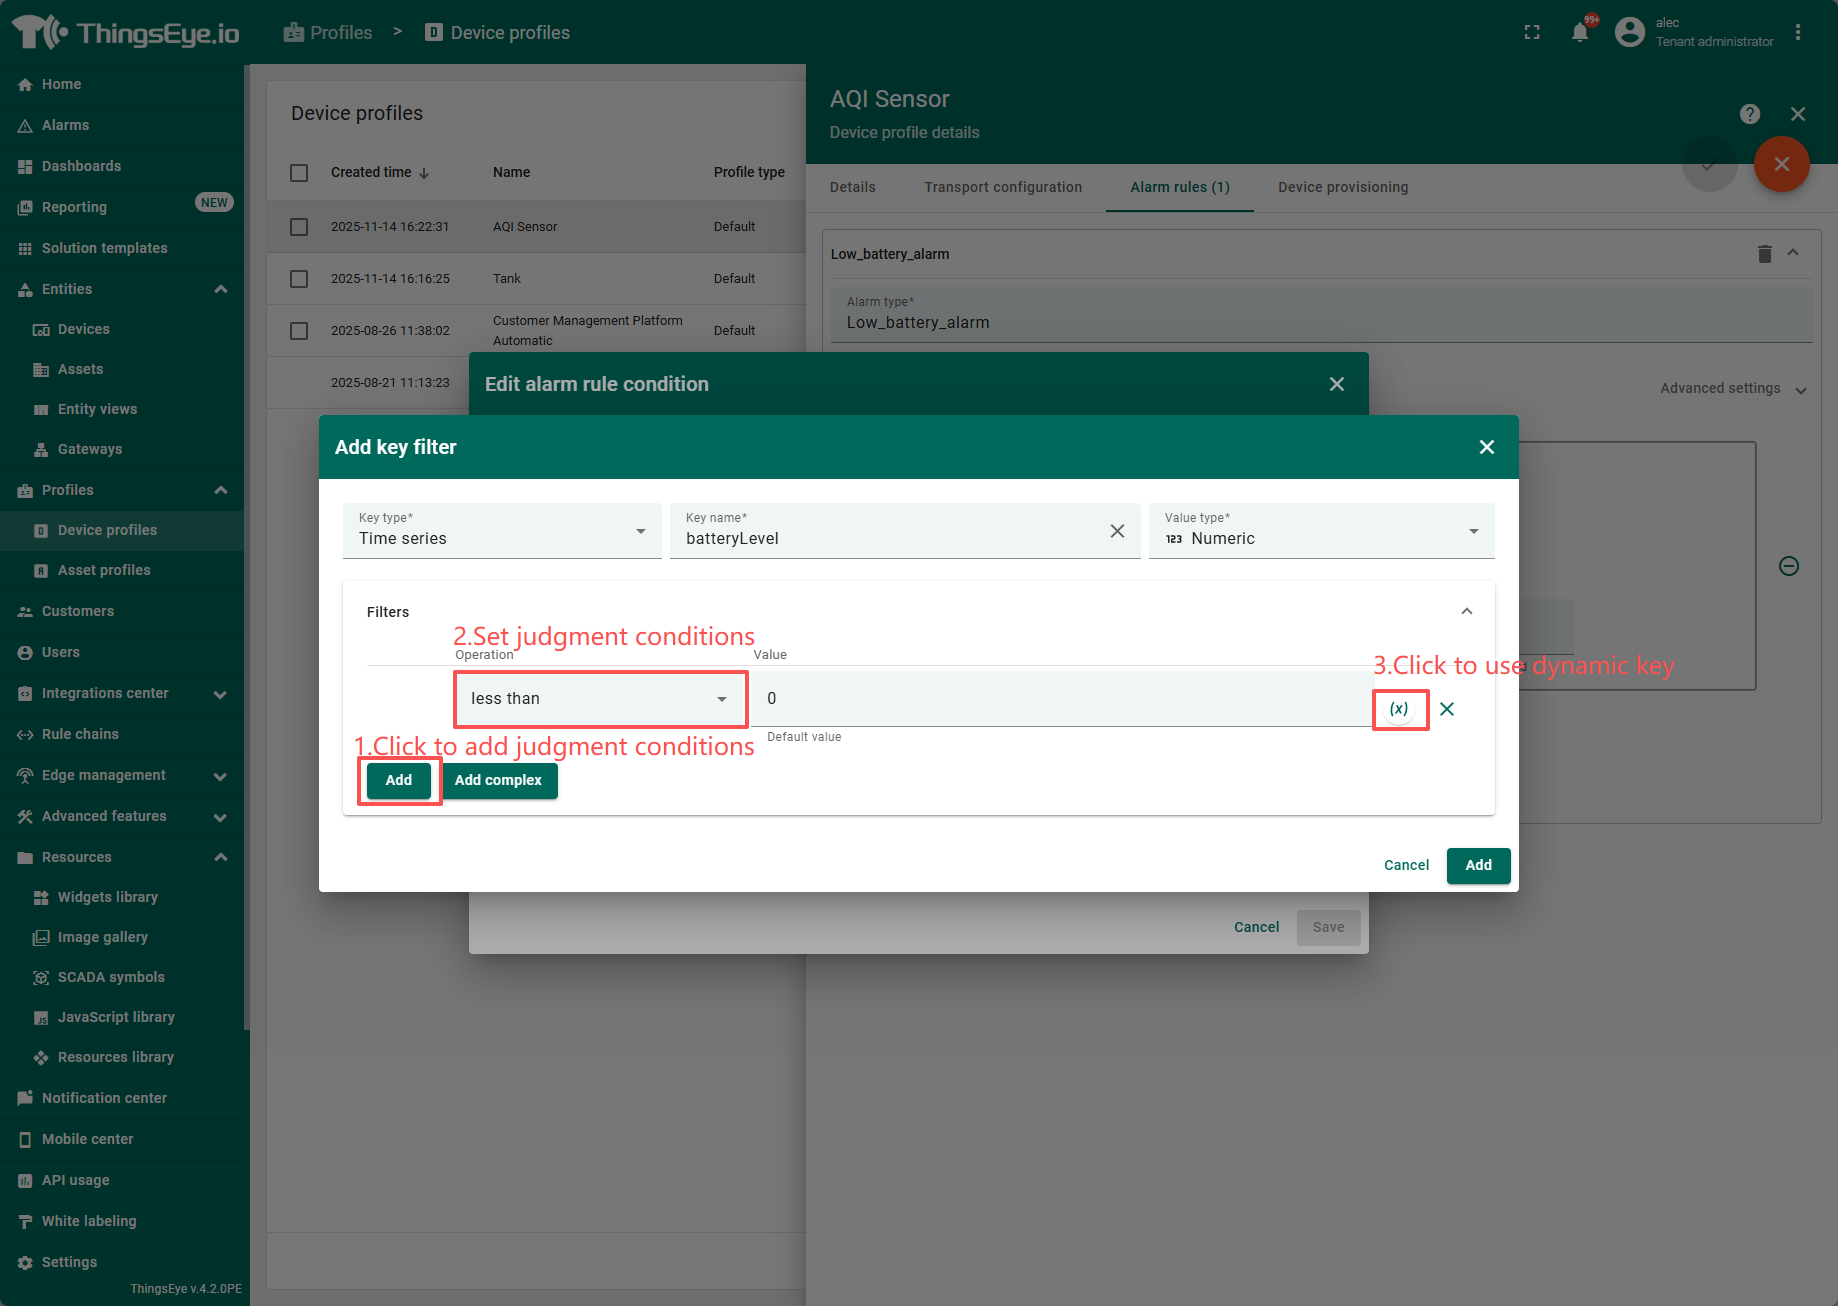
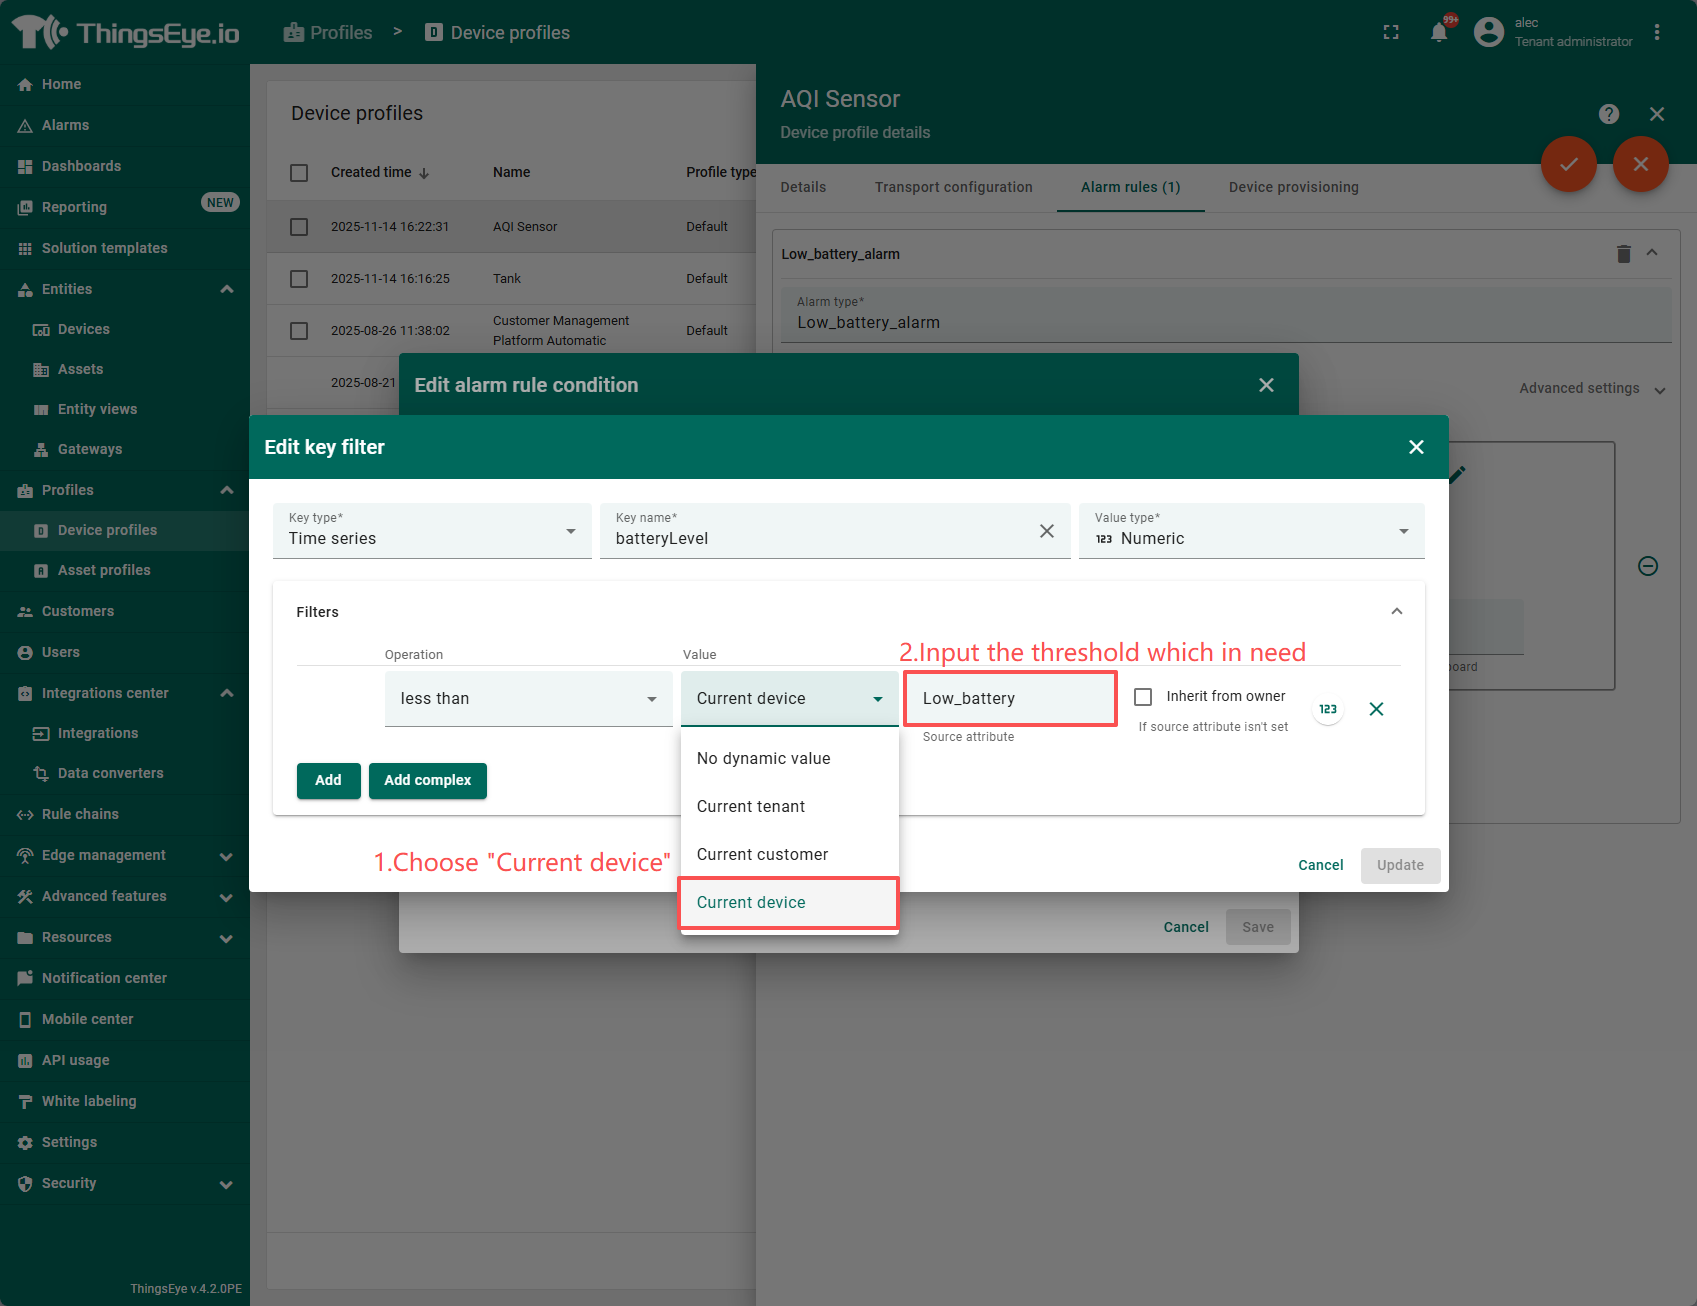
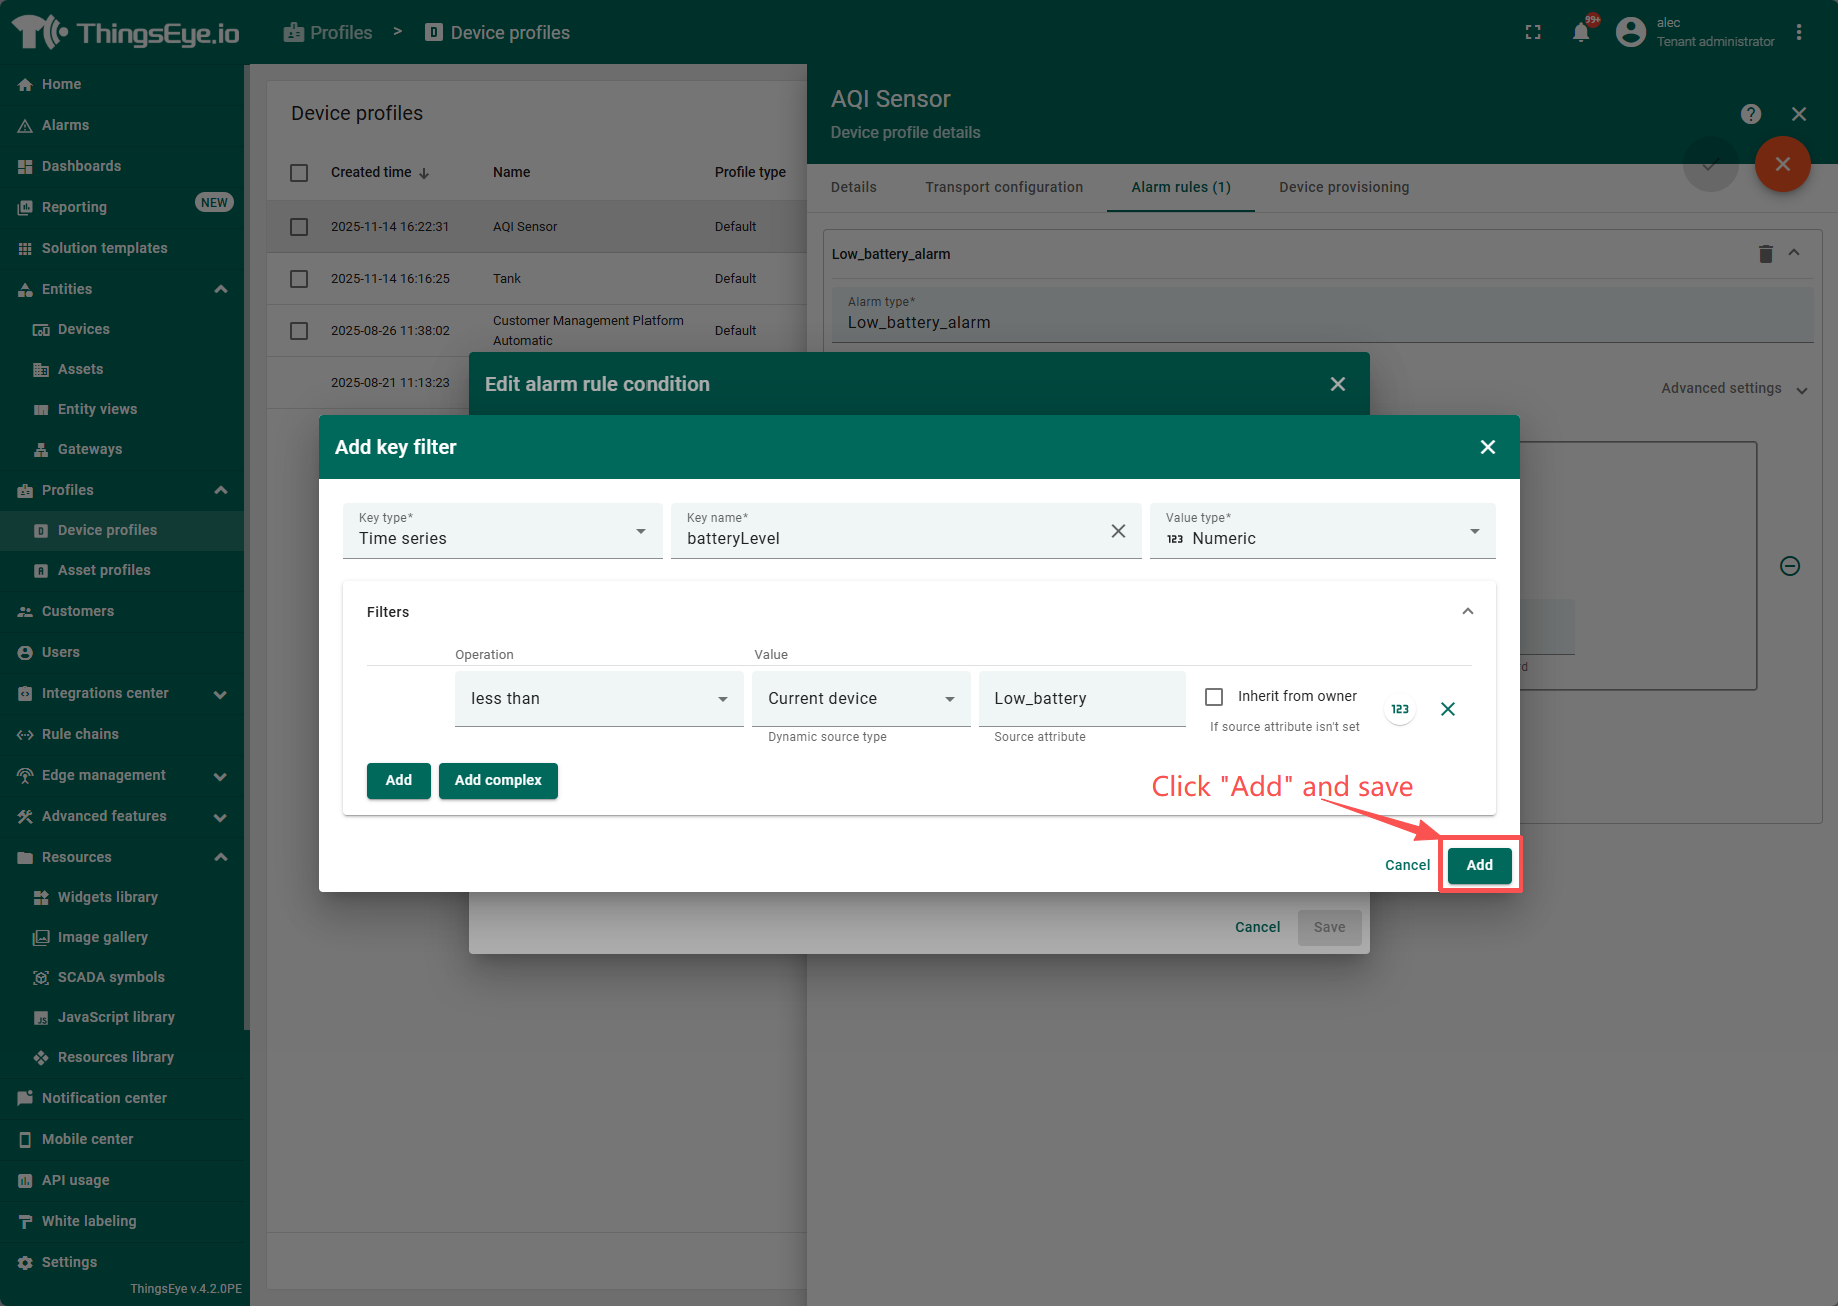
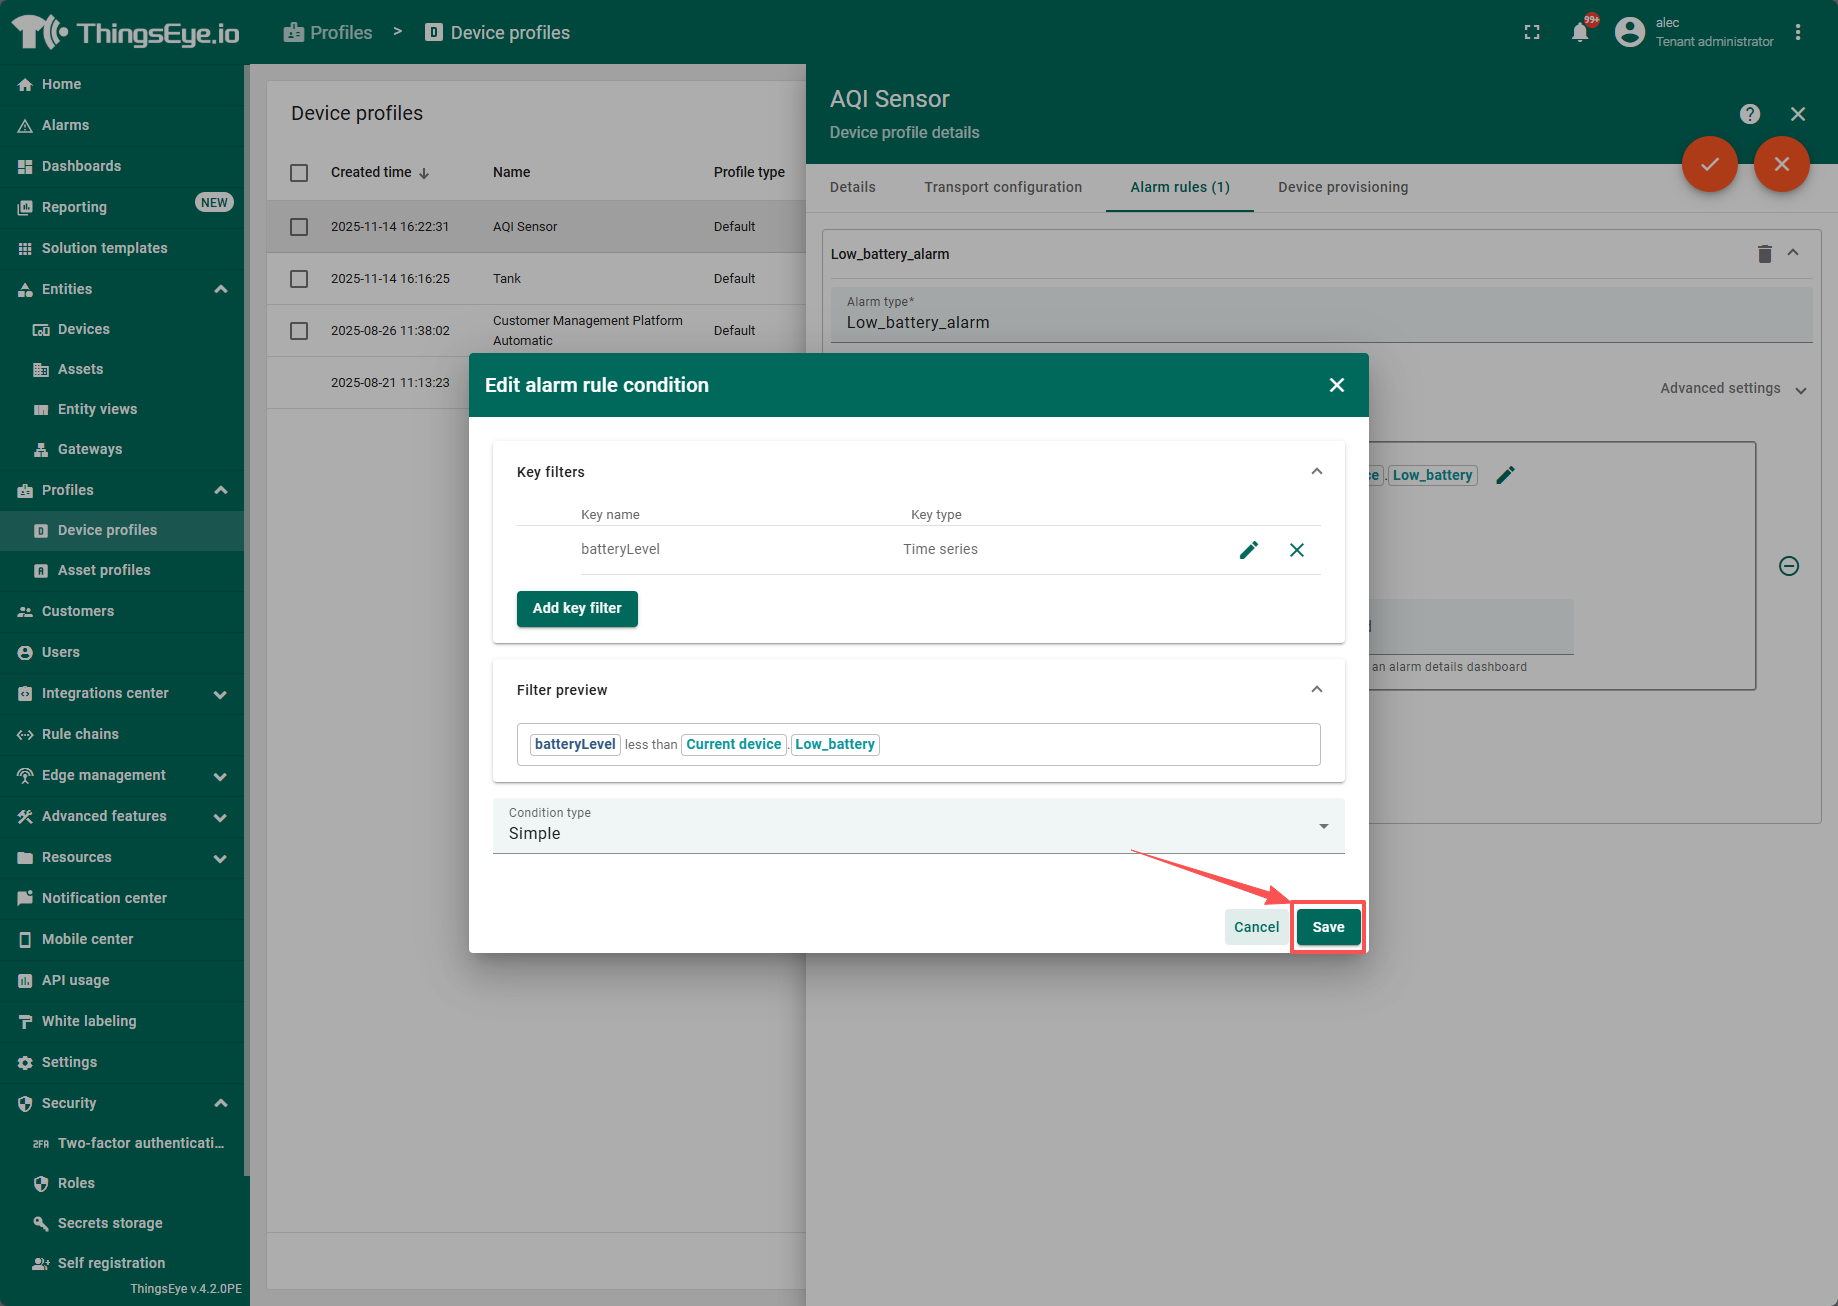
2.2 Set a clear condition to clear the alarm when the data returns to normal.
The steps are similar to Create alarm, only the values are set in reverse.
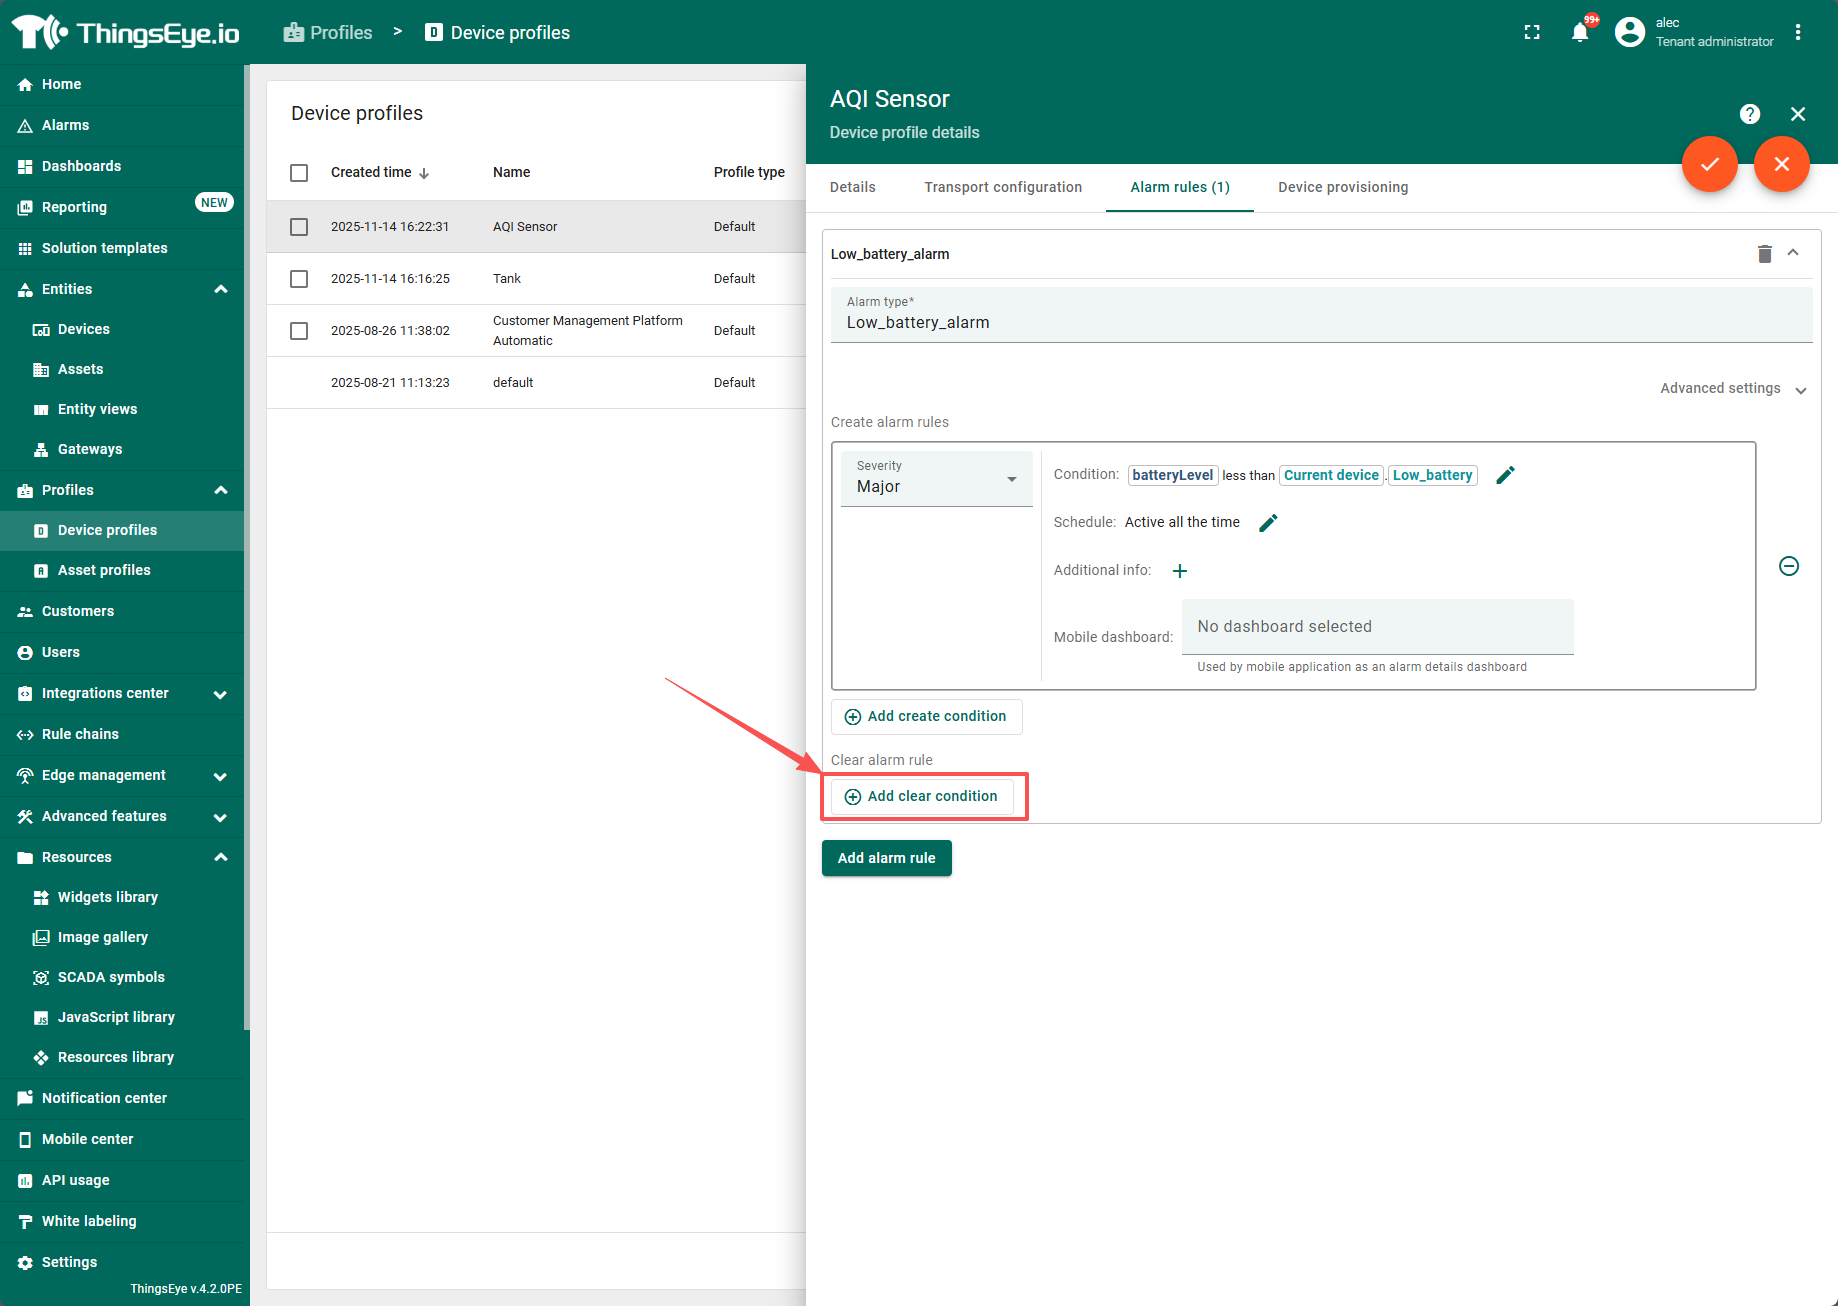
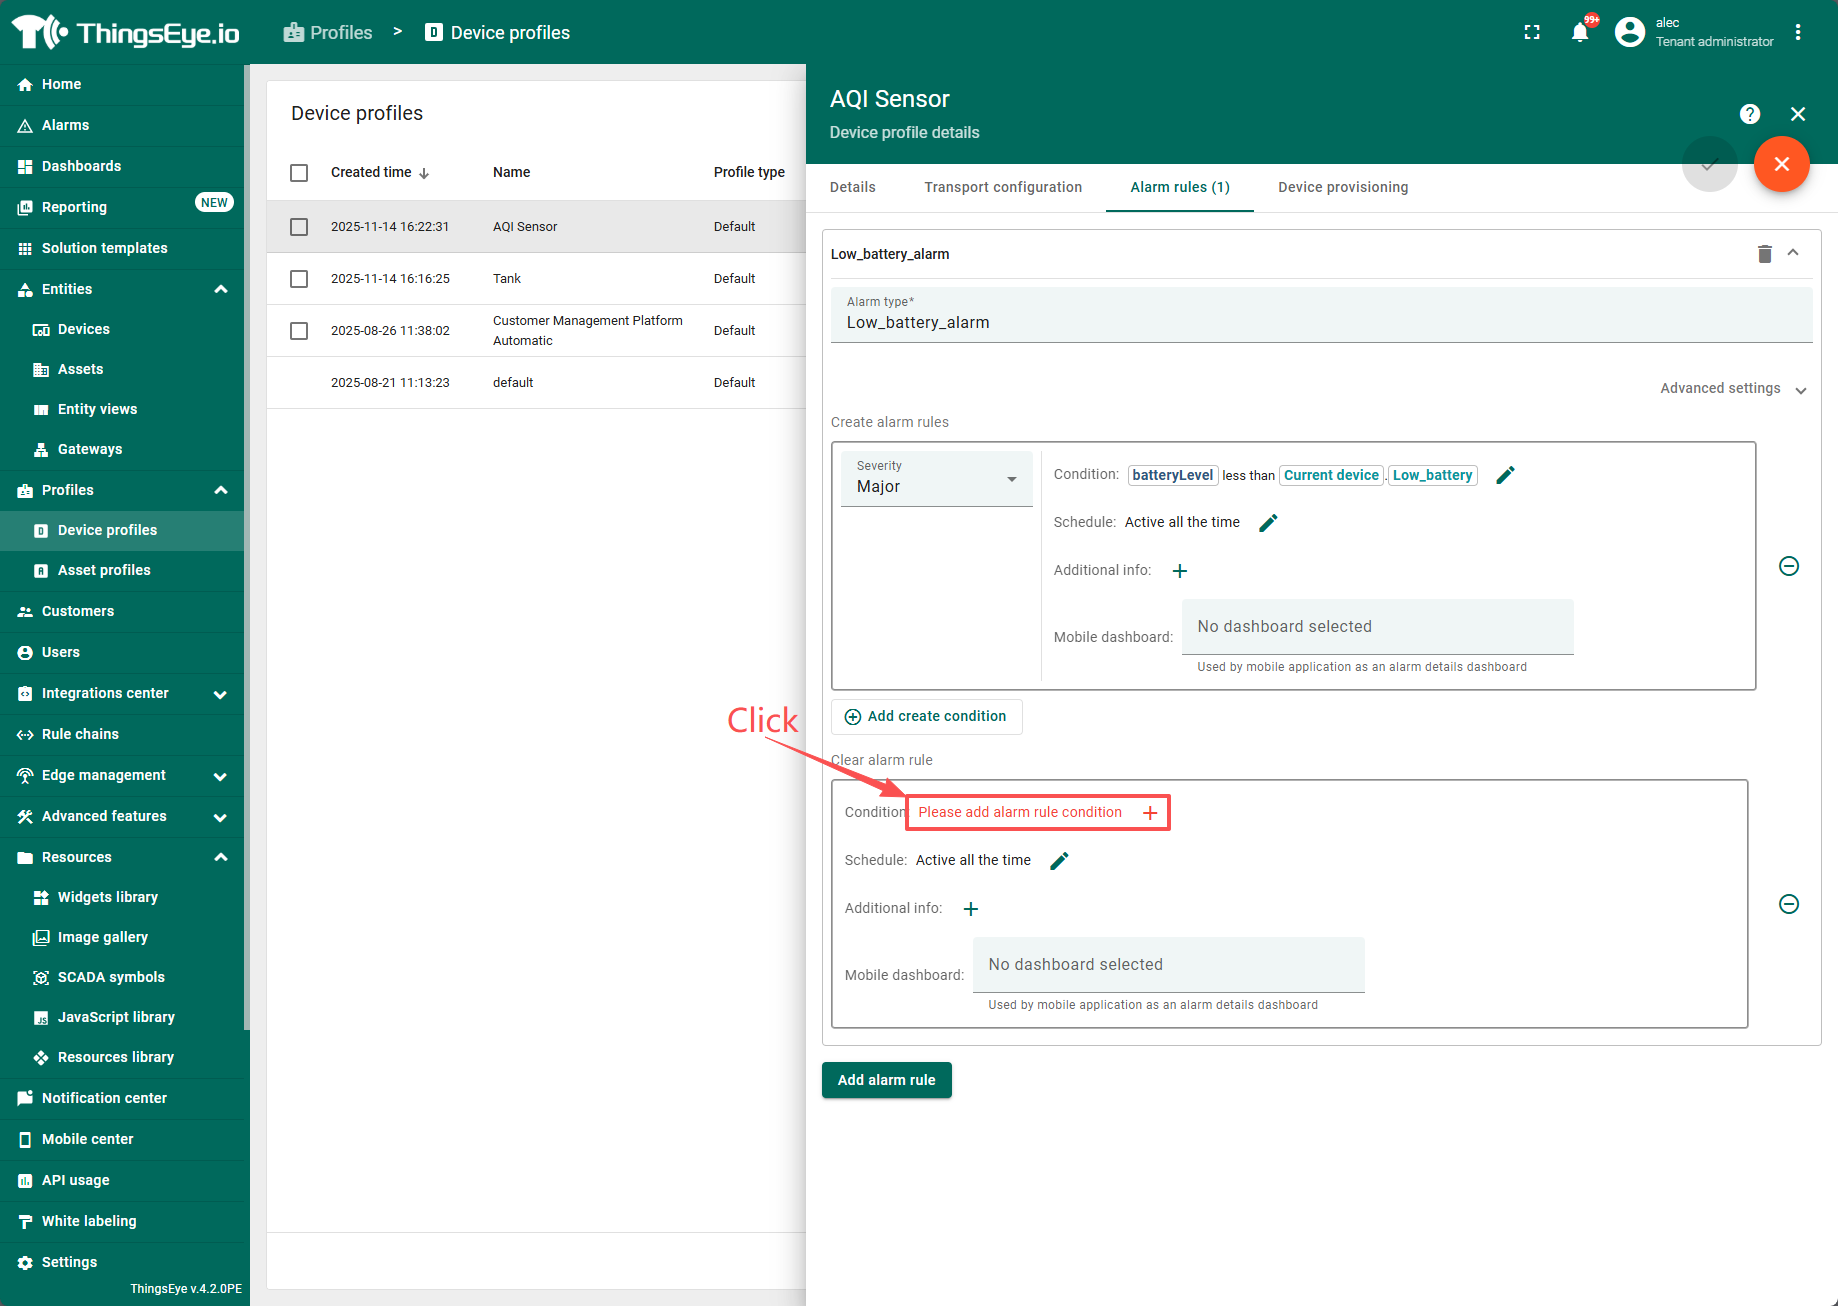
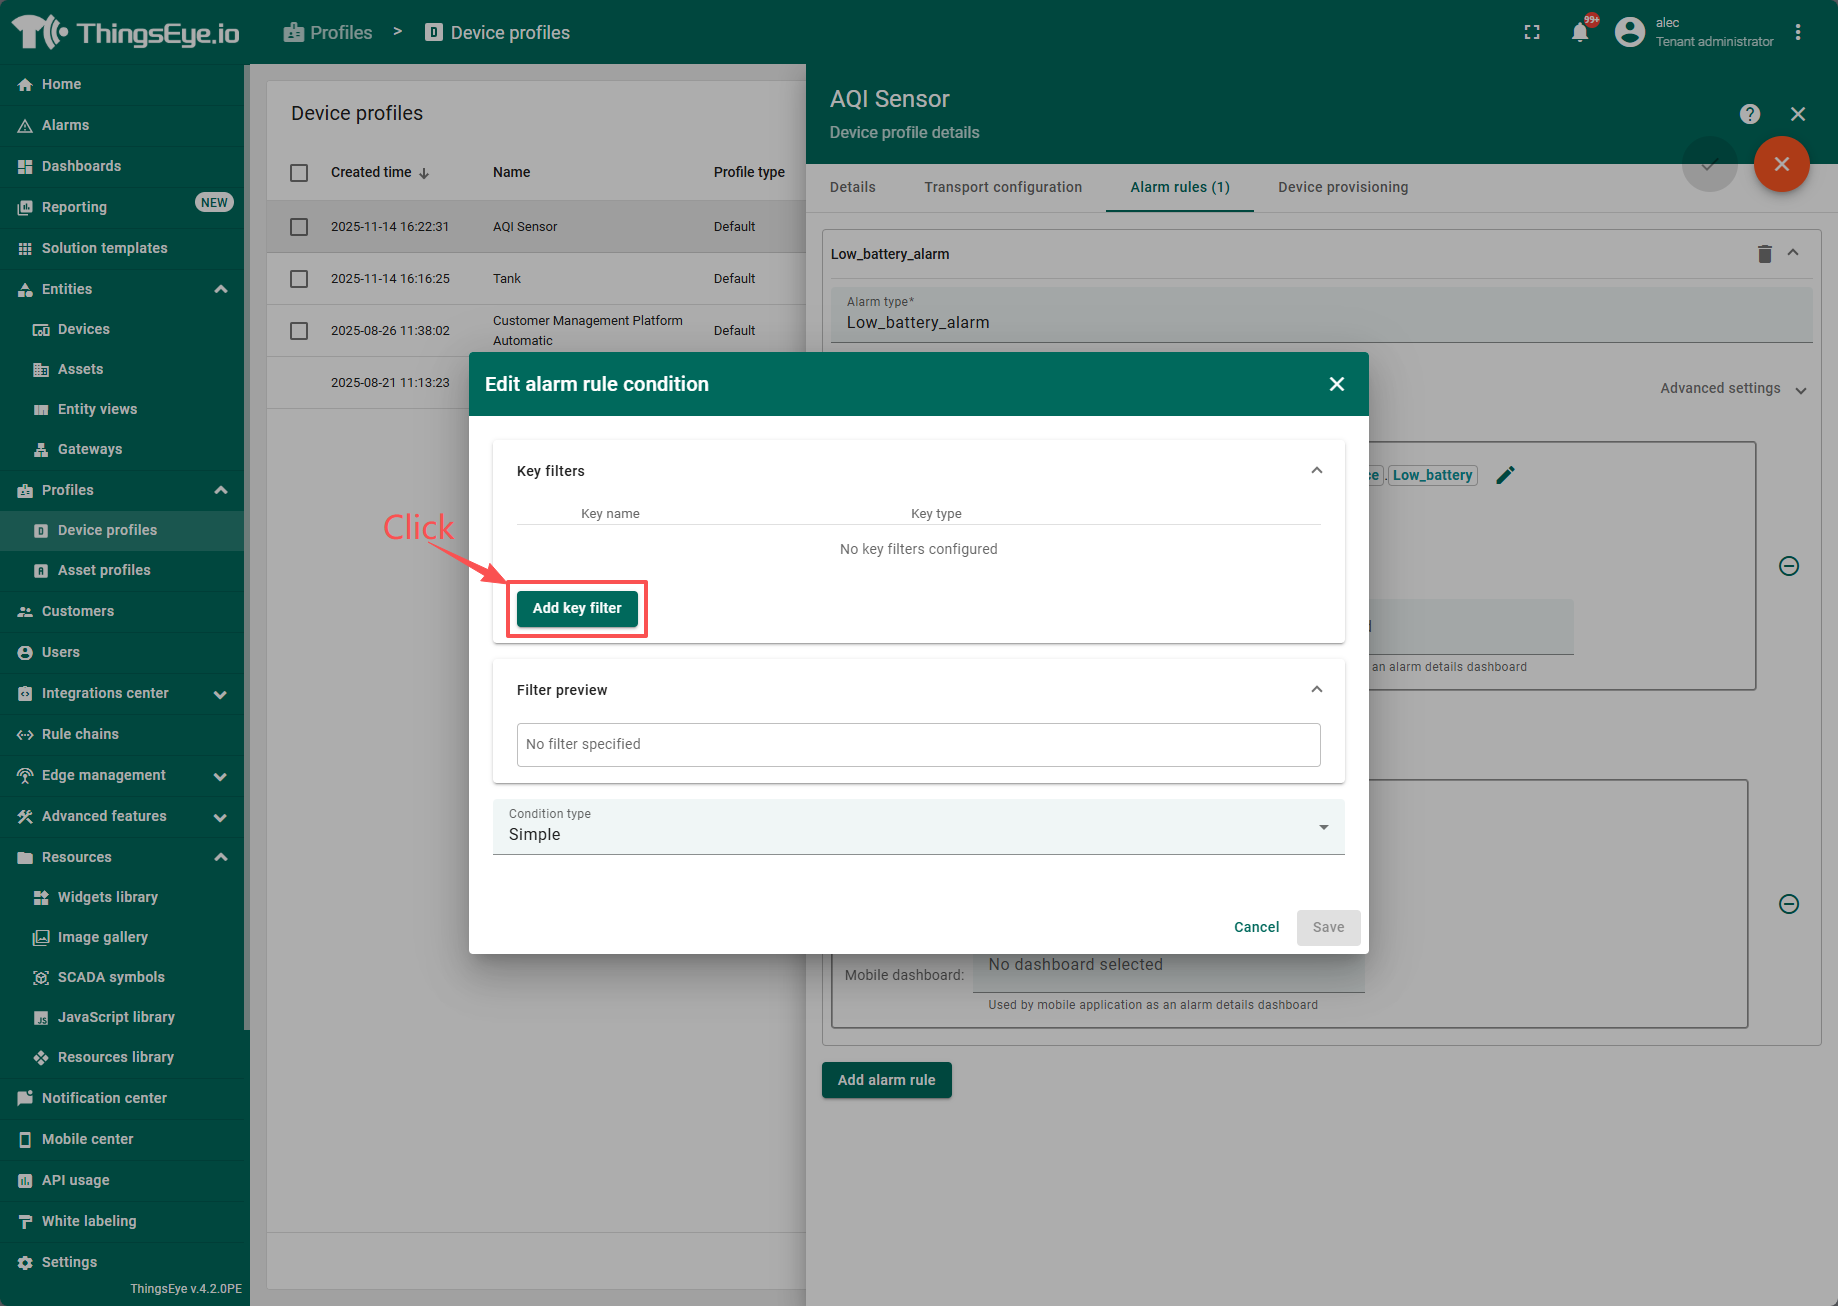
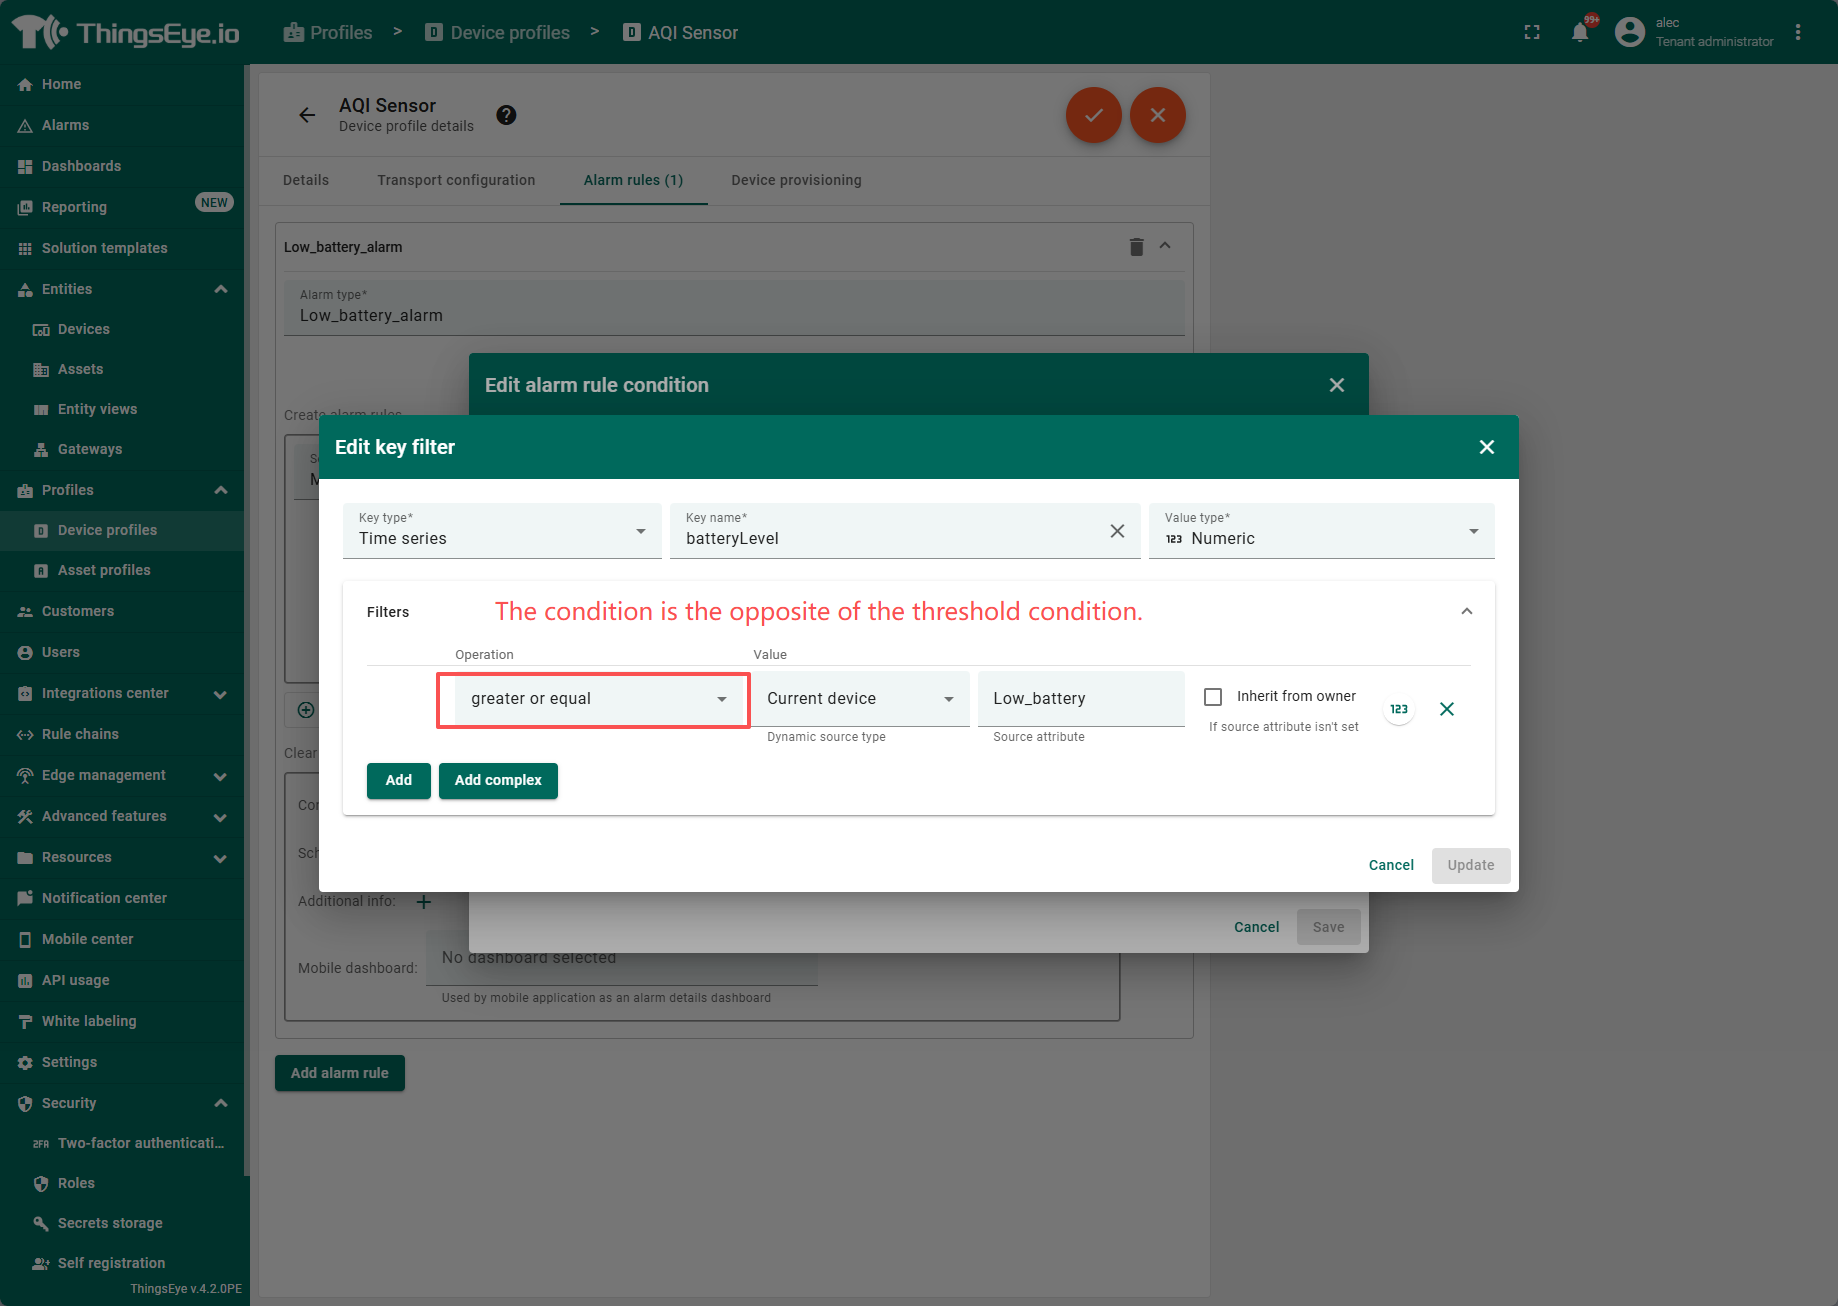
Save after set
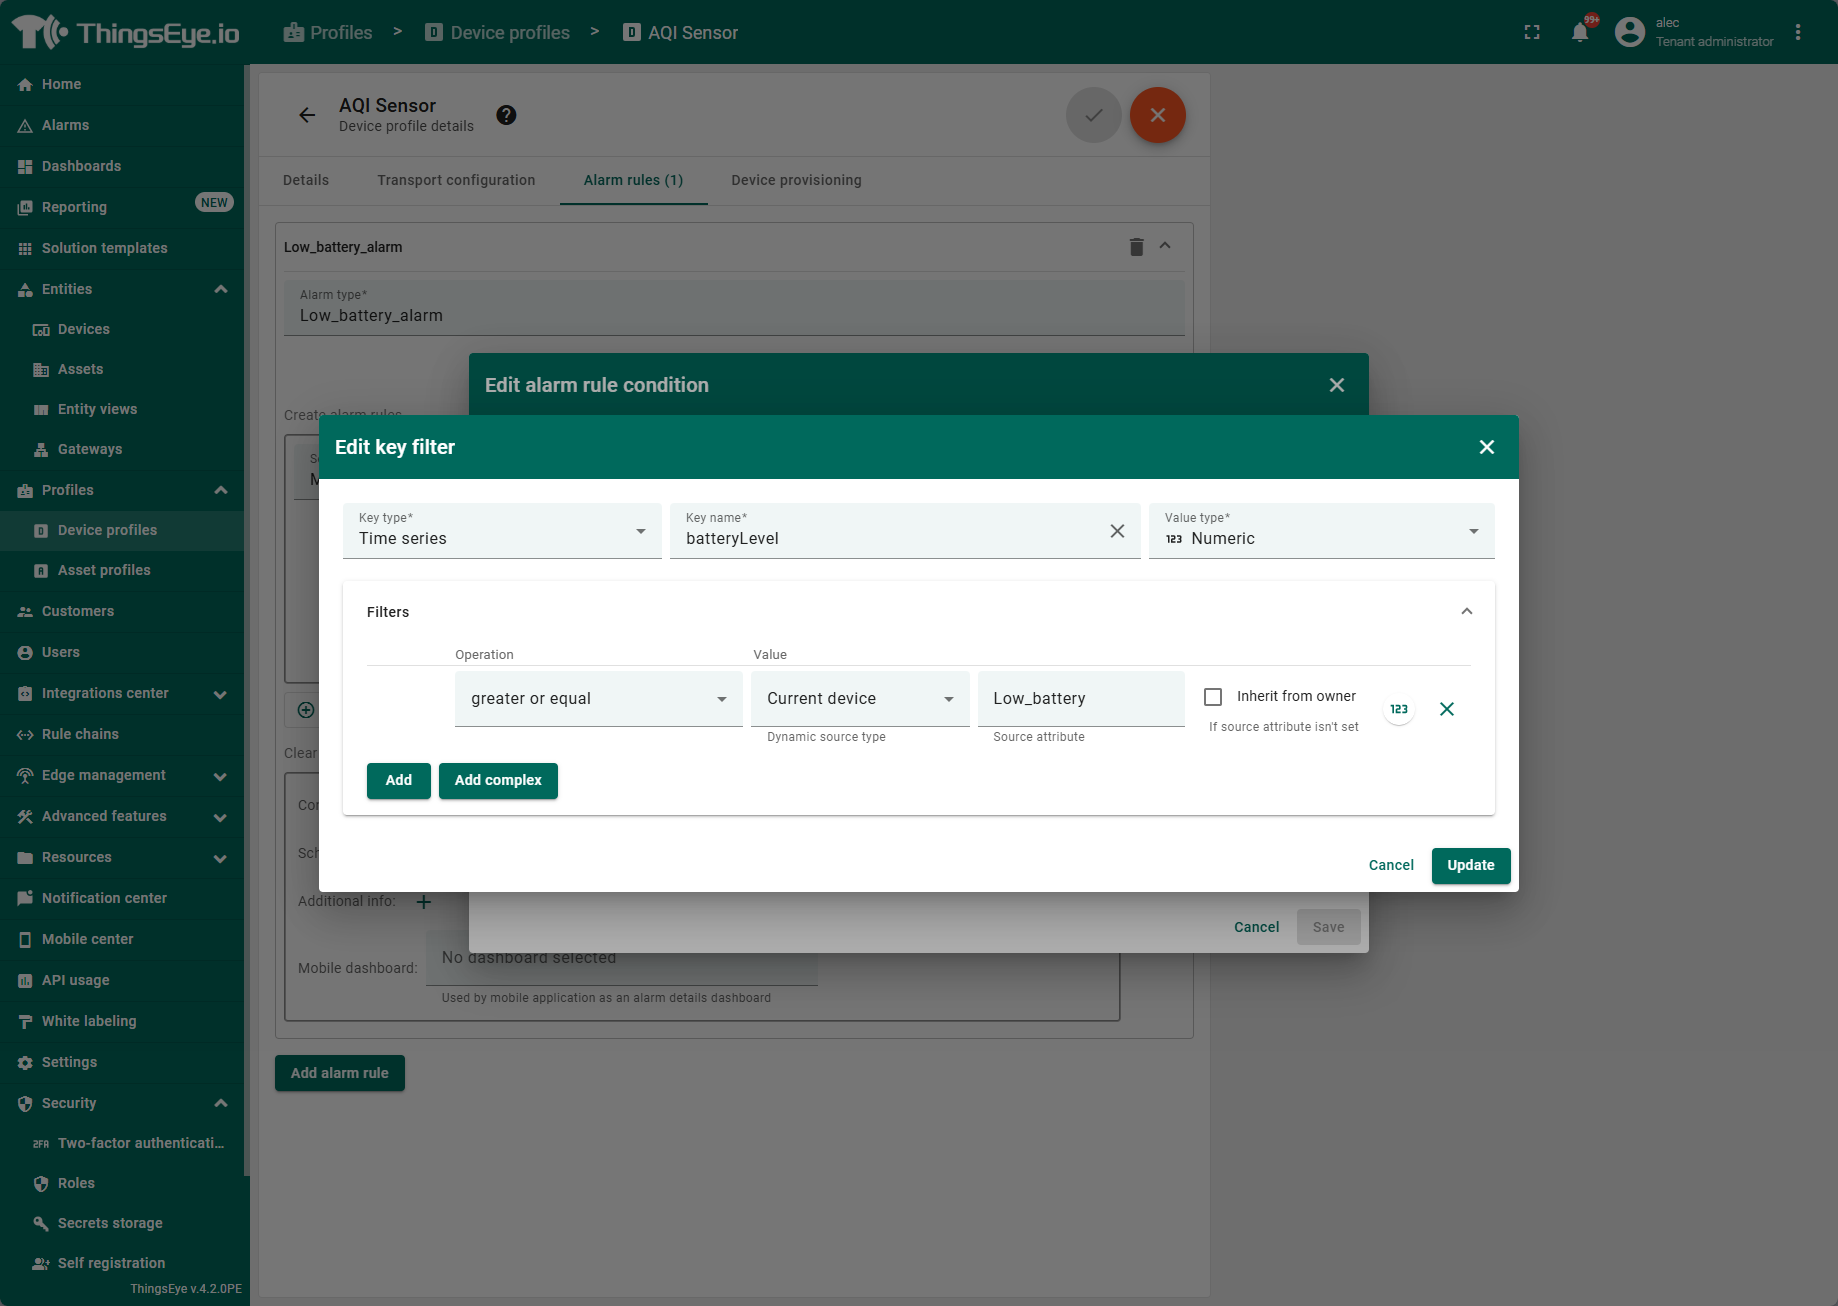
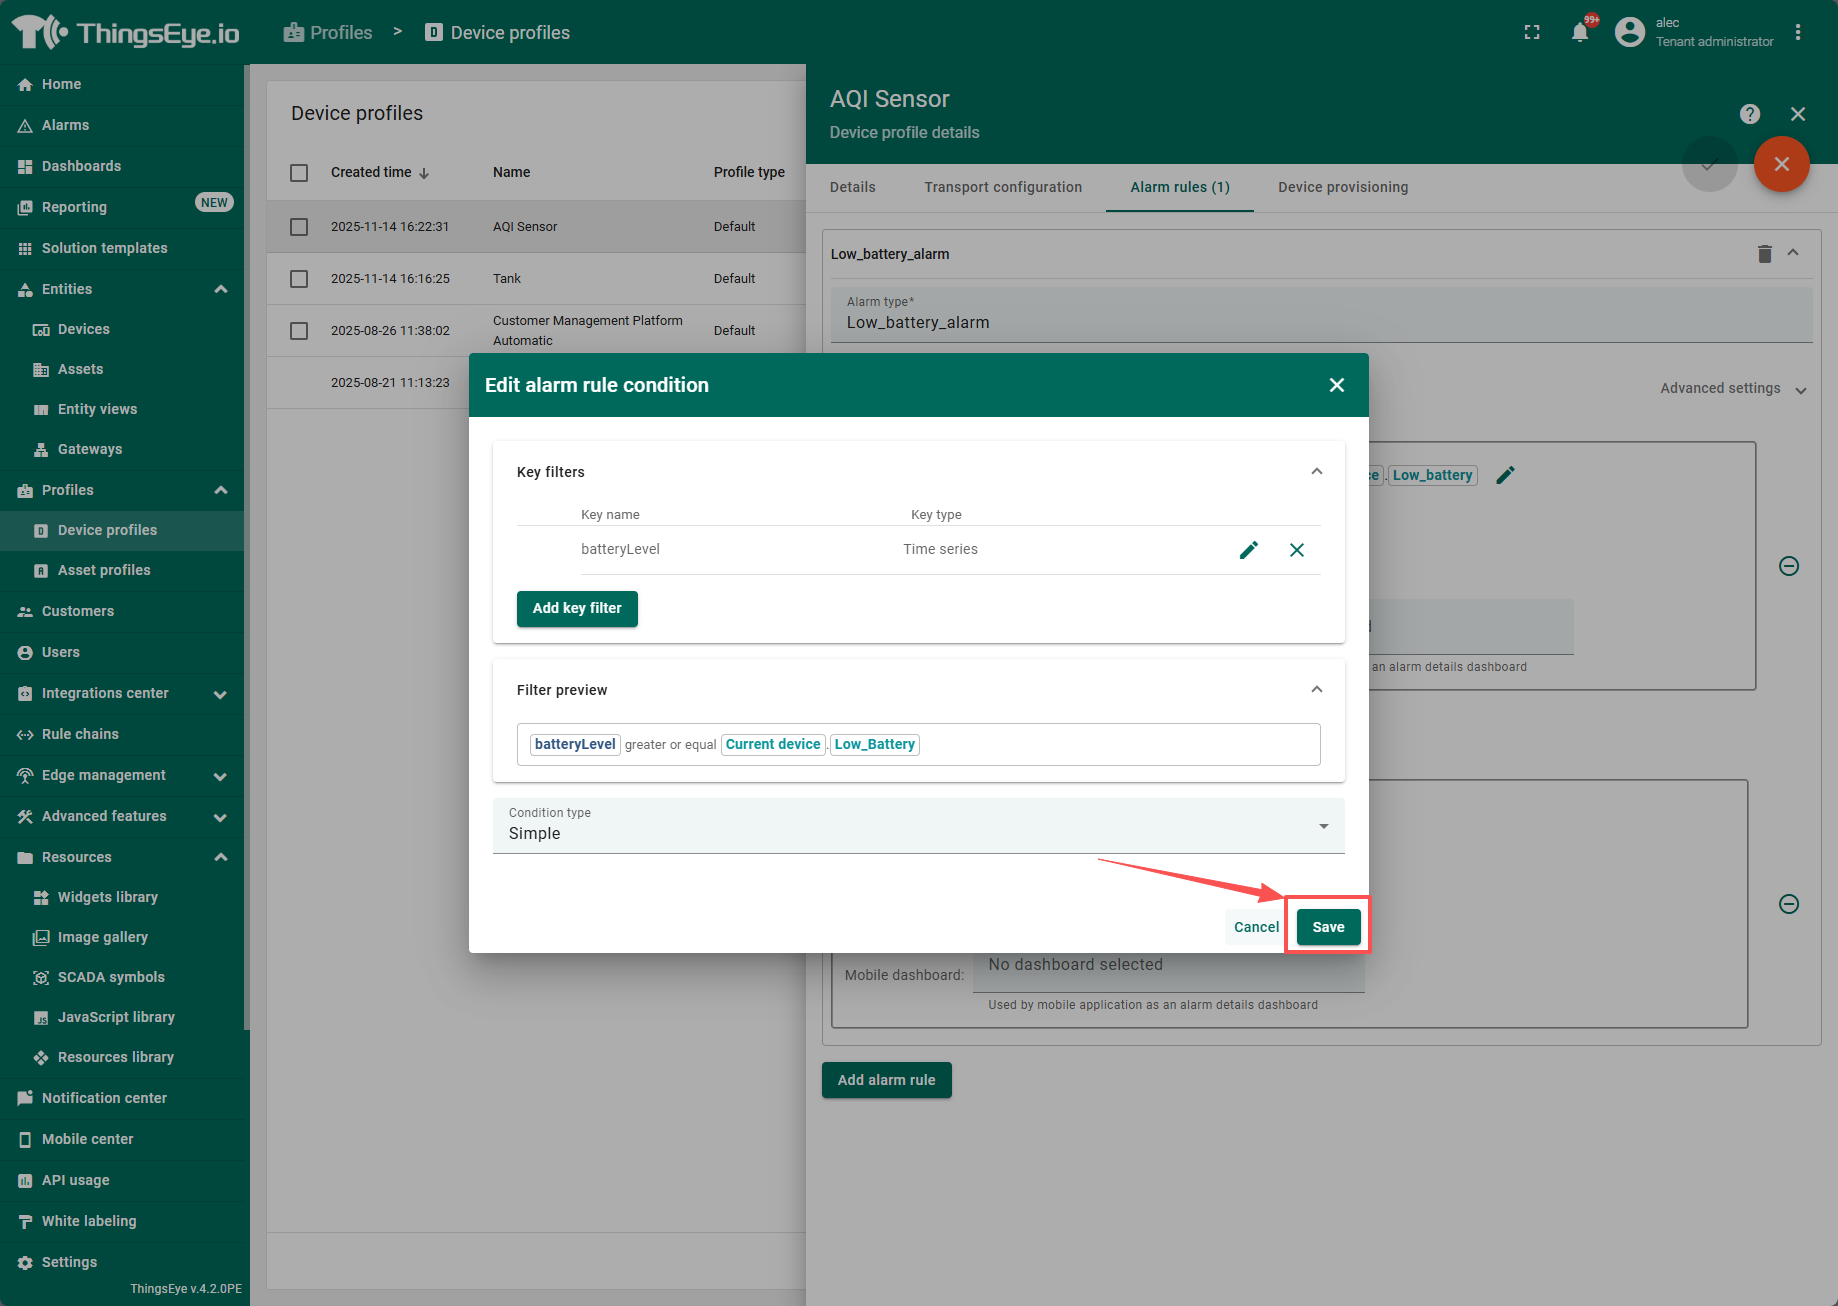
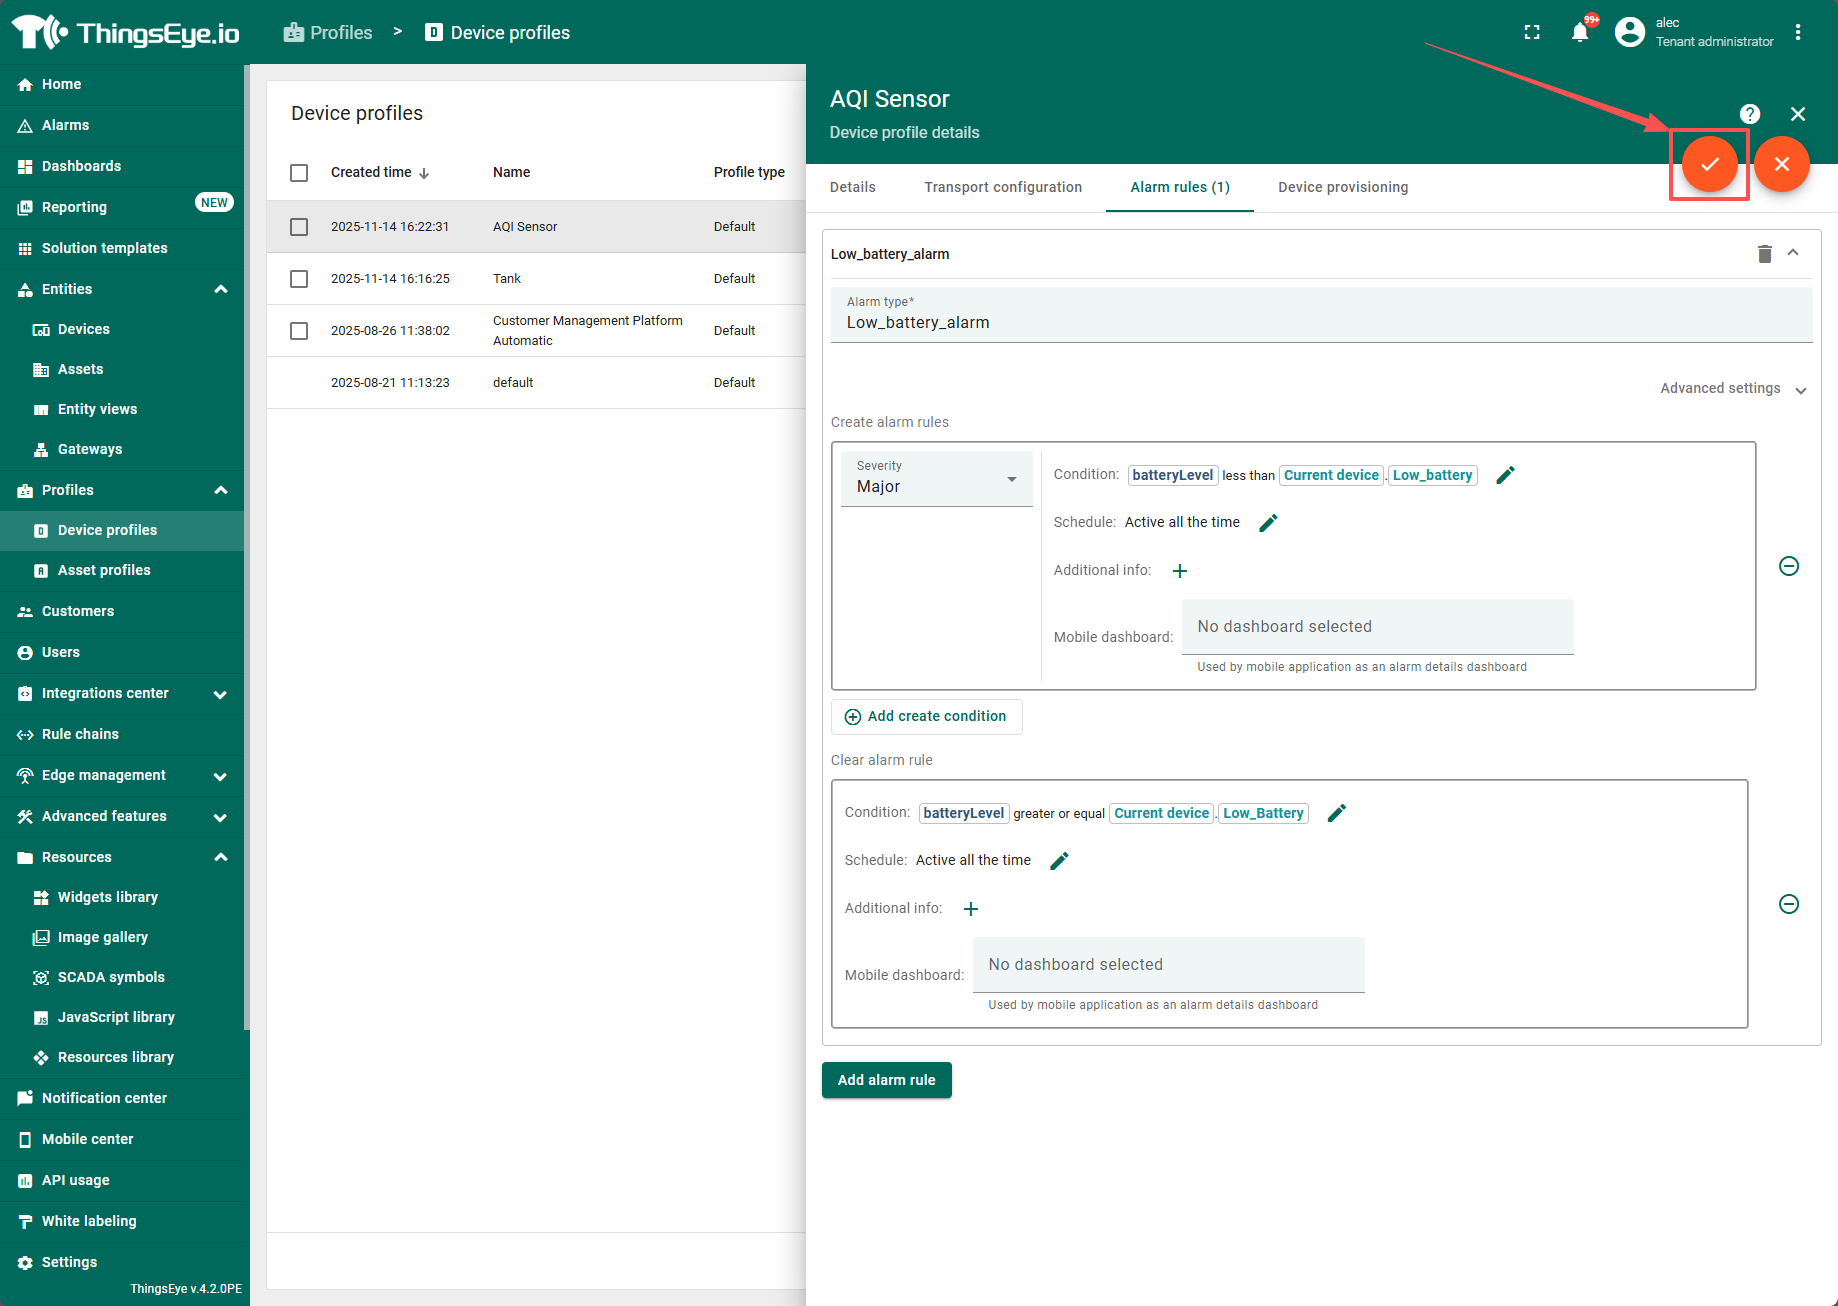
3. Configure the threshold input box
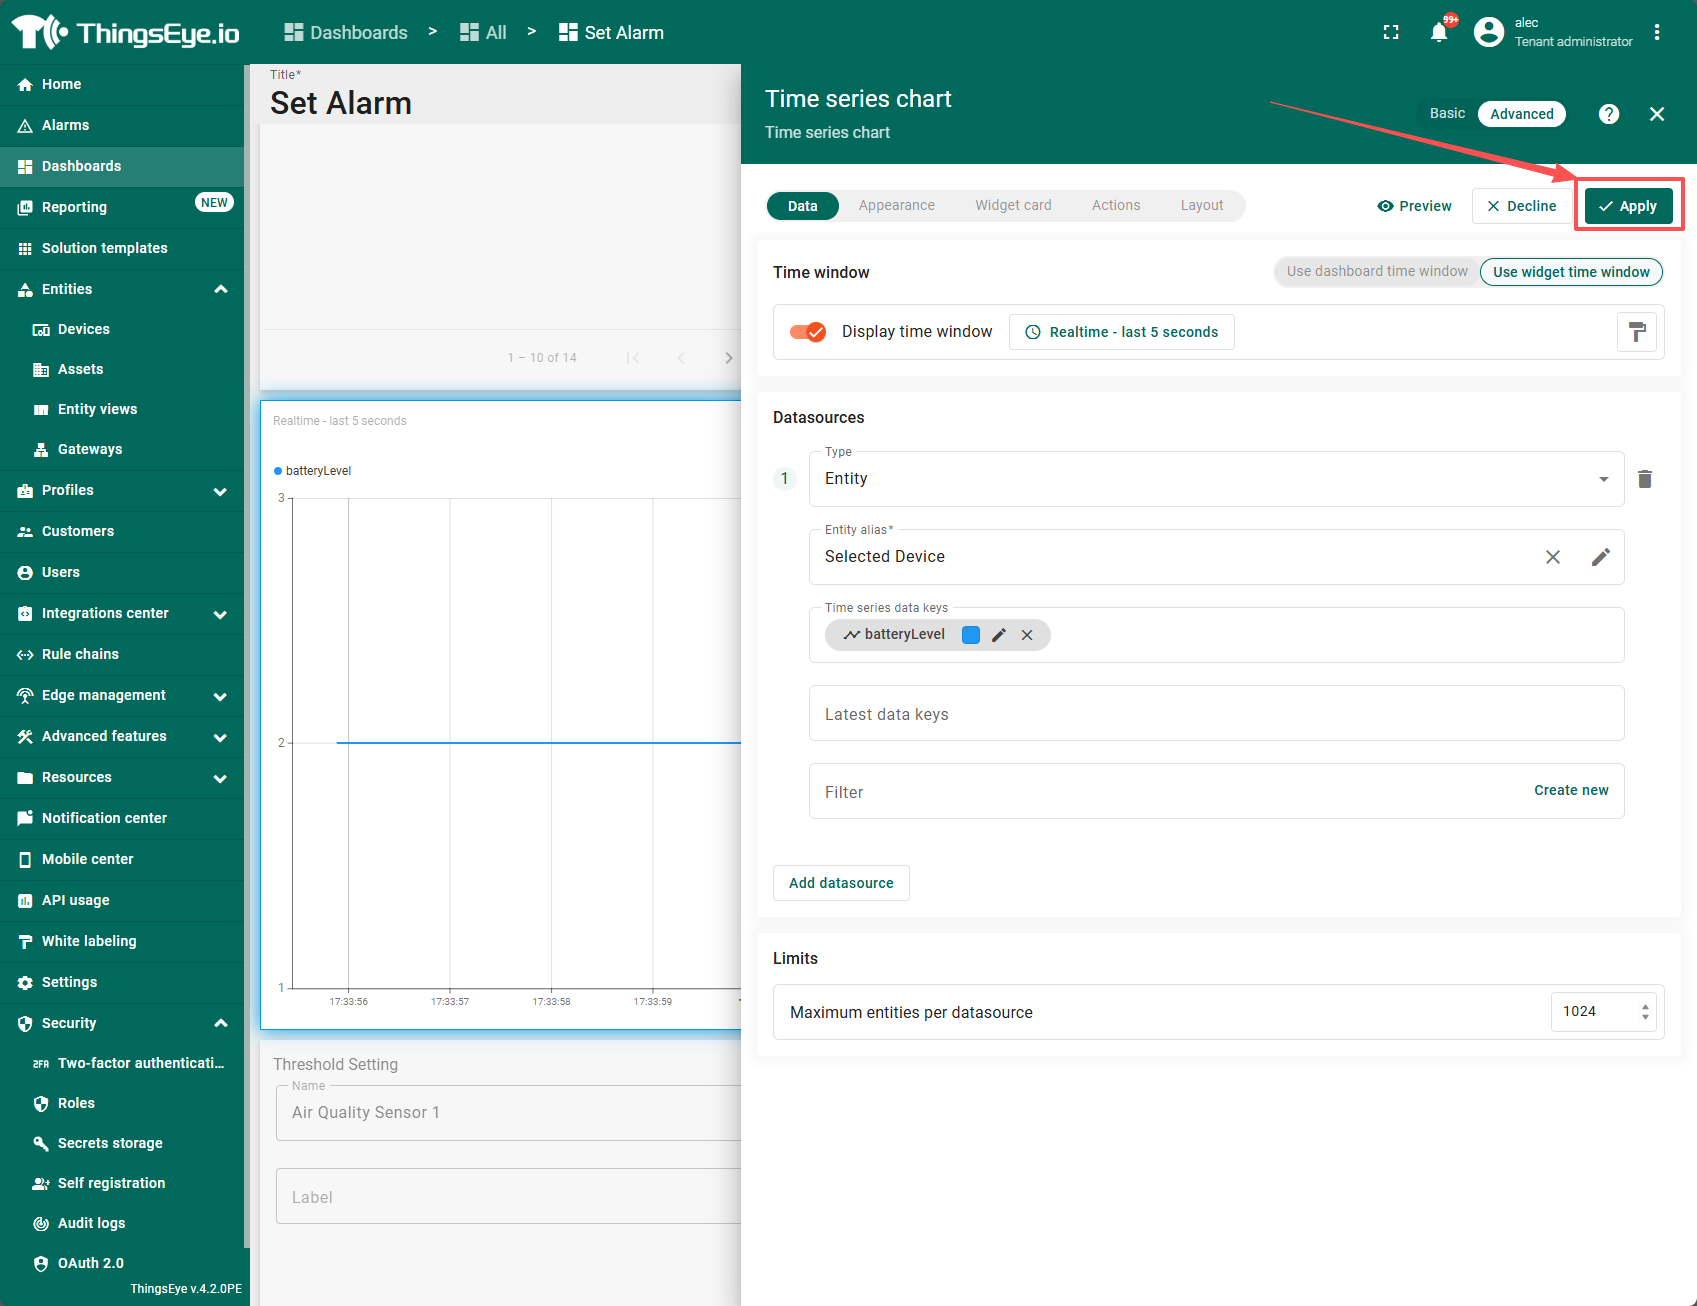
3.1 Select the Realtime data key to display
Return to the dashboard and click on the device you want to edit.
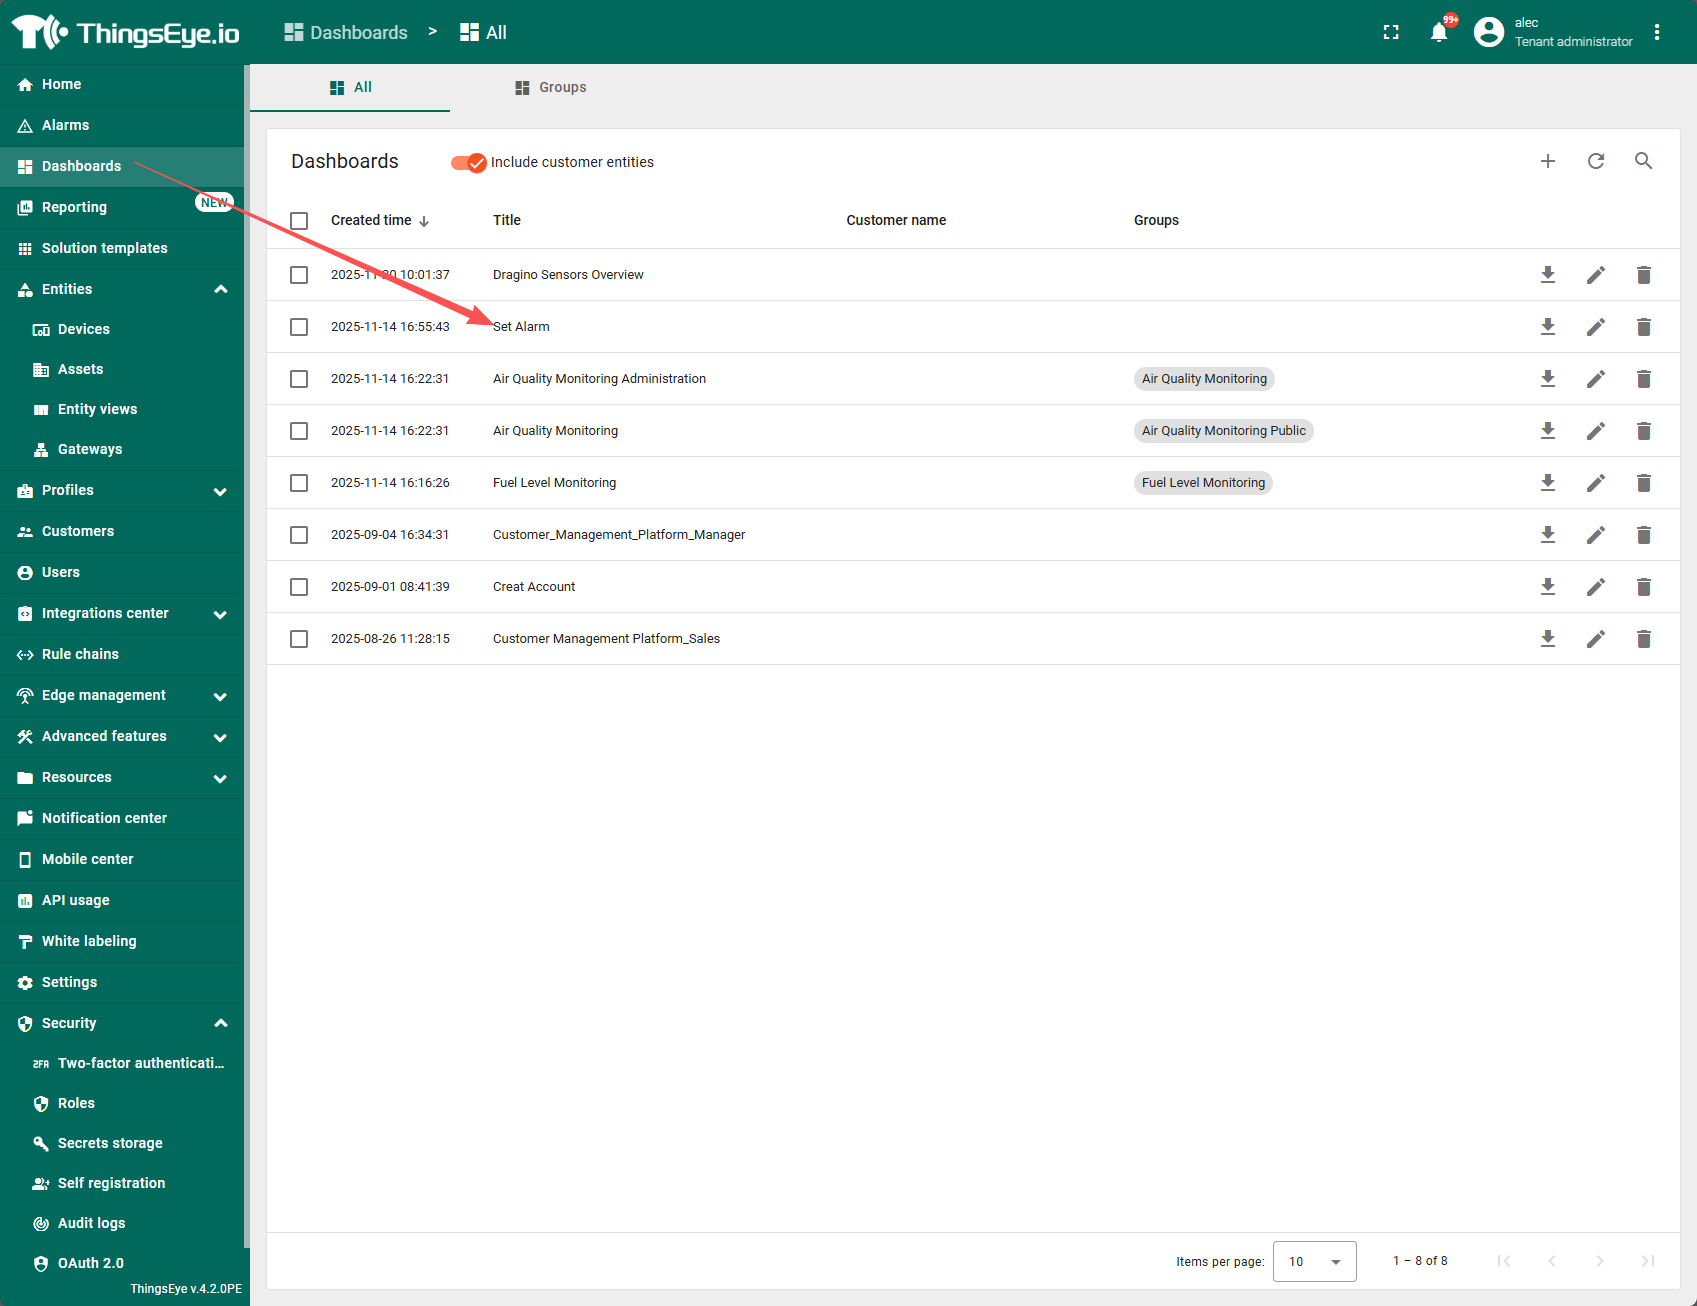
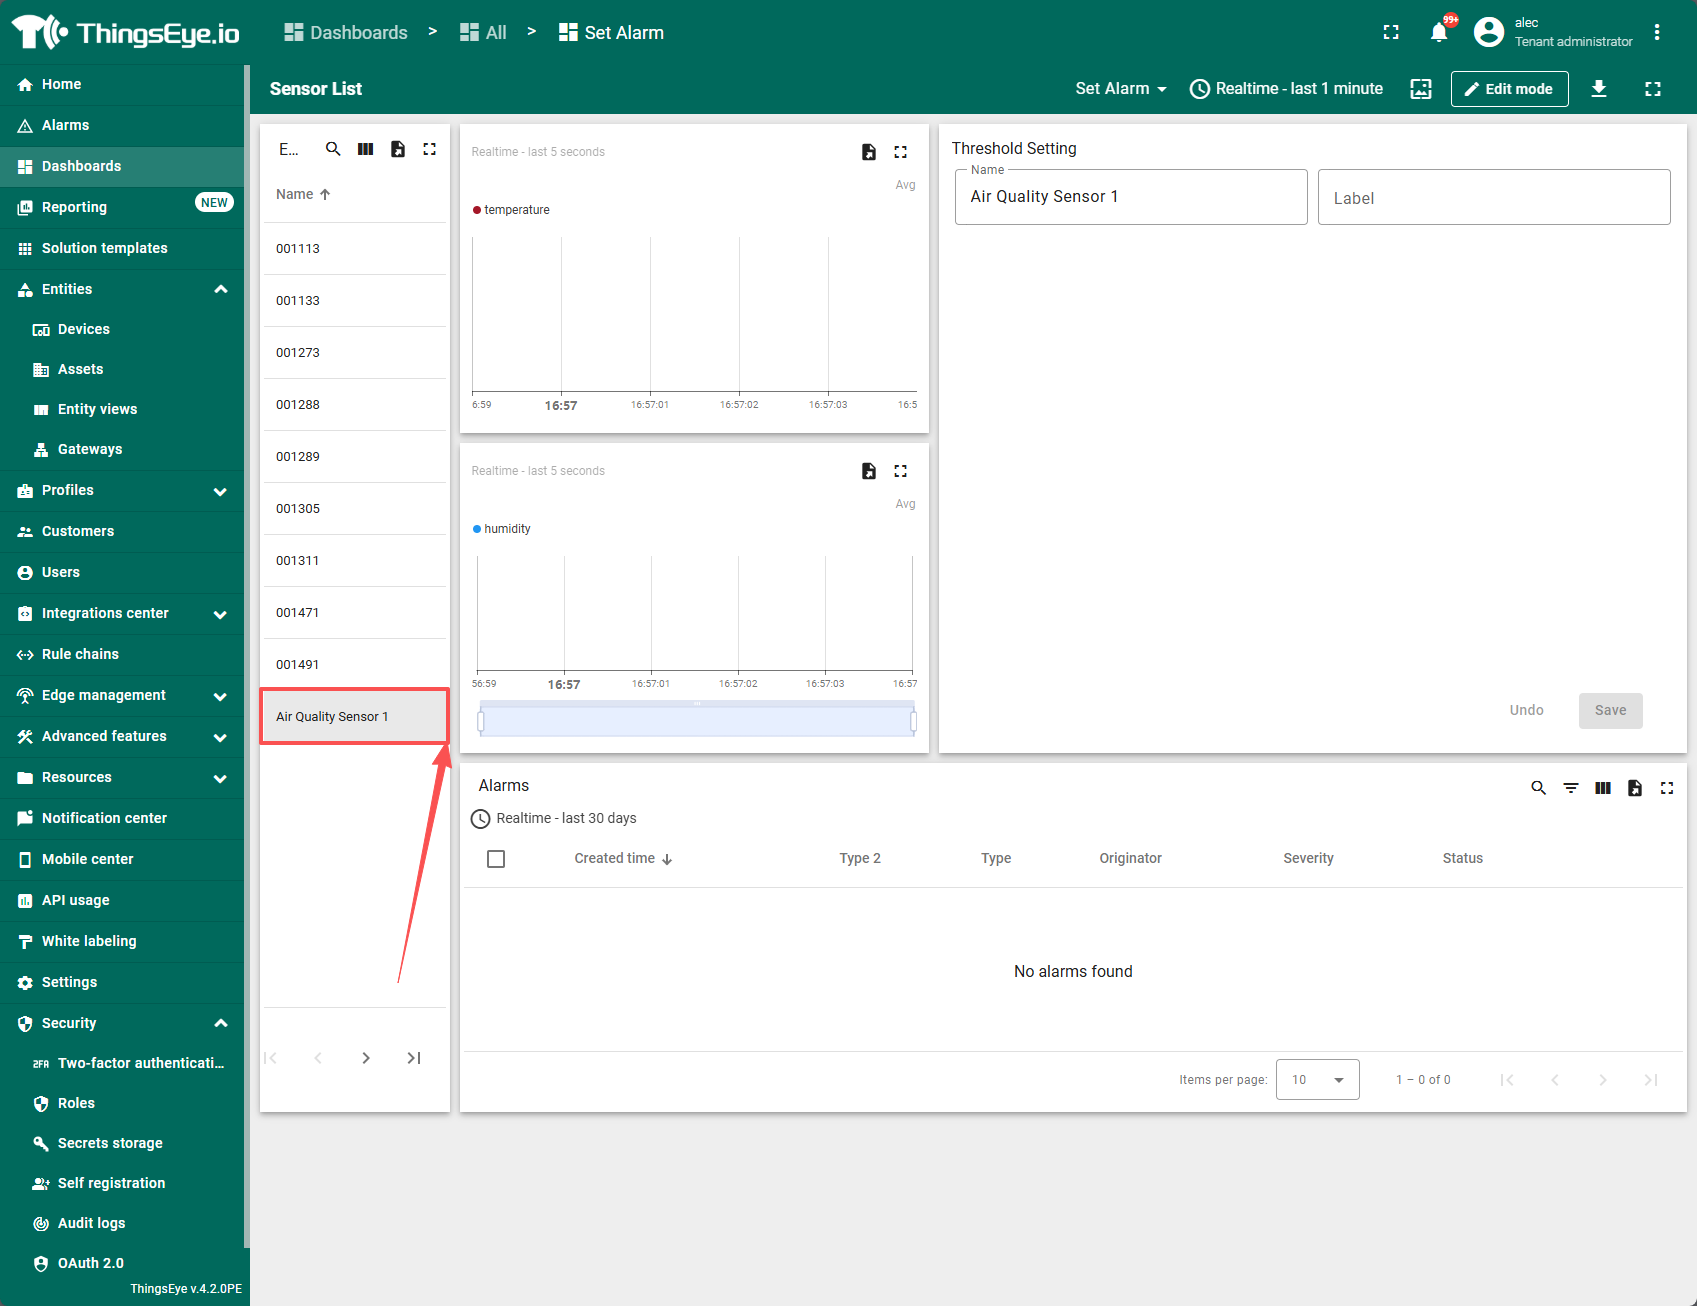
Click "Edit mode" to enter edit mode.
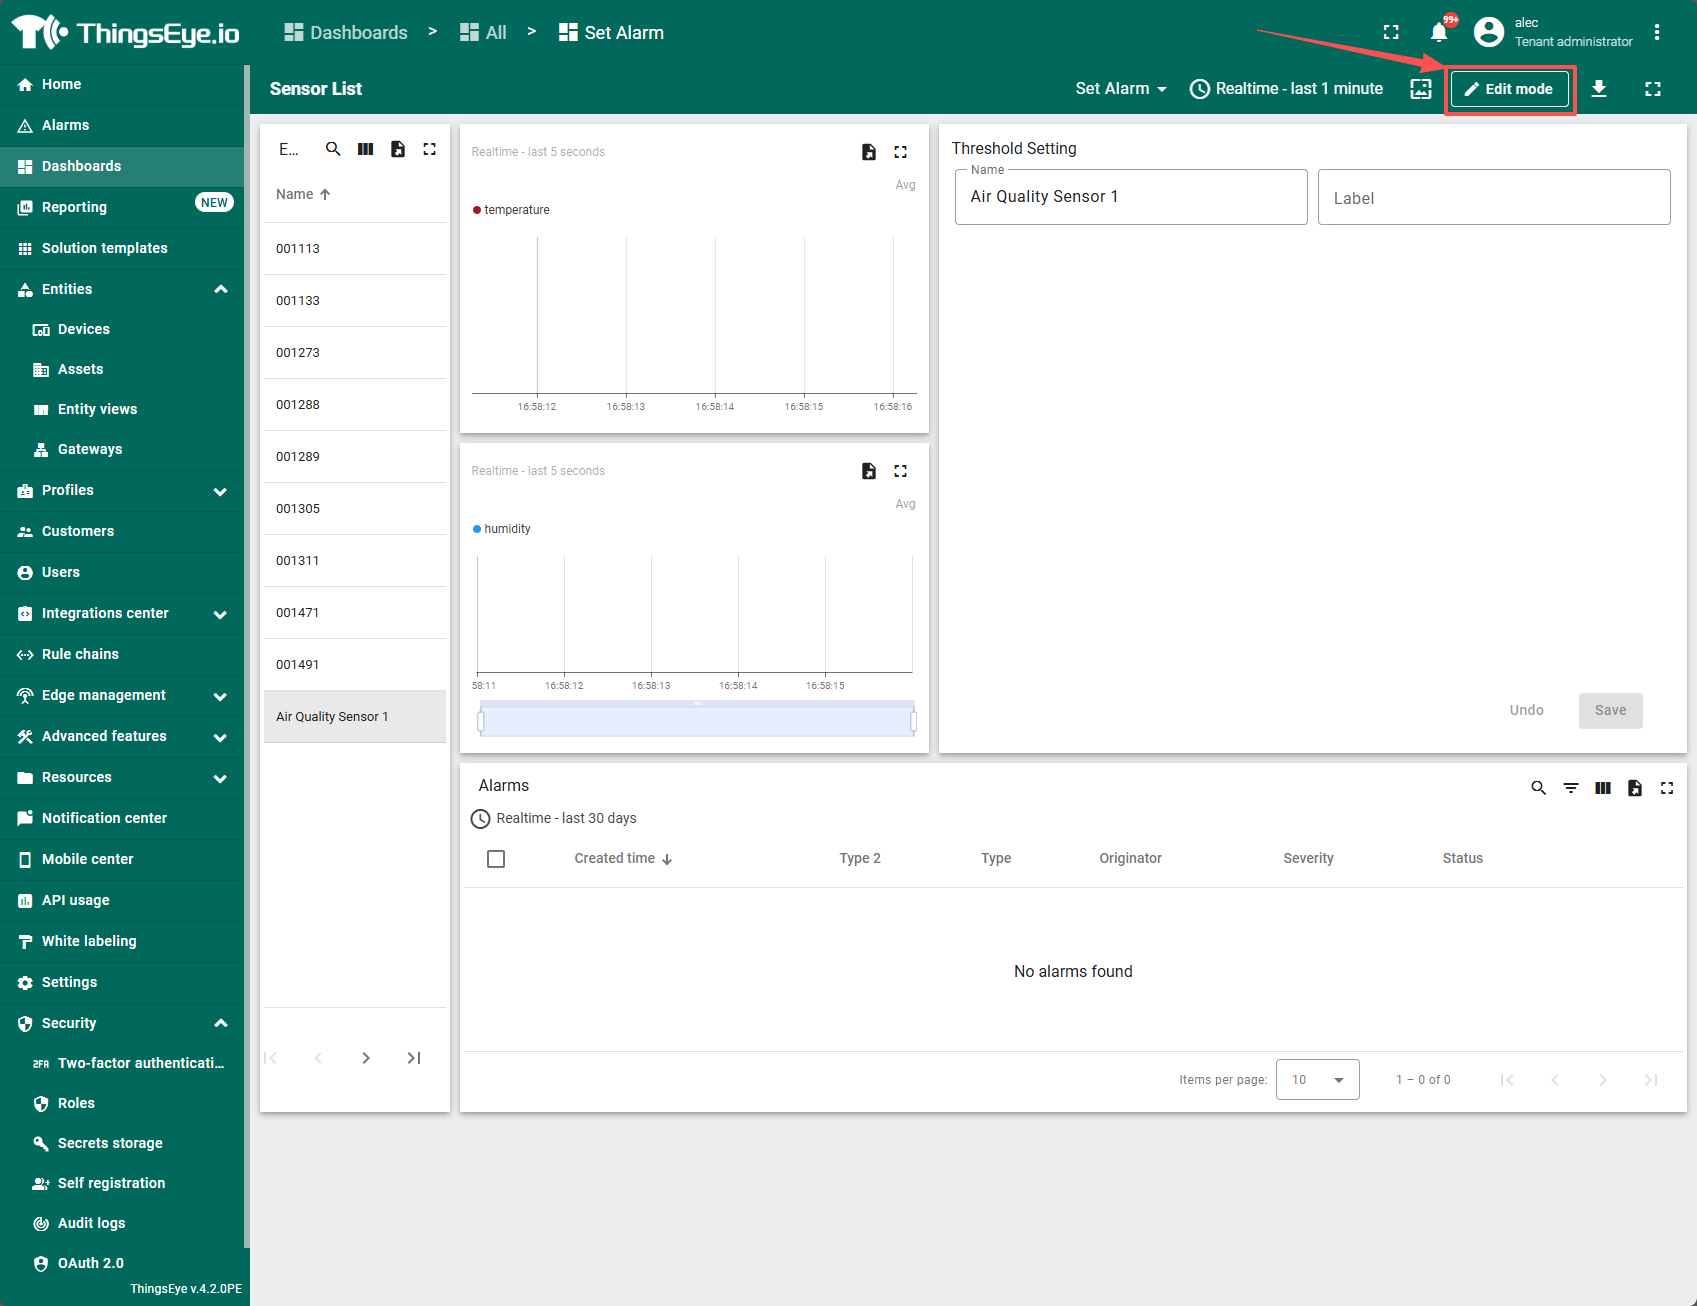
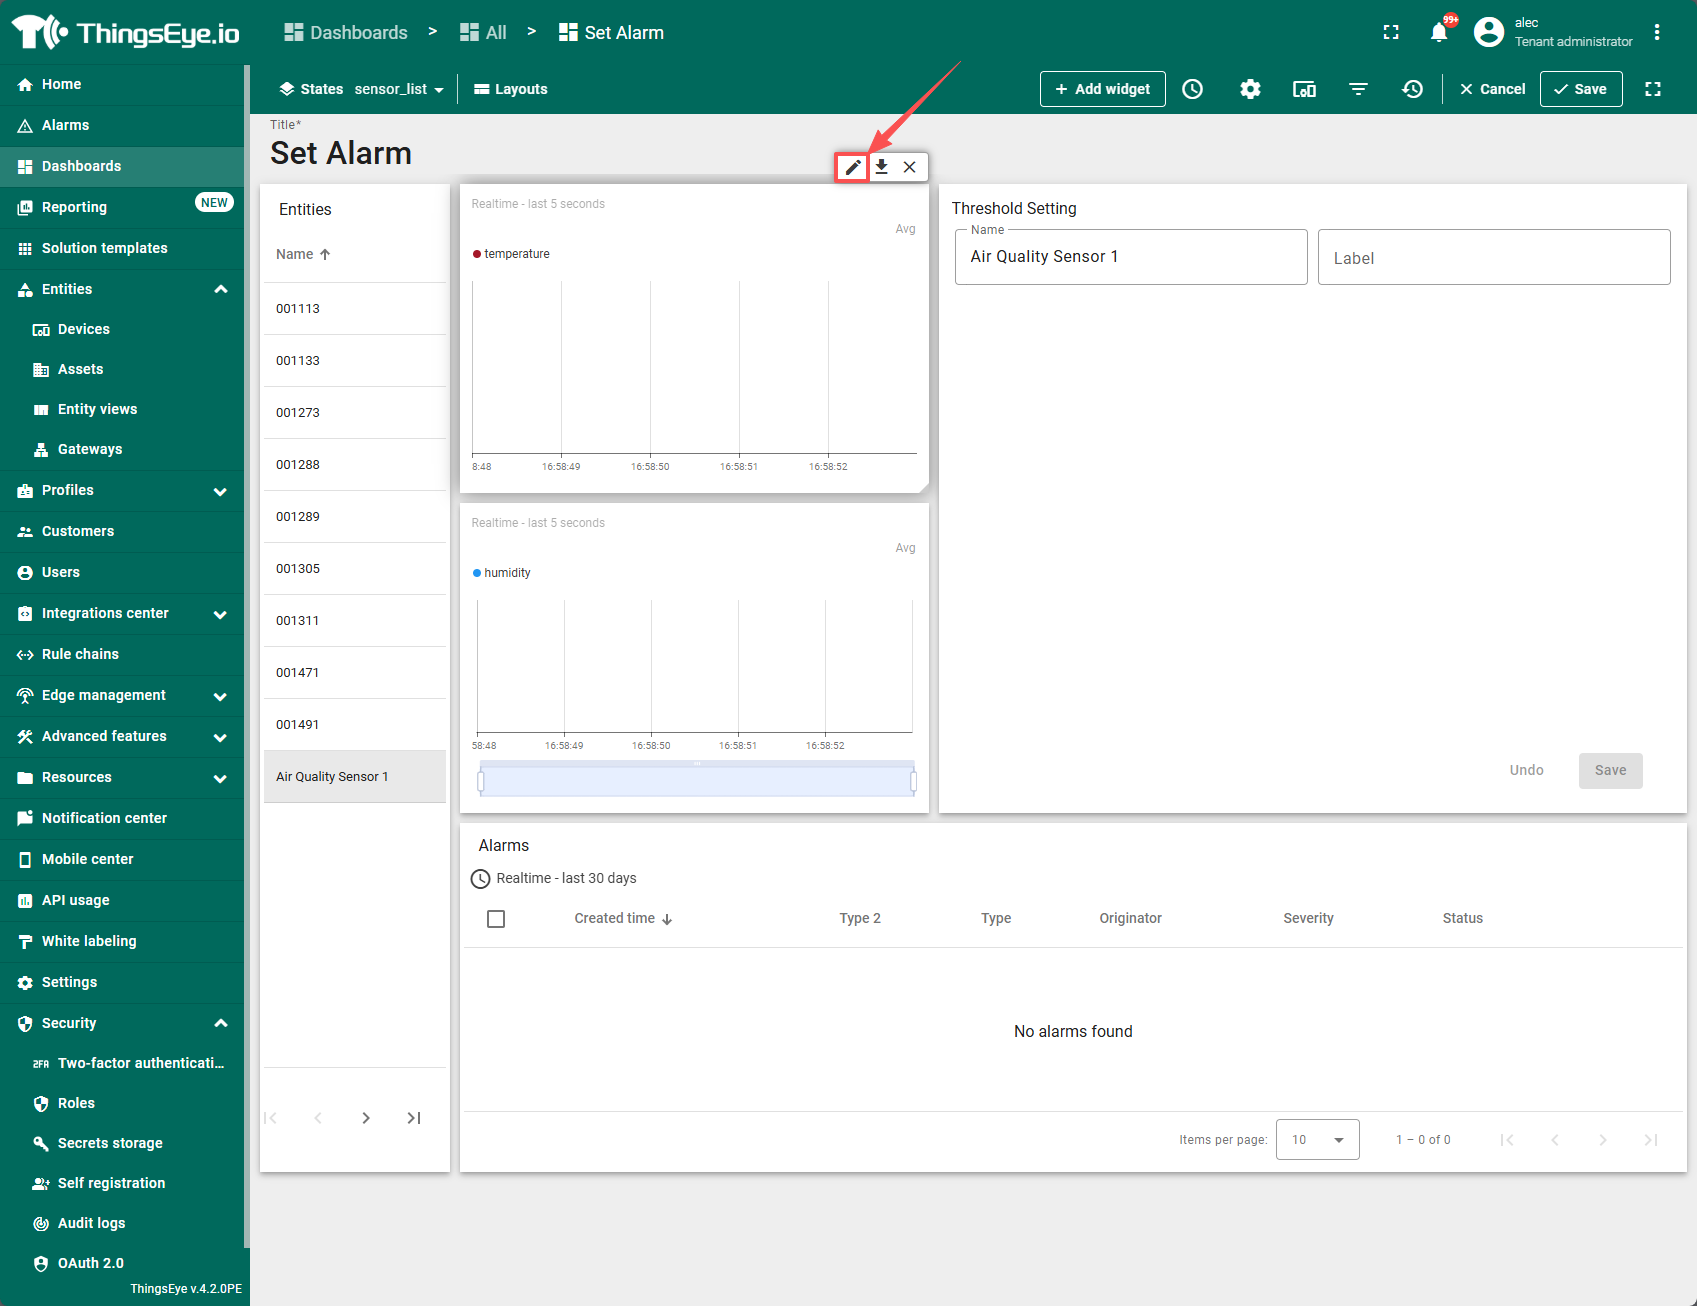
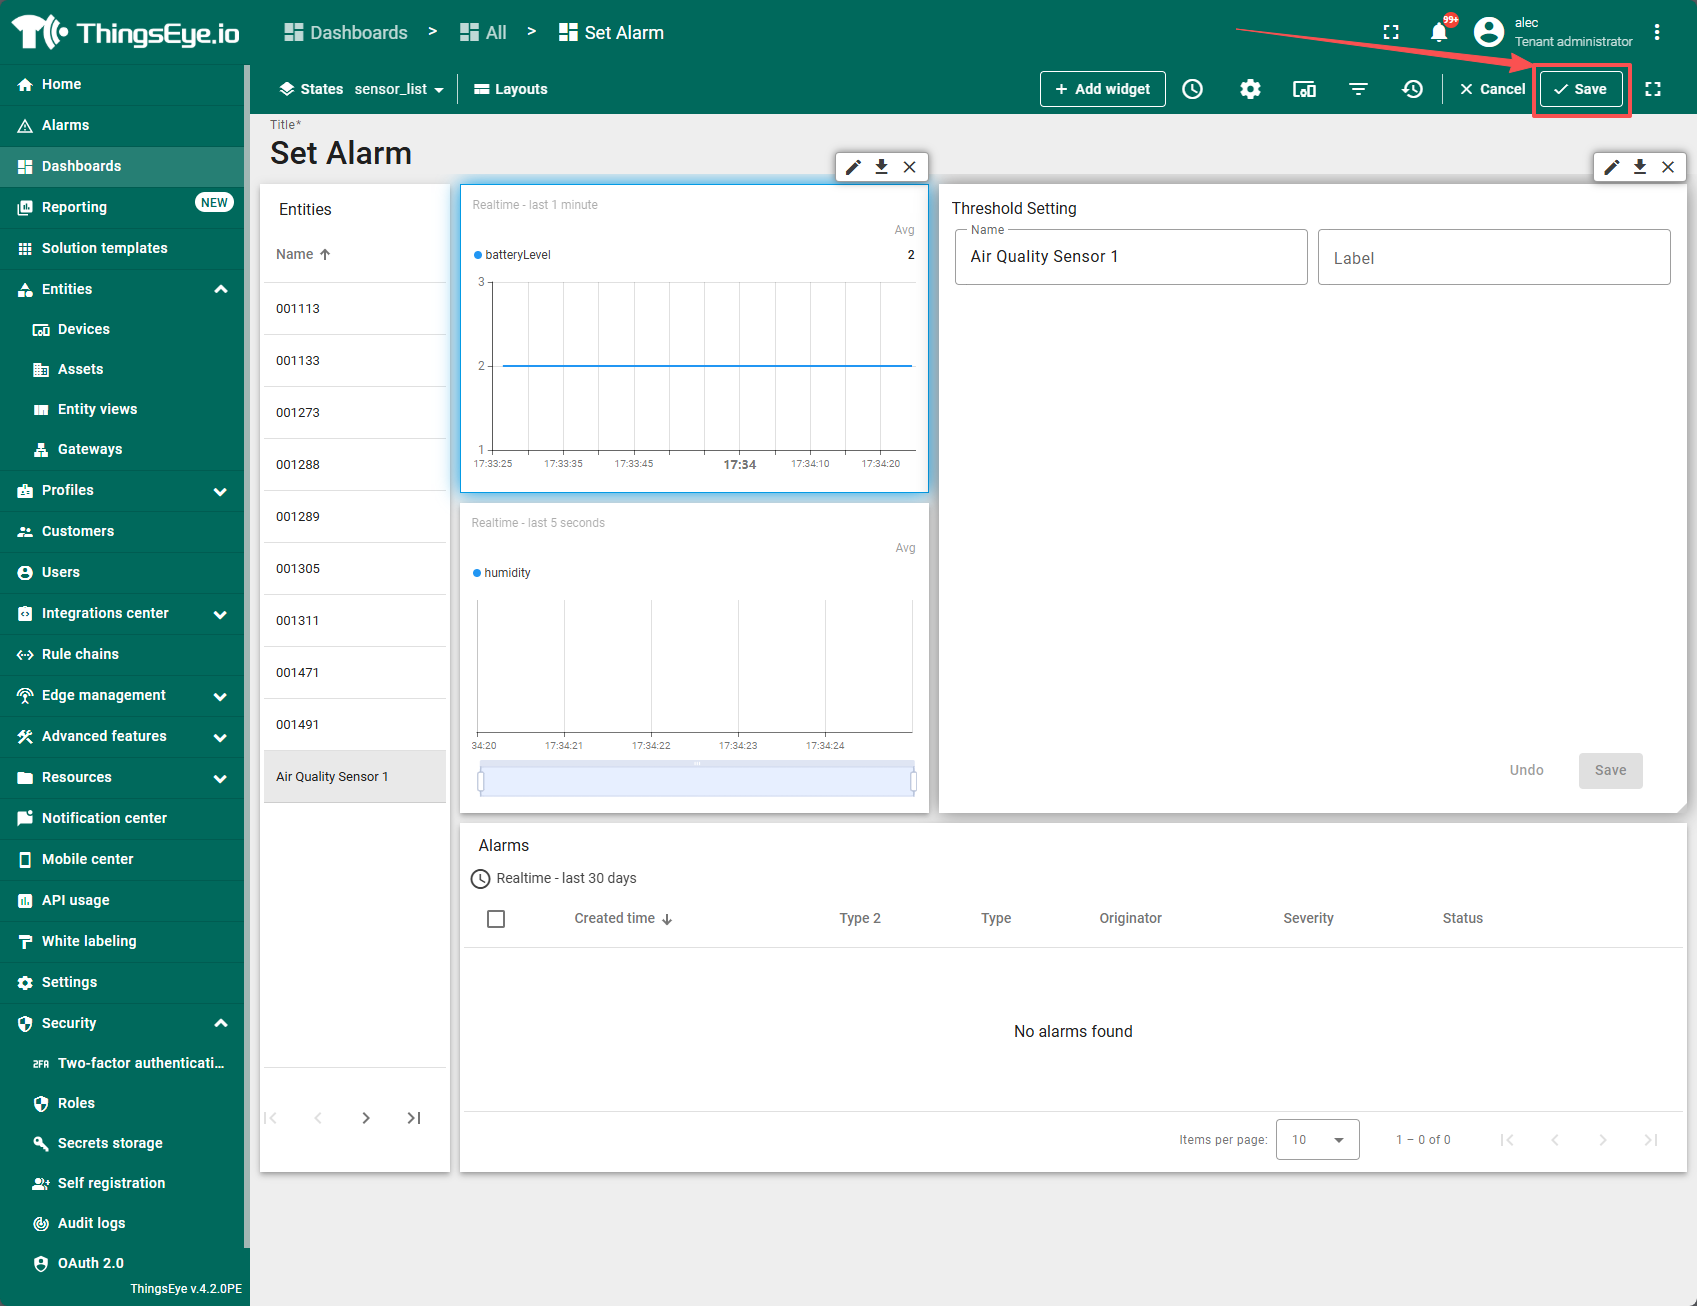
Delete the default key and select the key you want to display.
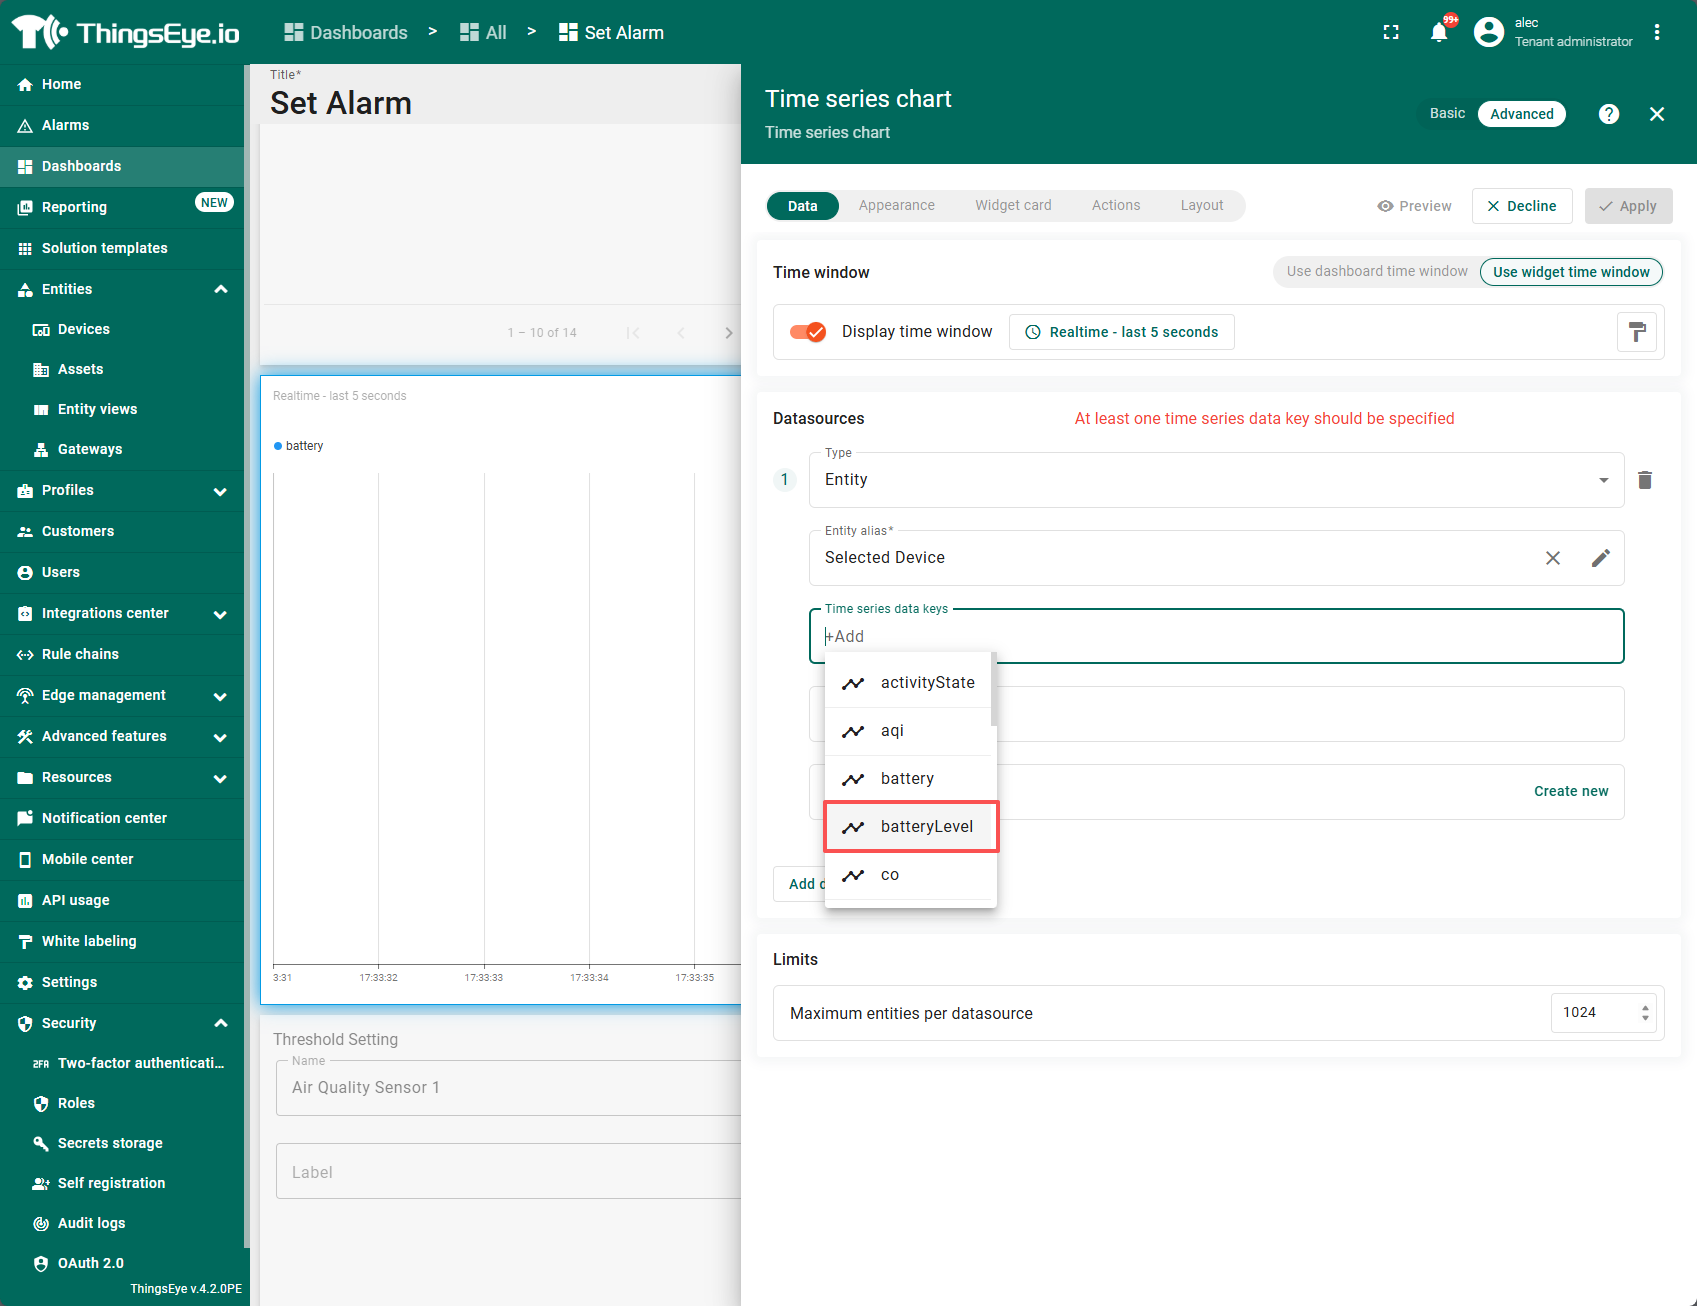
Save after confirmation.
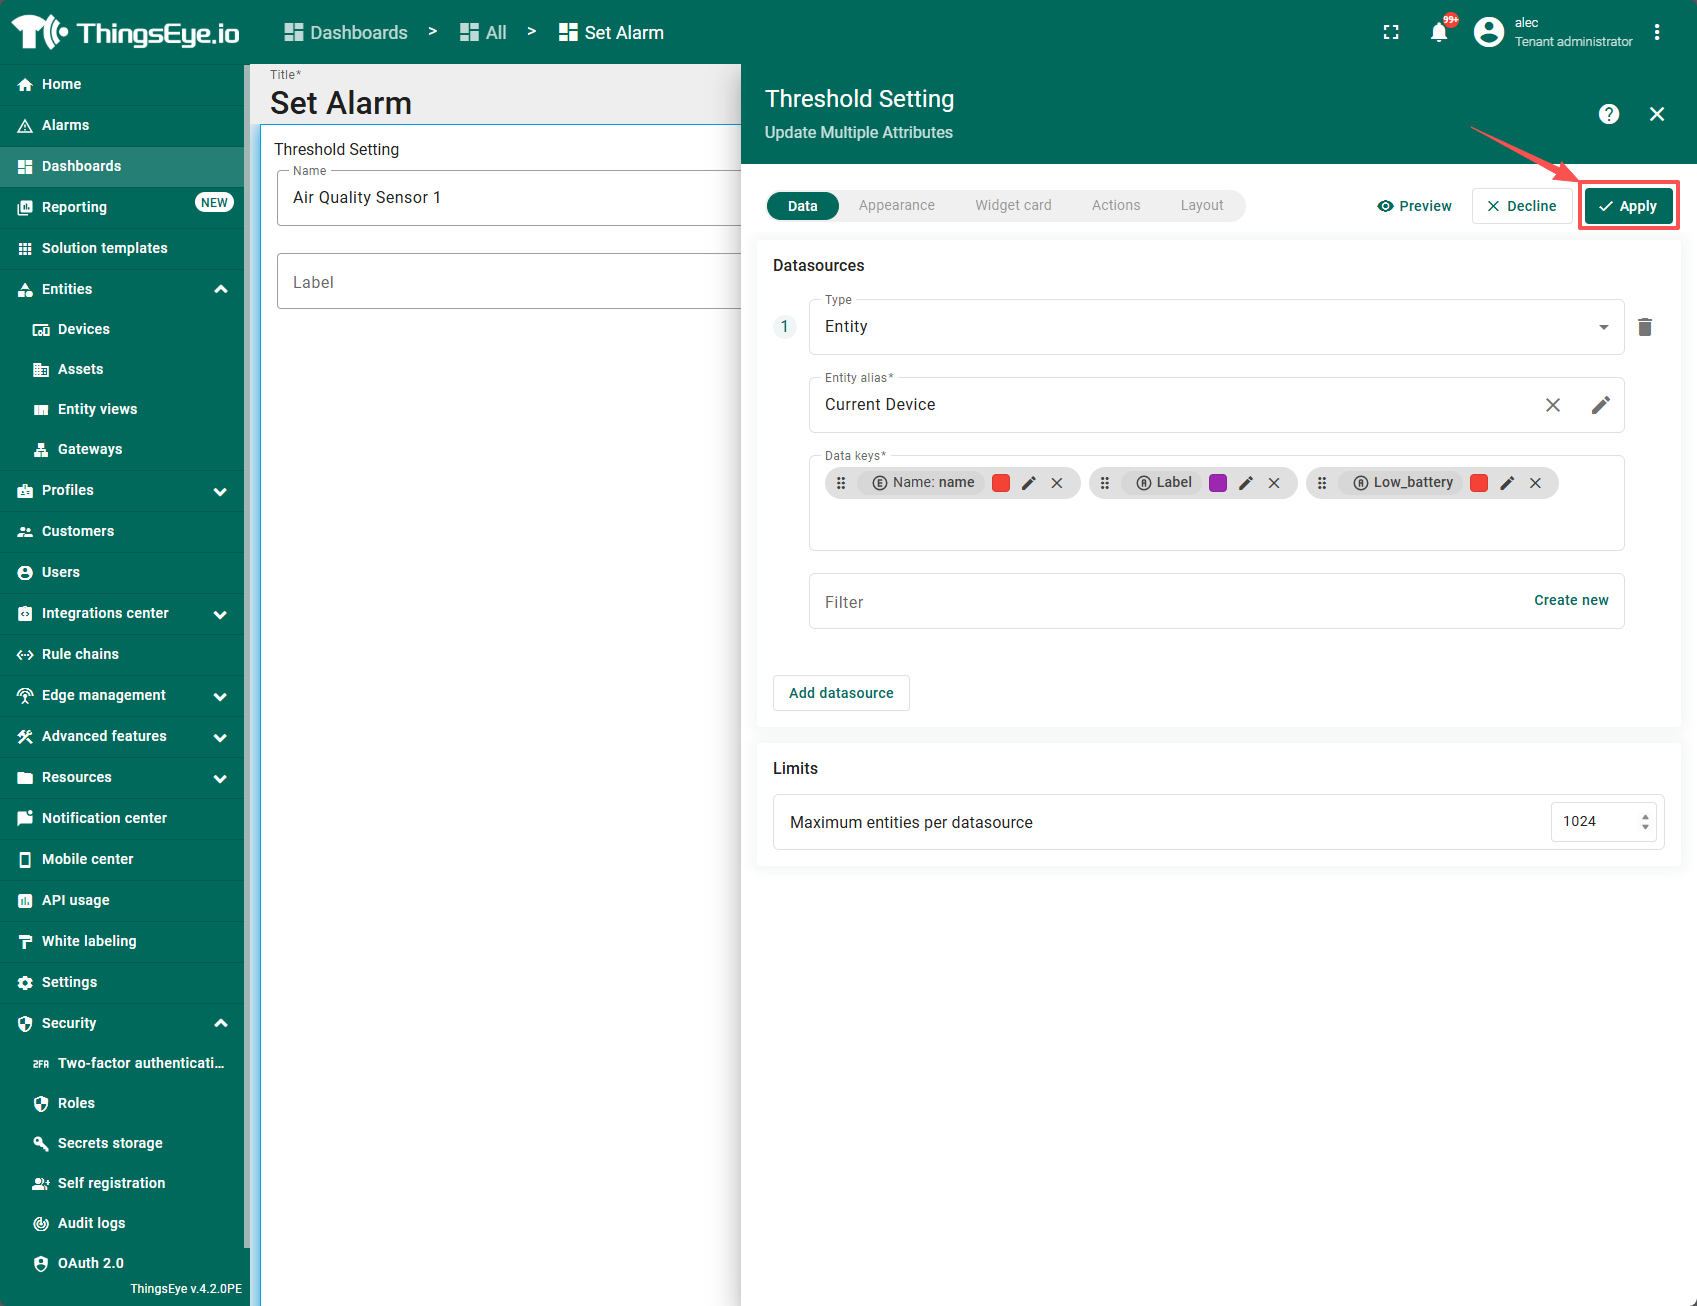
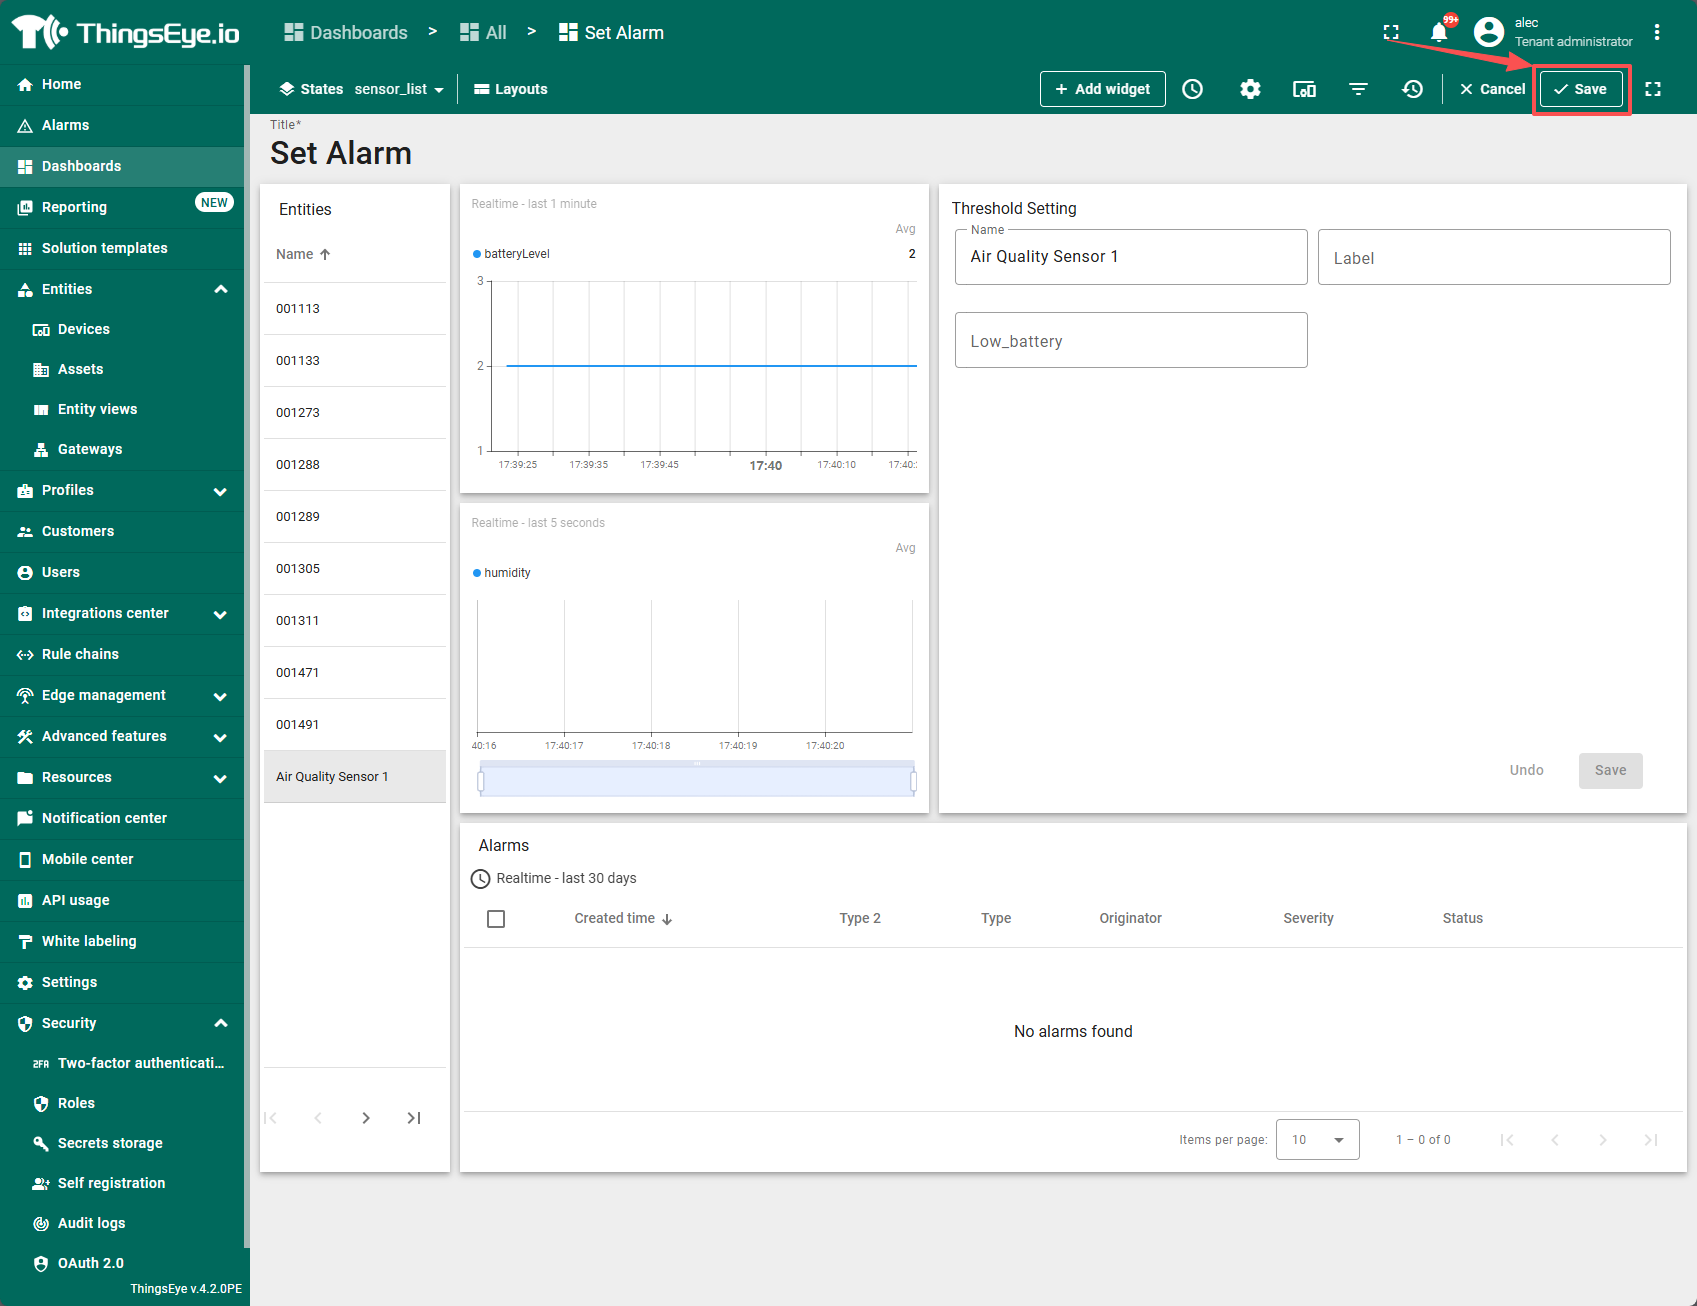
3.2 Create Threshold KEY
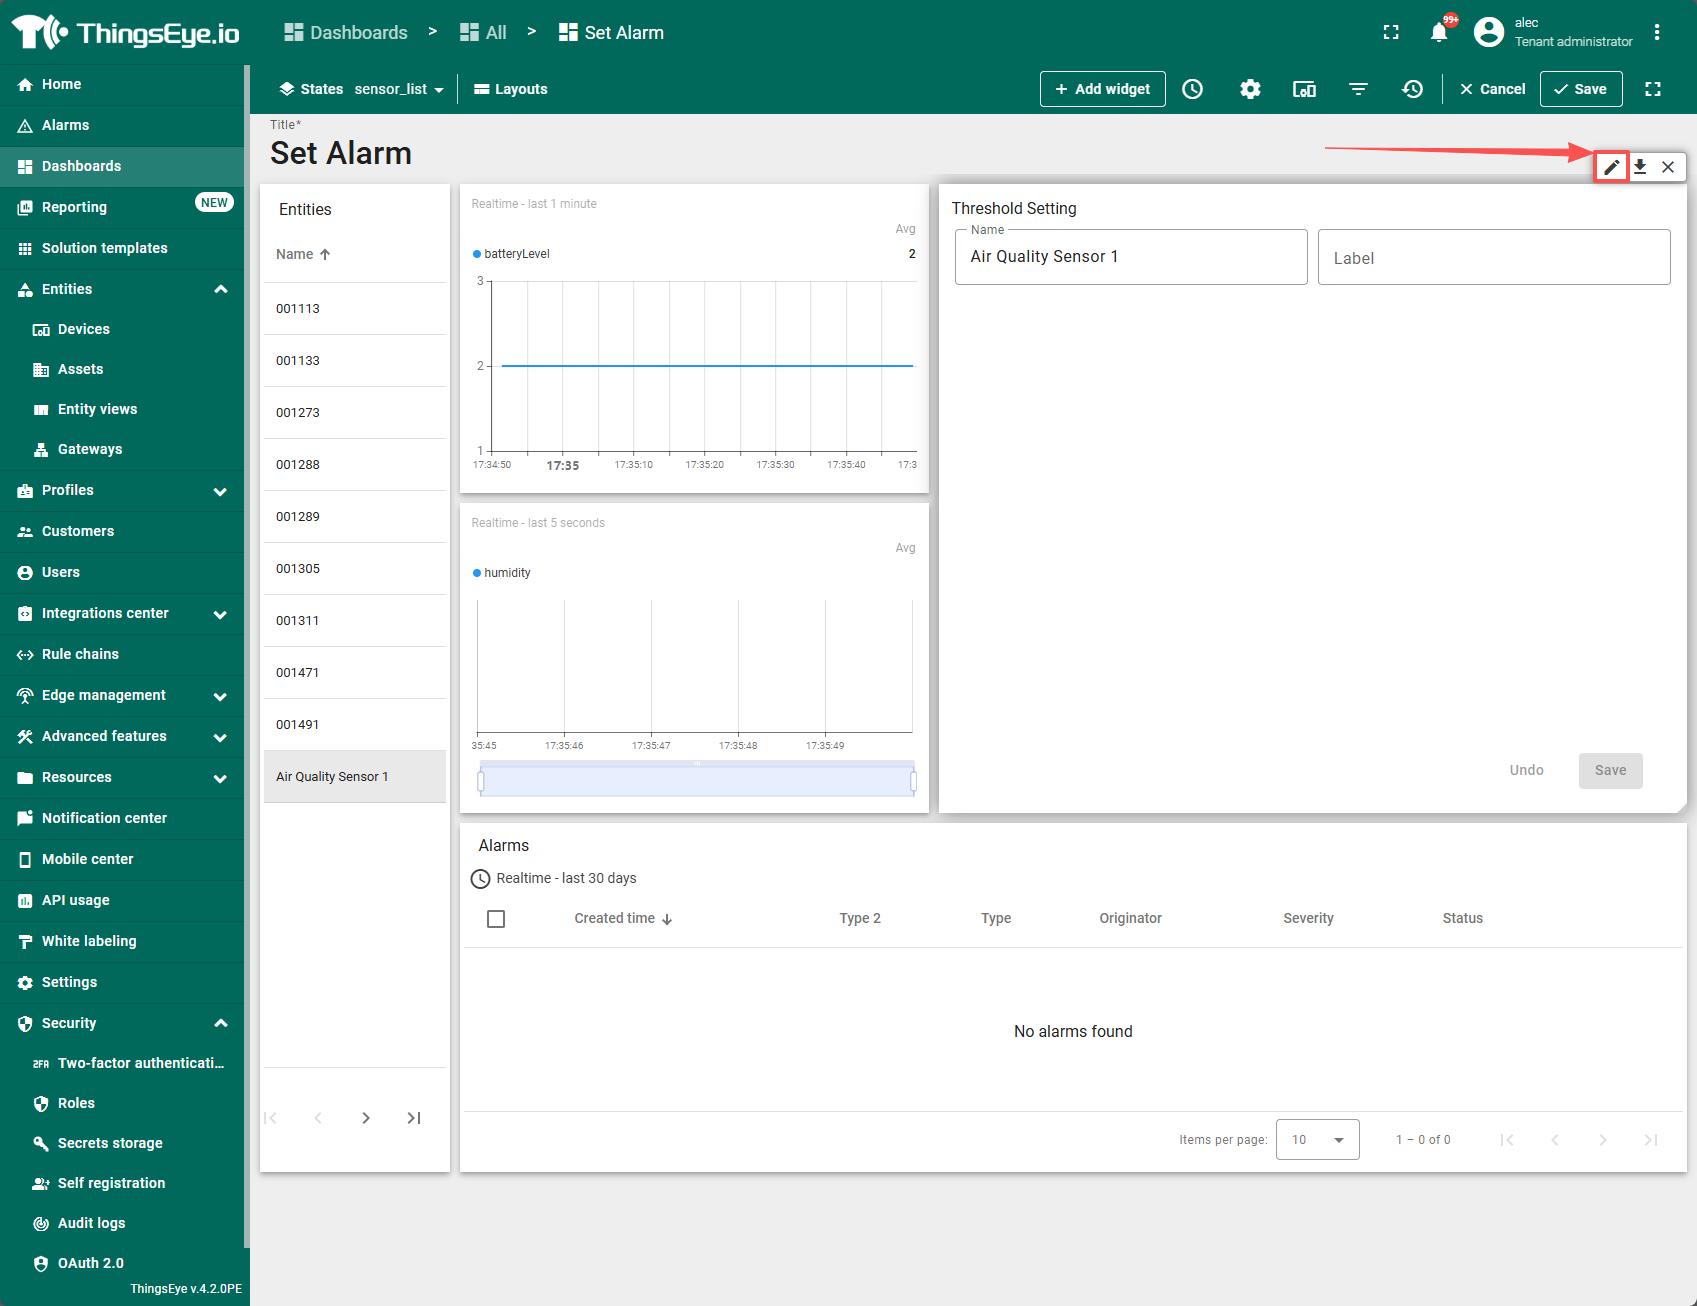
Enter edit mode and select the Threshold Setting component.
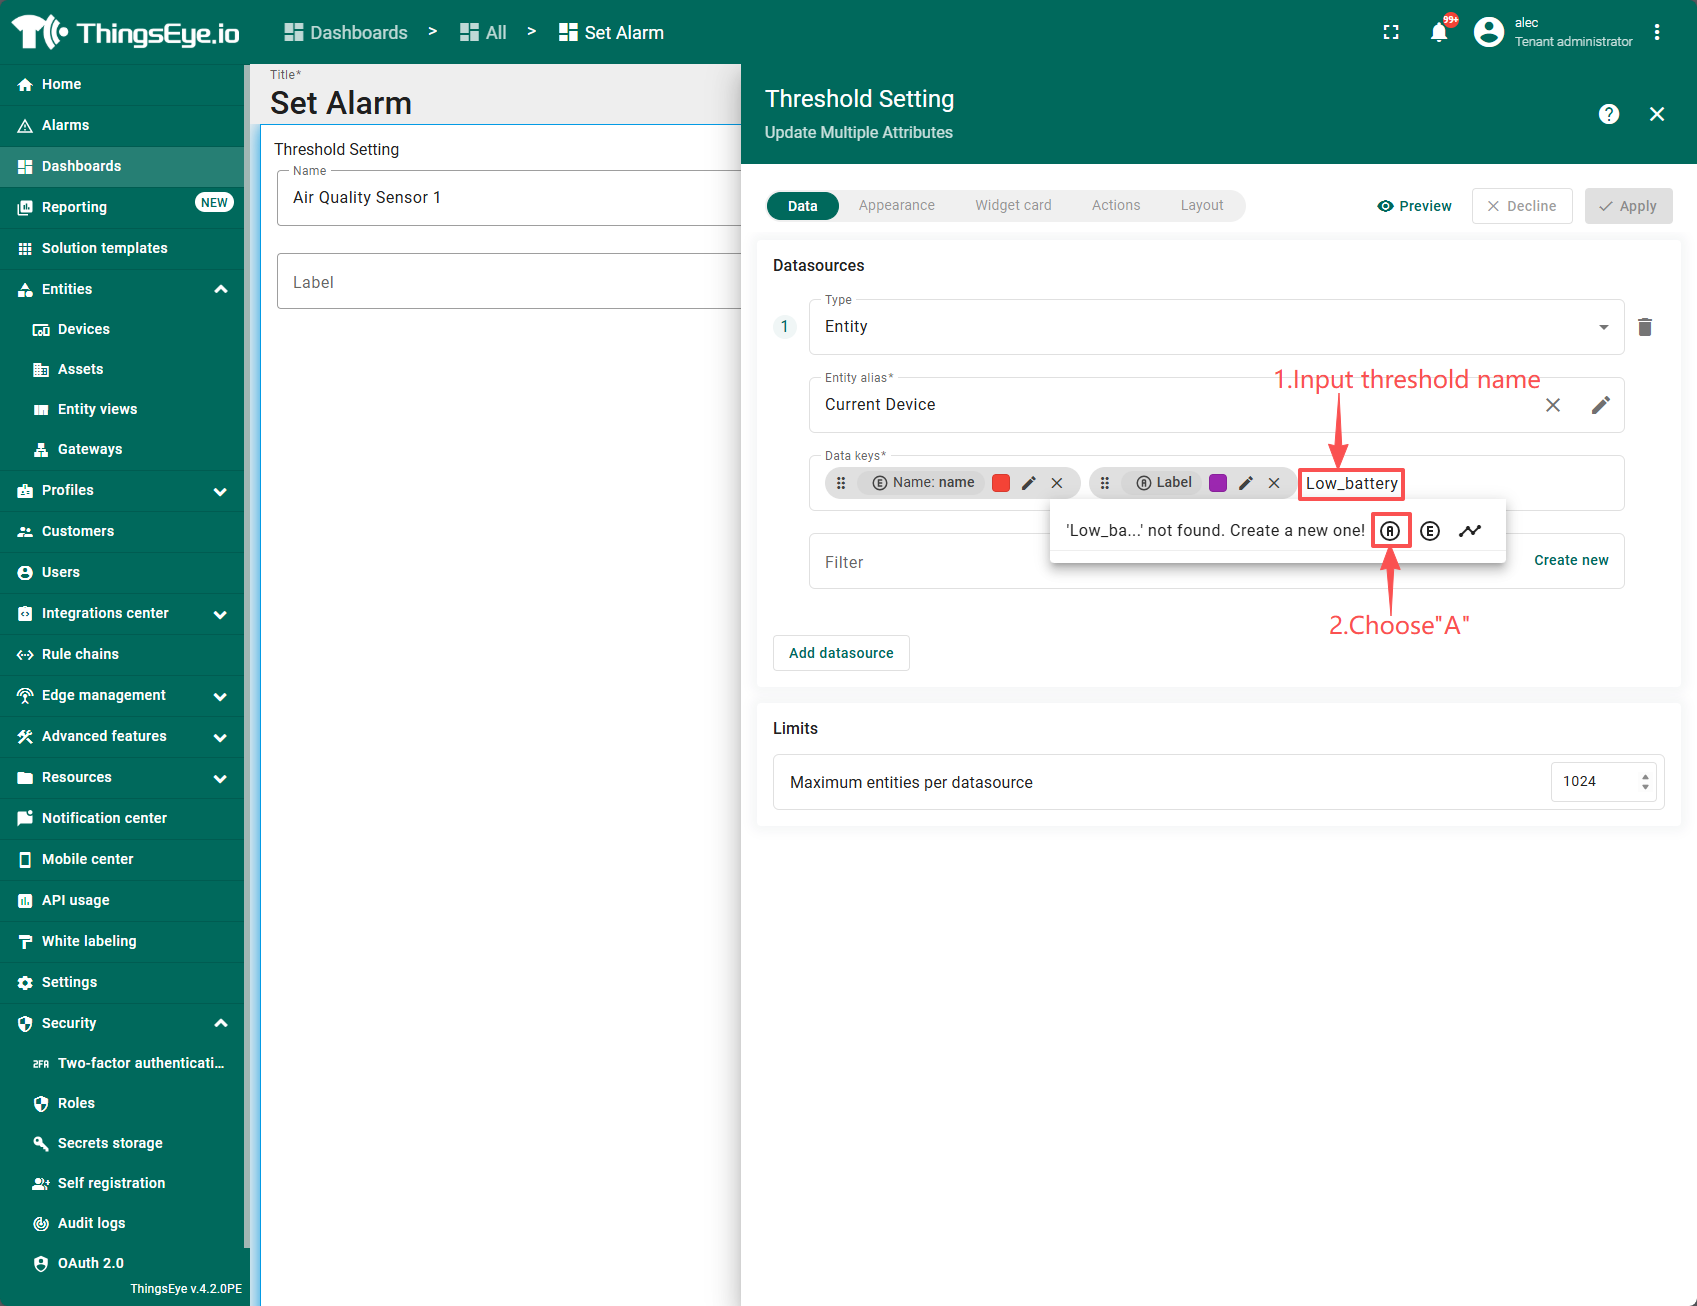
Save after add.
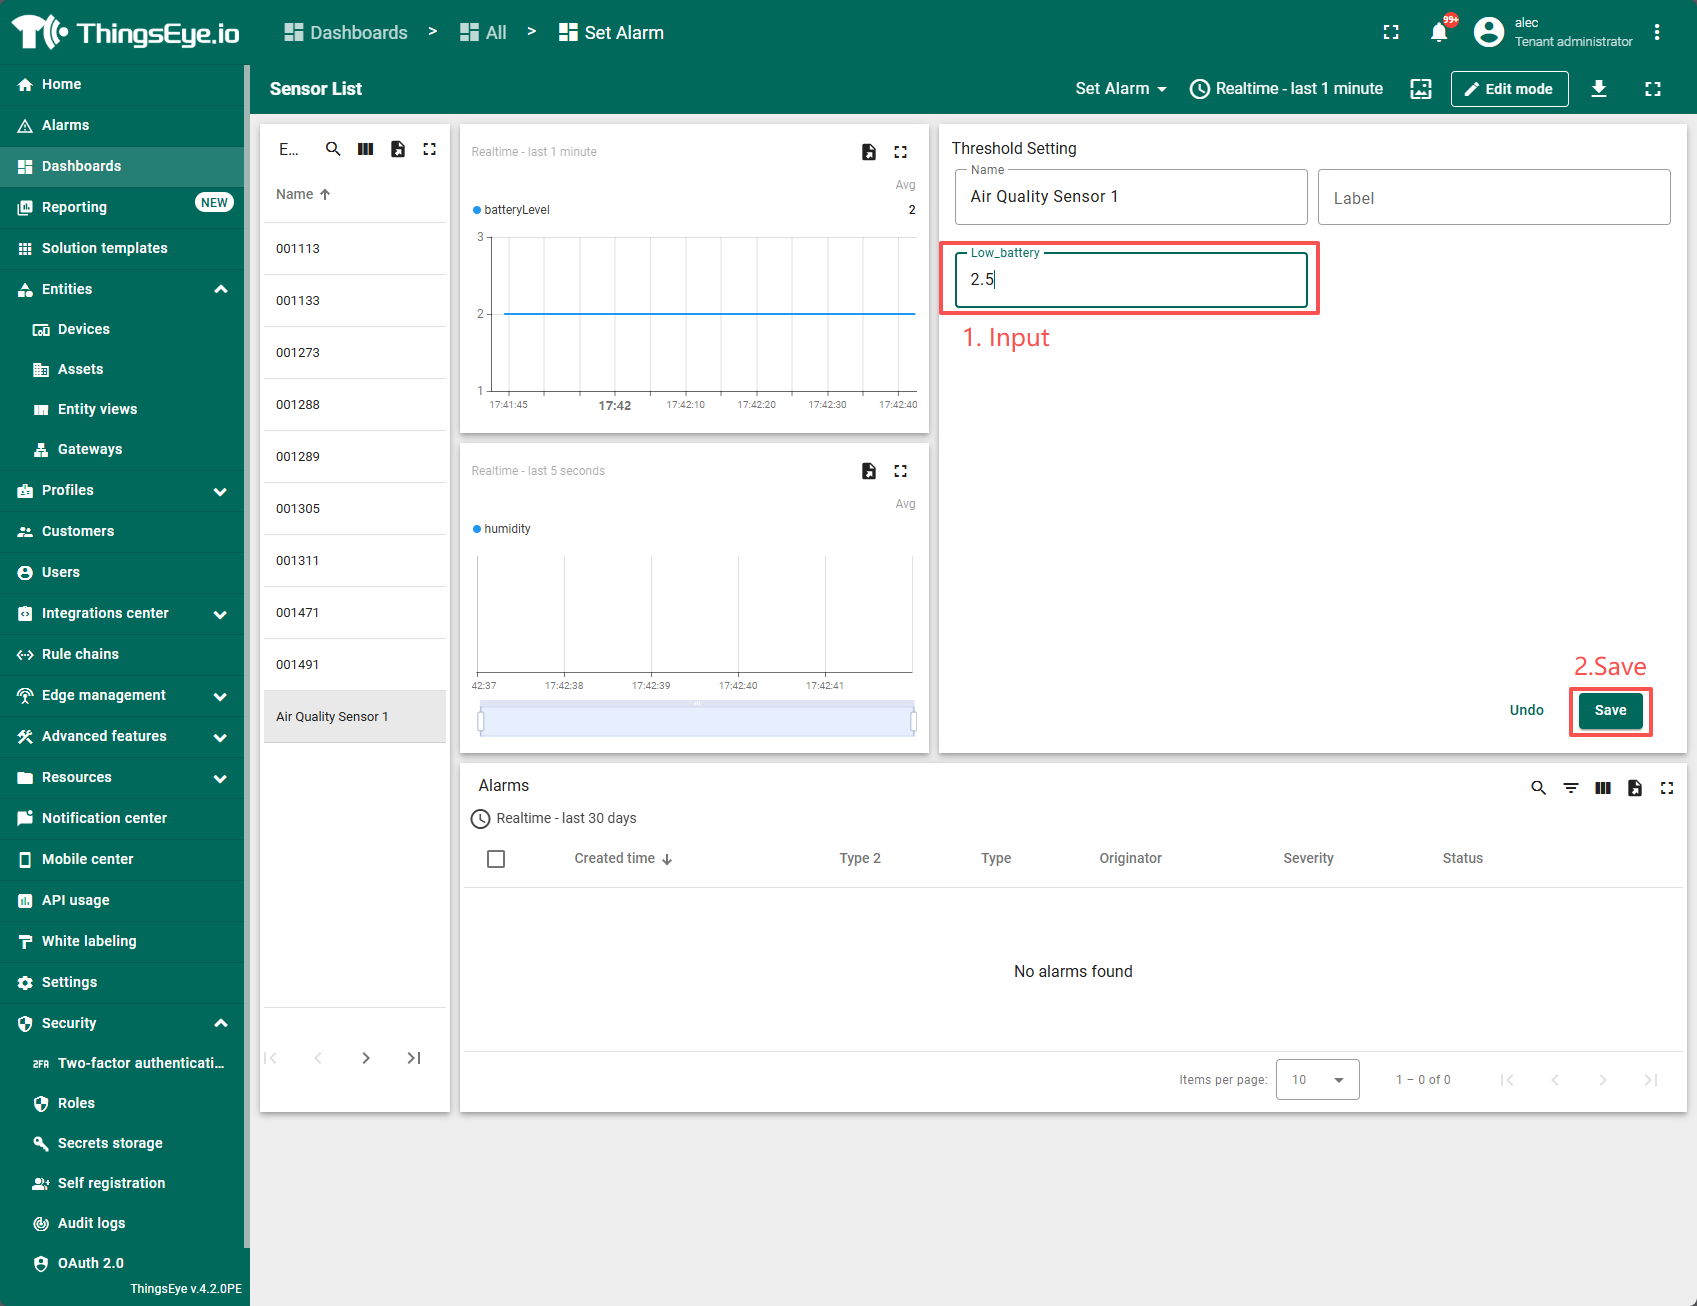
3.3 Example
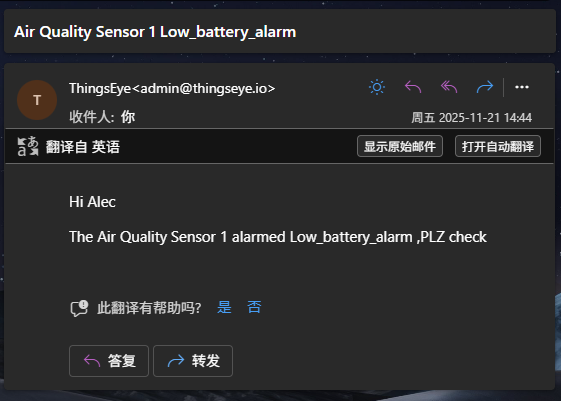
Example of an alert email received:
4. Configure Notification (only required for initial use)
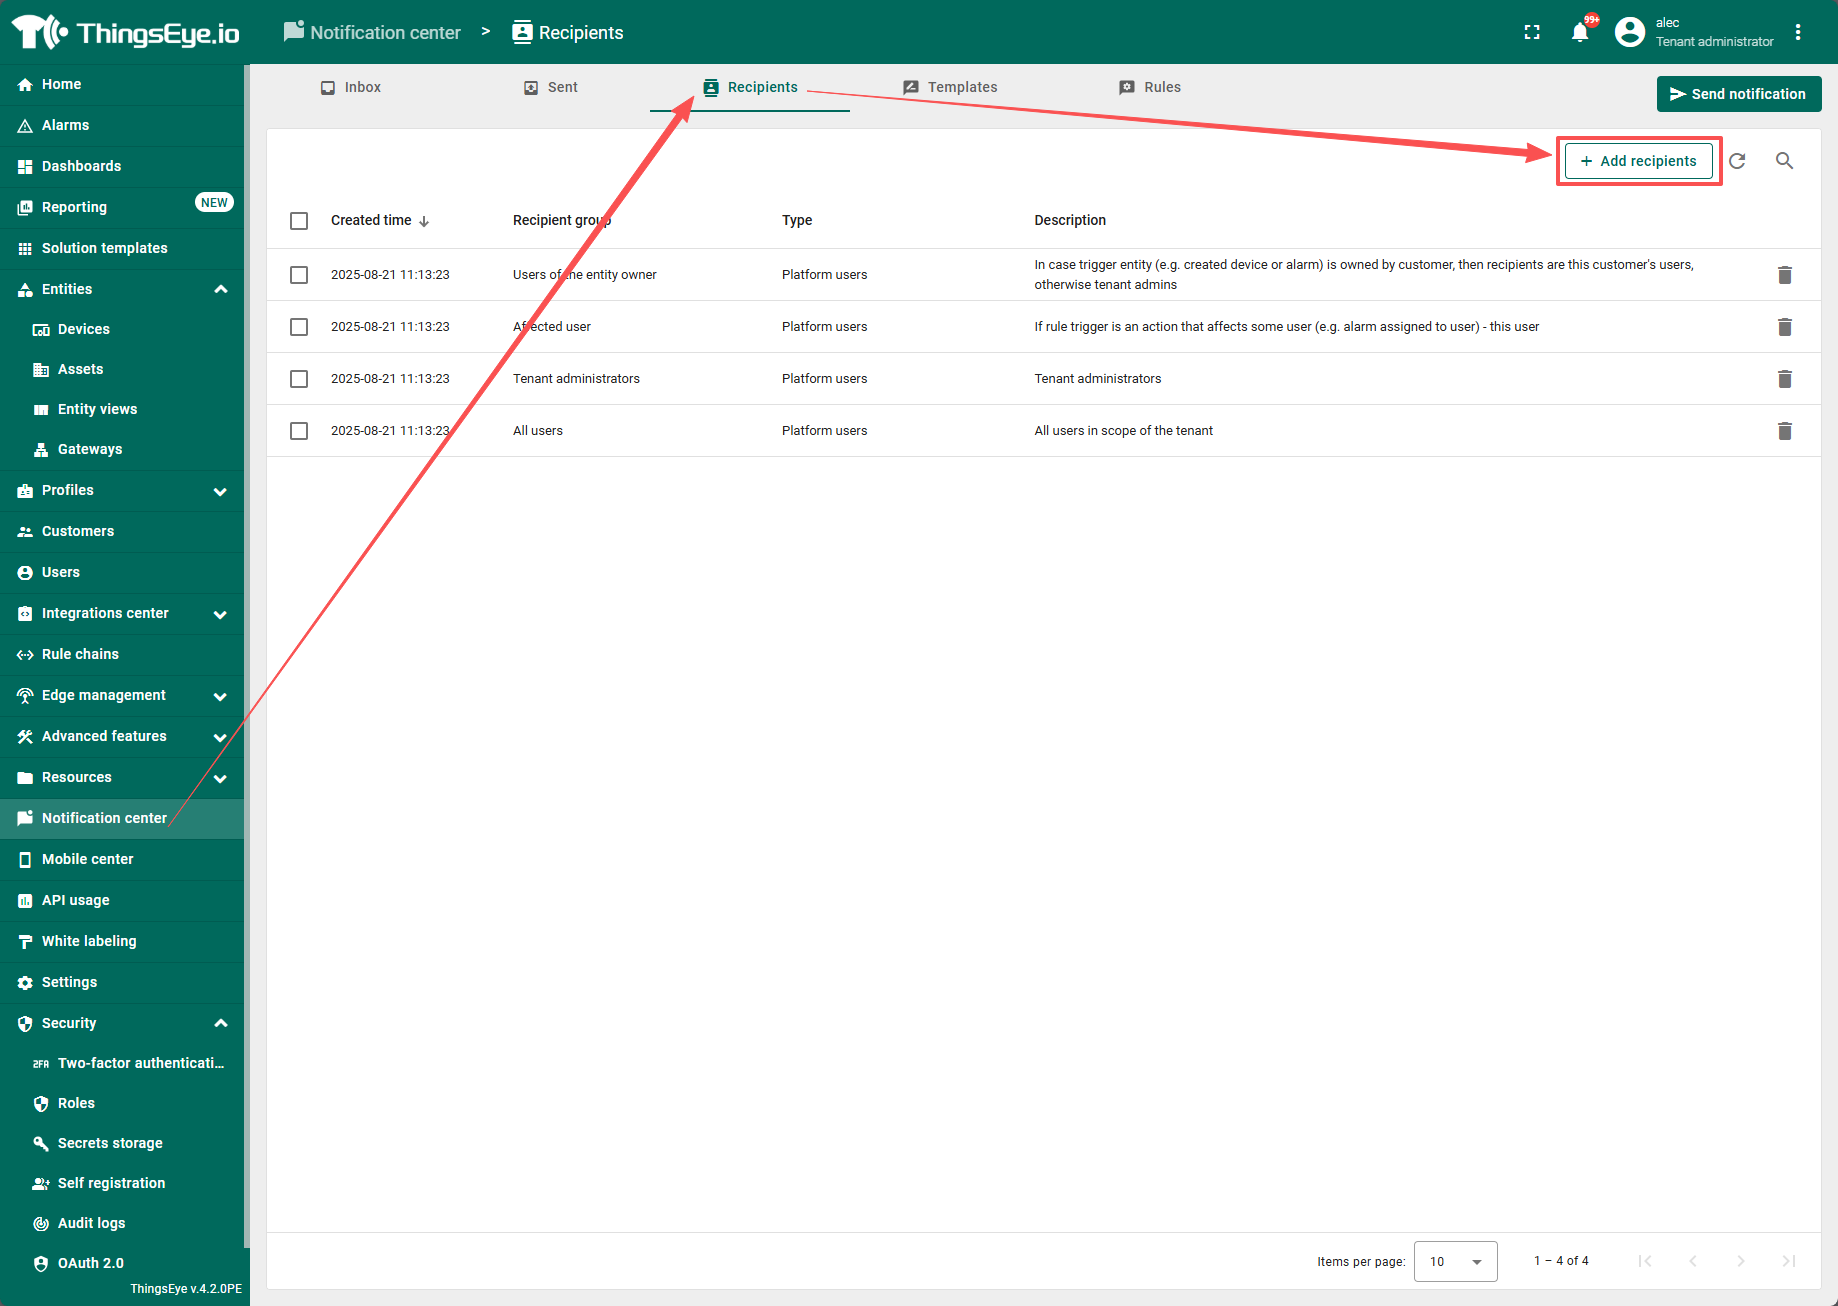
If this is the first time configuring the email sending function, you also need to configure the Notification to specify the recipient/template/sending rules.
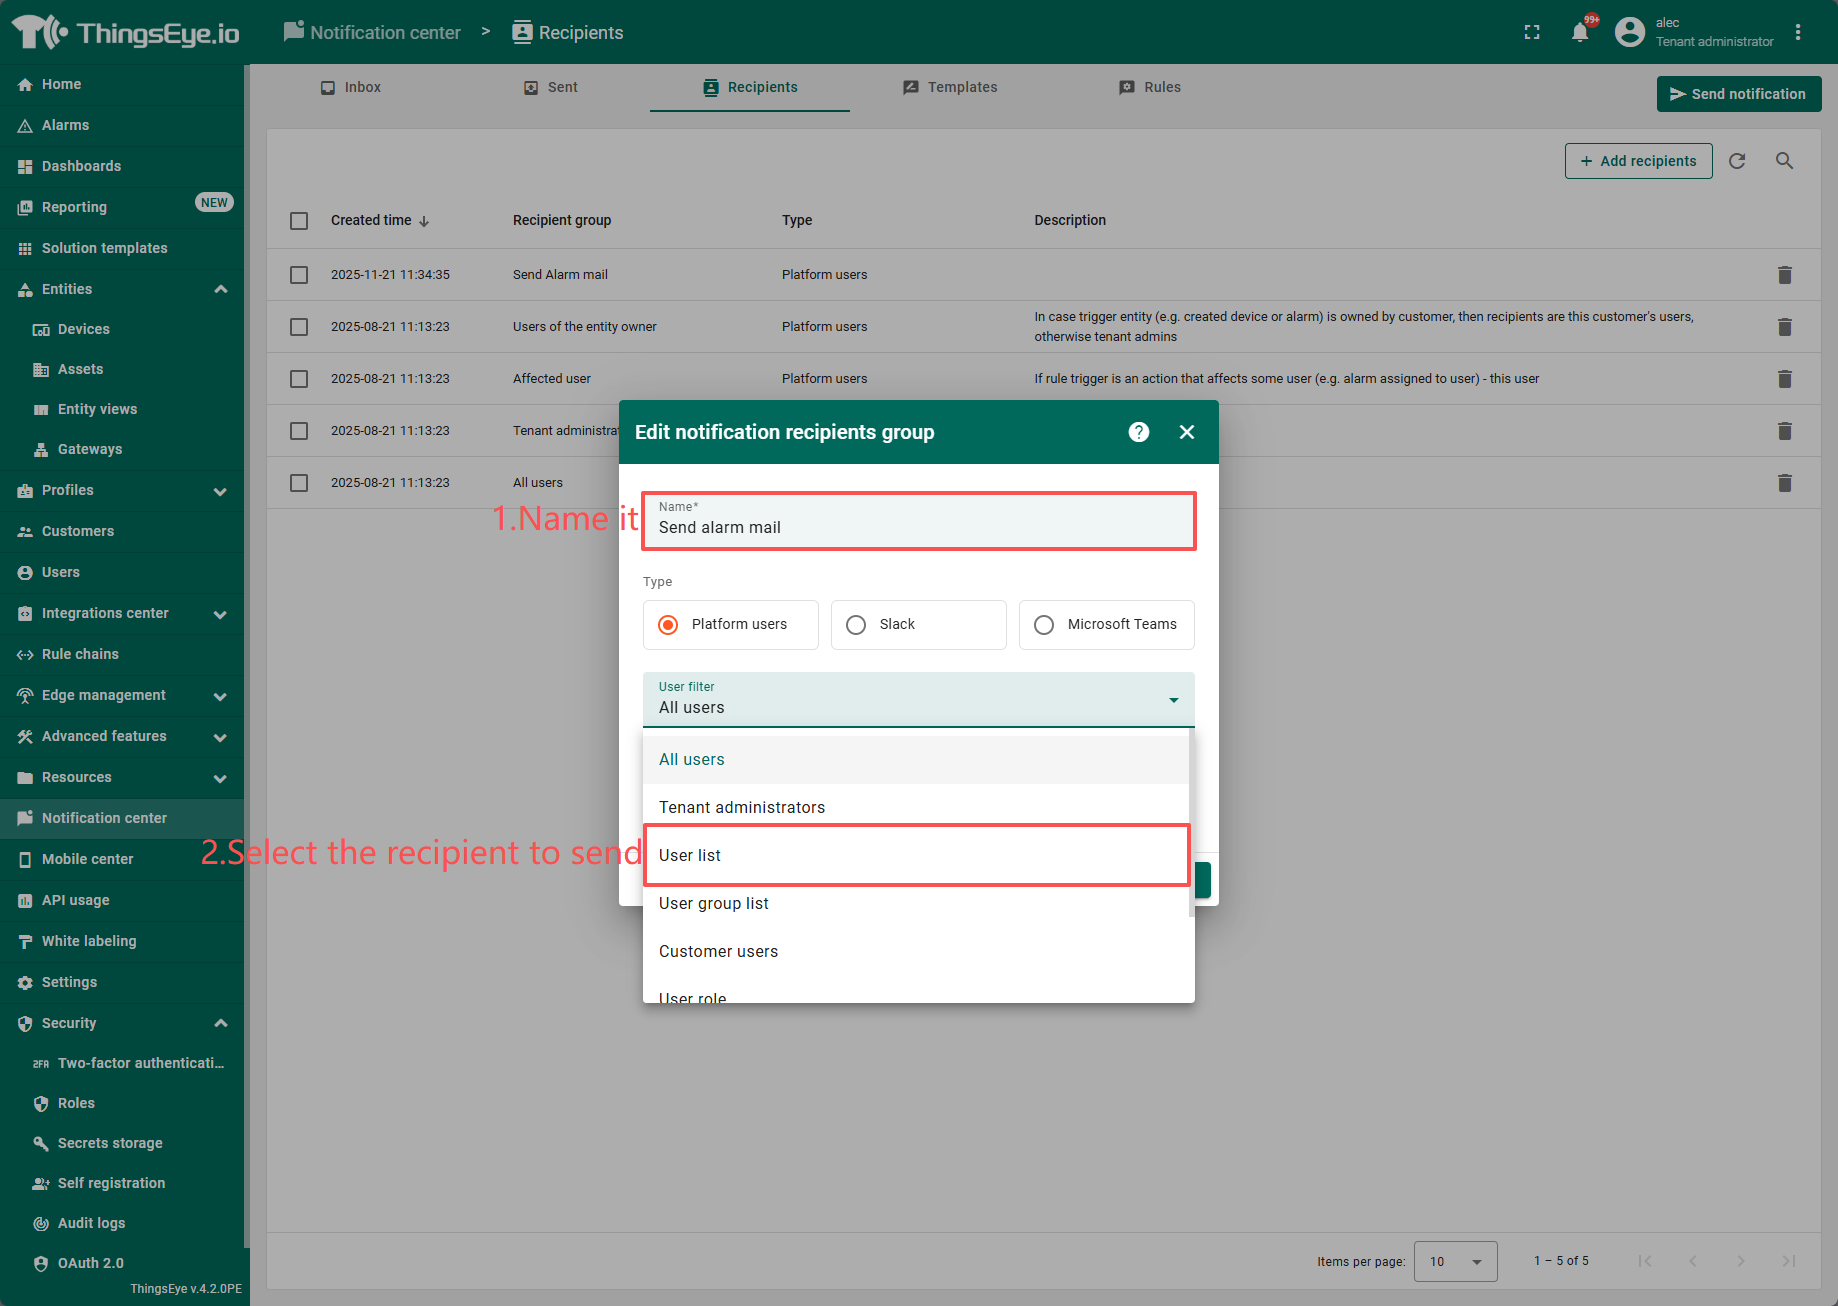
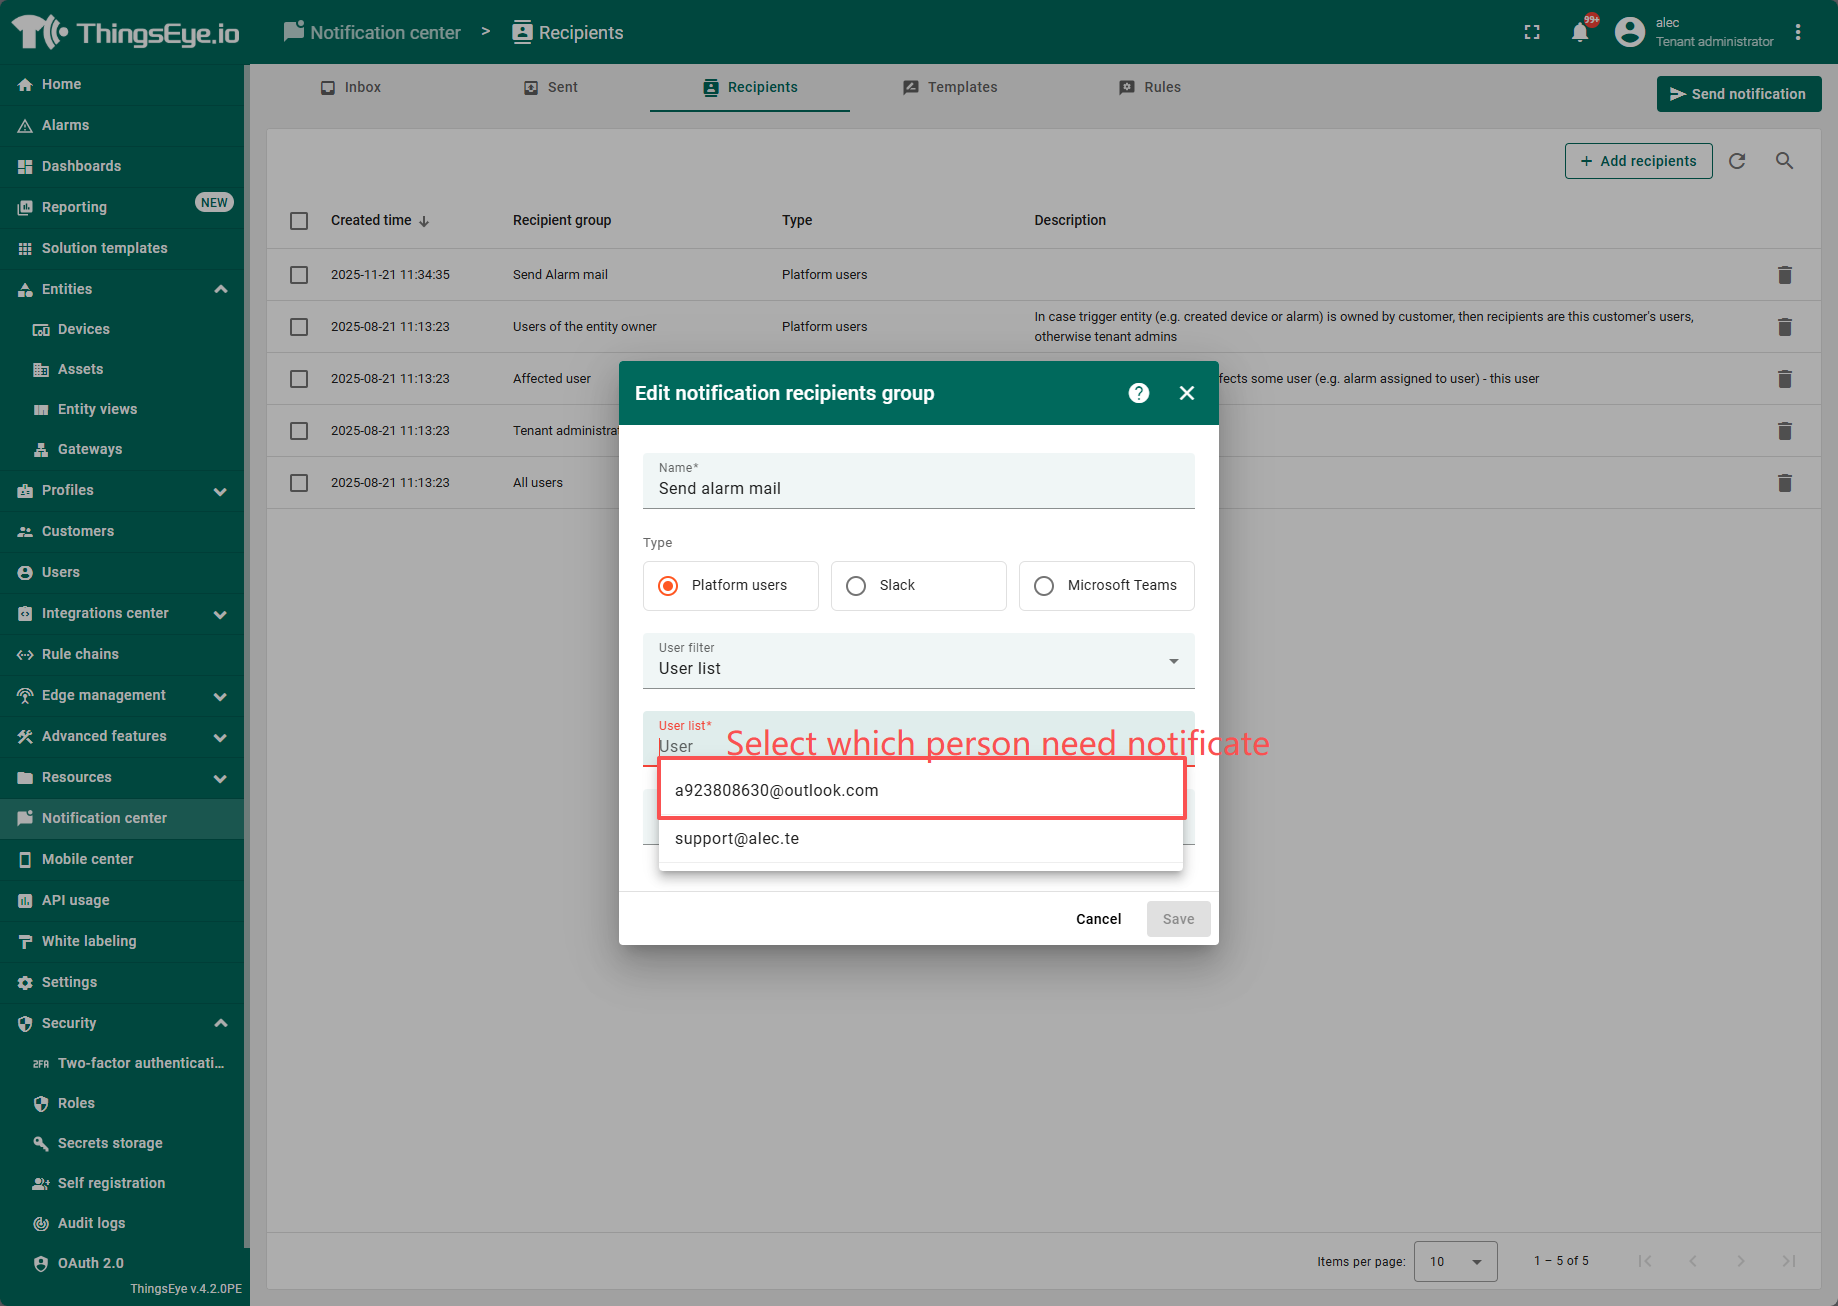
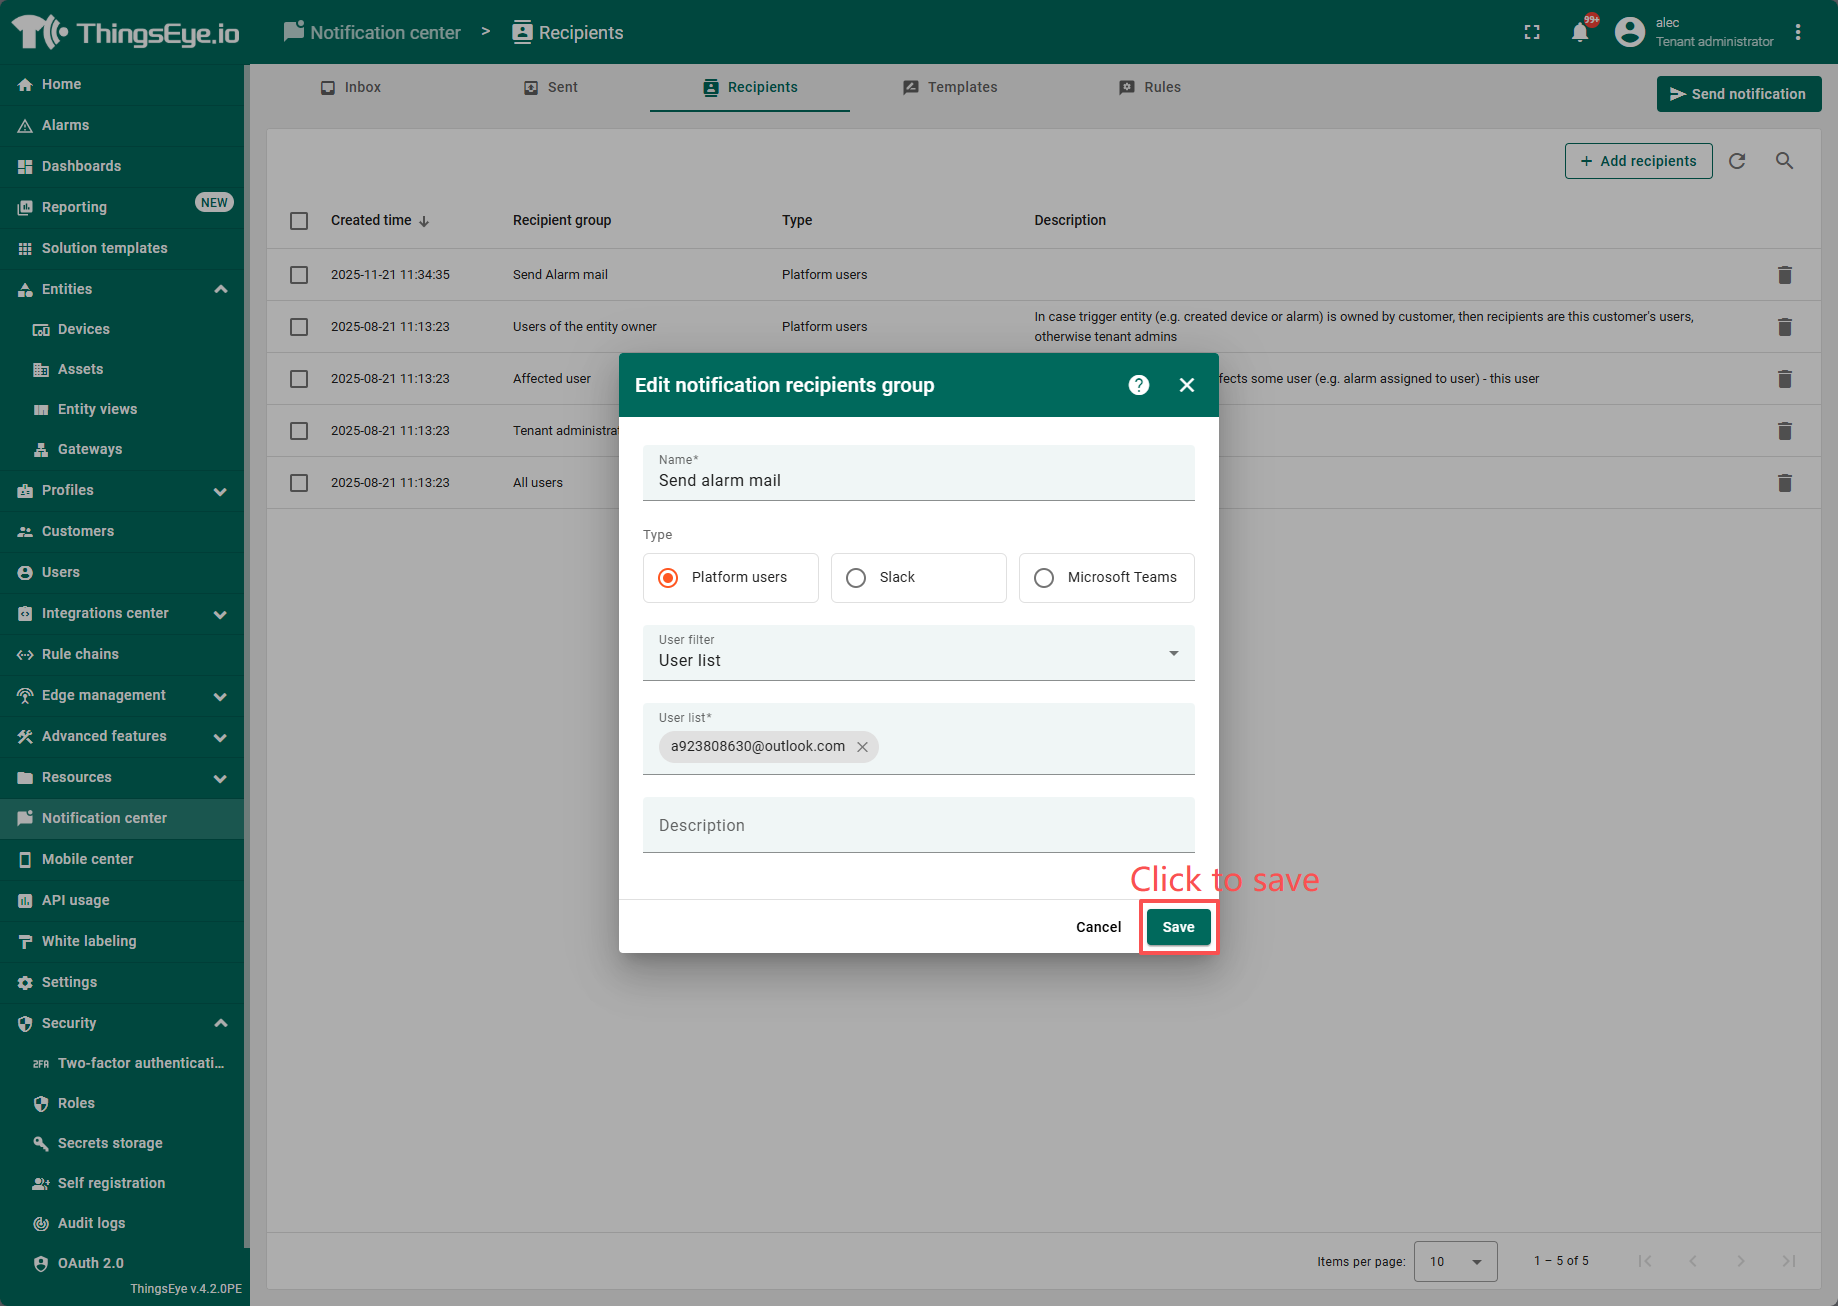
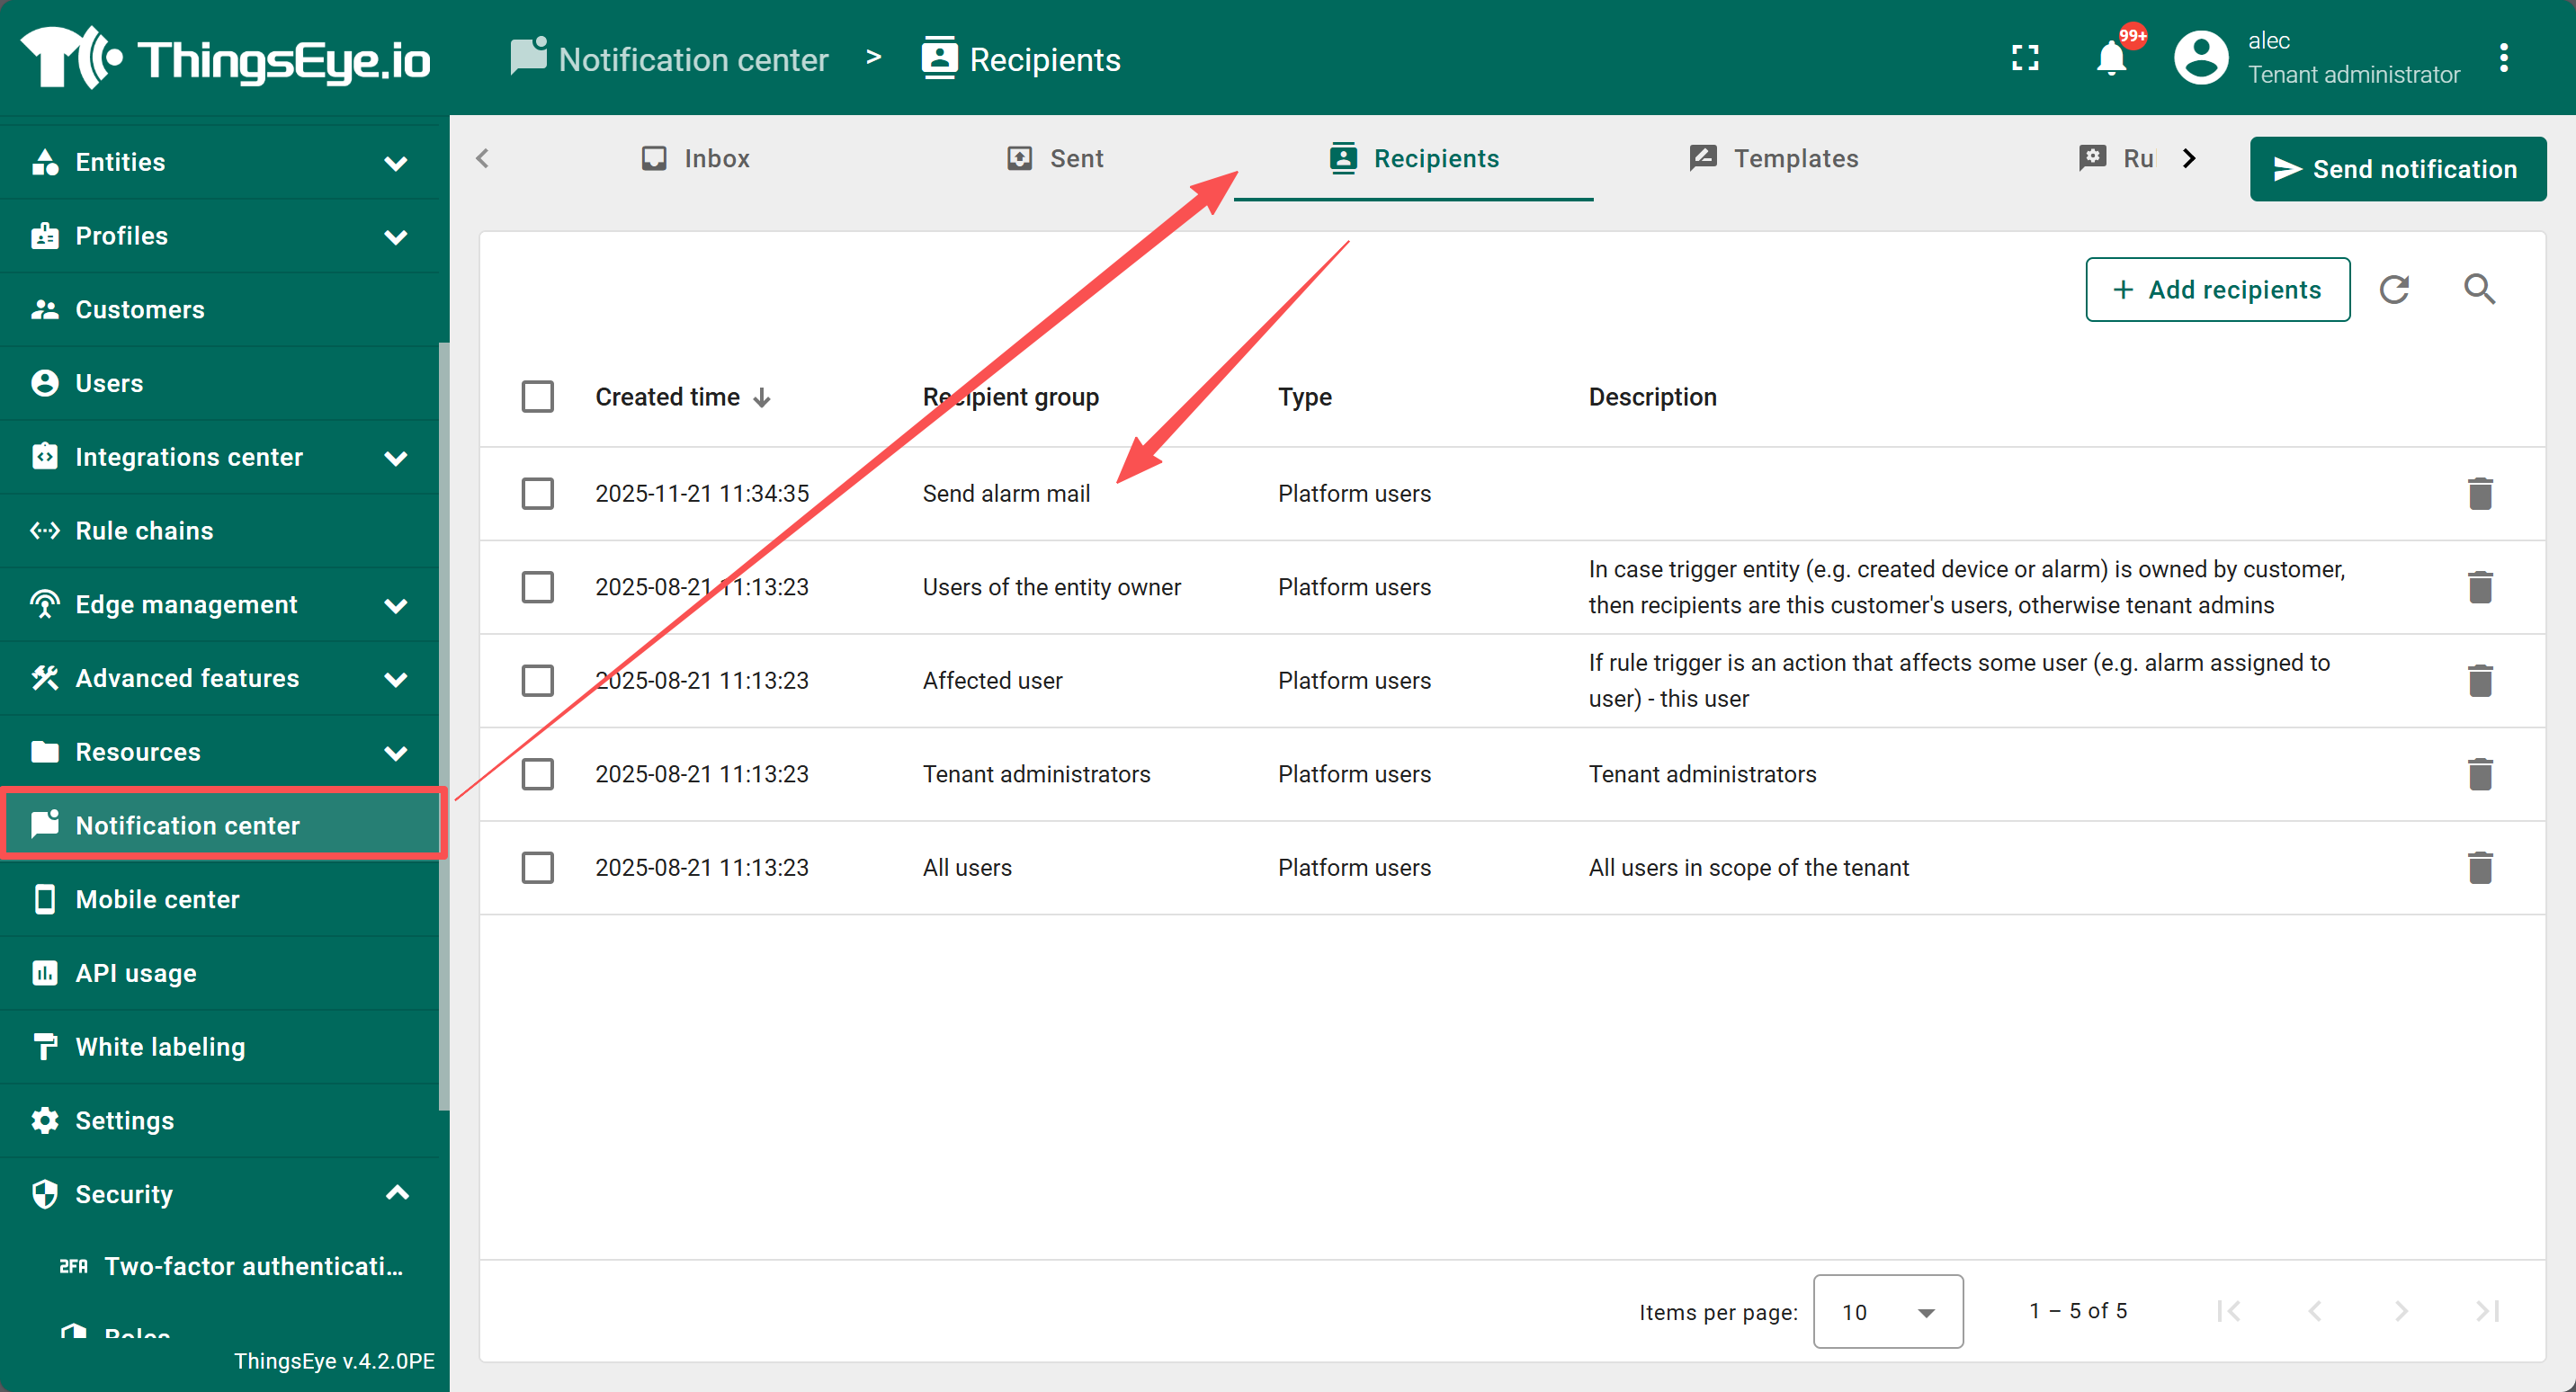
4.1 Configure Recipients
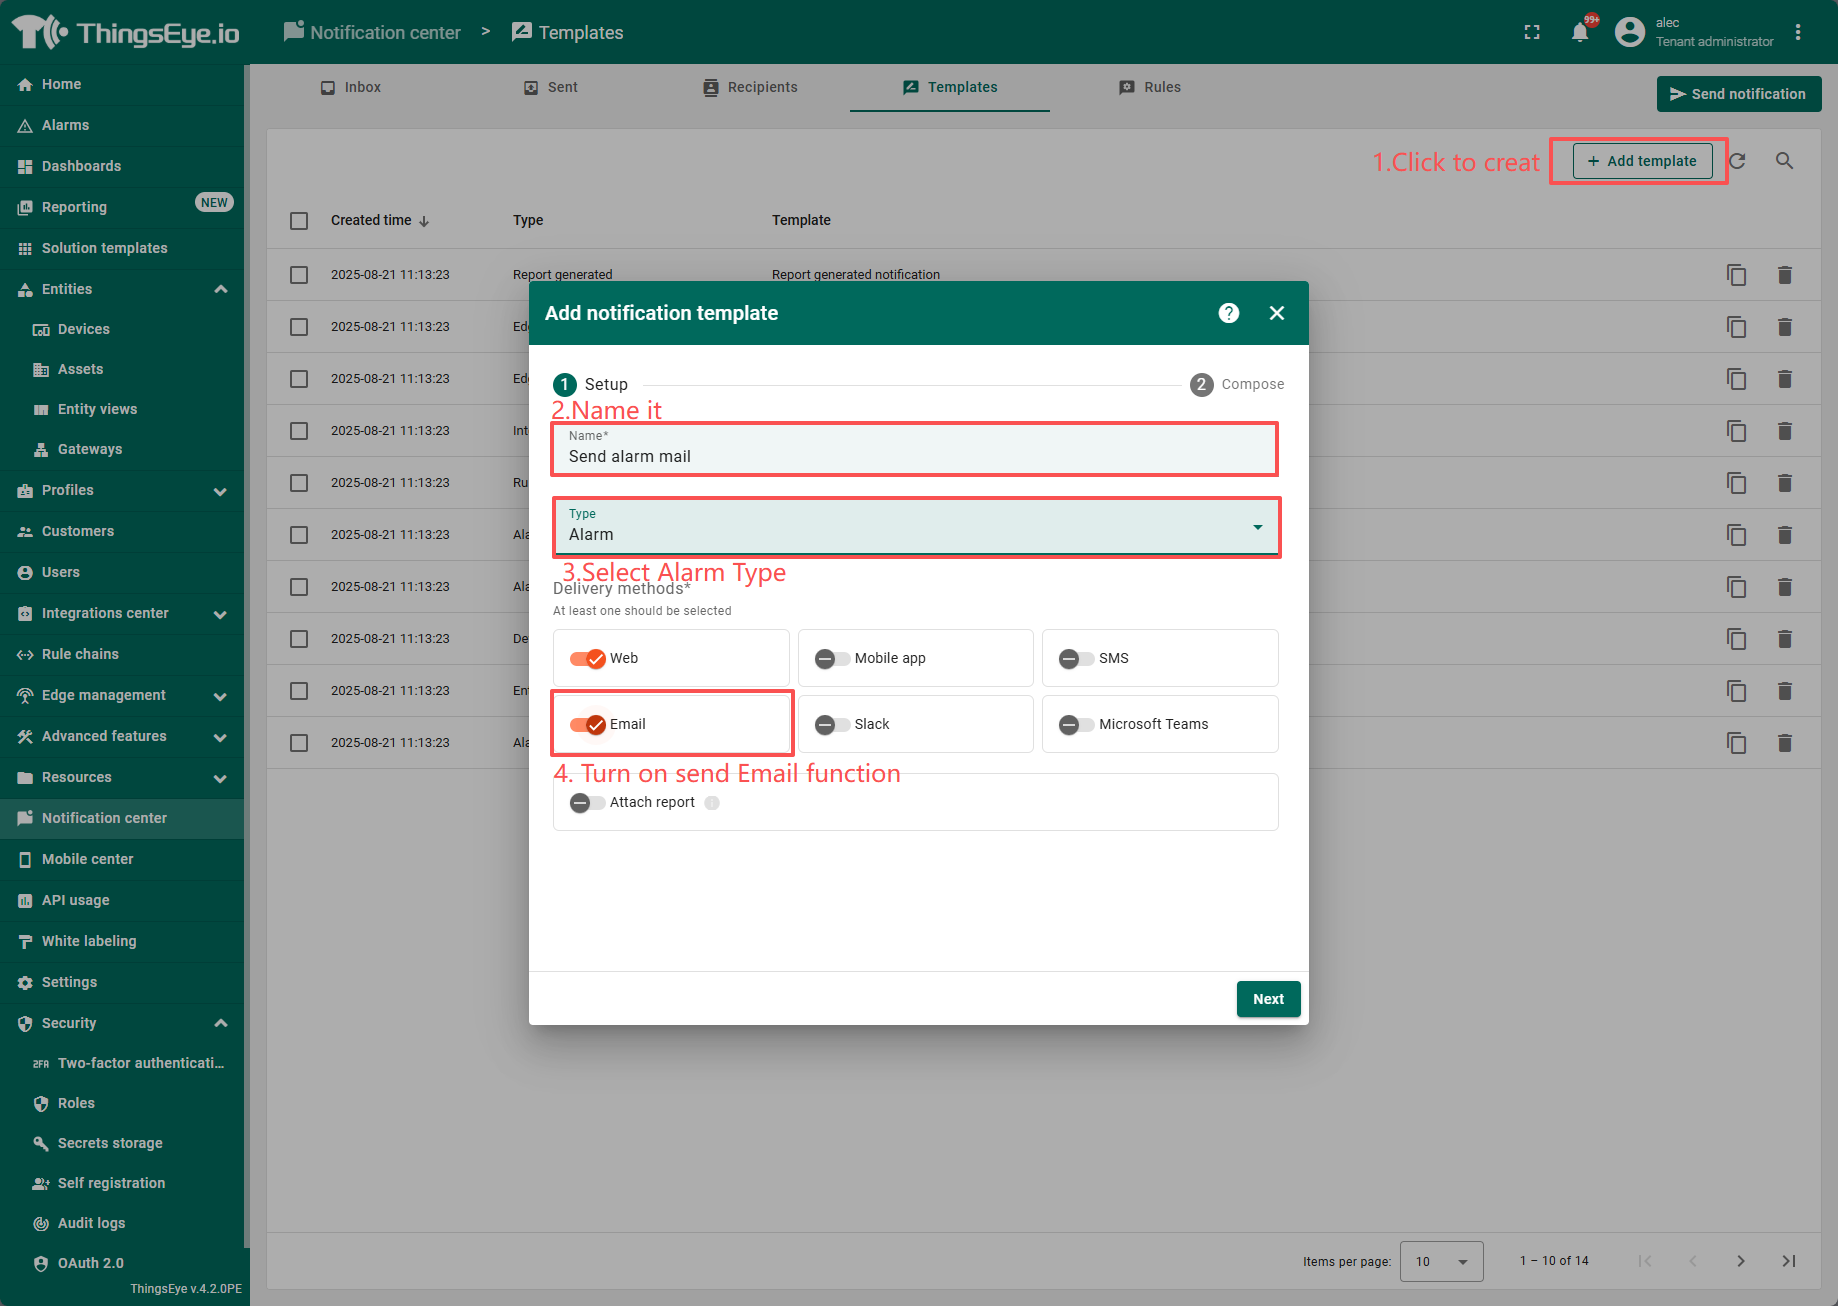
4.2 Configuring Templates
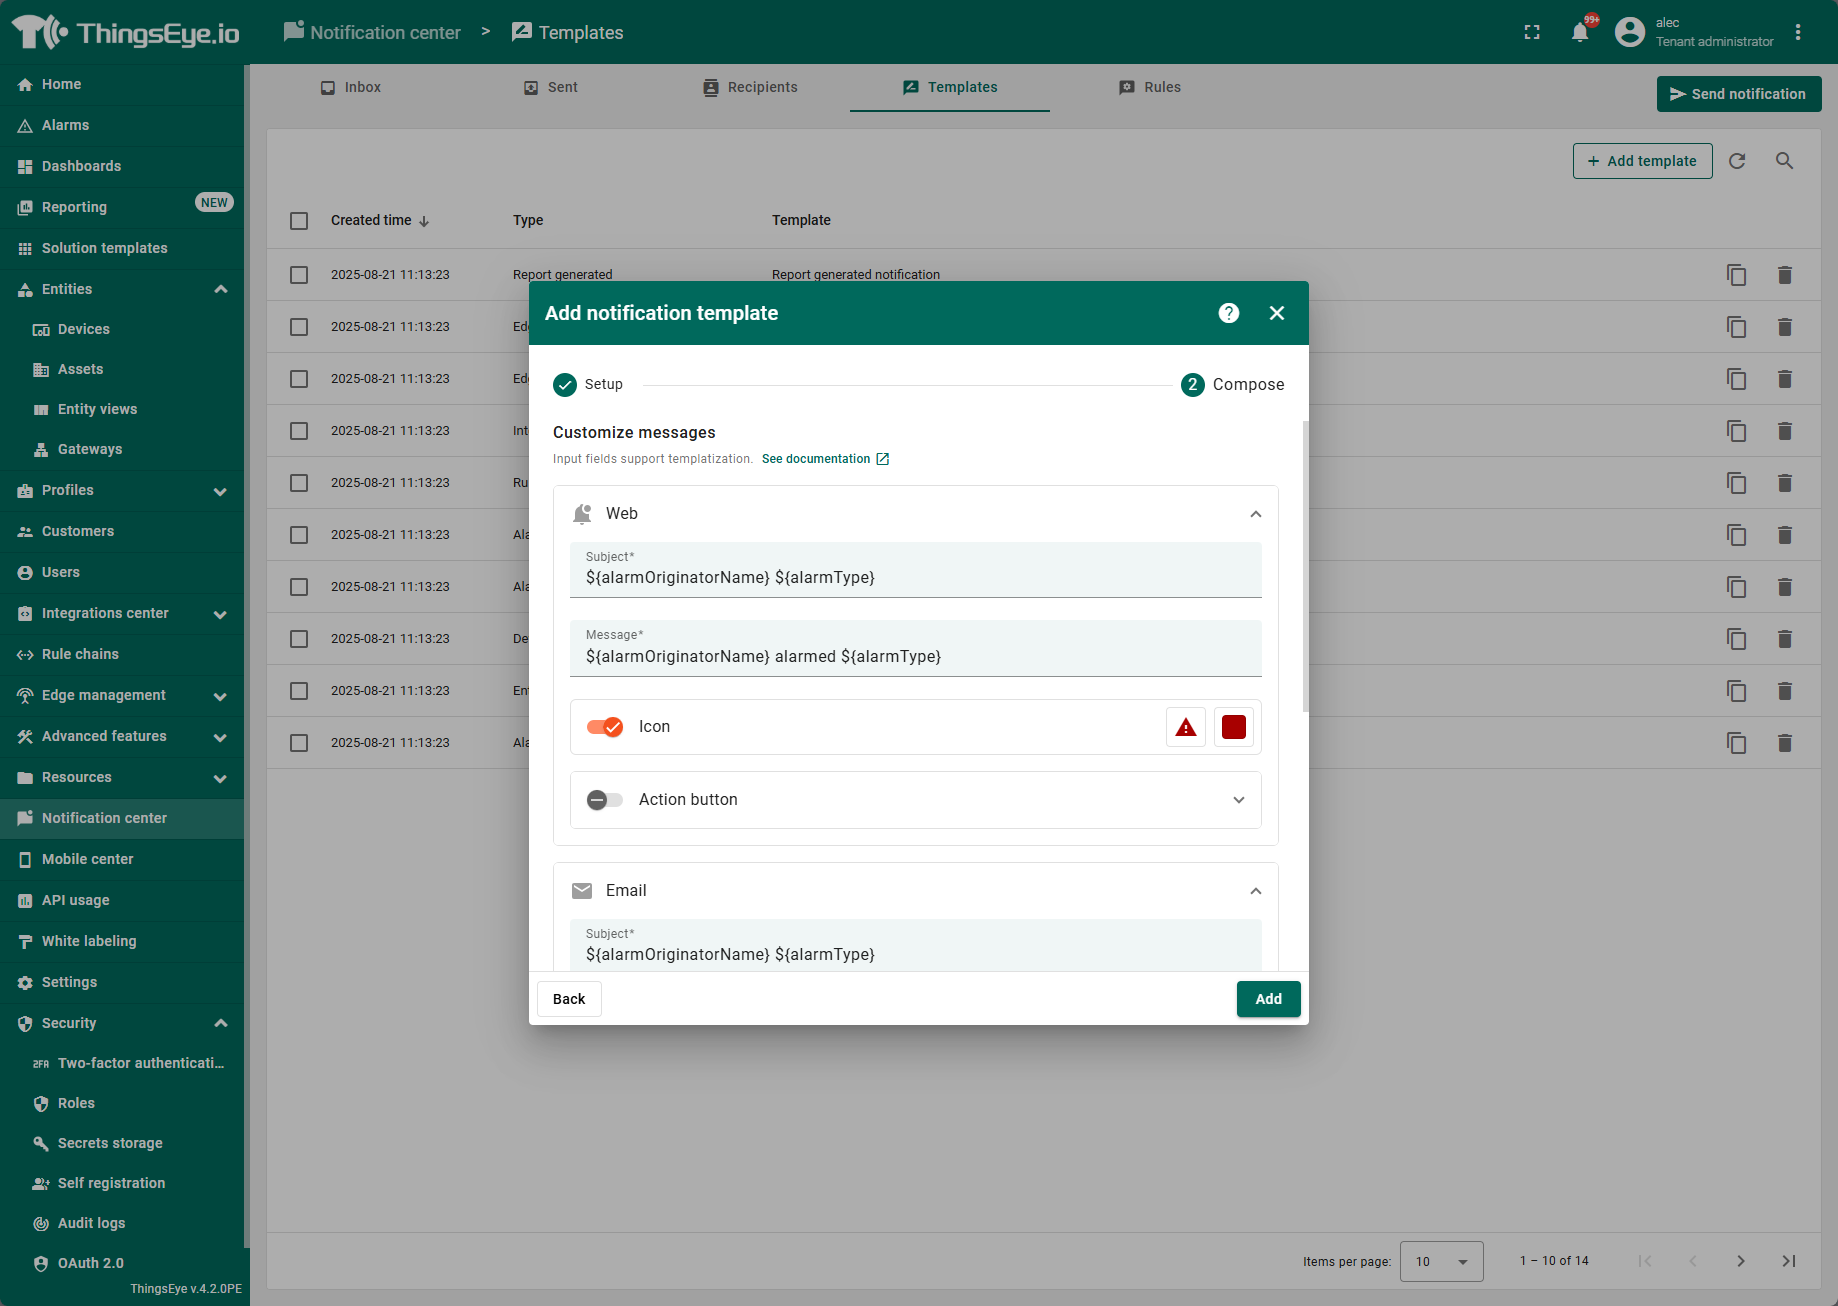
Set Compose
Web
Subjtct:${alarmOriginatorName} ${alarmType}
Message:${alarmOriginatorName} alarmed ${alarmType}
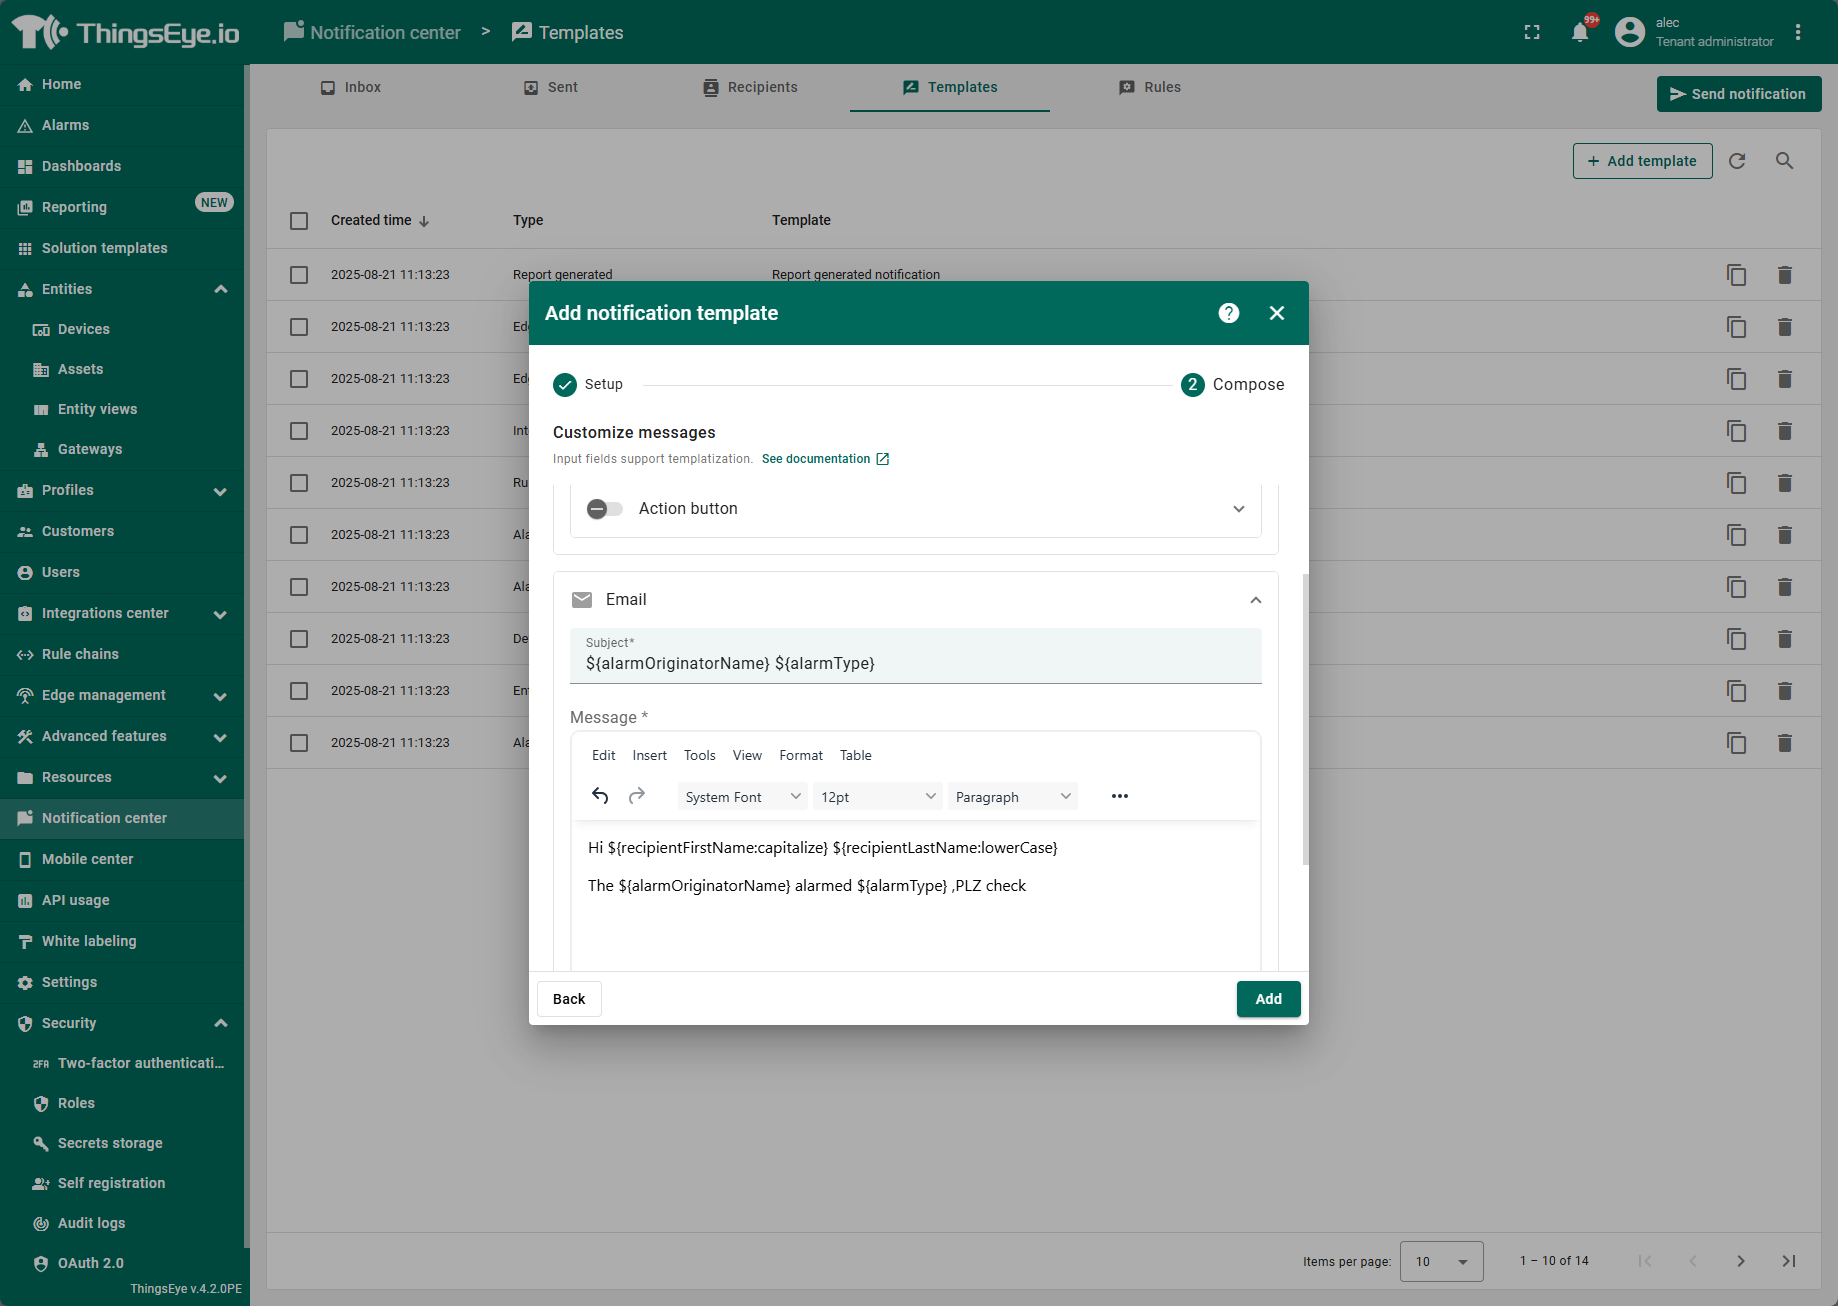
Subjtct:${alarmOriginatorName} ${alarmType}
**Message:**Hi ${recipientFirstName:capitalize} ${recipientLastName:lowerCase}
The ${alarmOriginatorName} alarmed ${alarmType} ,PLZ check
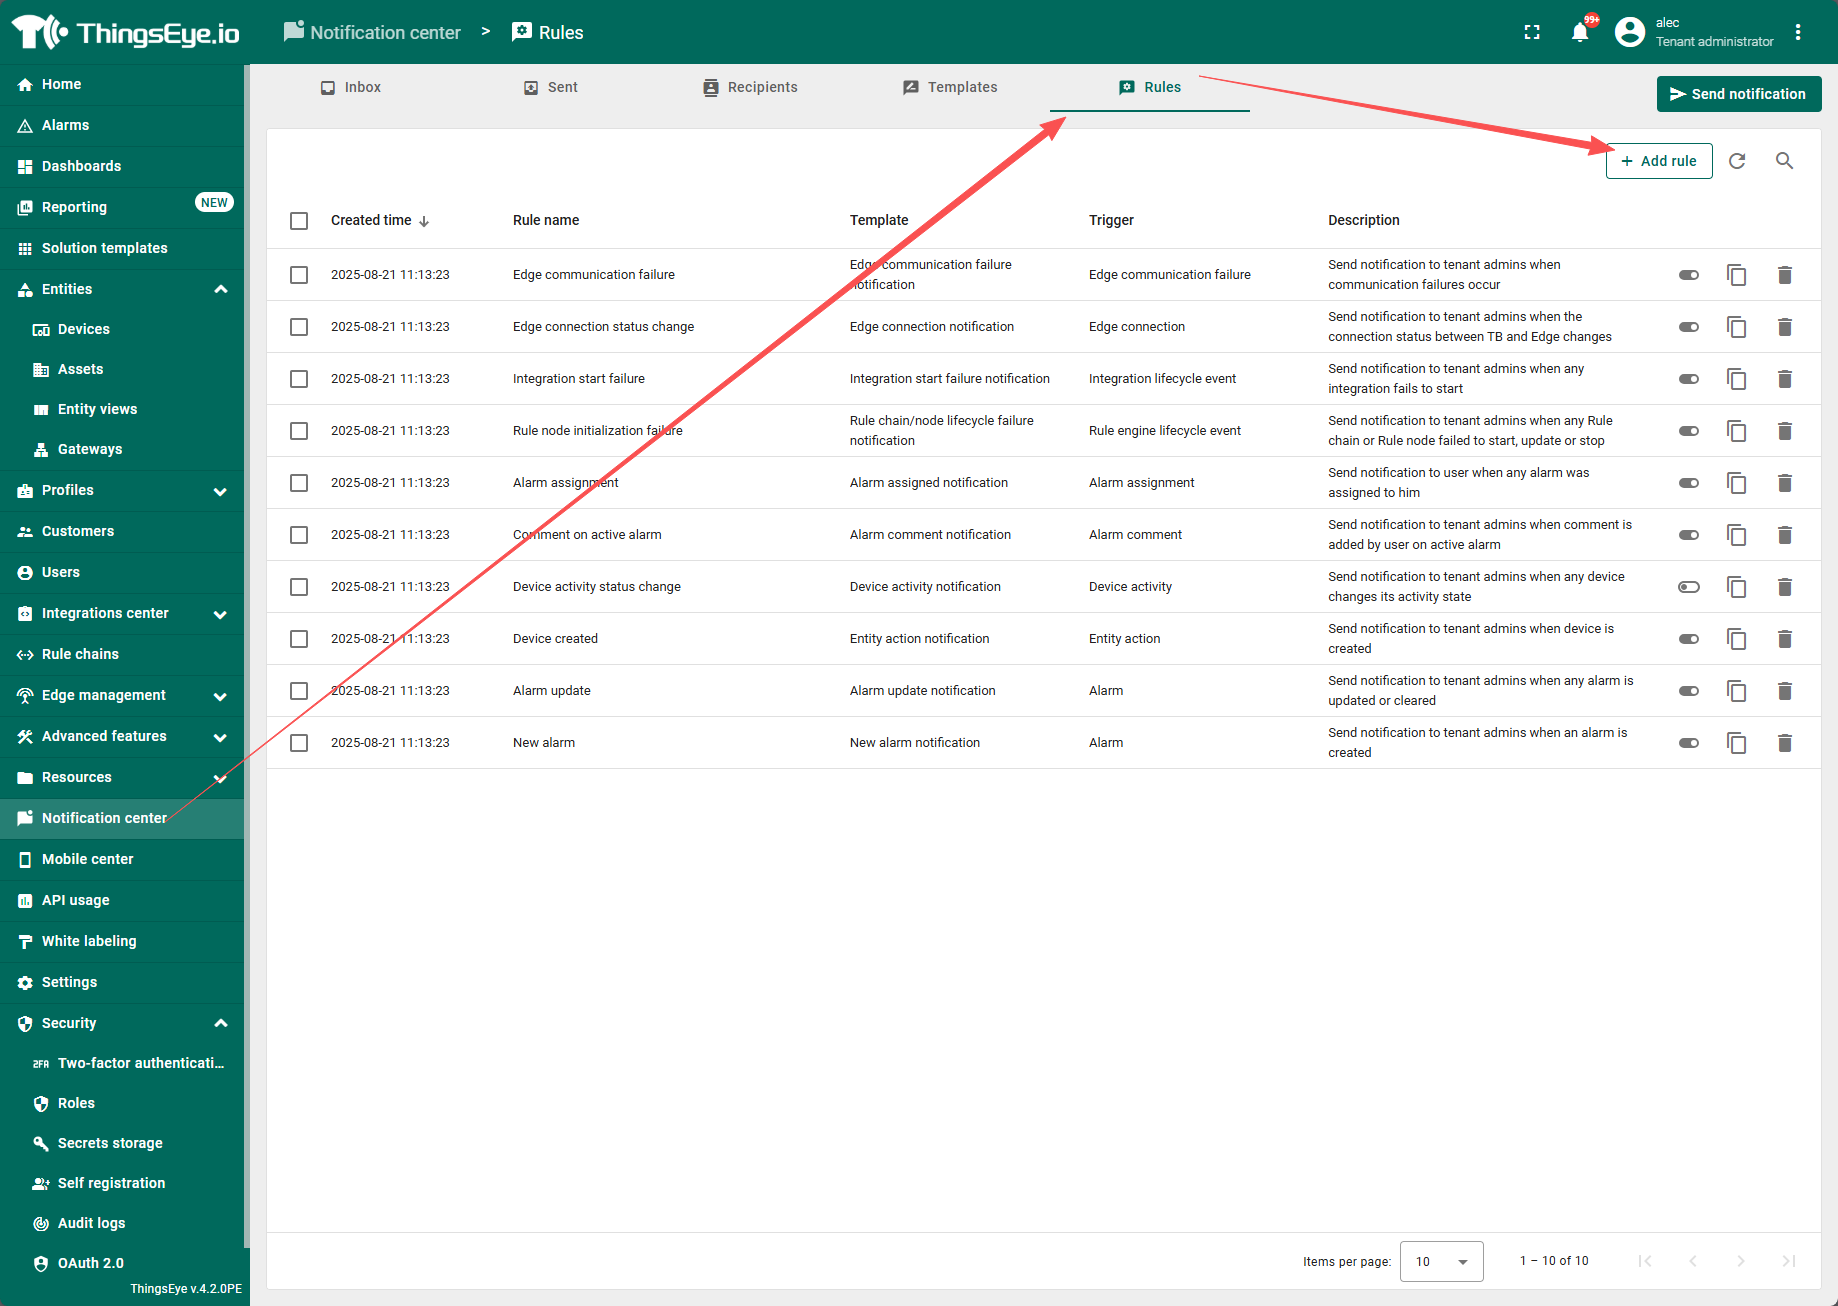
4.3 Configure Notification Rules
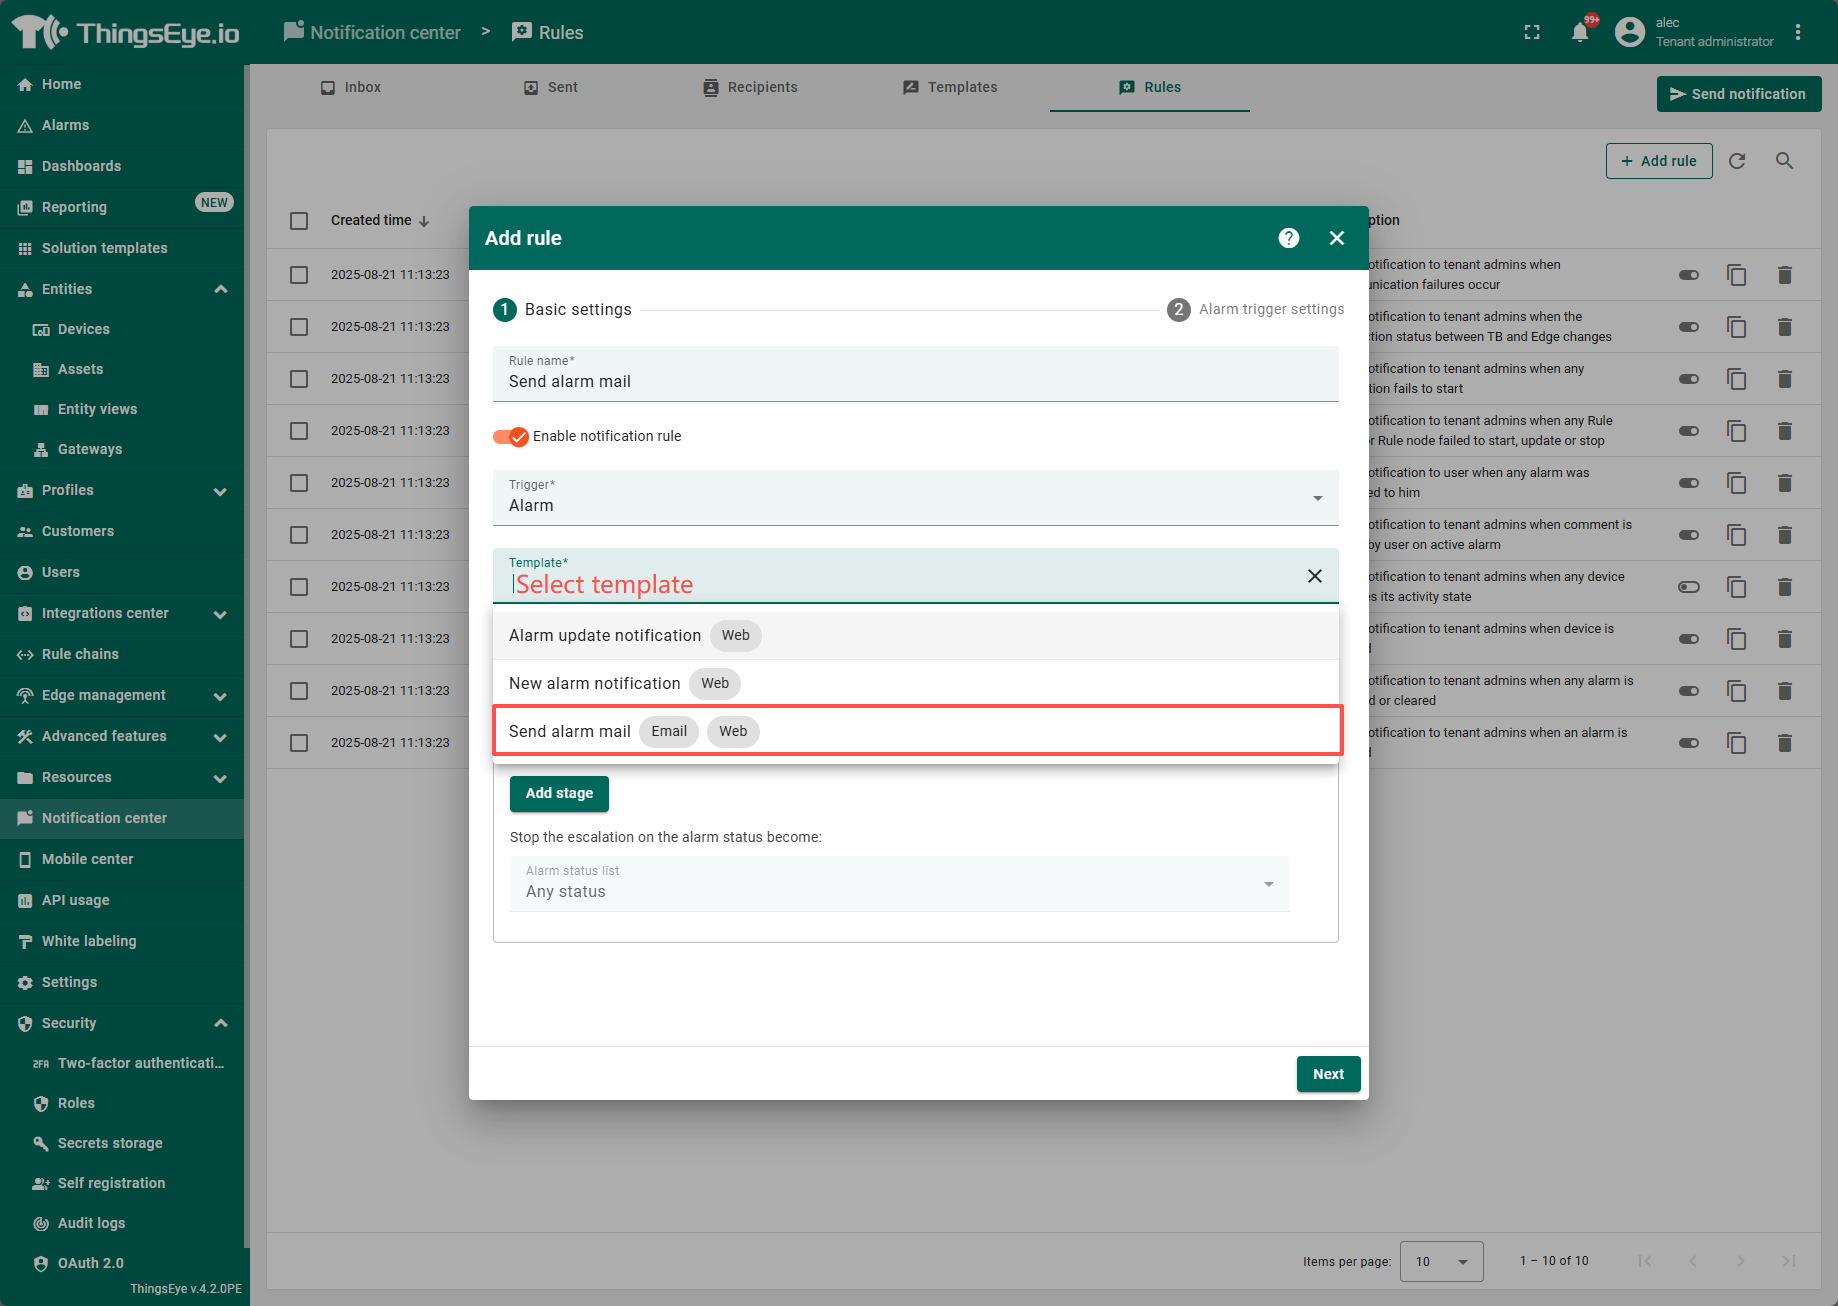
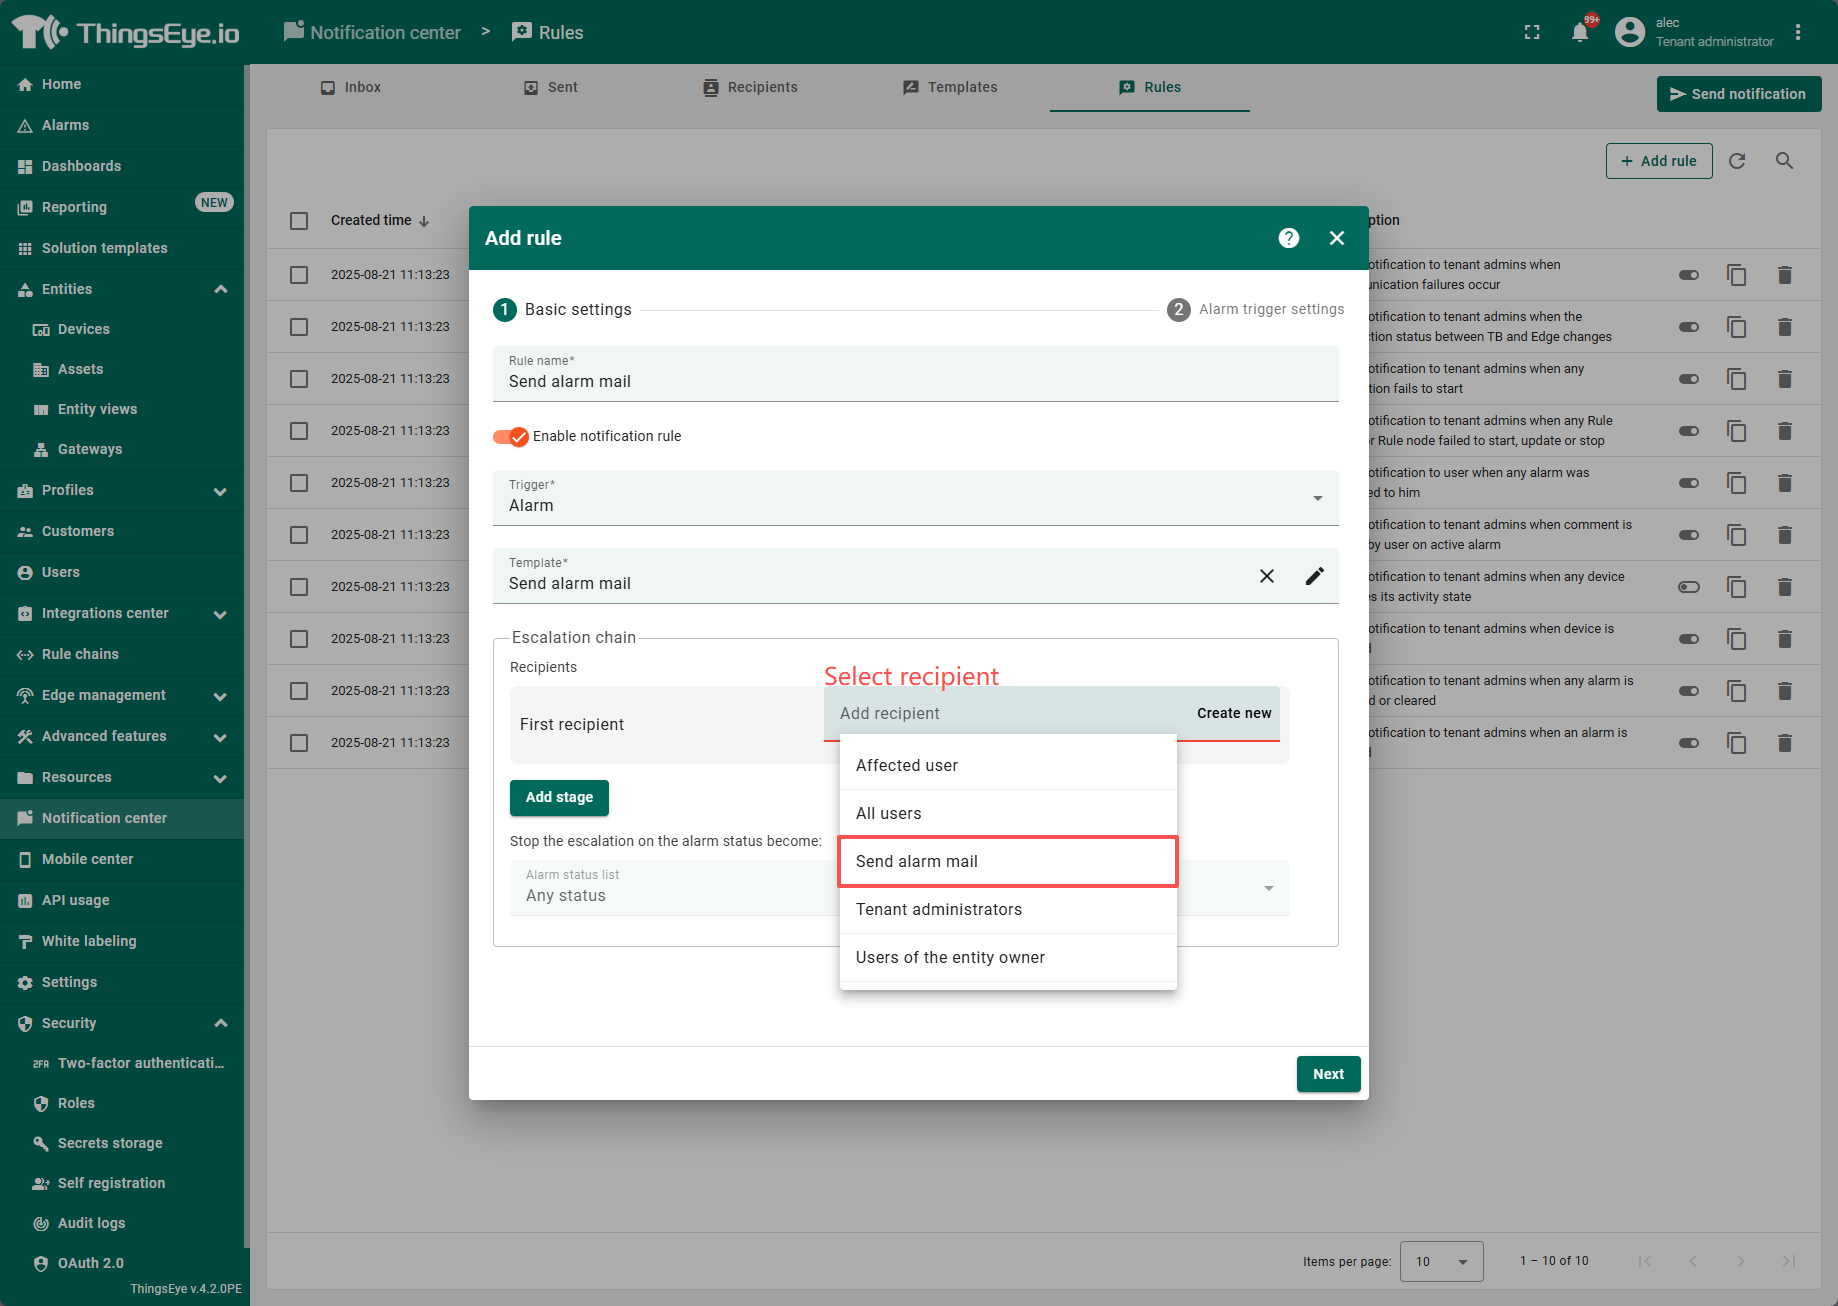
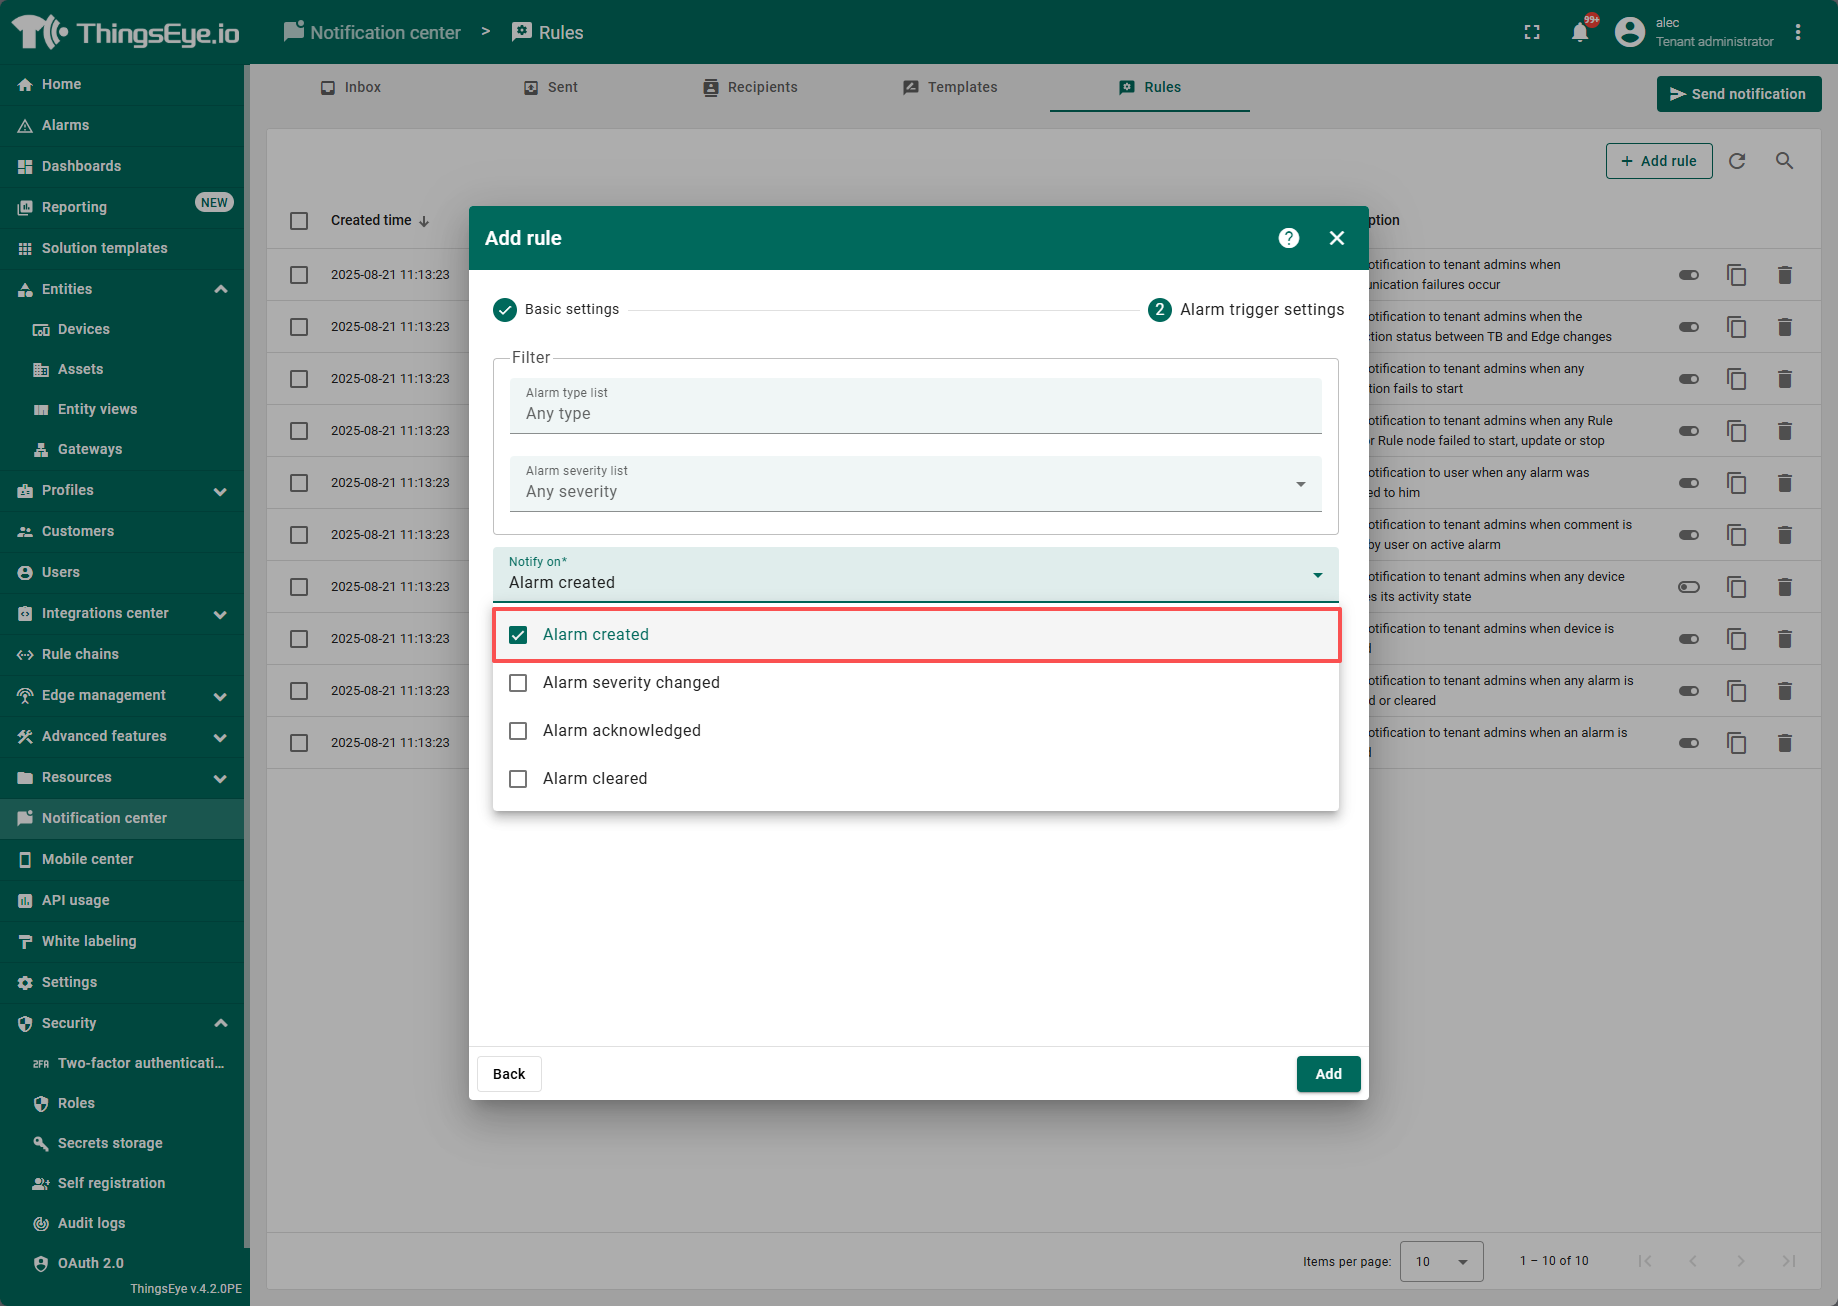
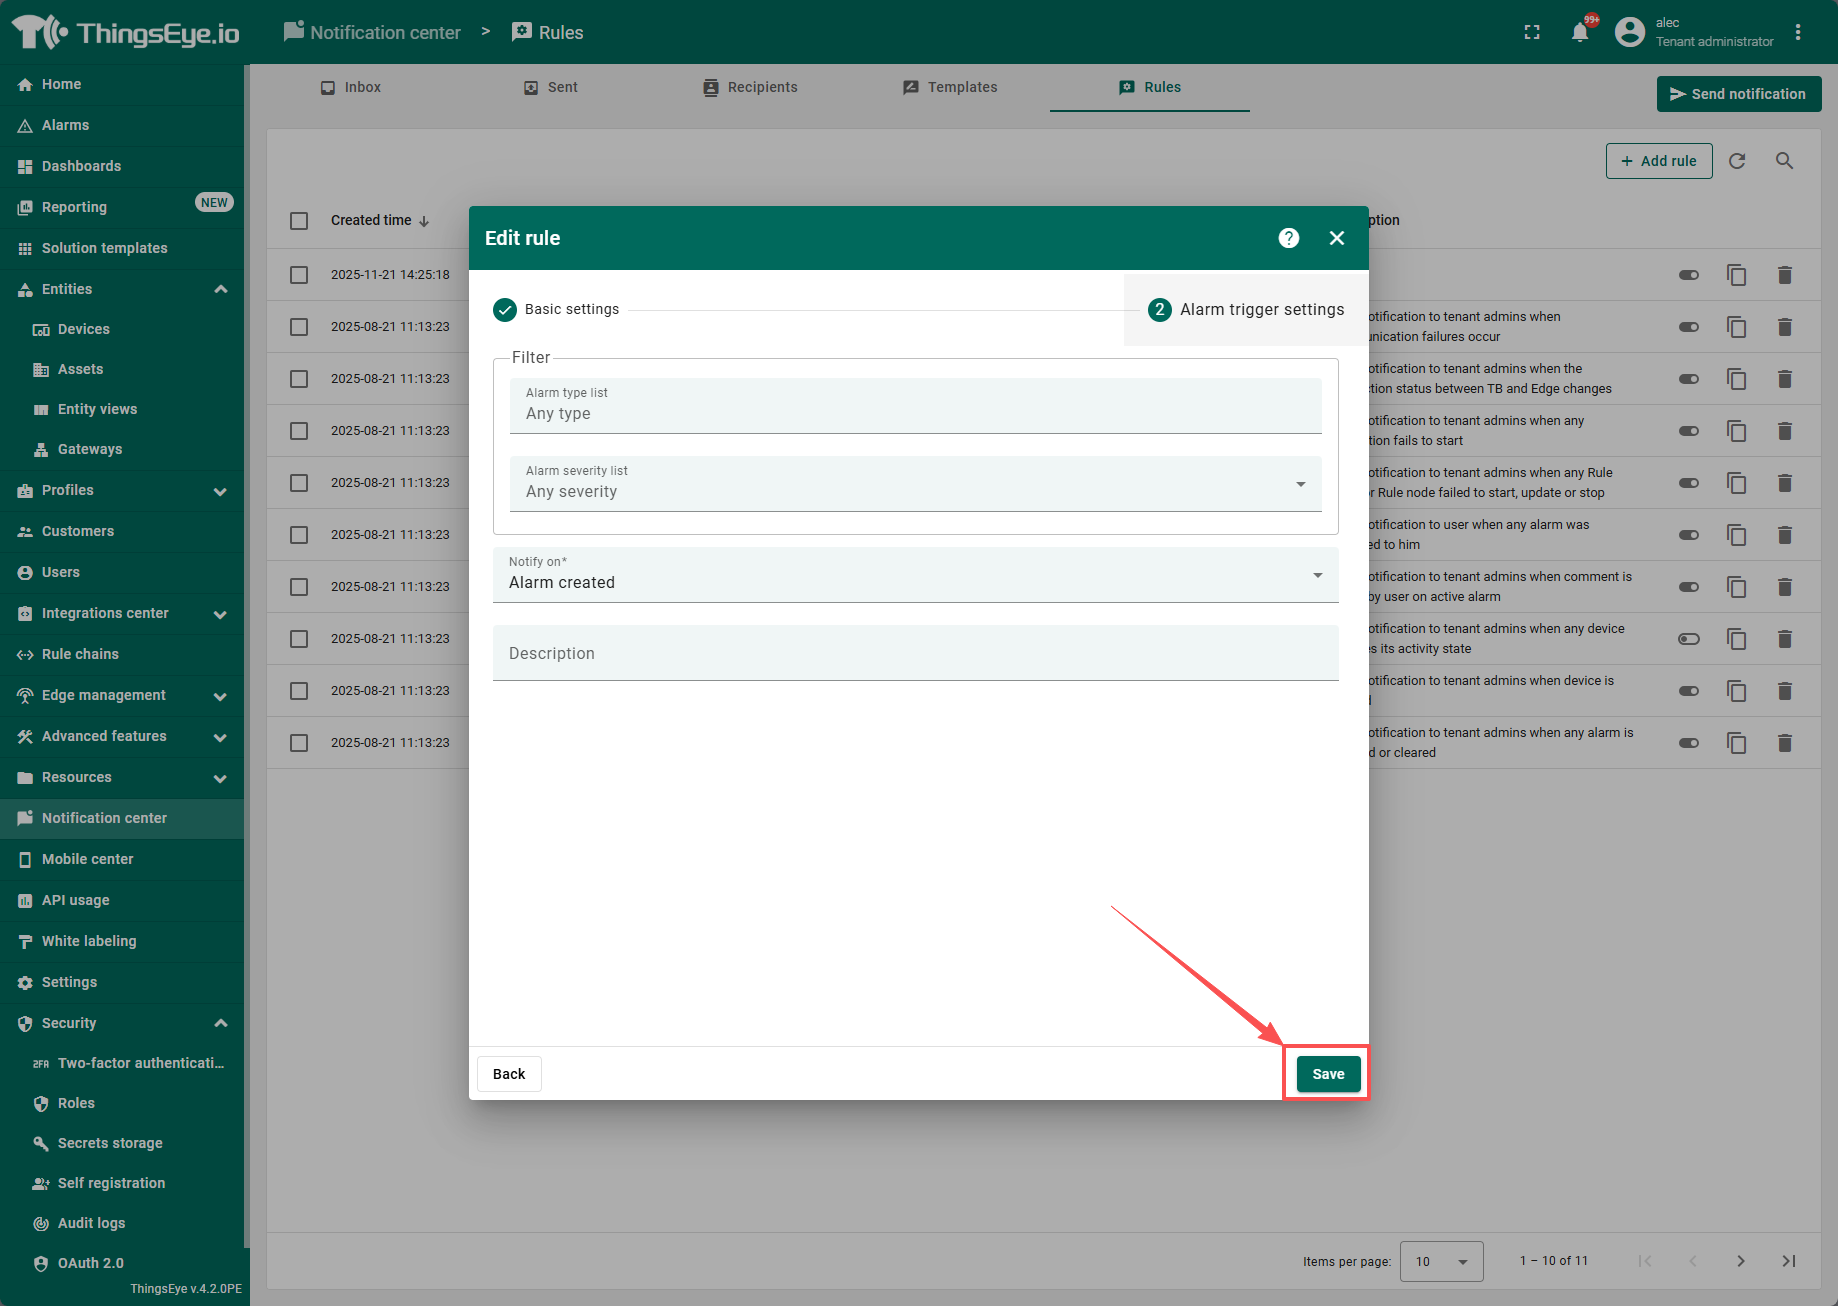
Extended content:
5. What if I want to send an email to a specific recipient?
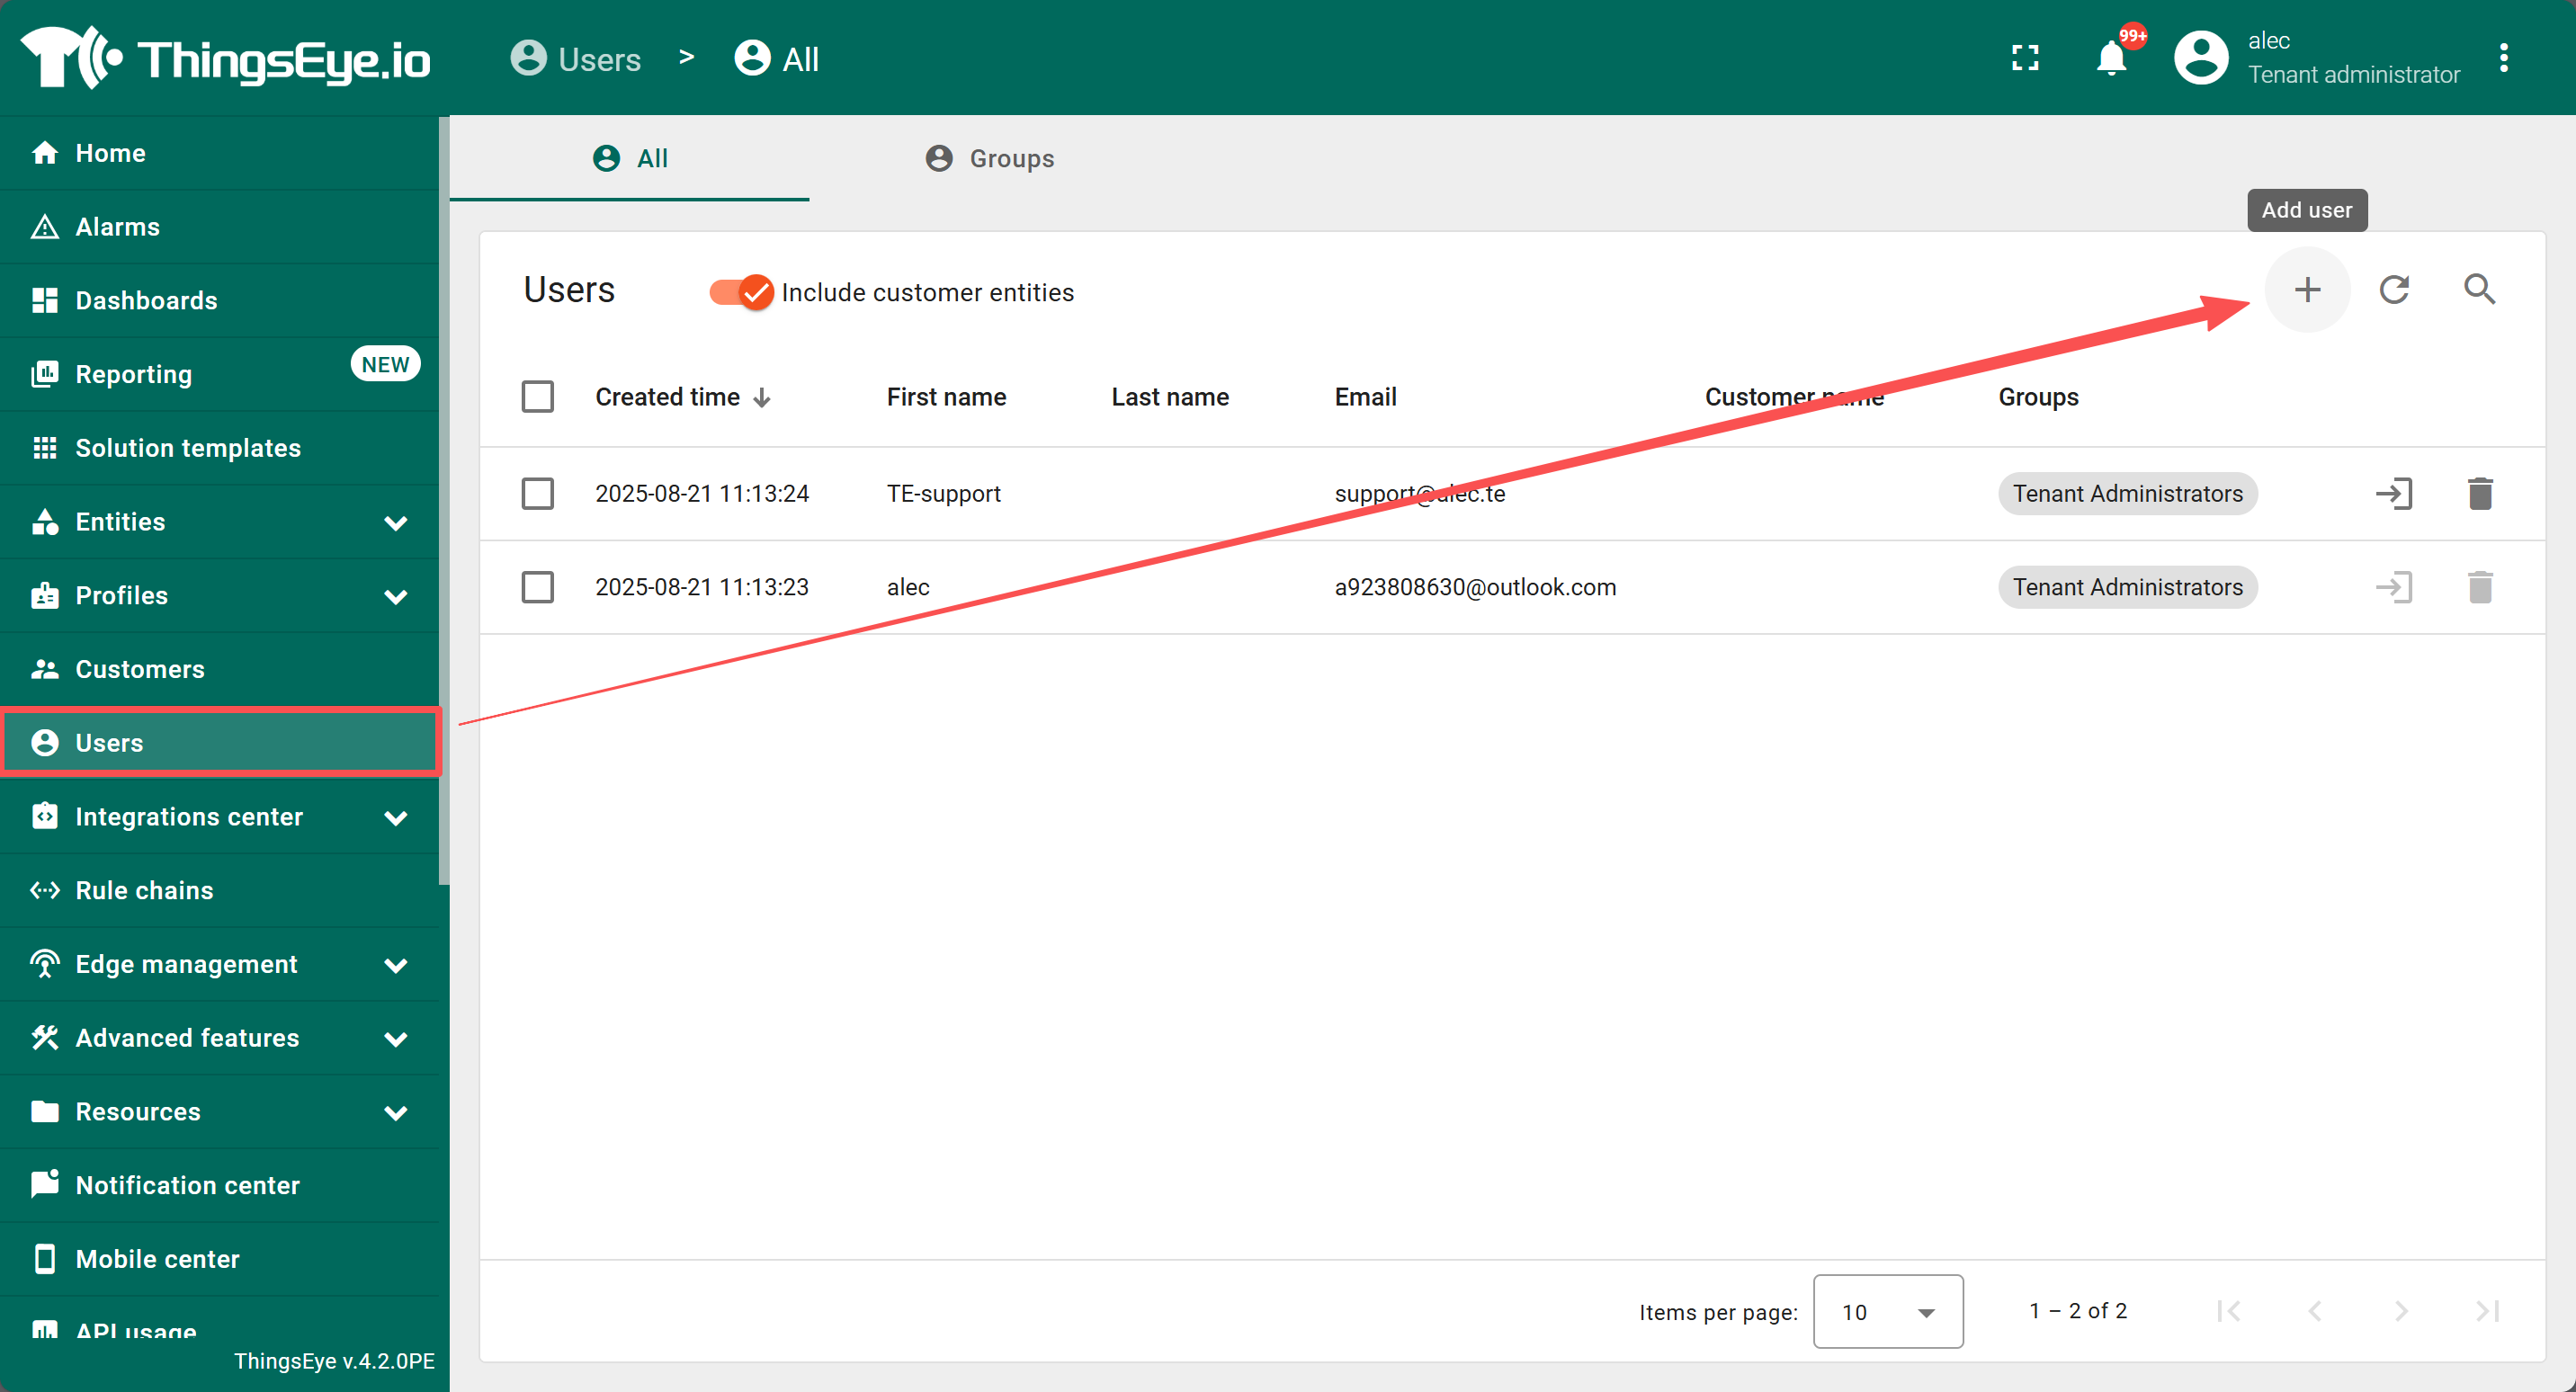
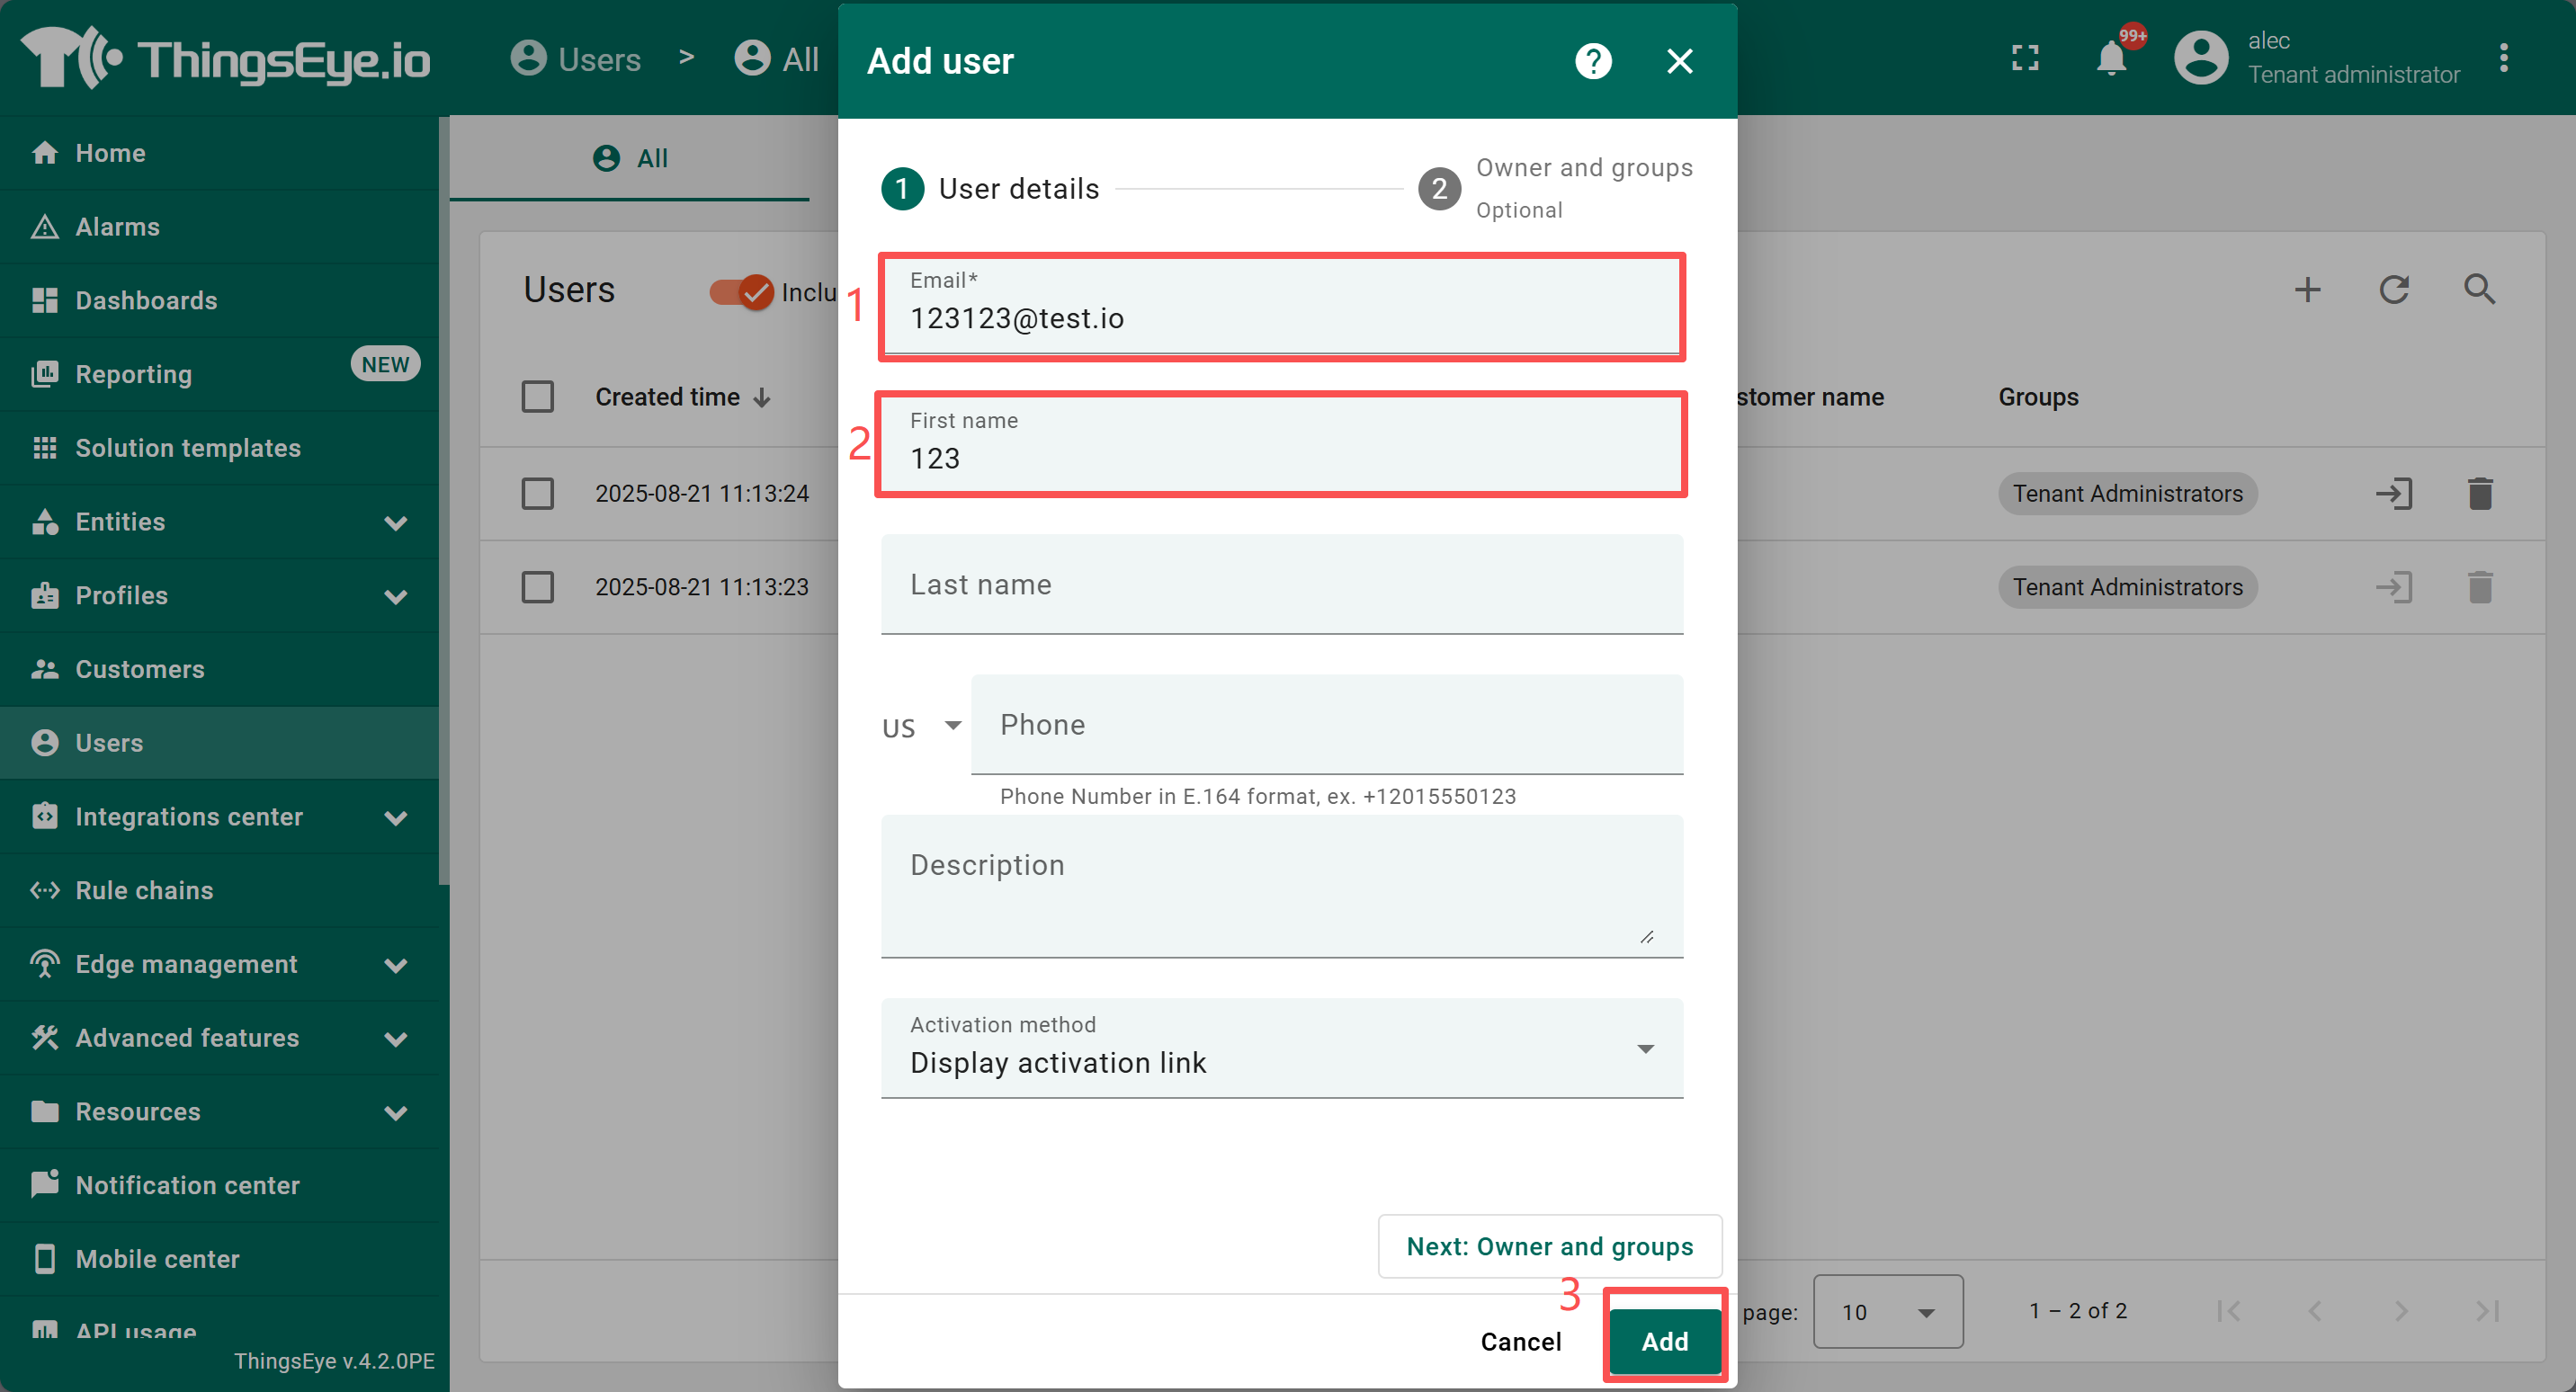
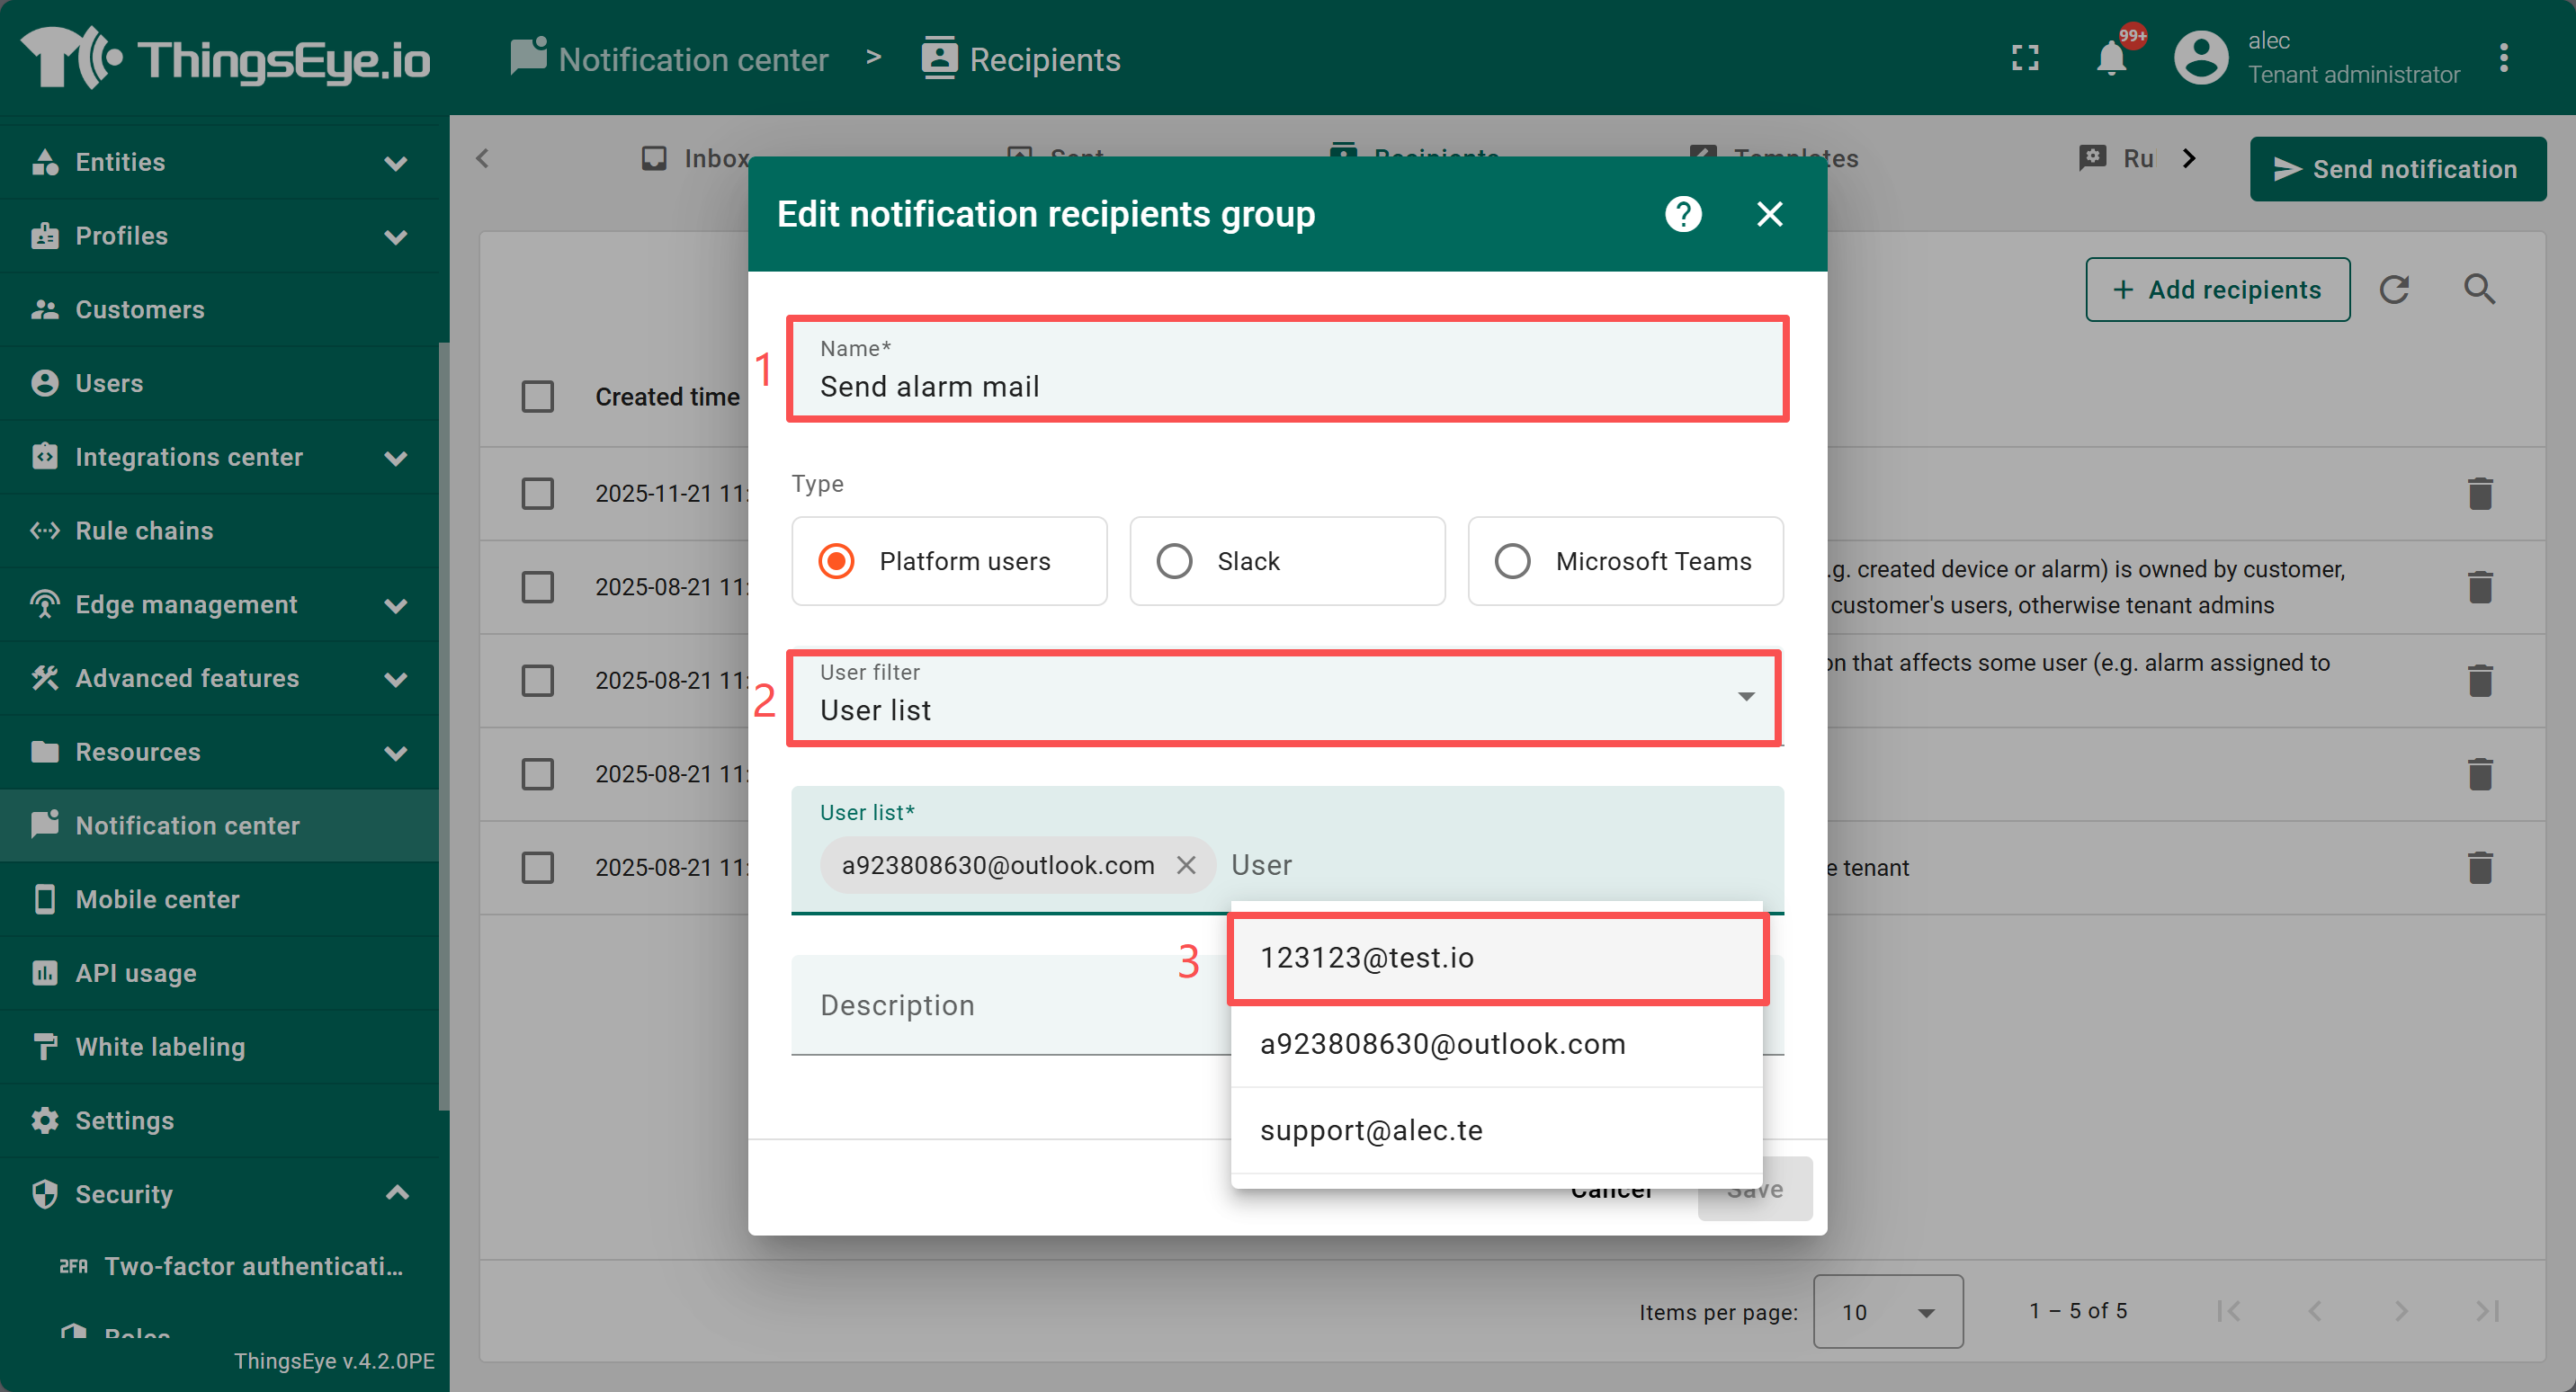
Currently, it supports three recipient types: Platform users, Slack, and Microsoft Teams. You can create a user using the email address you want to receive emails from, and then select the recipient in Platform users -> UserList.
6. How to set up a separate page for each device for easier management?
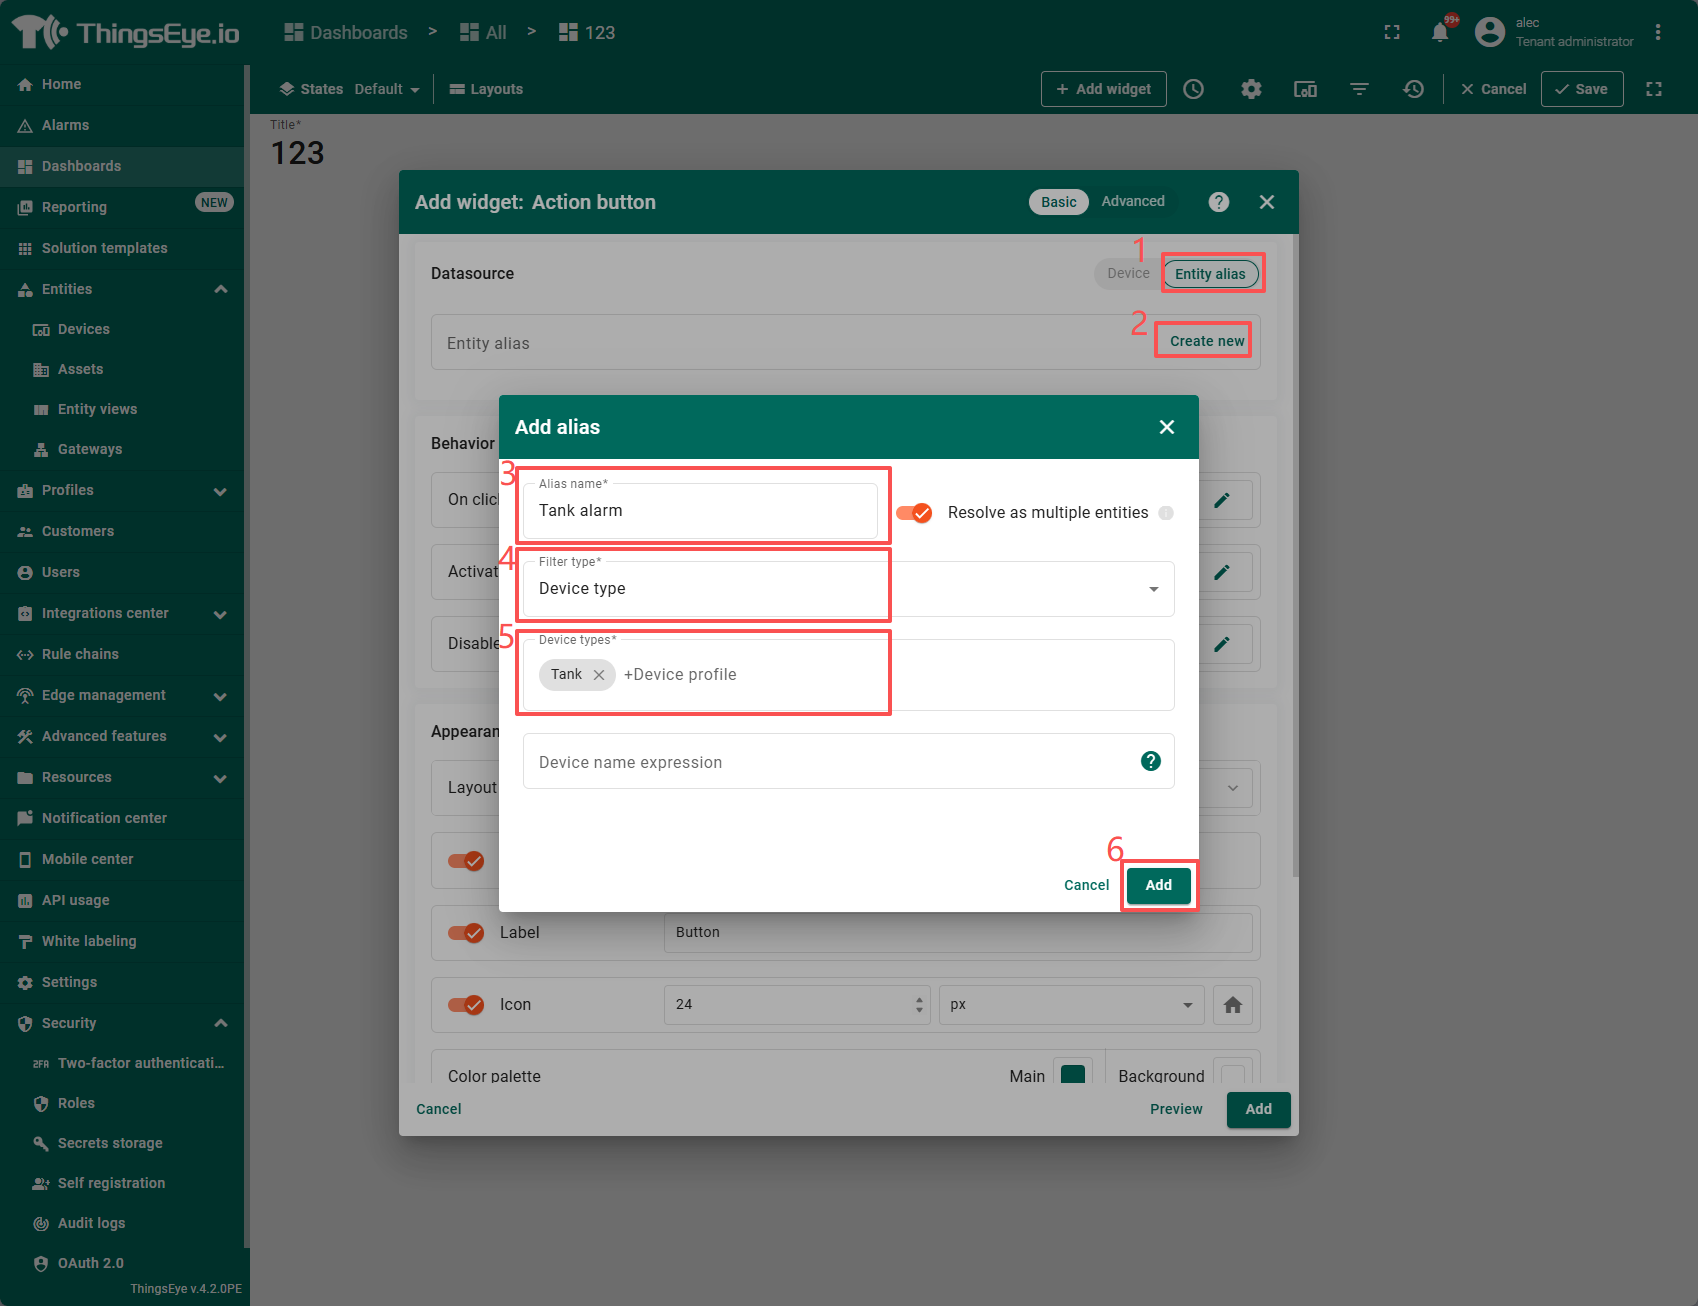
Suppose we have a batch of AQI sensors and a batch of Tank sensors. How do we display them on two different pages or put them into an existing dashboard?
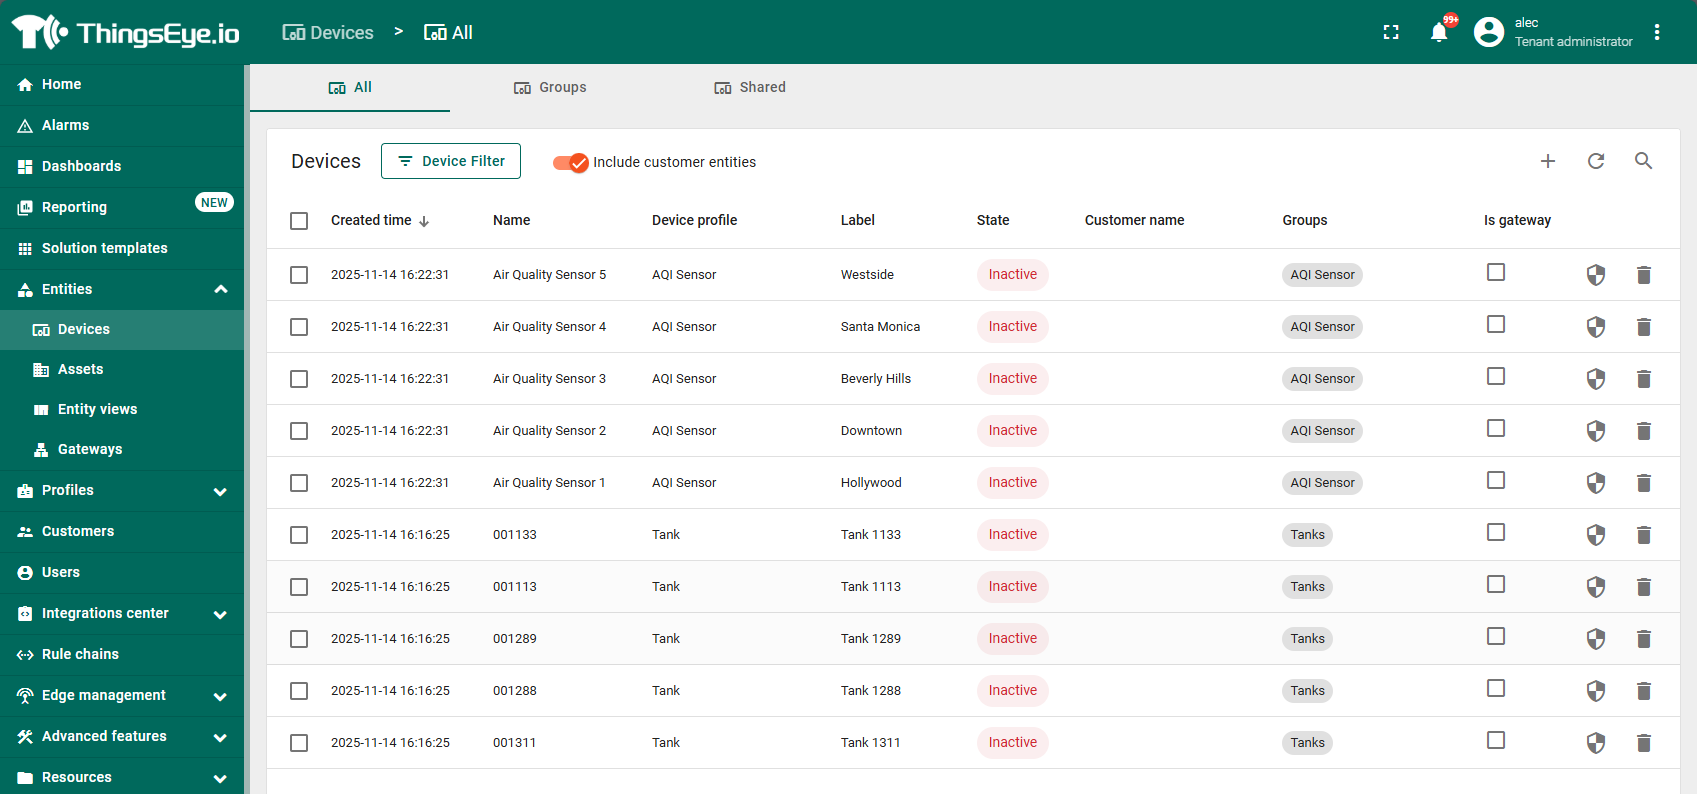
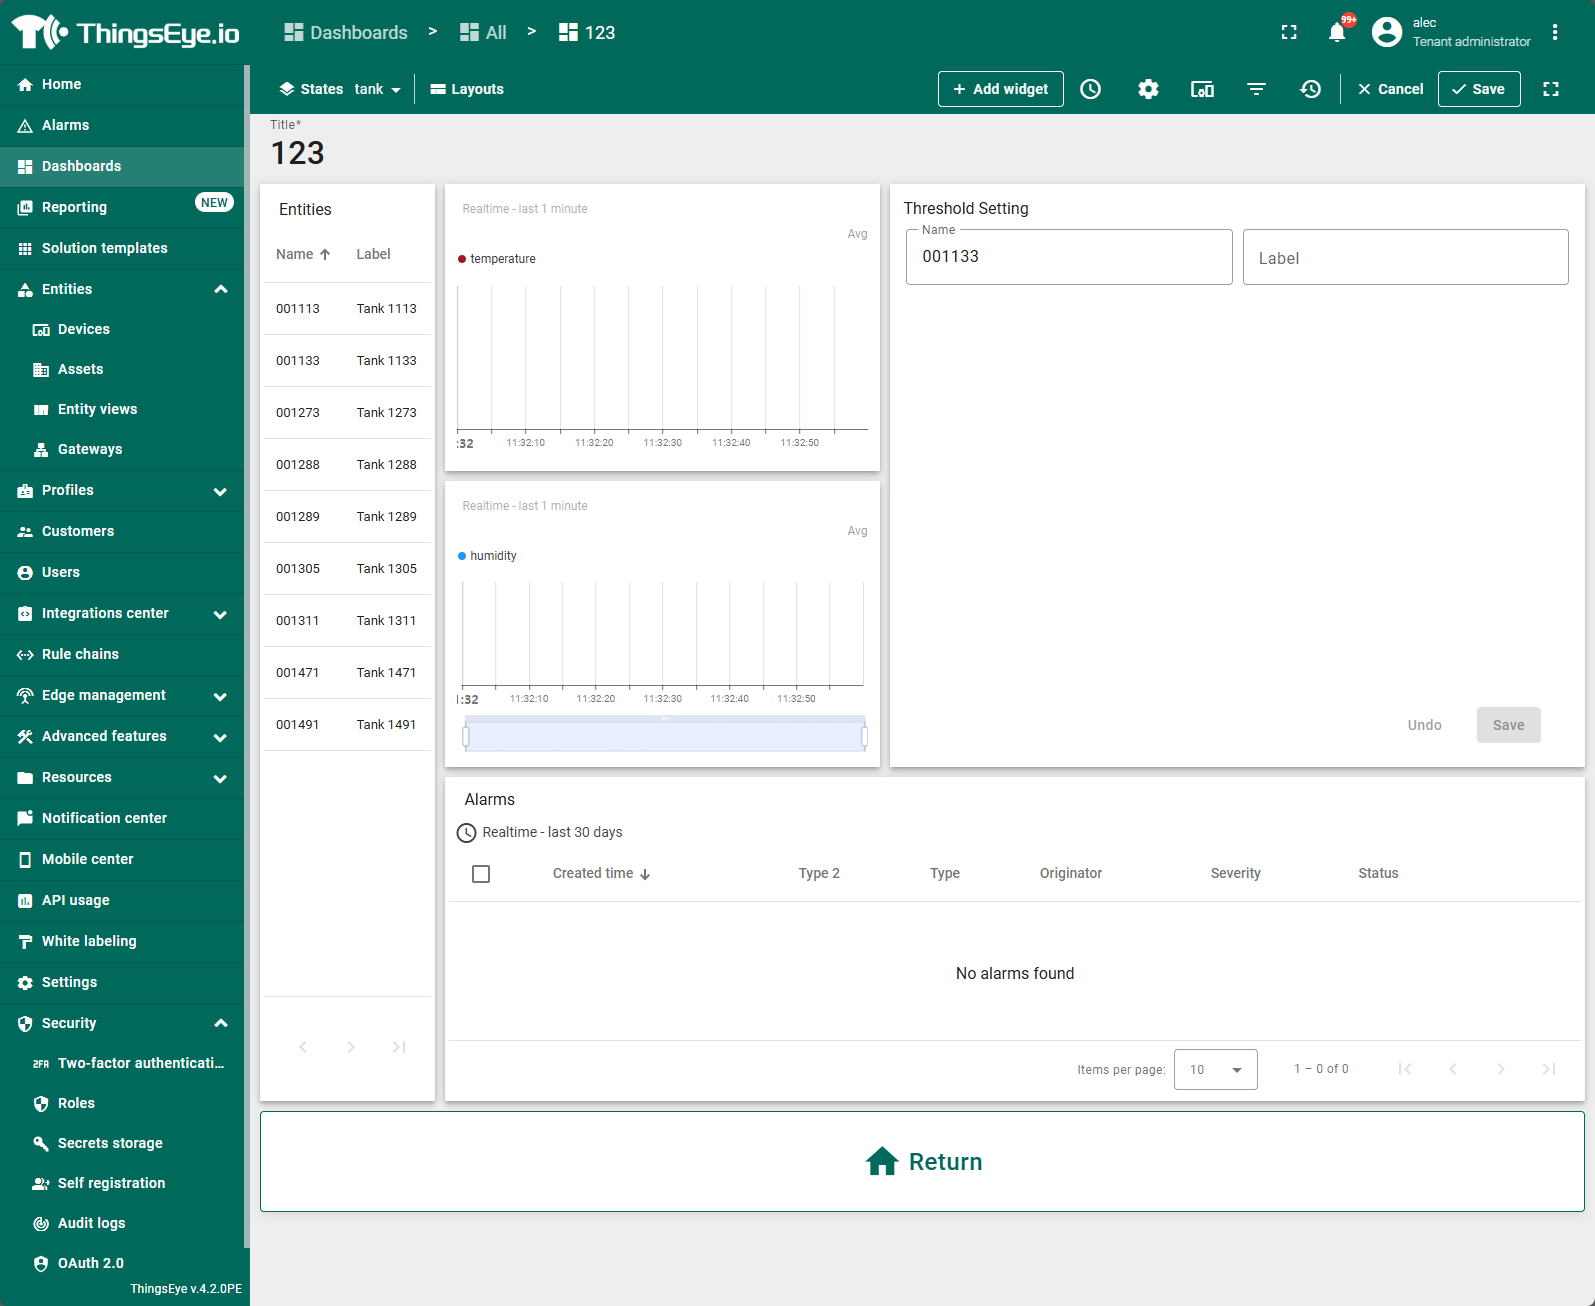
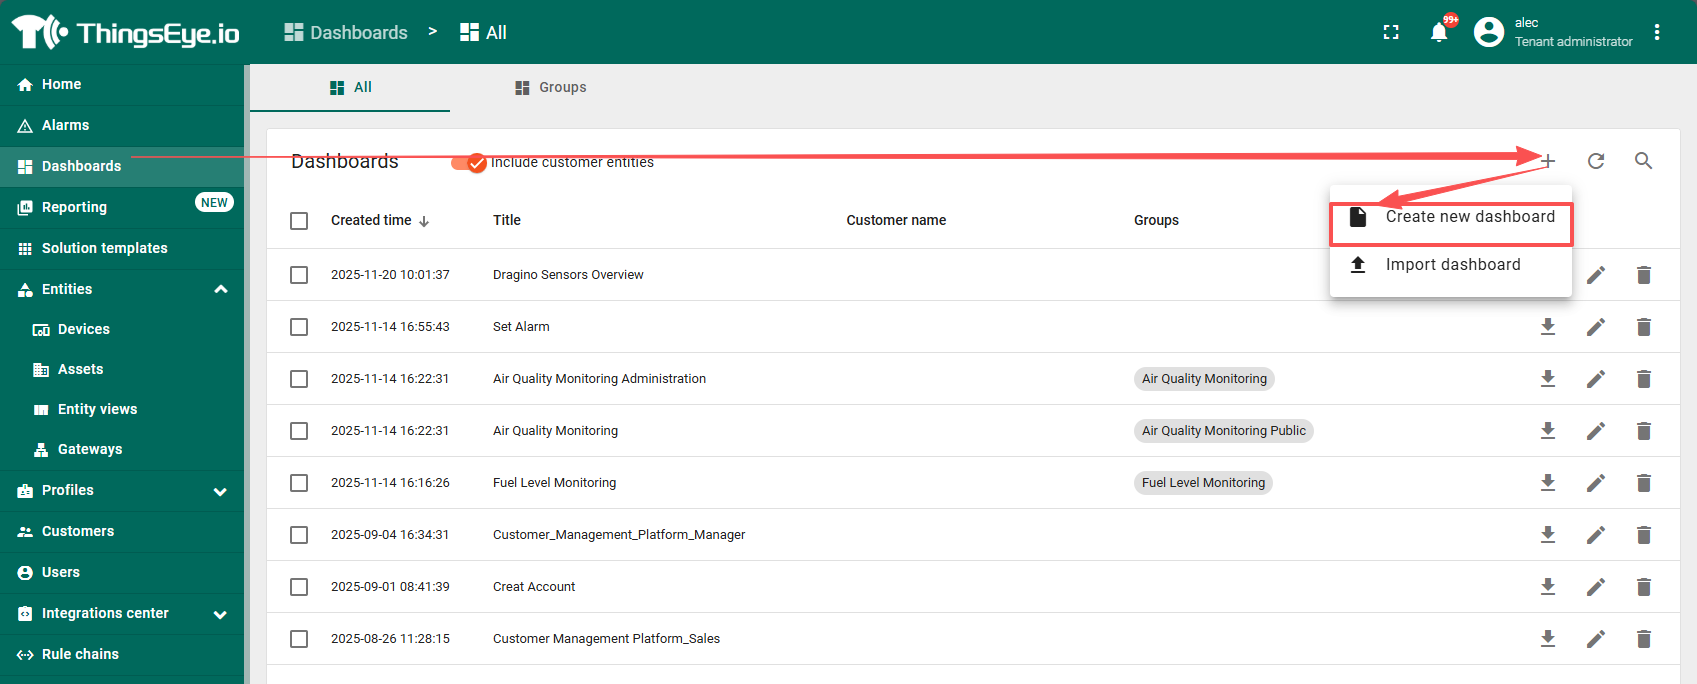
Here, we will create a blank dashboard for demonstration purposes, and create two States (Pages) to distinguish and display two different types of devices.
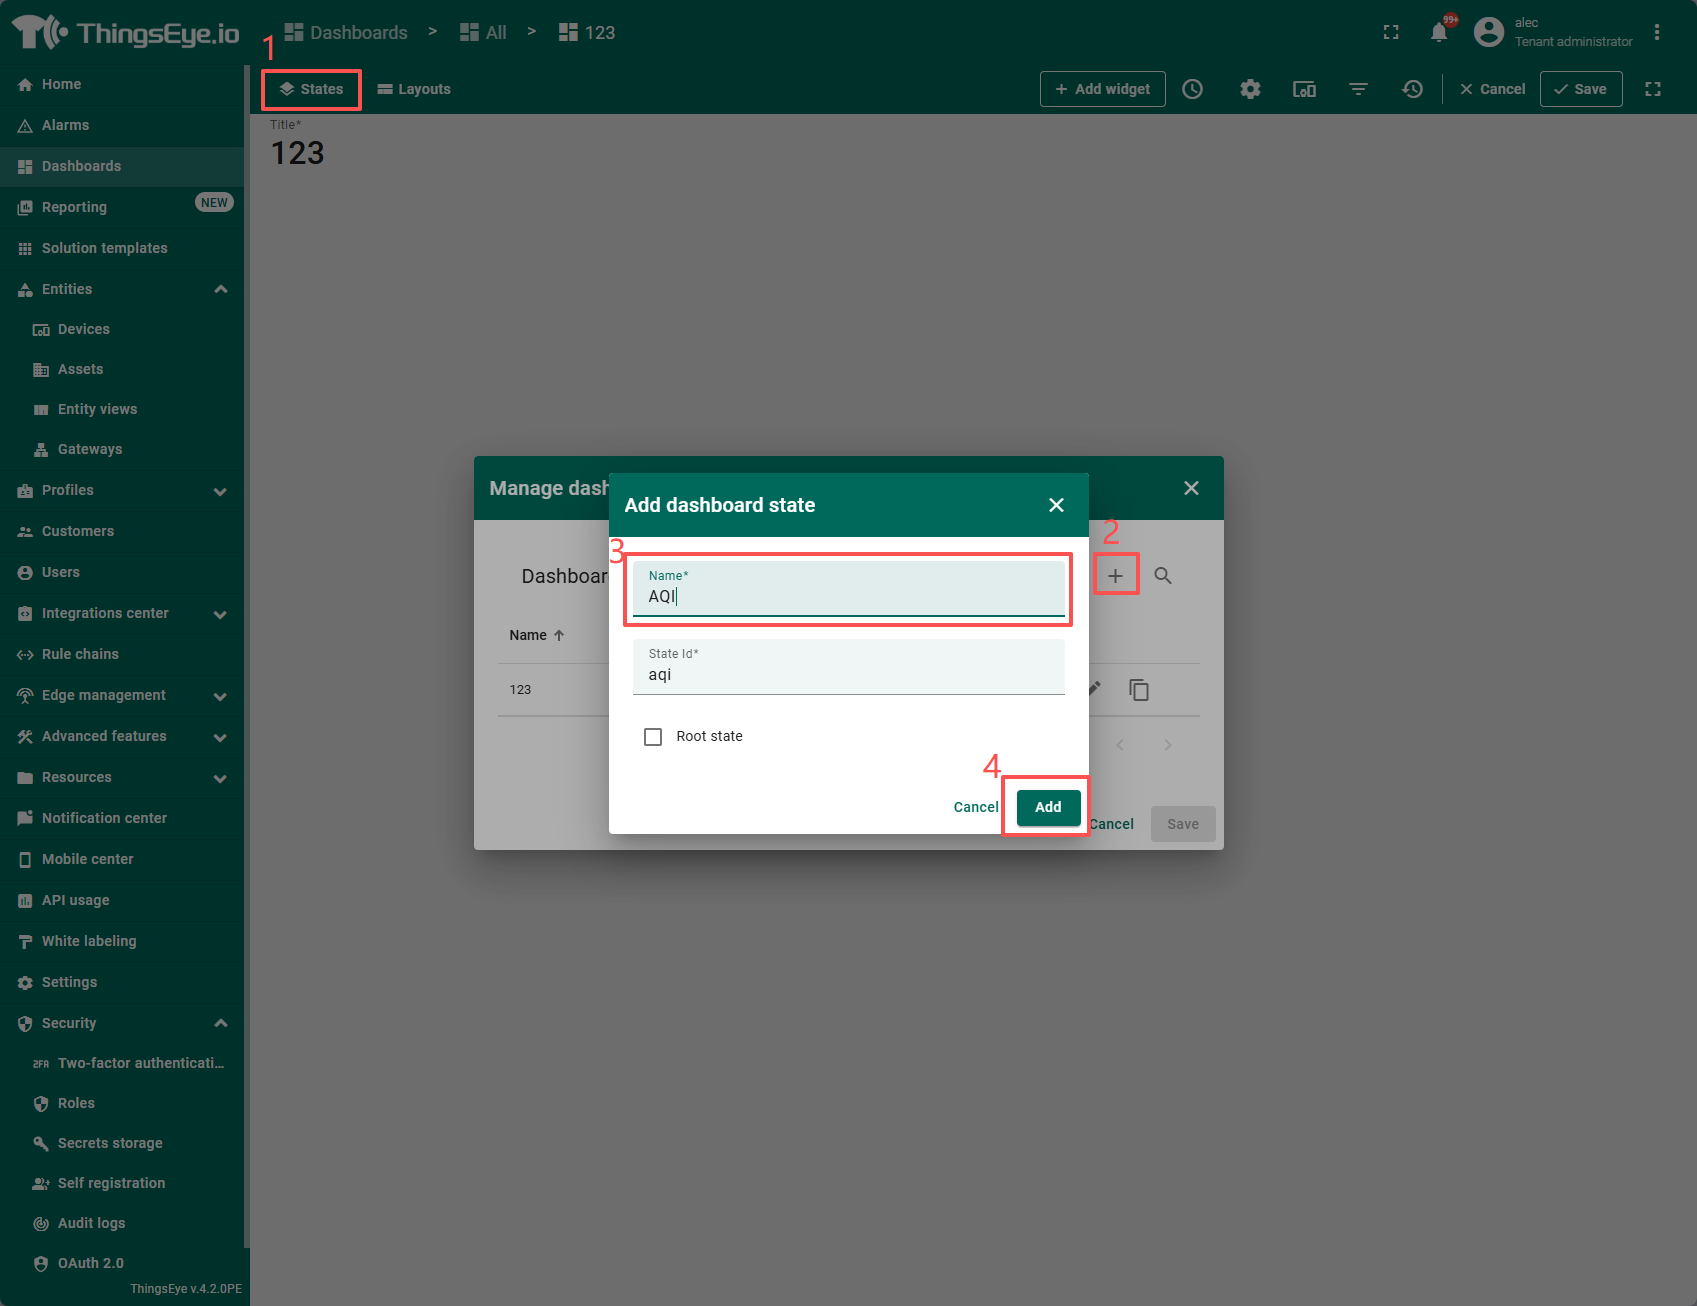
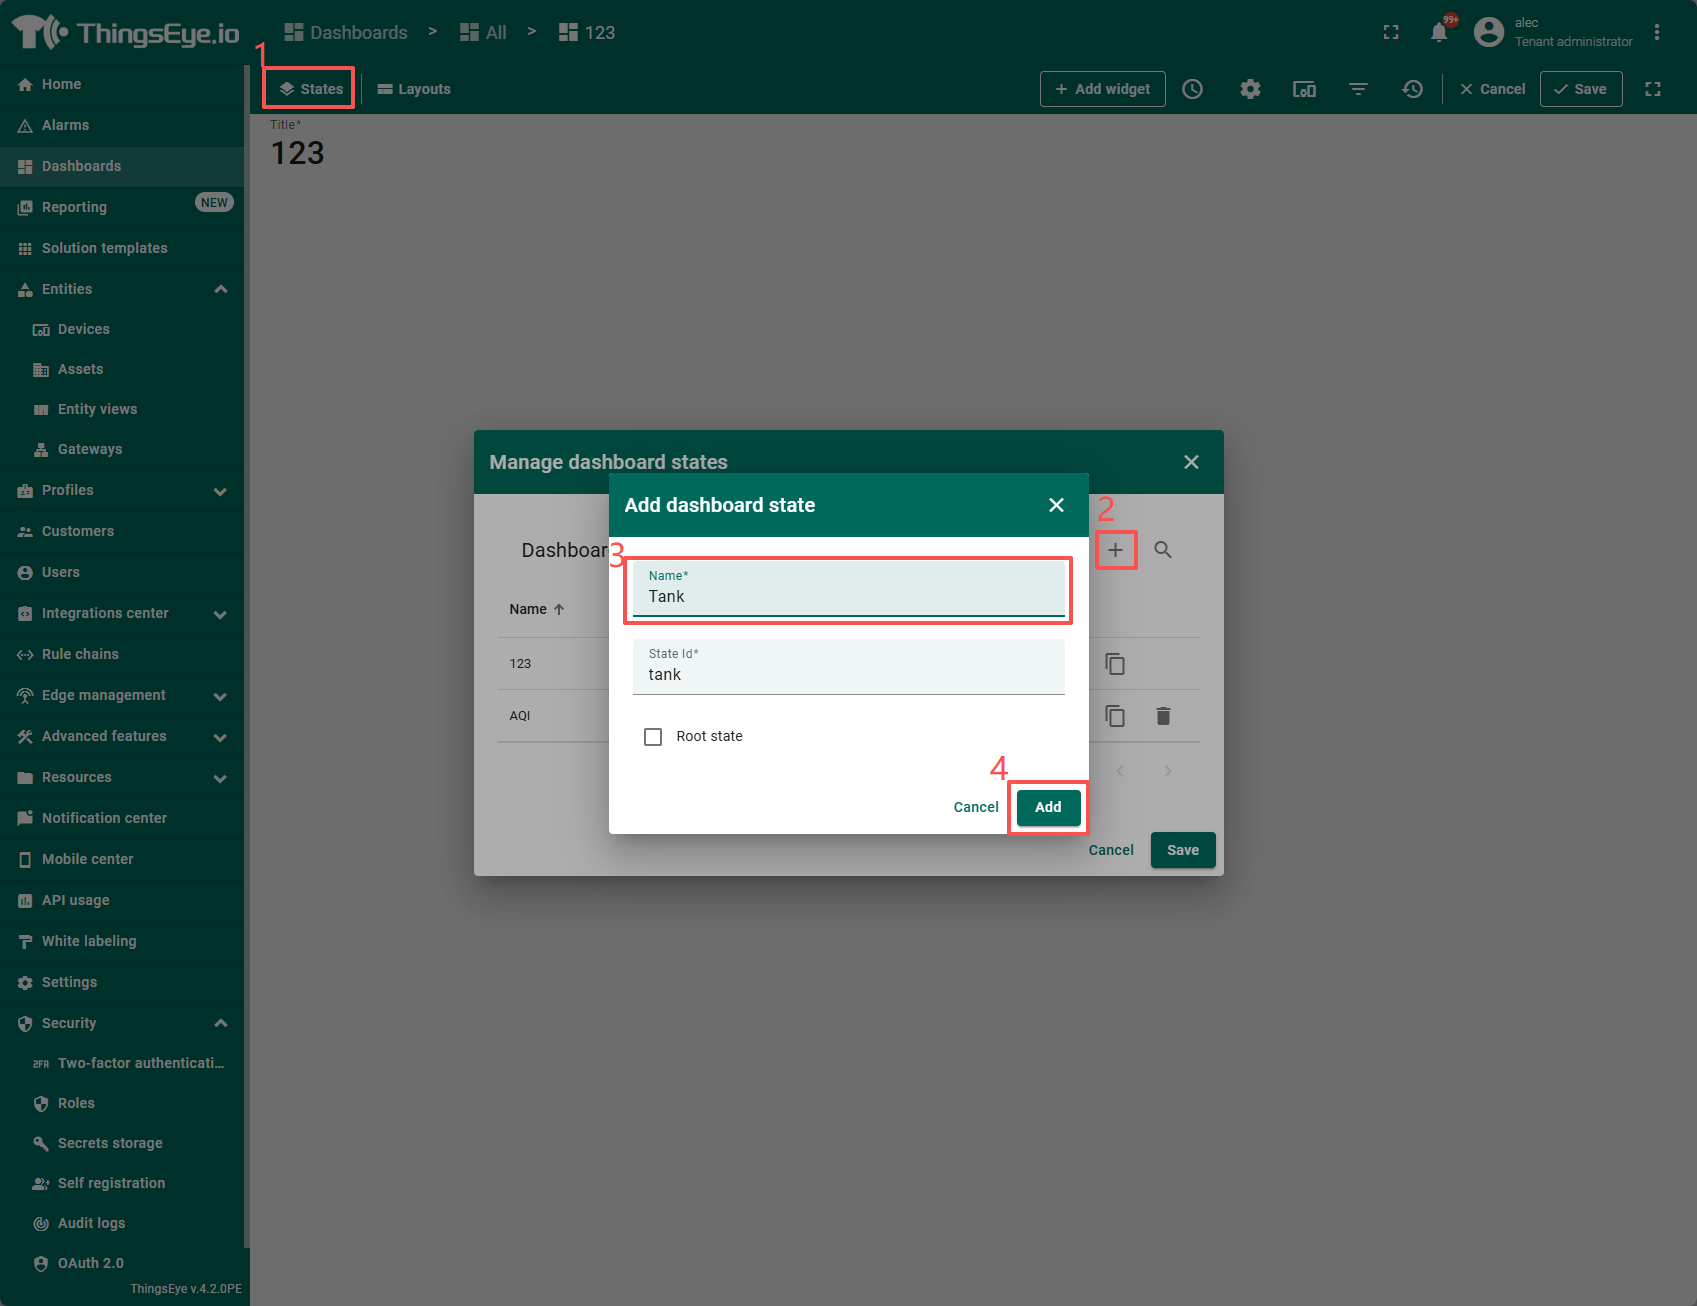
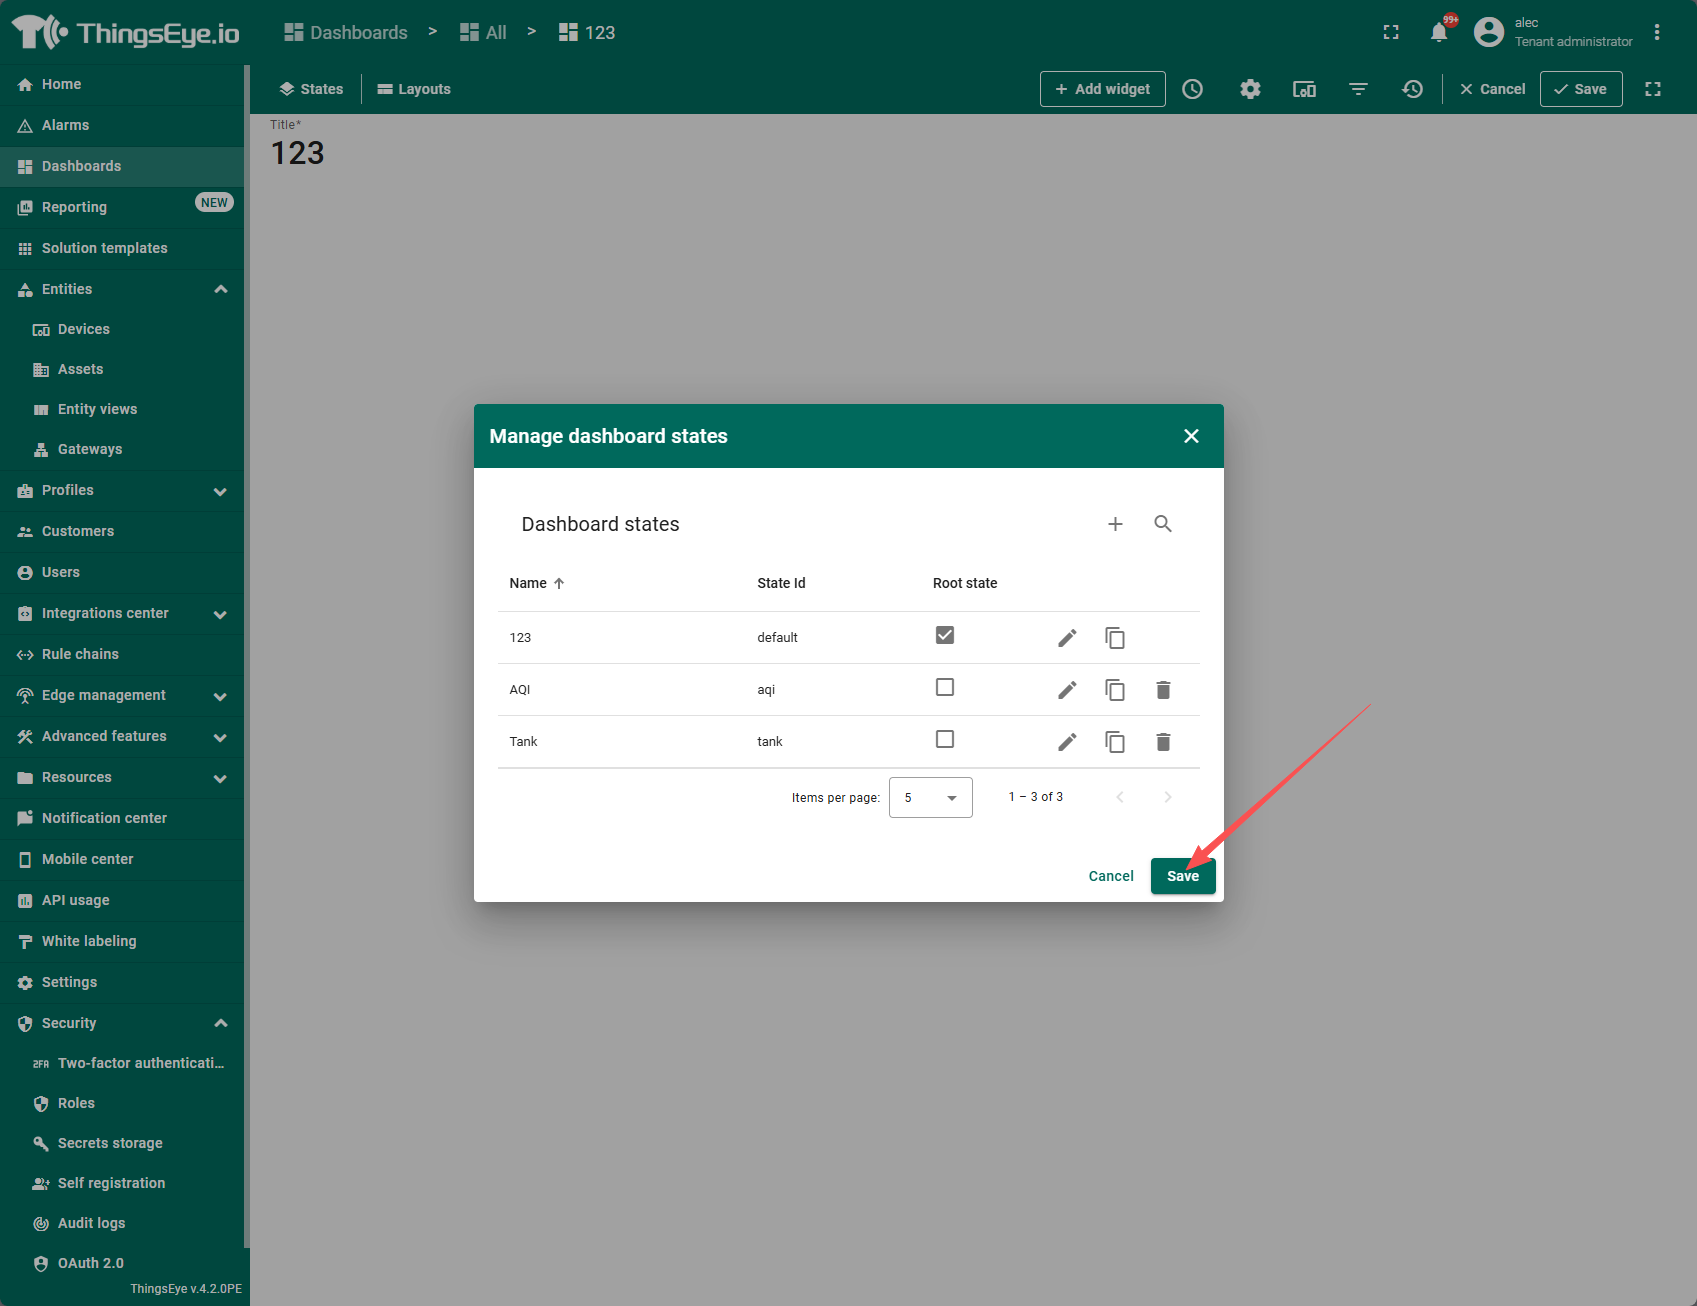
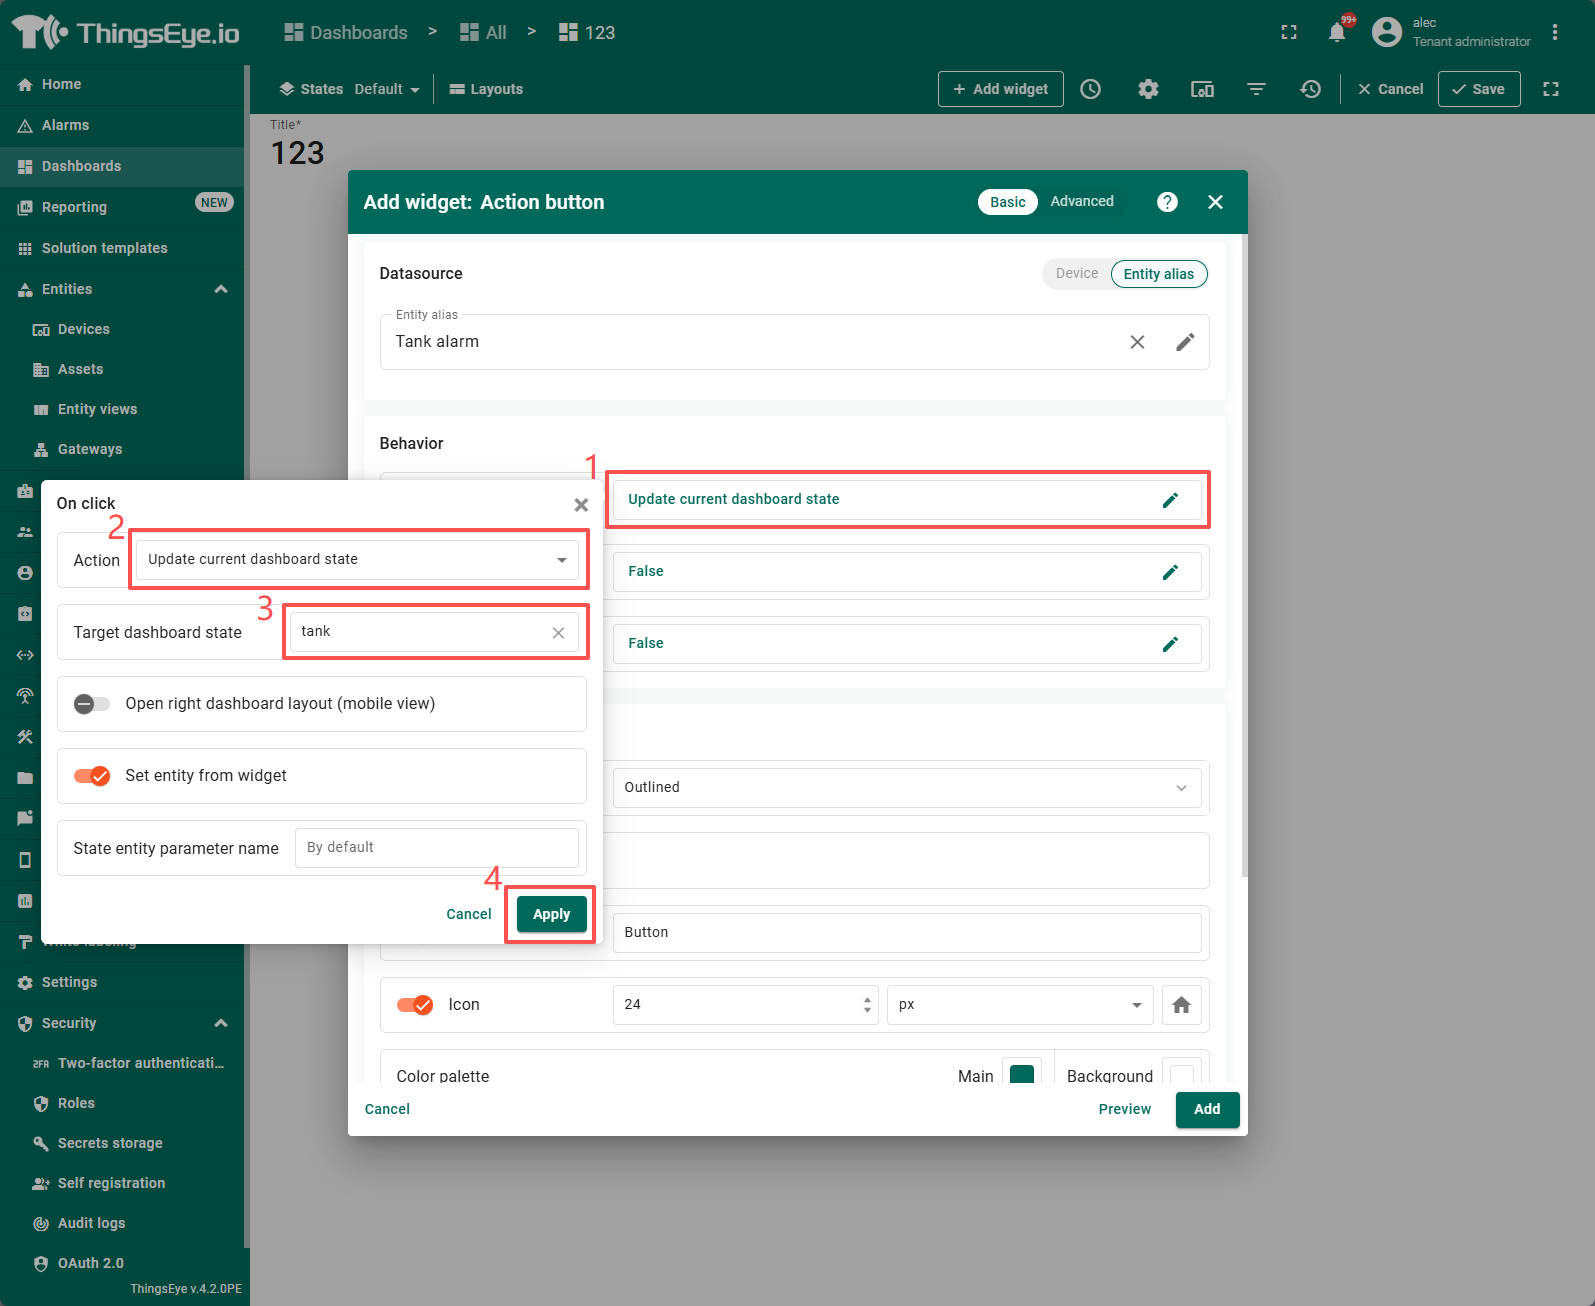
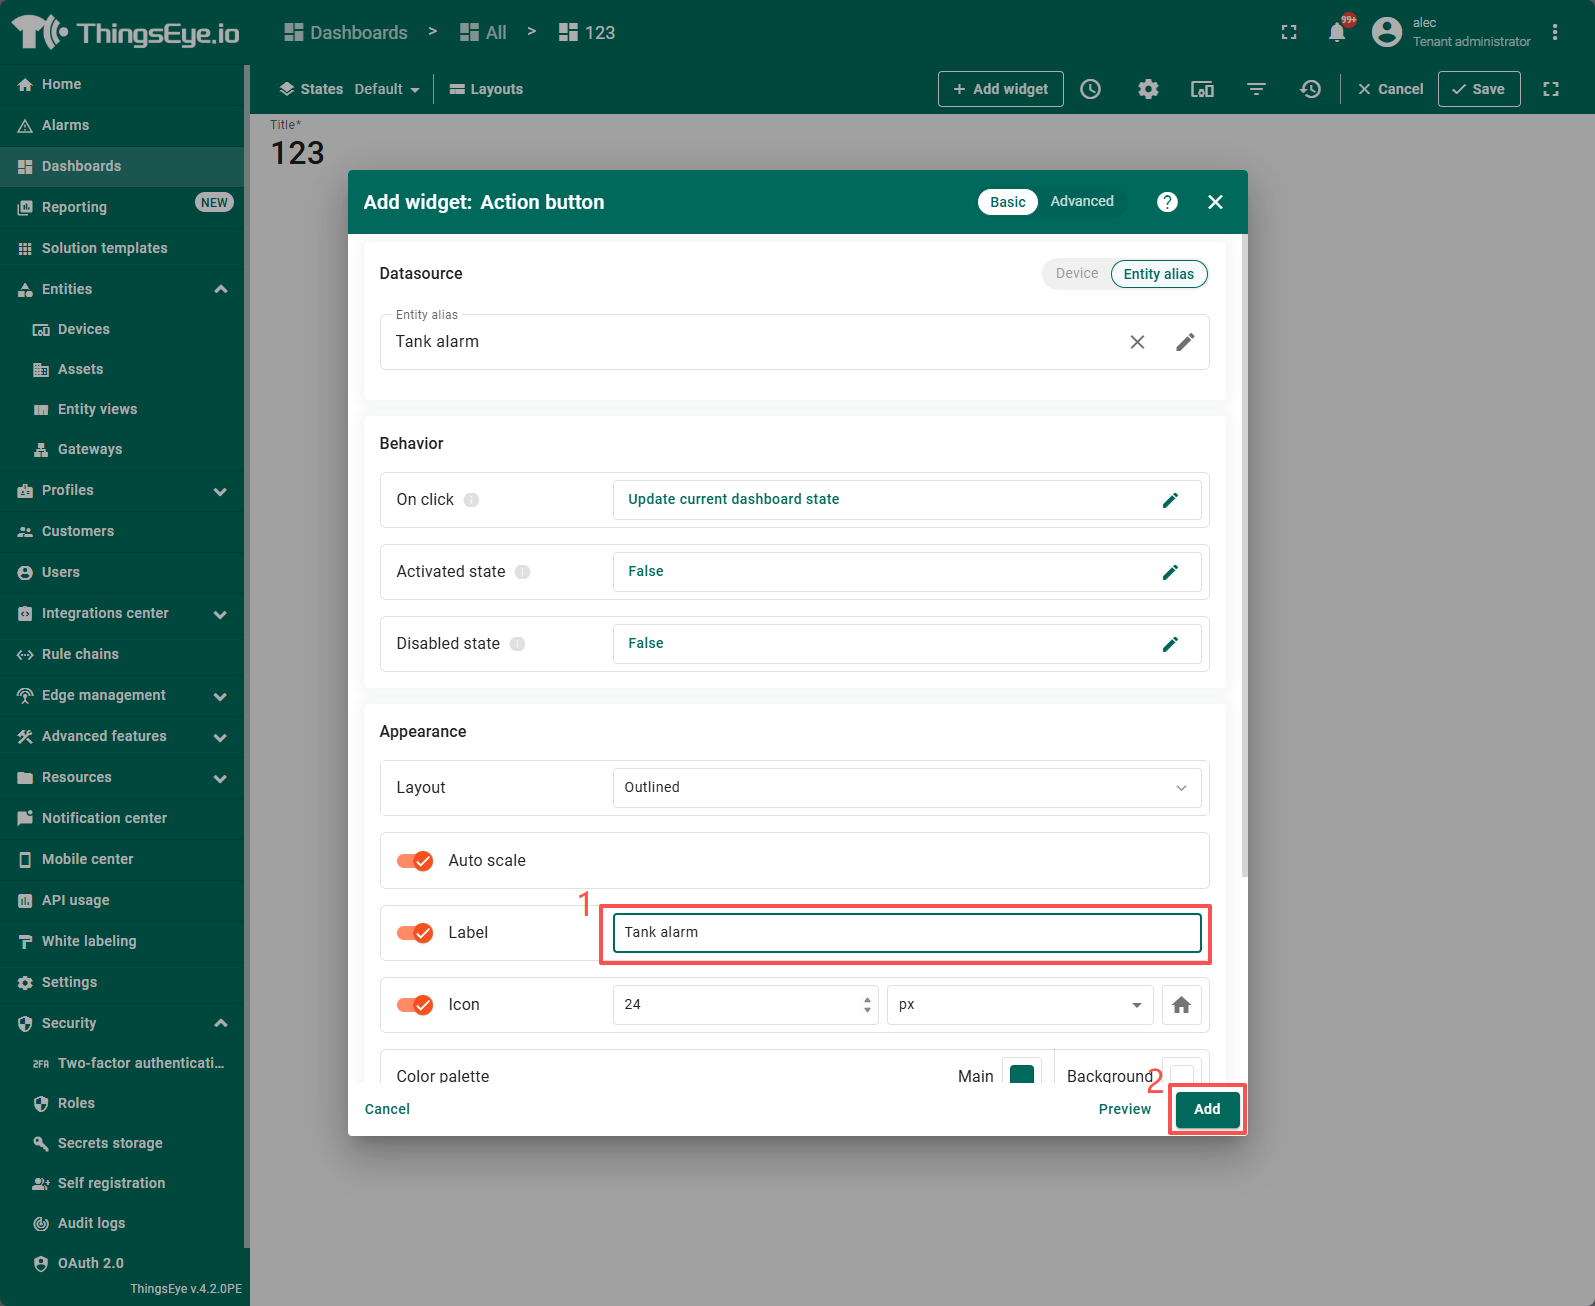
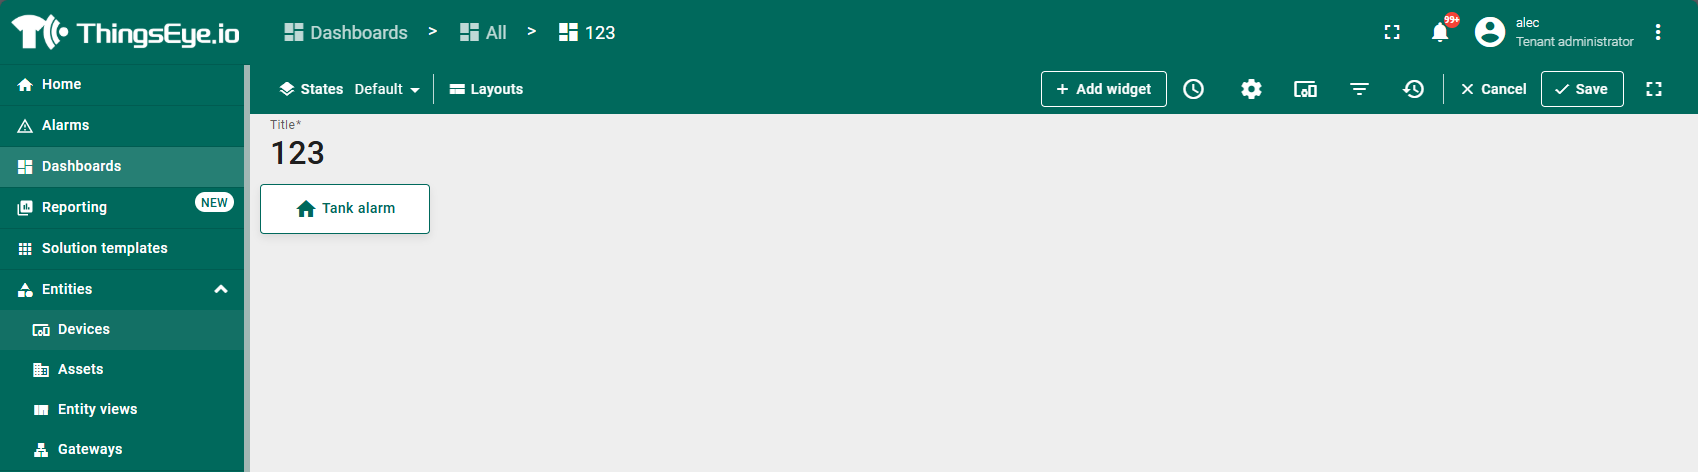
Add a button to the default page to navigate to different Stata instances.
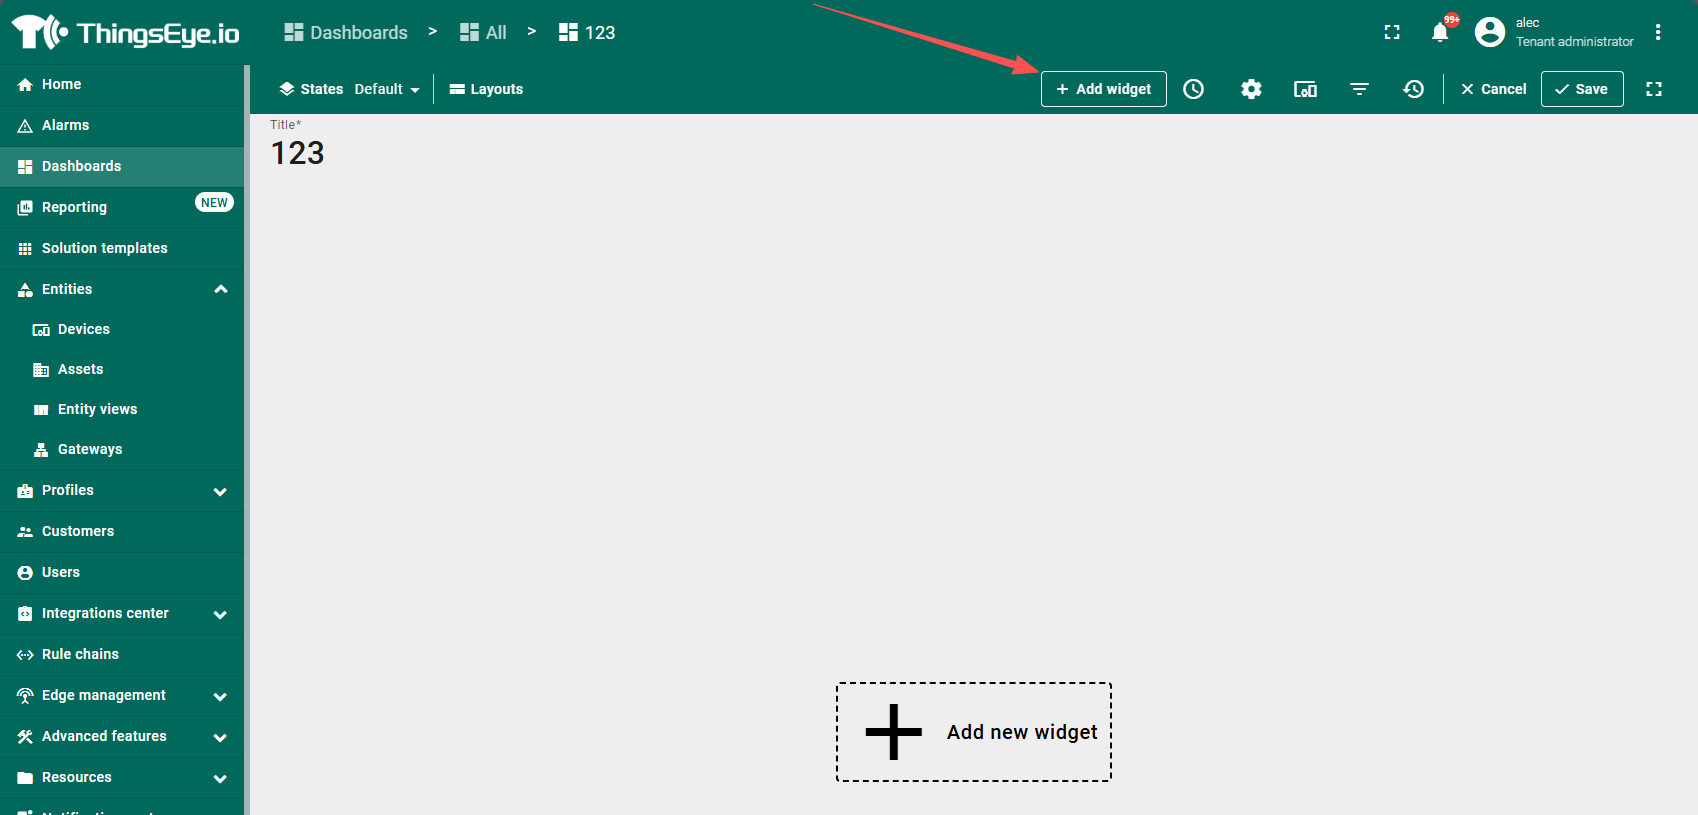
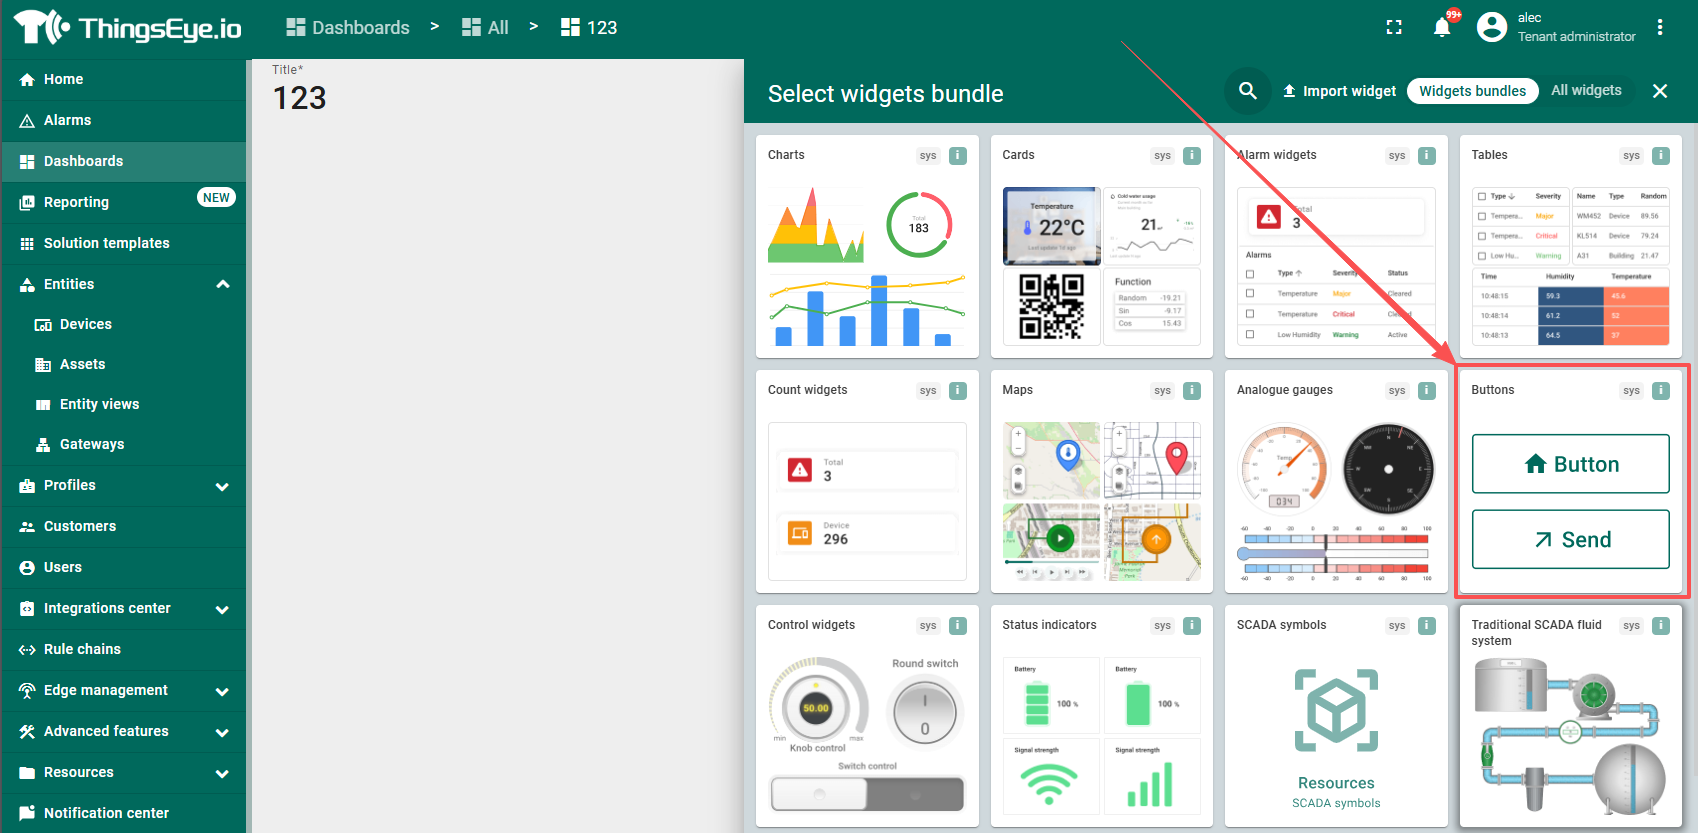
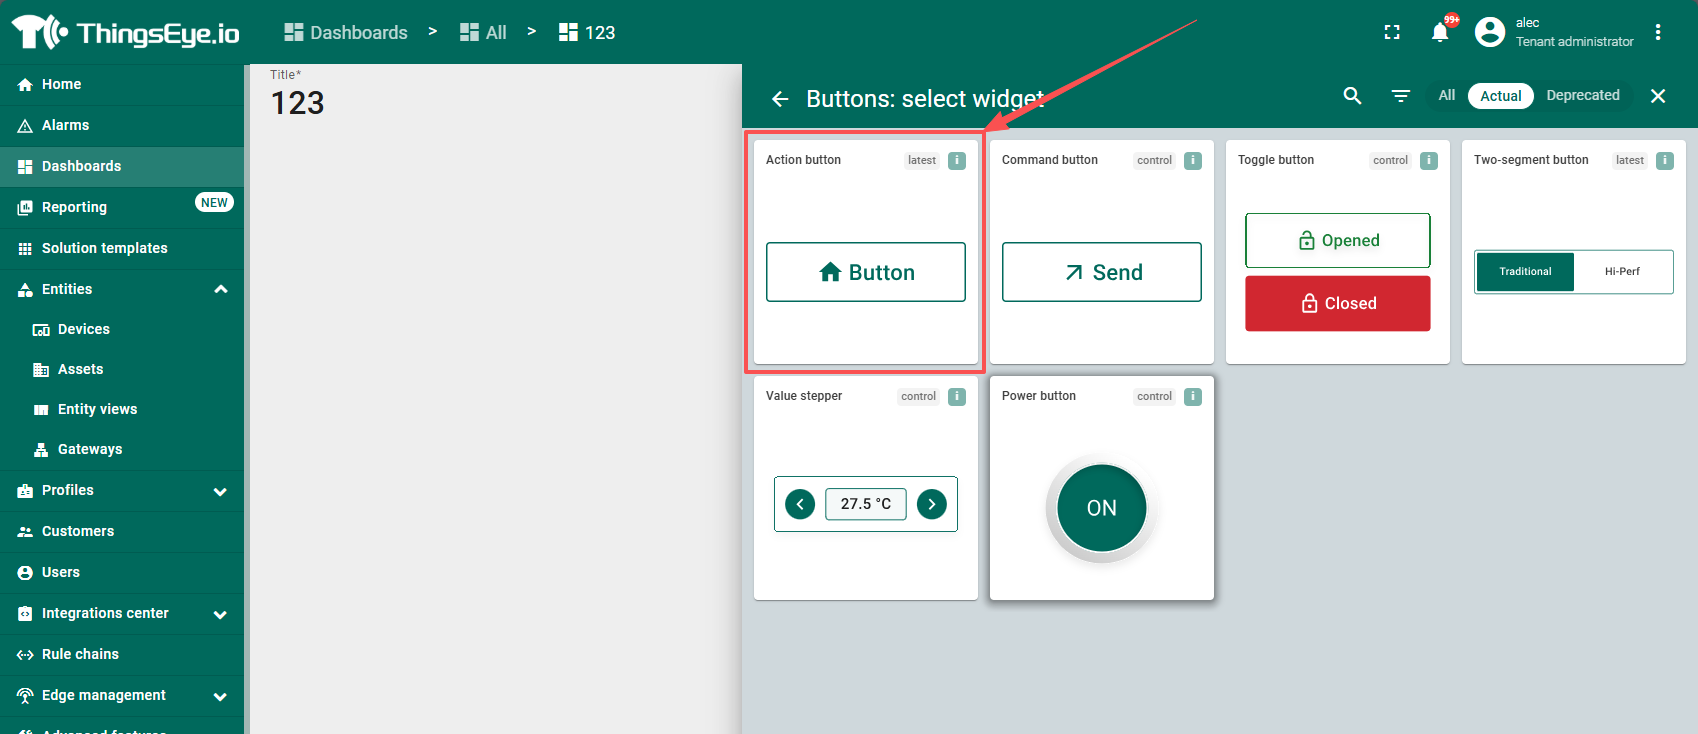
Similarly, create an AQI alarm button.
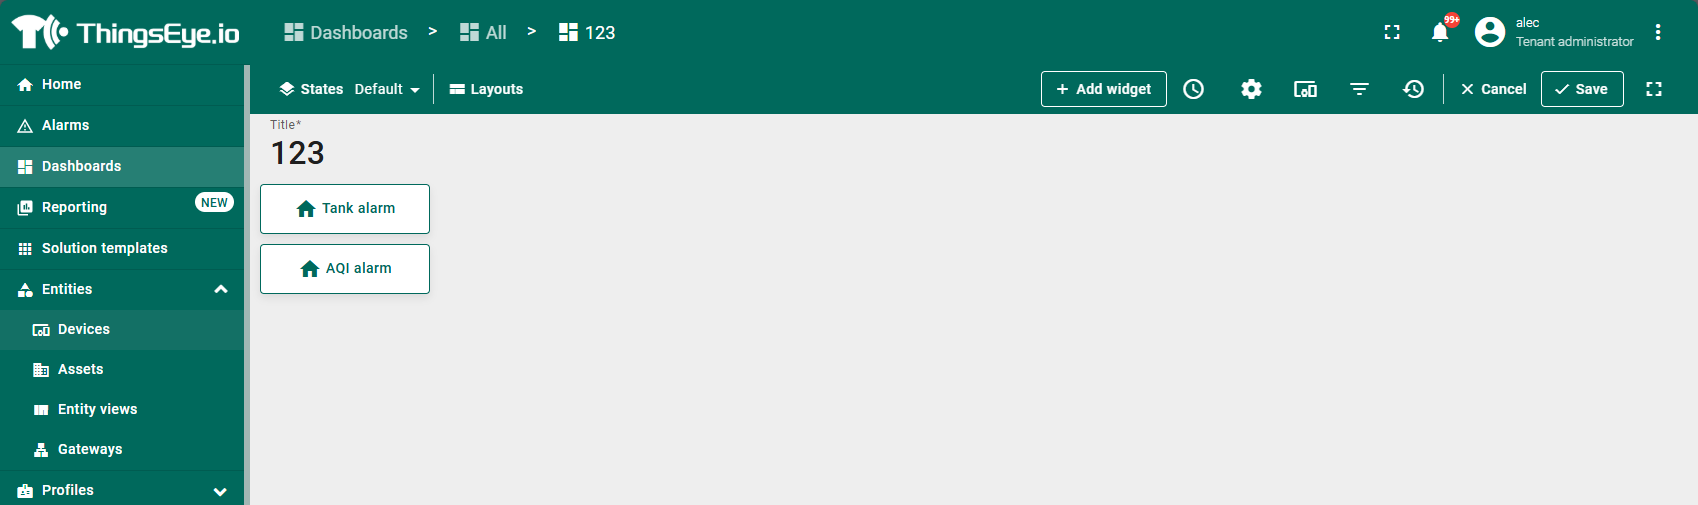
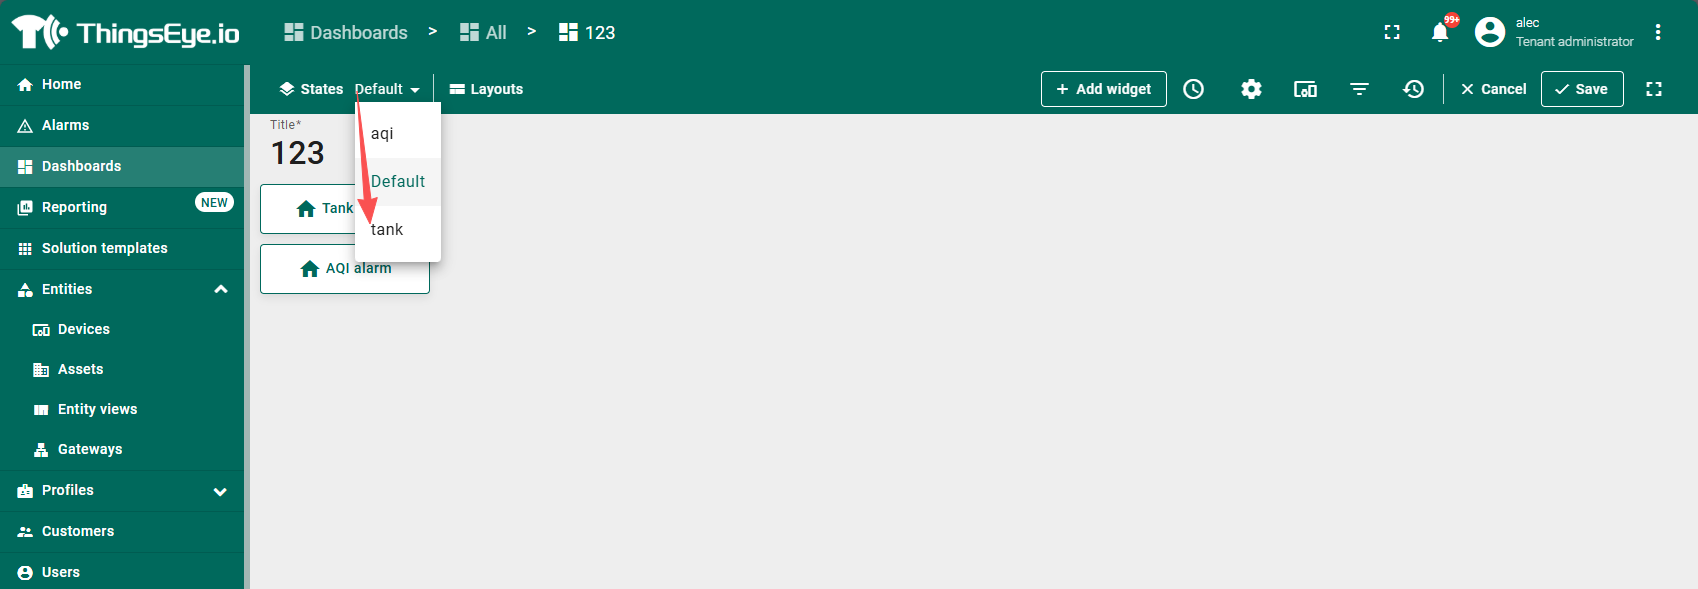
Switch to Tank state
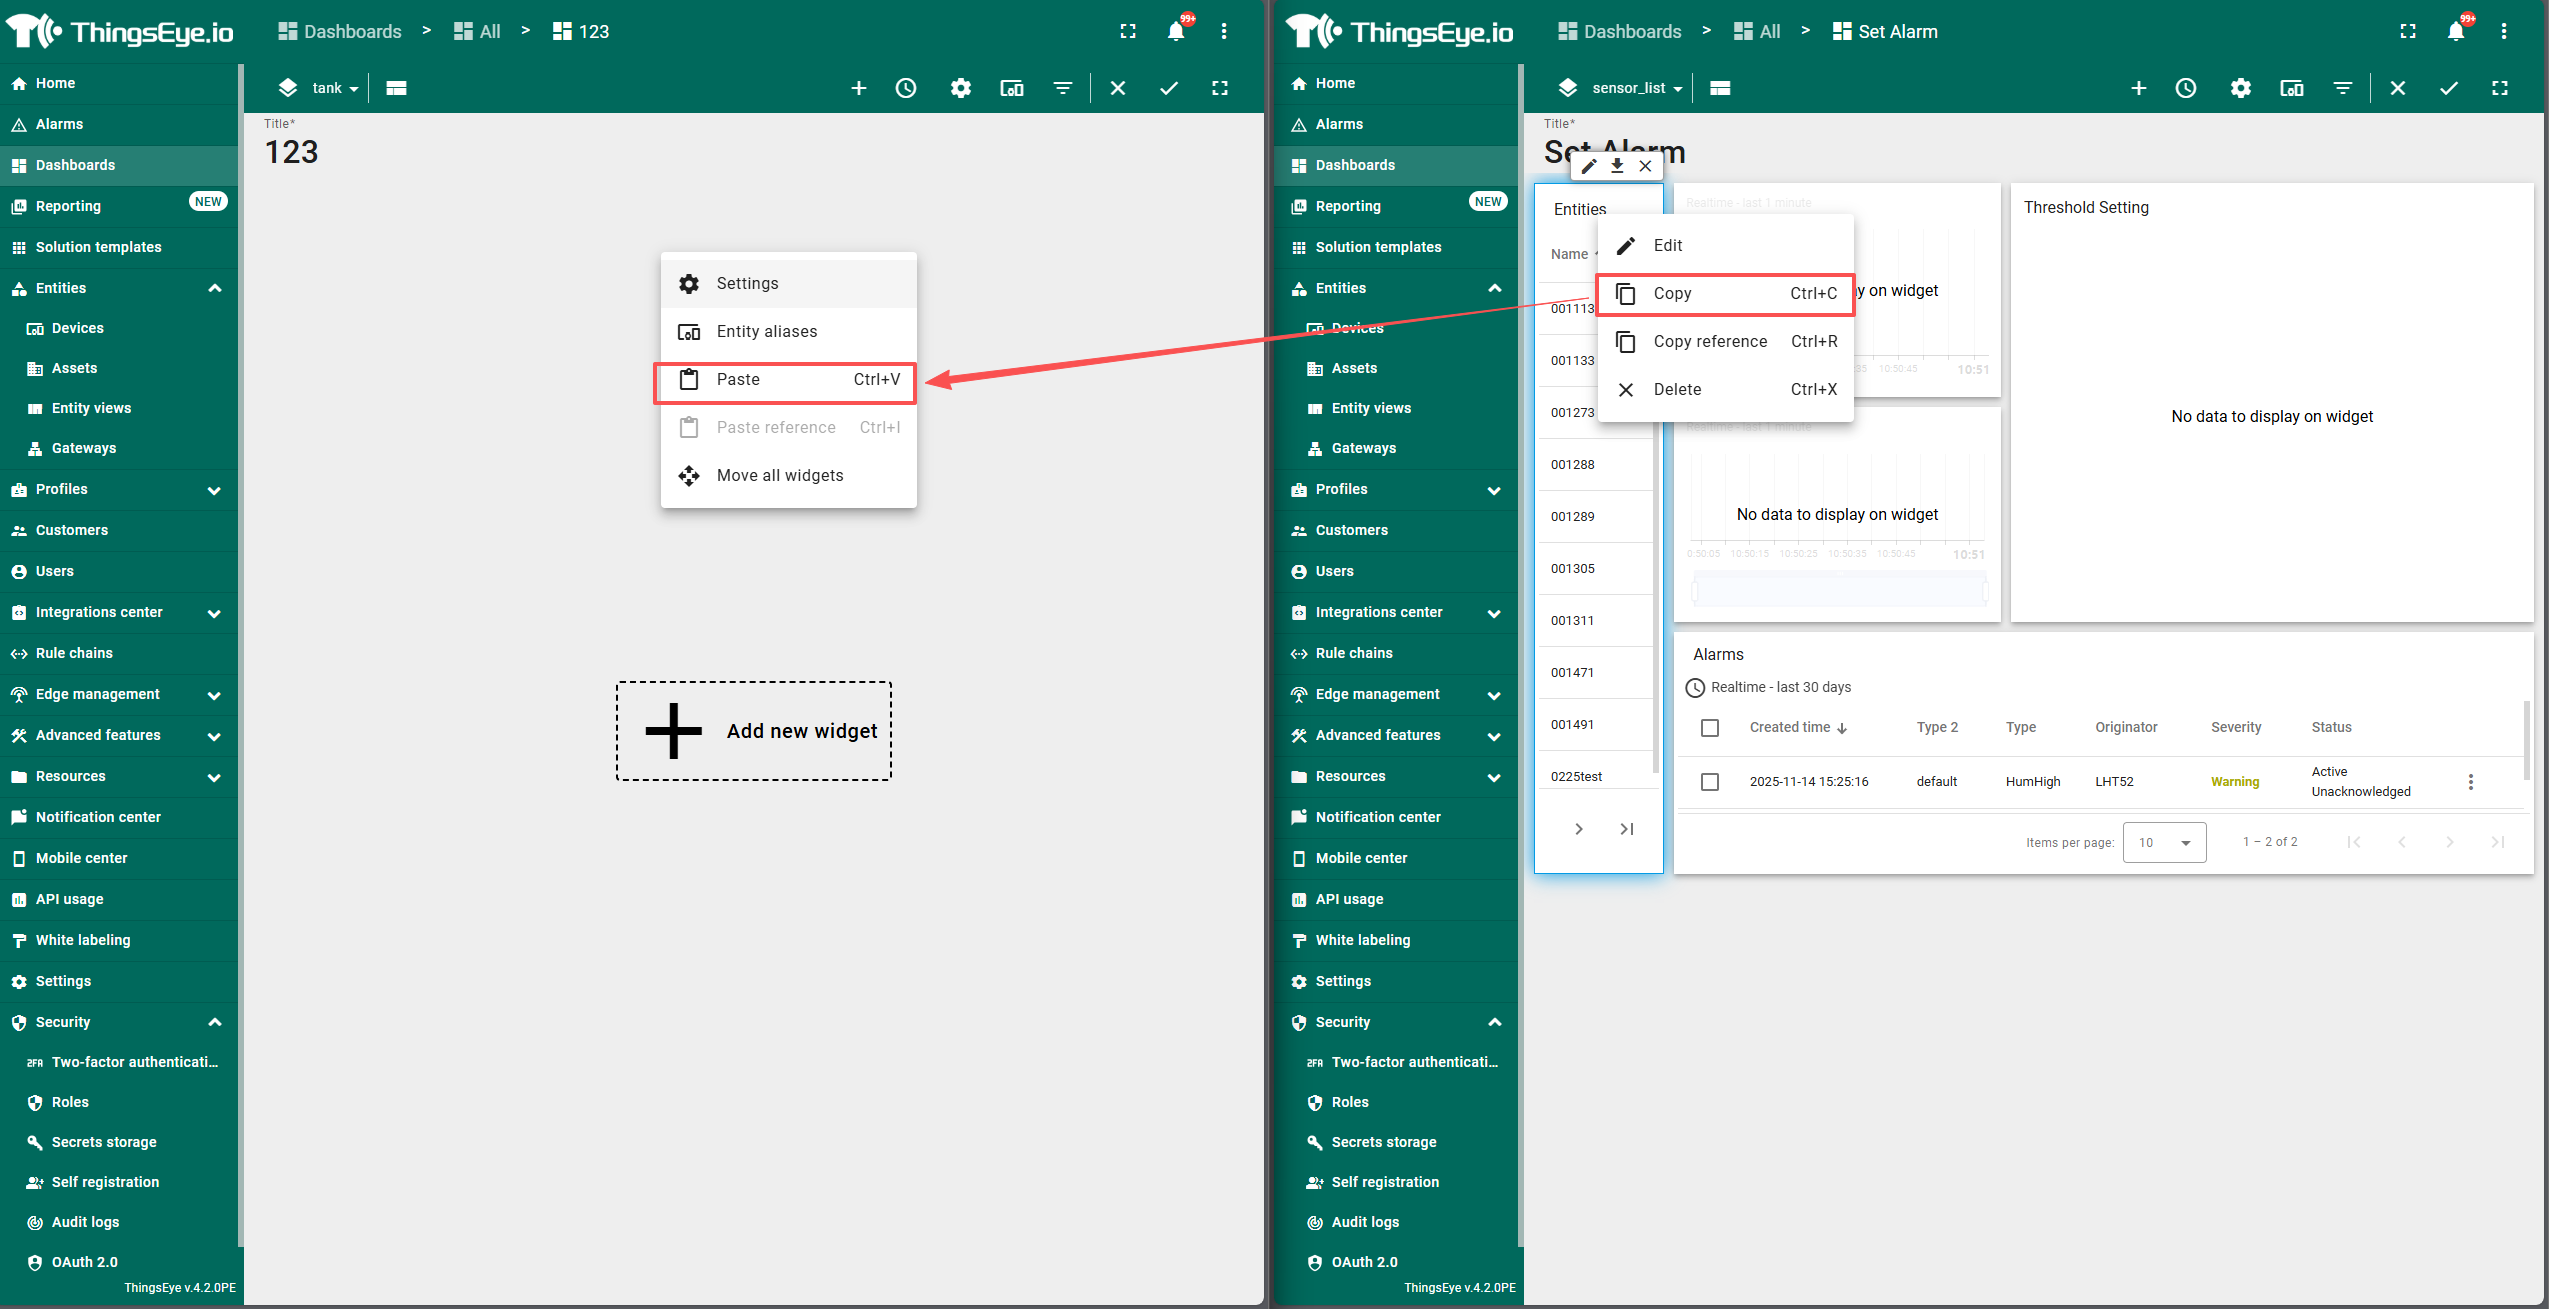
Open the Set Alarm dashboard in the new page and copy all the components there.
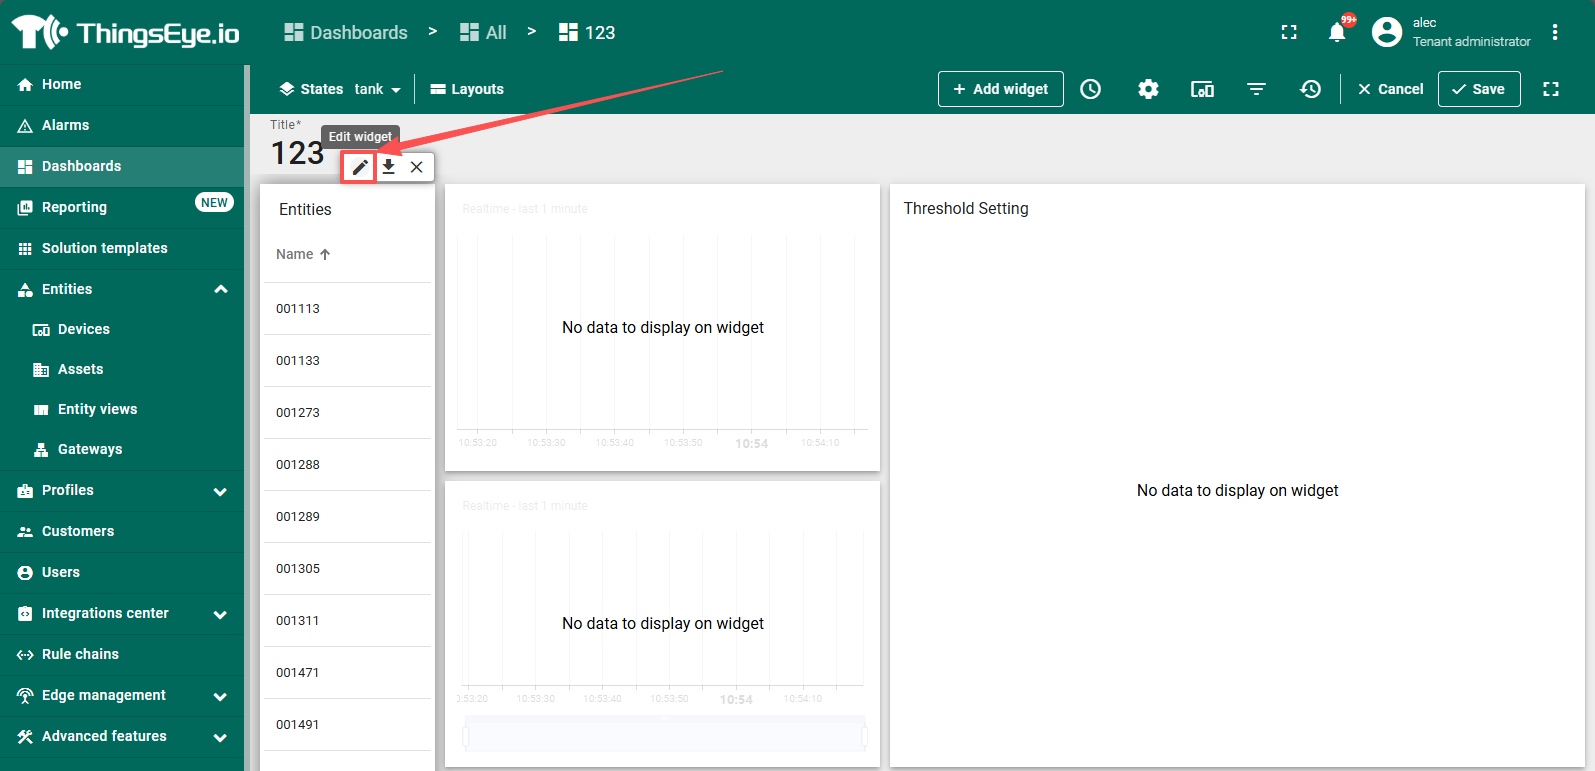
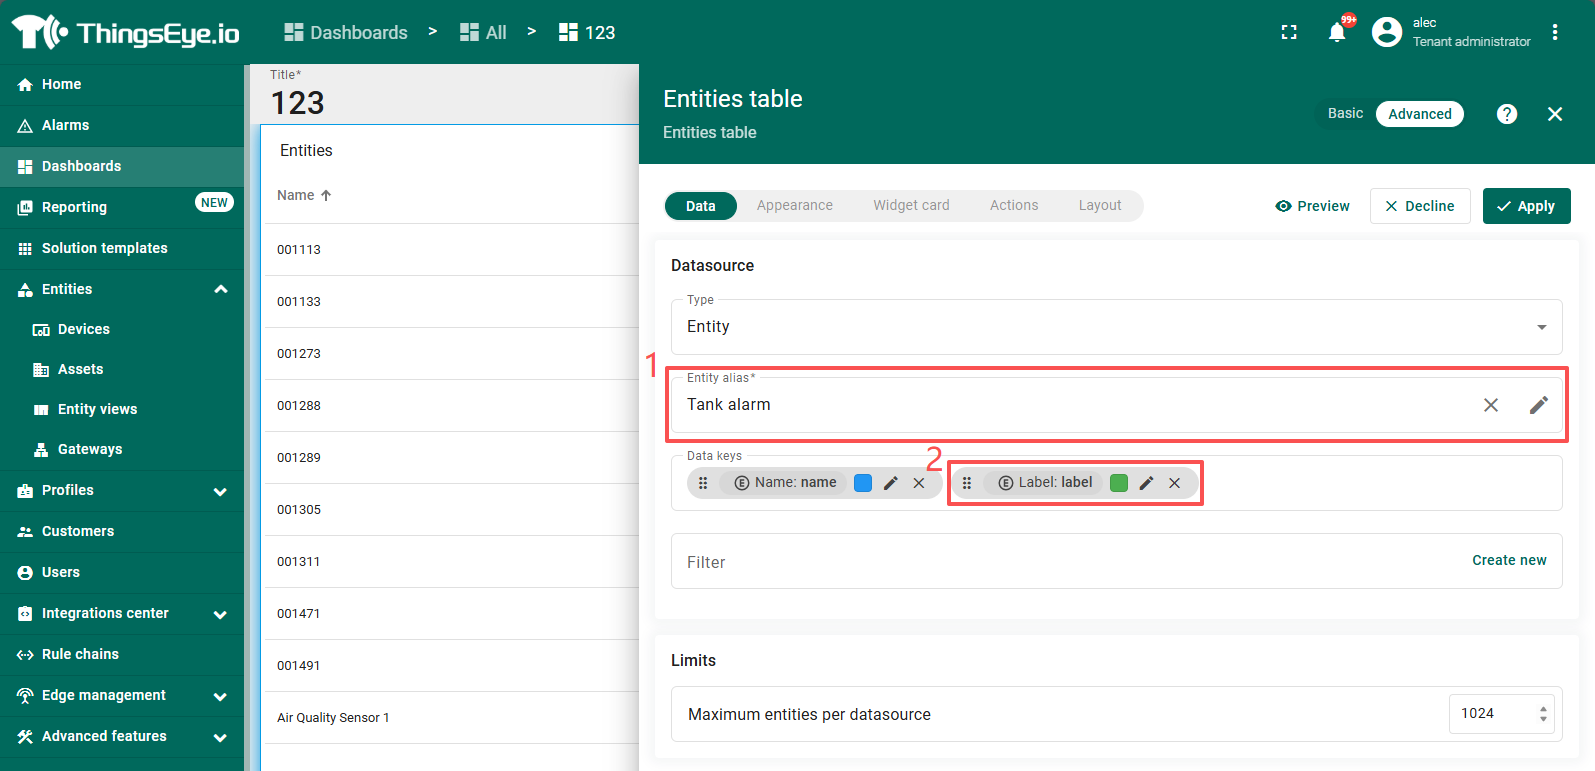
Enter the component editing page and switch the device group to be displayed.
Add a button to return to the initial page.
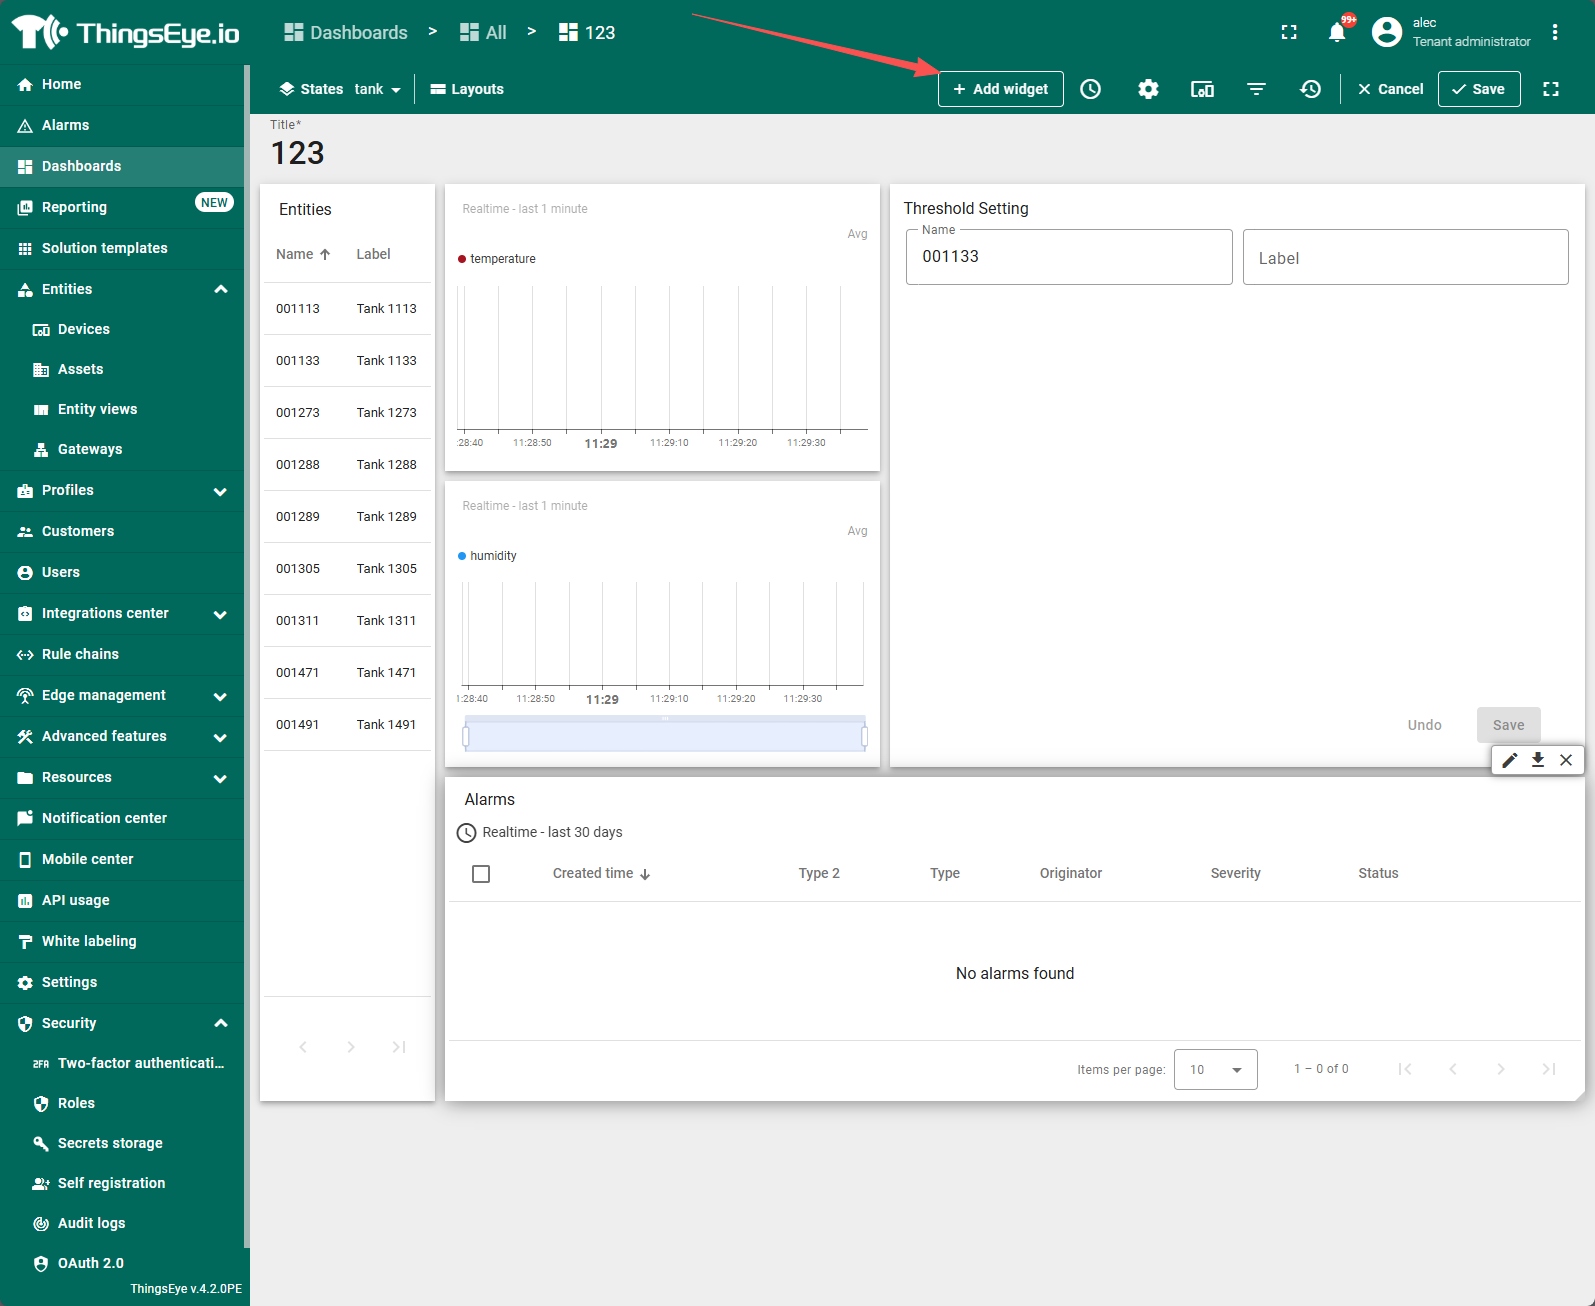
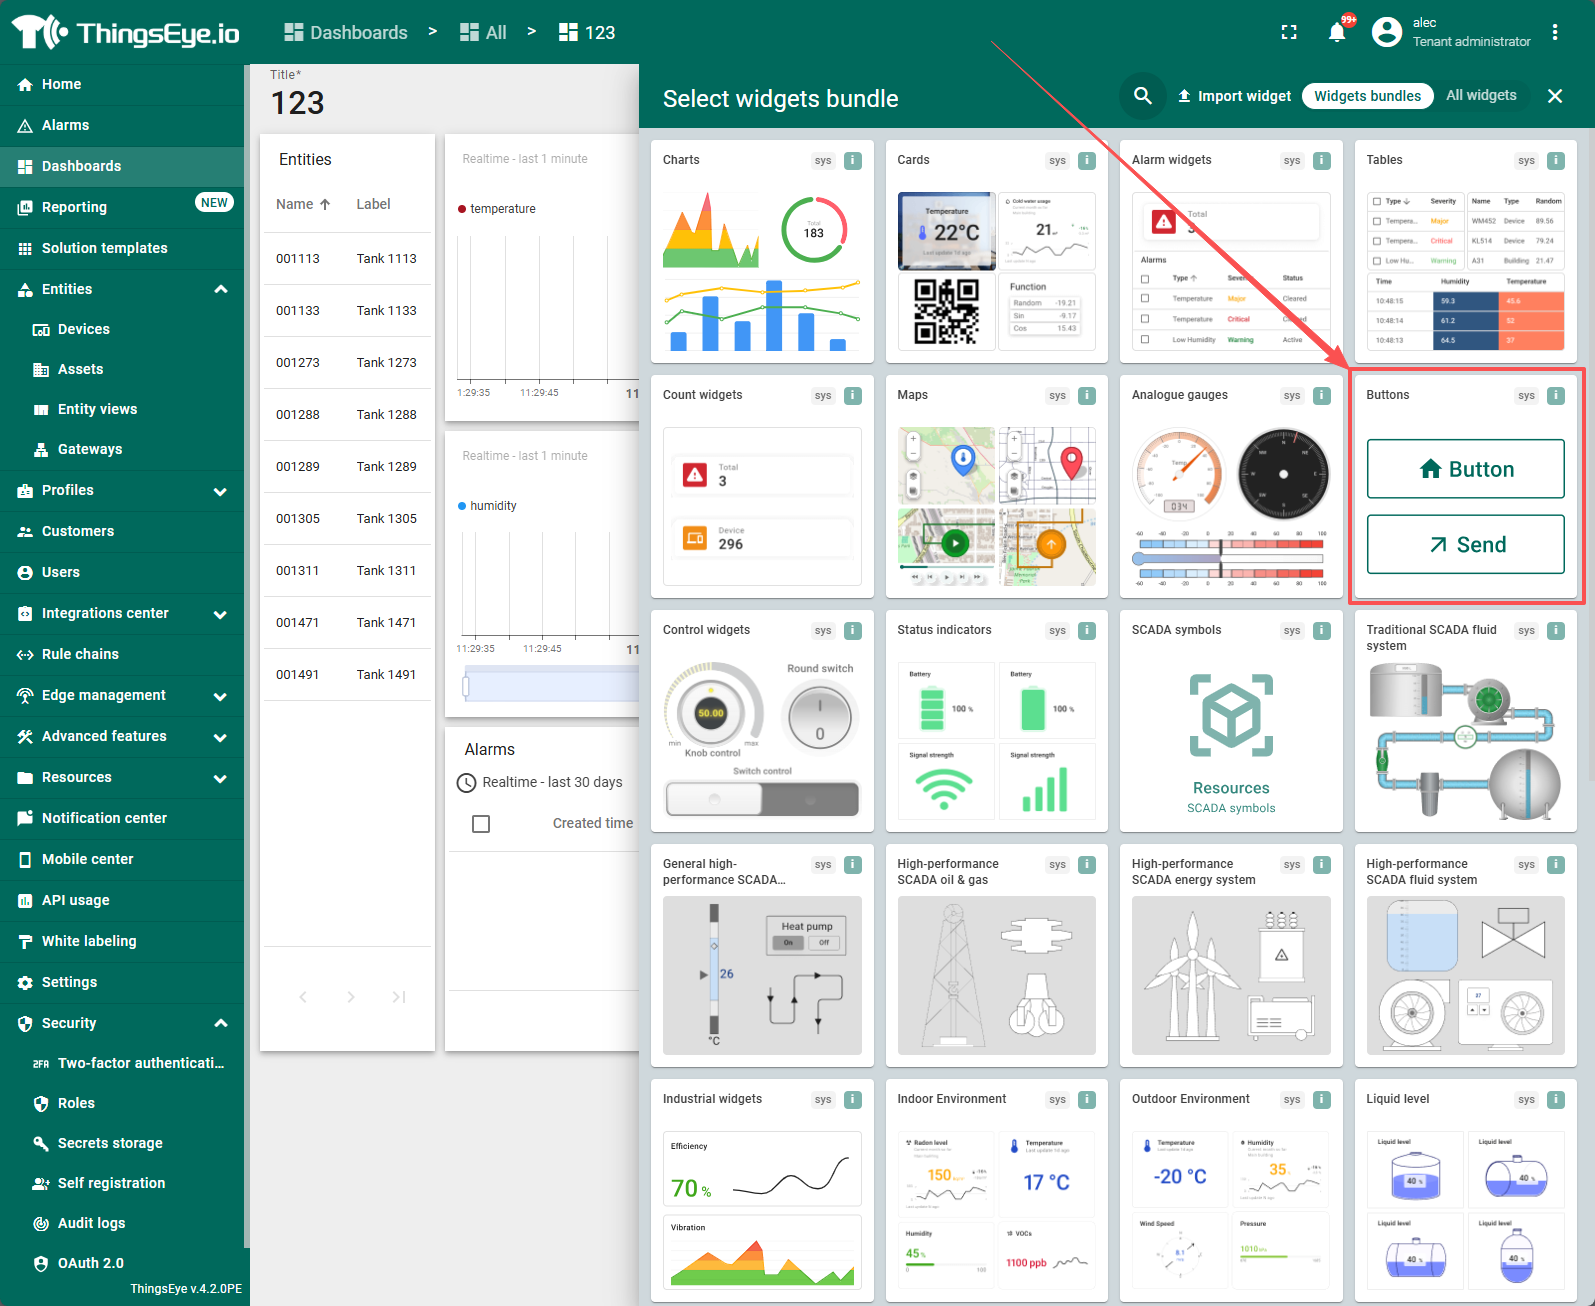
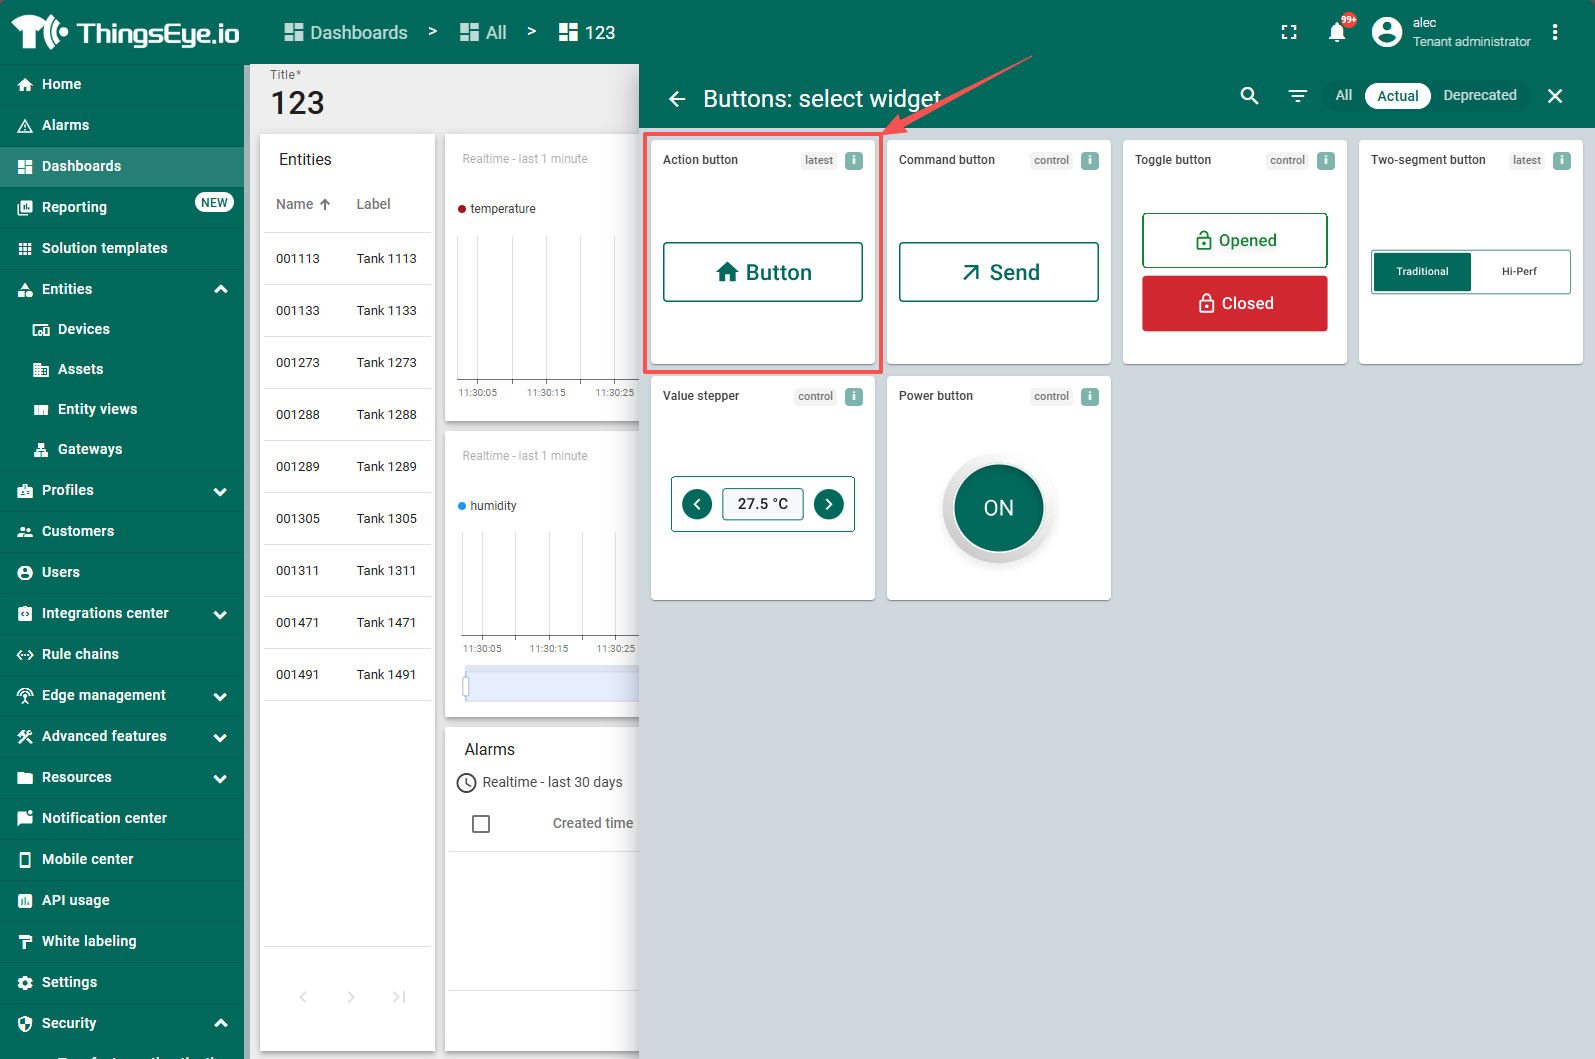
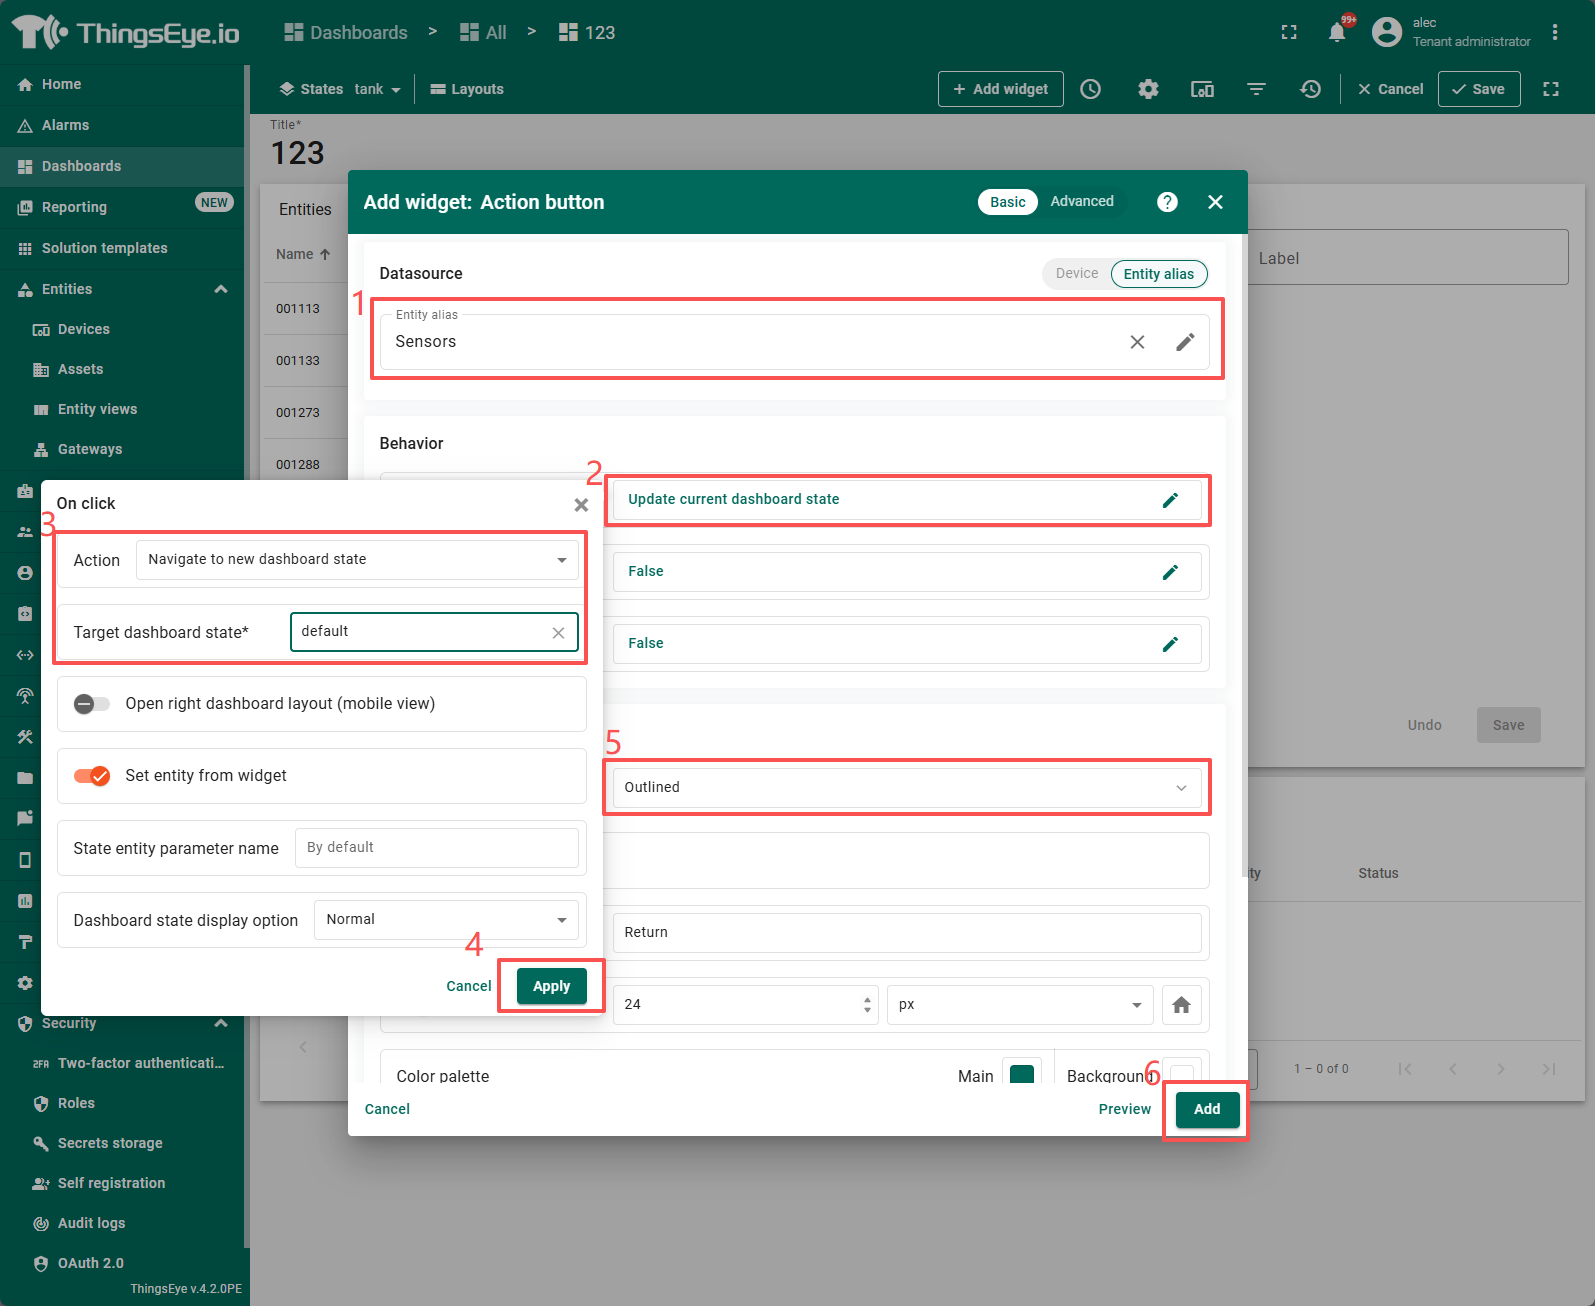
This completes the creation of a State page that only displays Tank-class devices. The AQI State configuration can be referenced from the Tank page.