Tenant Admin Management
Overview
Applicable Role: System Administrator.
The Tenant Admin Management module enables System Administrators to manage administrator accounts under each tenant, including creating, editing, and deleting Tenant Administrators. A Tenant Administrator is the highest‑authority role within a tenant and is responsible for all operations under that tenant, including user management, device management, and asset management. Through this module, System Administrators can manage the full lifecycle of Tenant Administrator accounts.
1. Create a Tenant Administrator
Procedure
Step 1: Go to the tenant management page
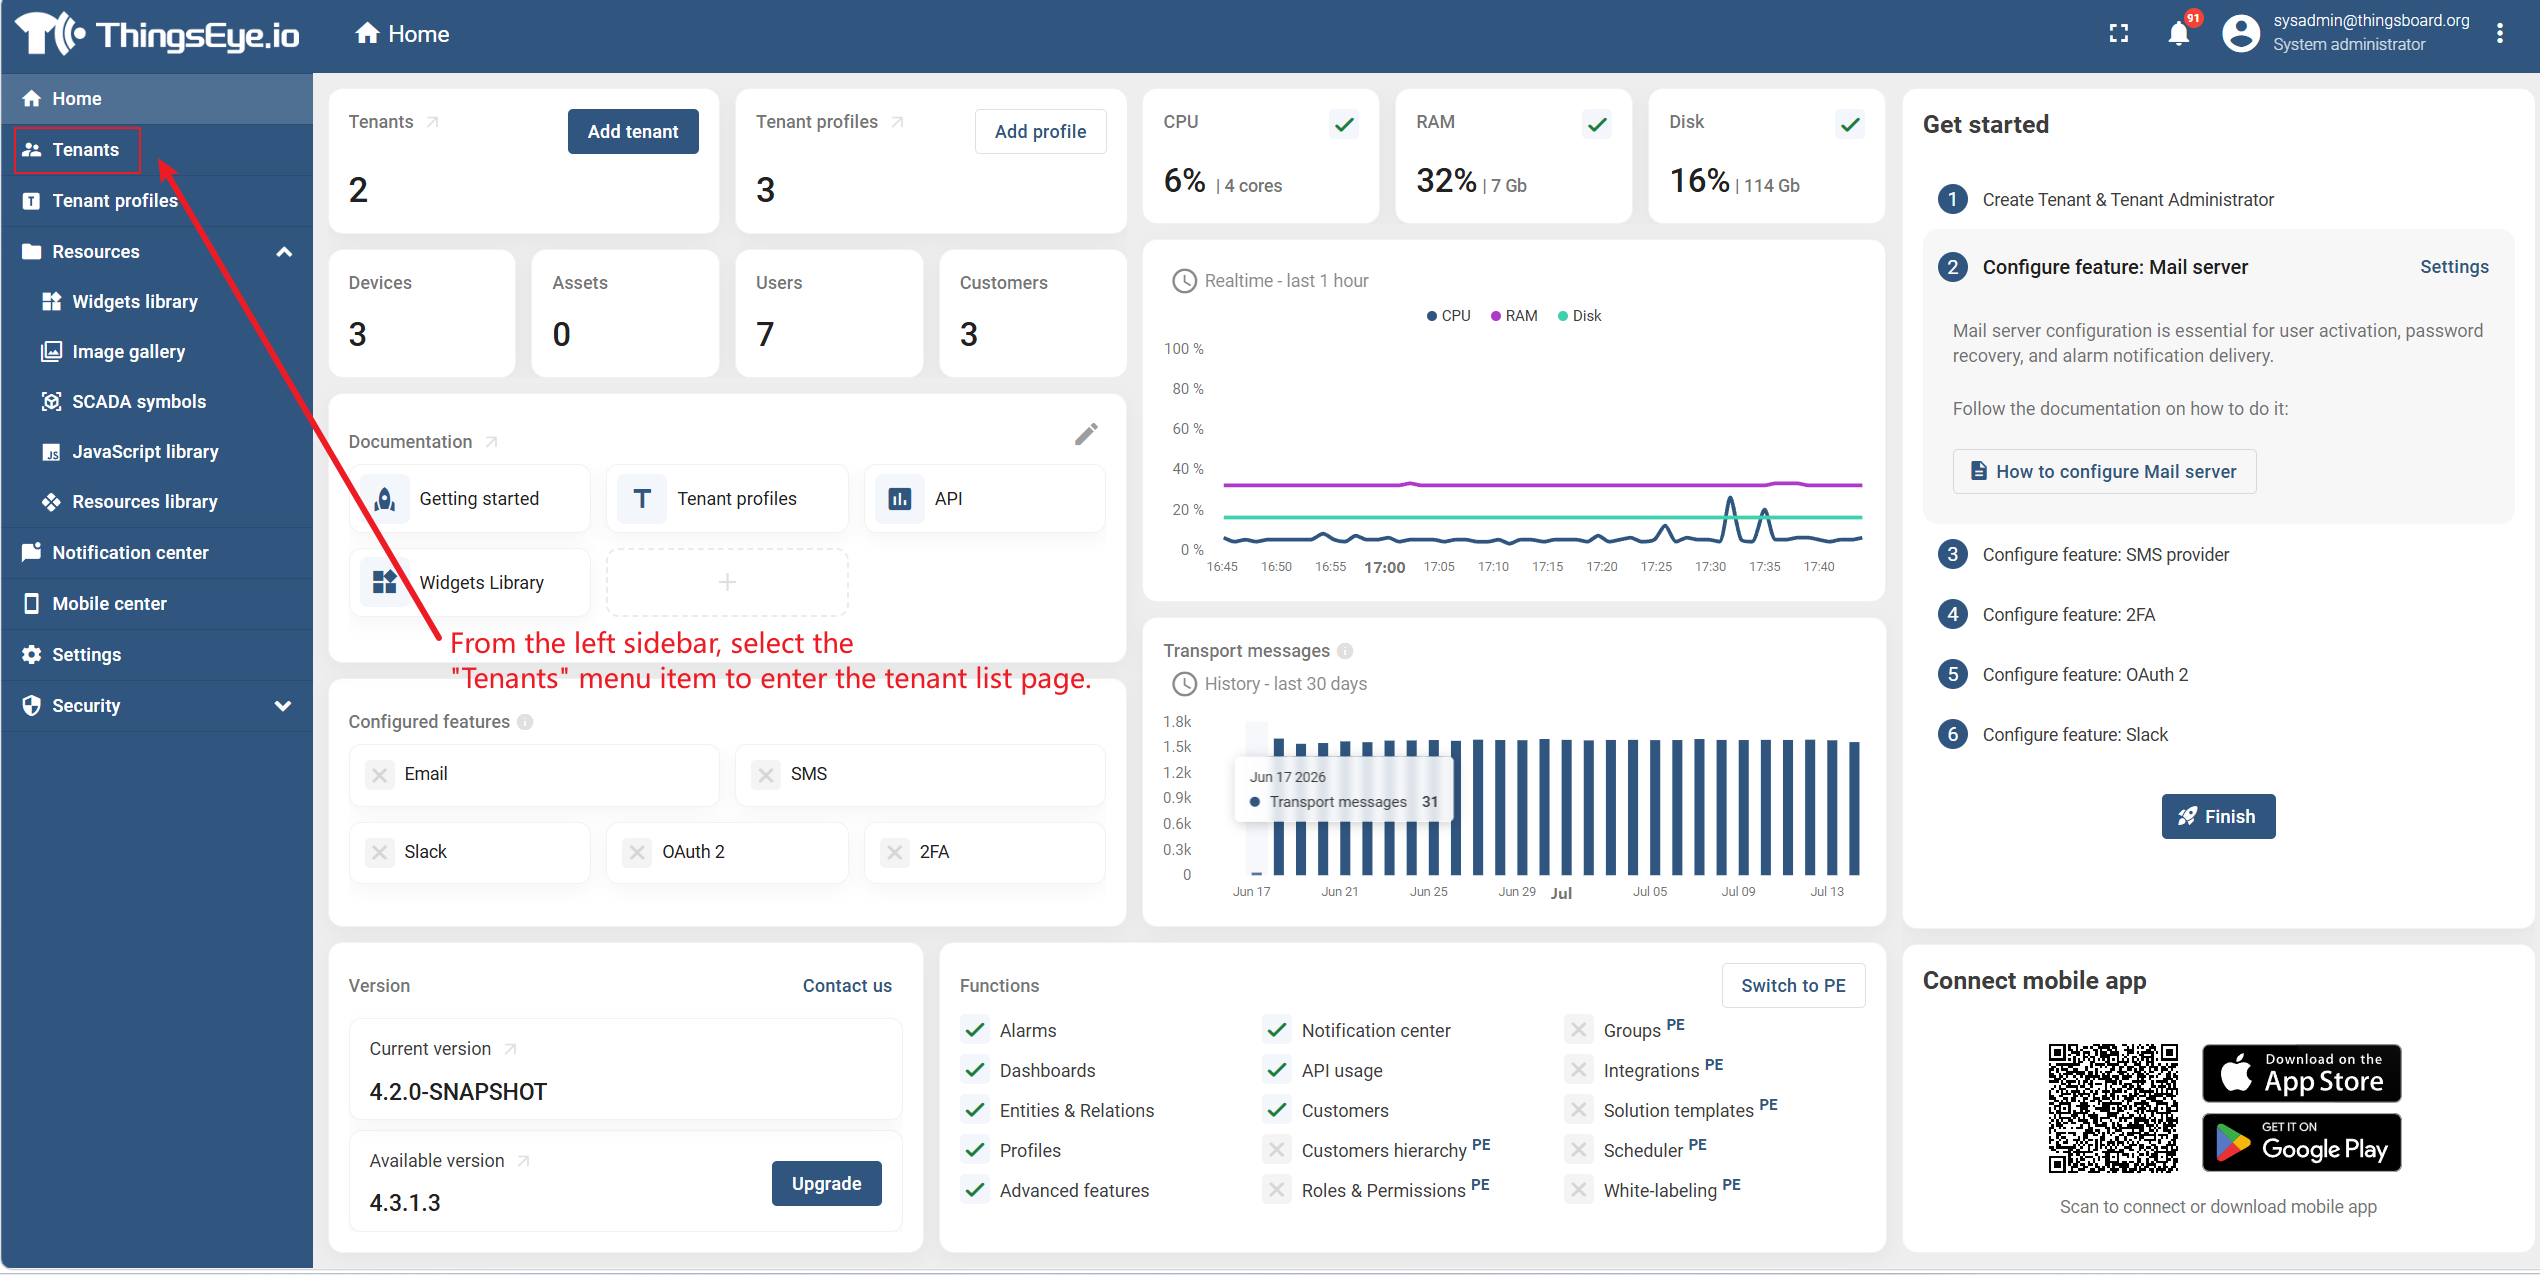
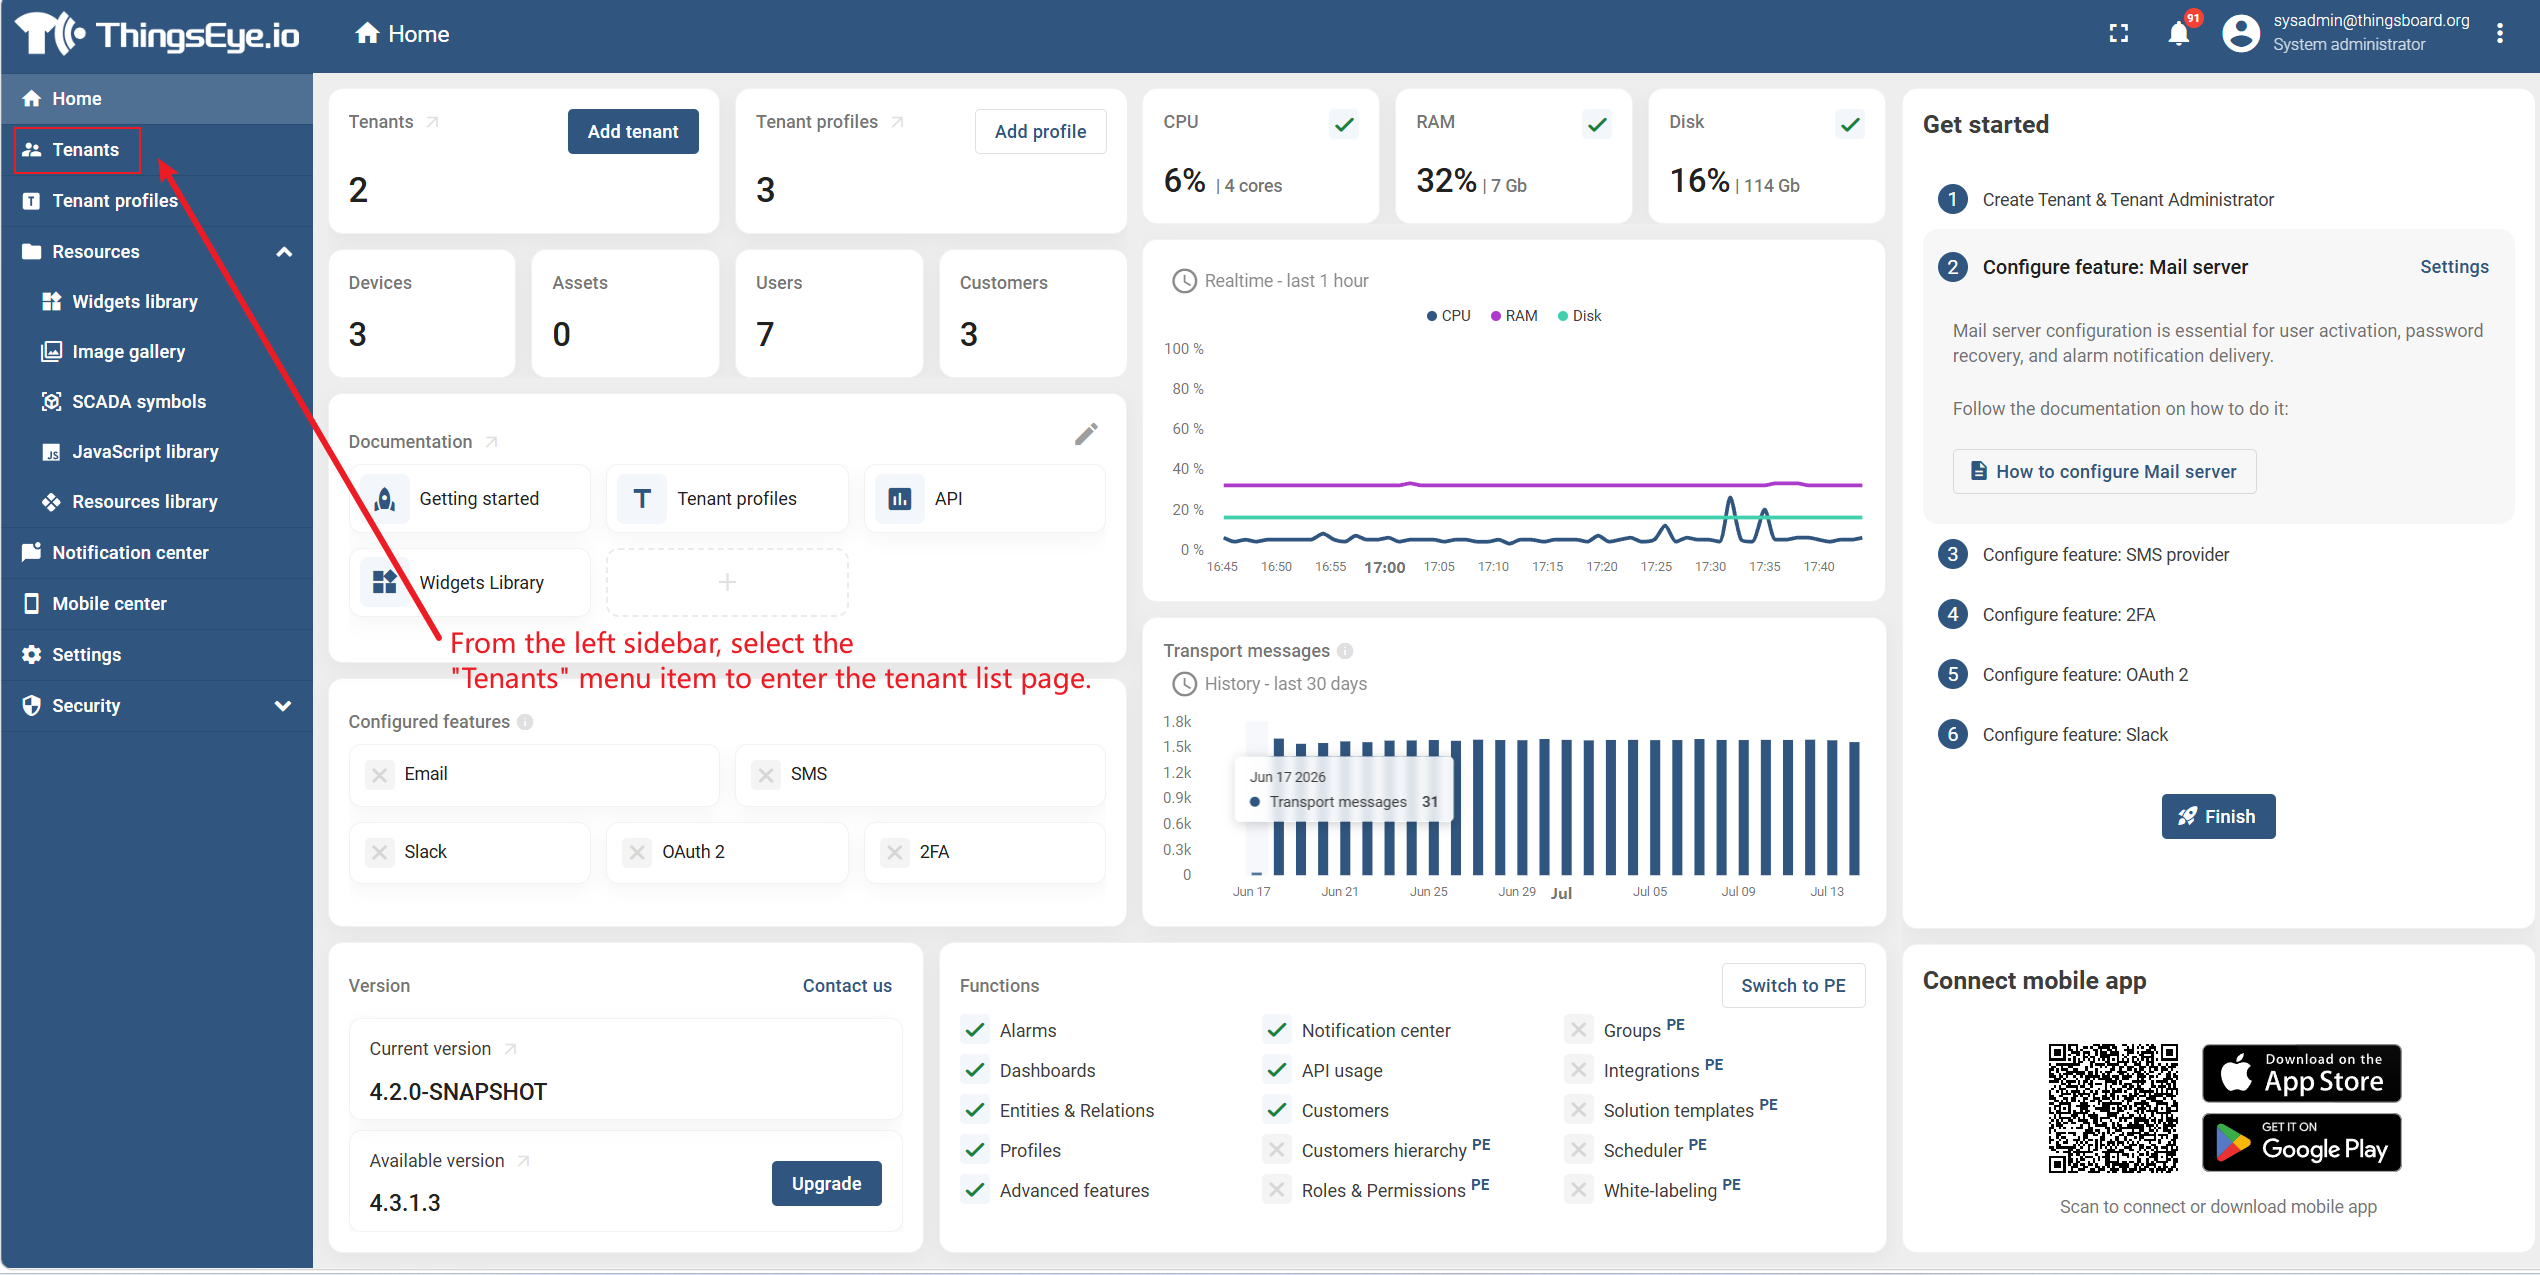
Select the “Tenants” menu from the left sidebar to go to the tenant list page.
Step 2: Select the target tenant
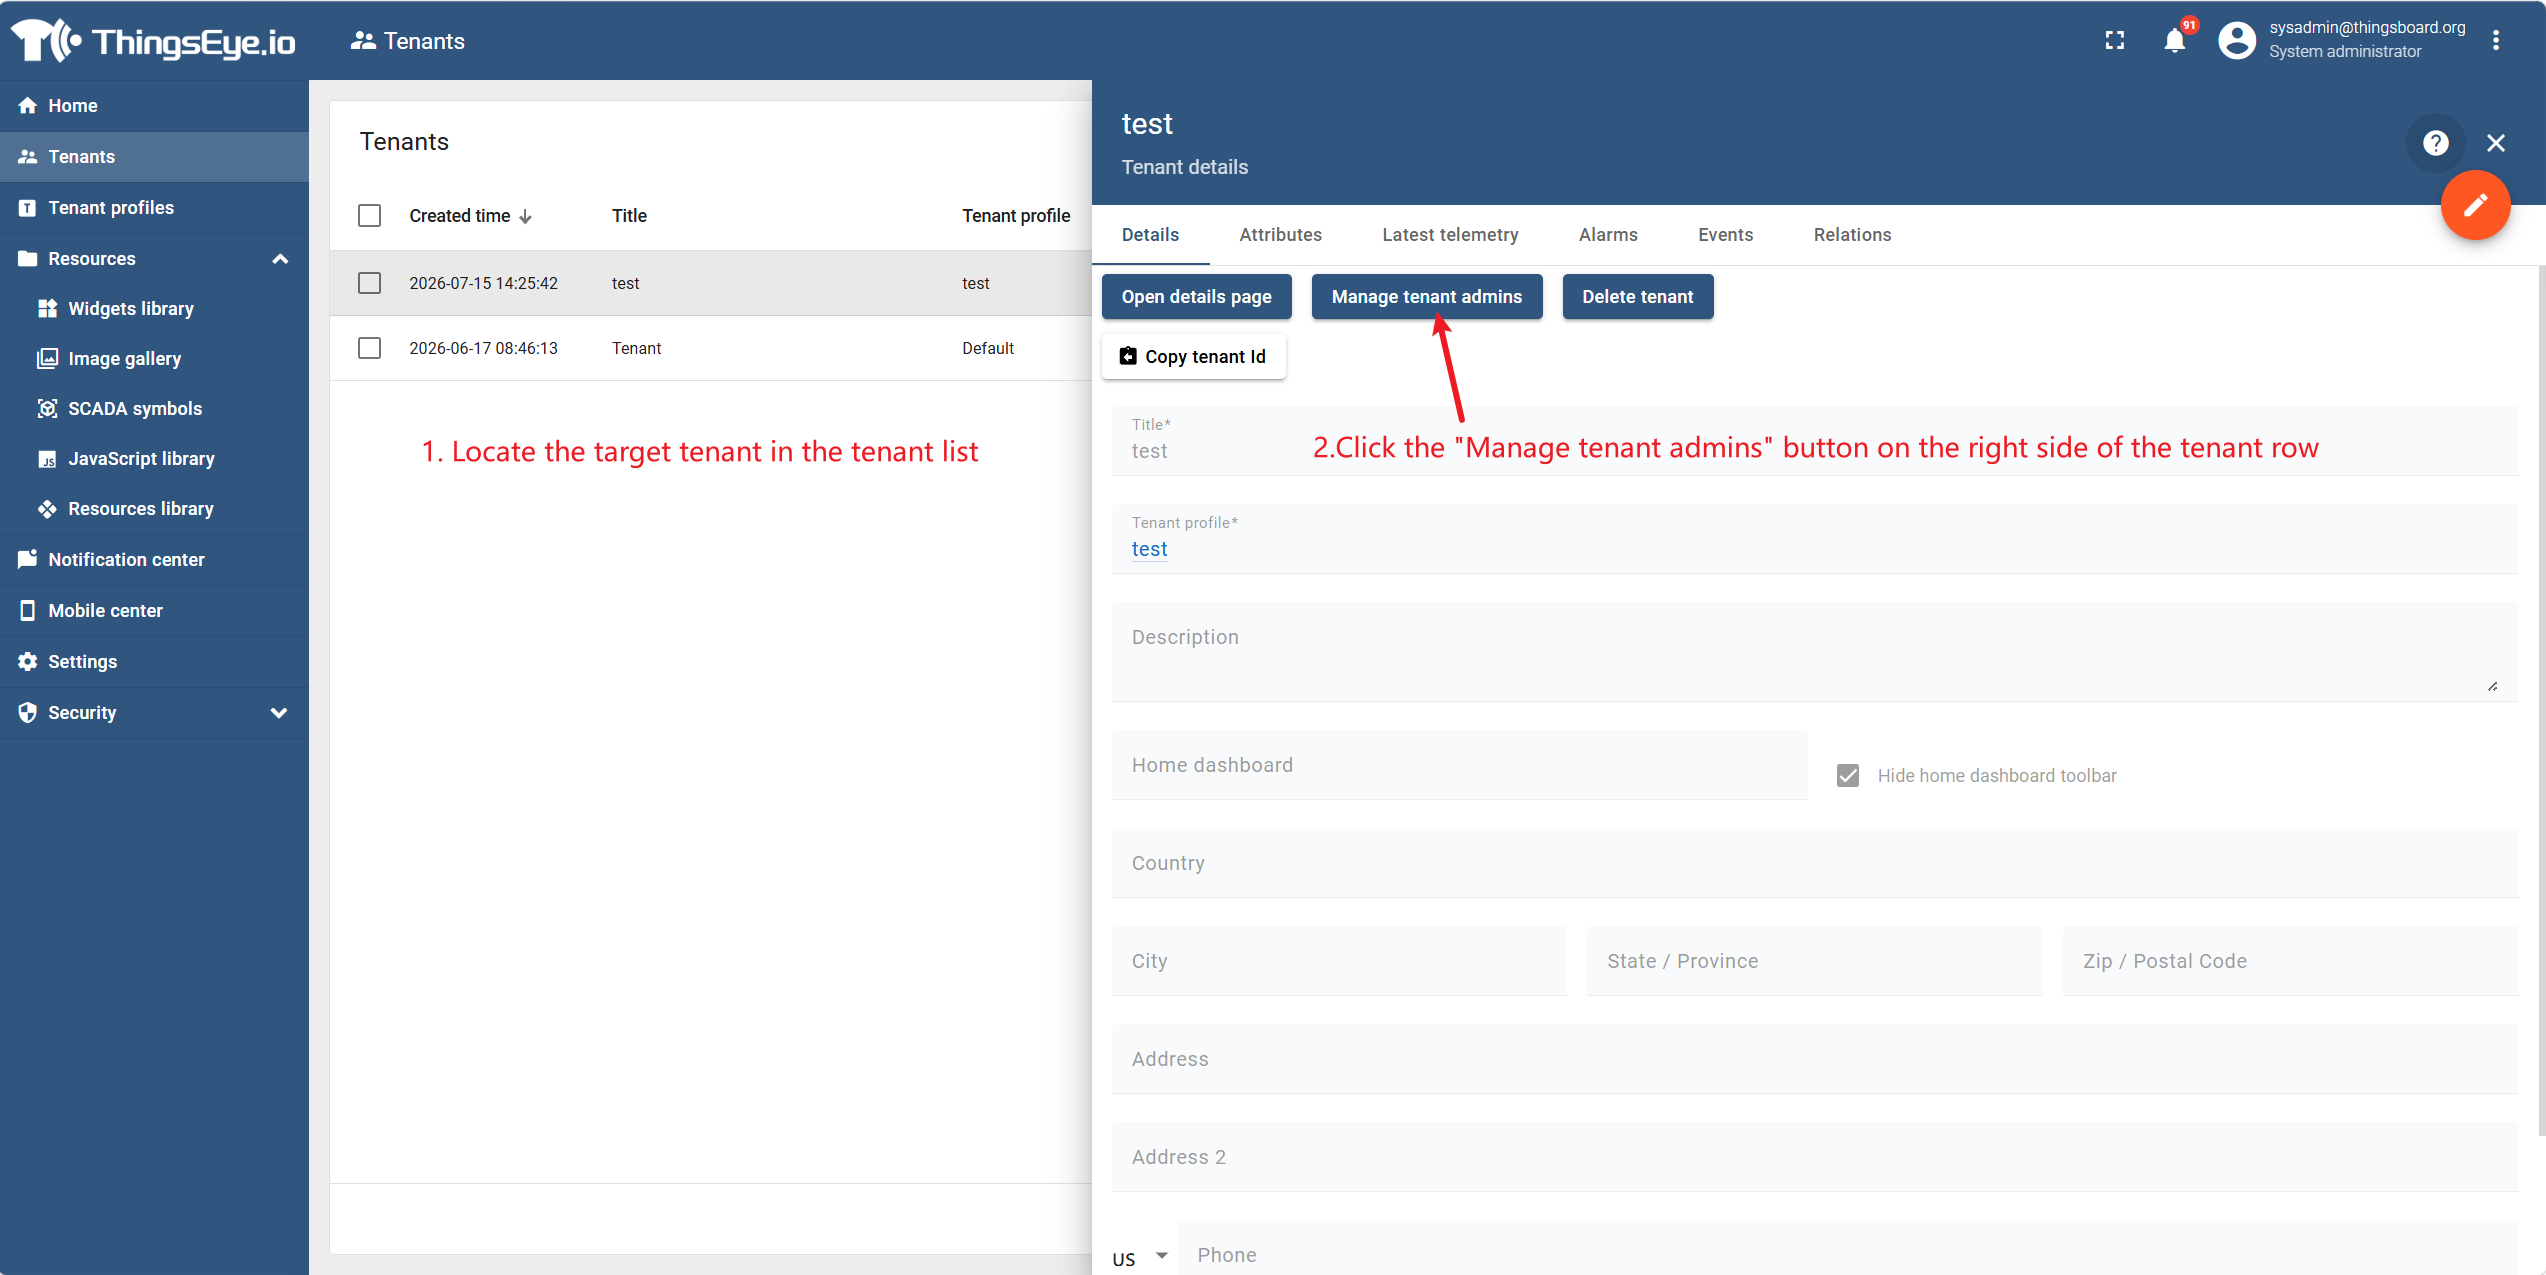
Locate the target tenant in the tenant list and click the “Manage Tenant Admins” button on the right side of the tenant row.
Step 3: Go to the creation page
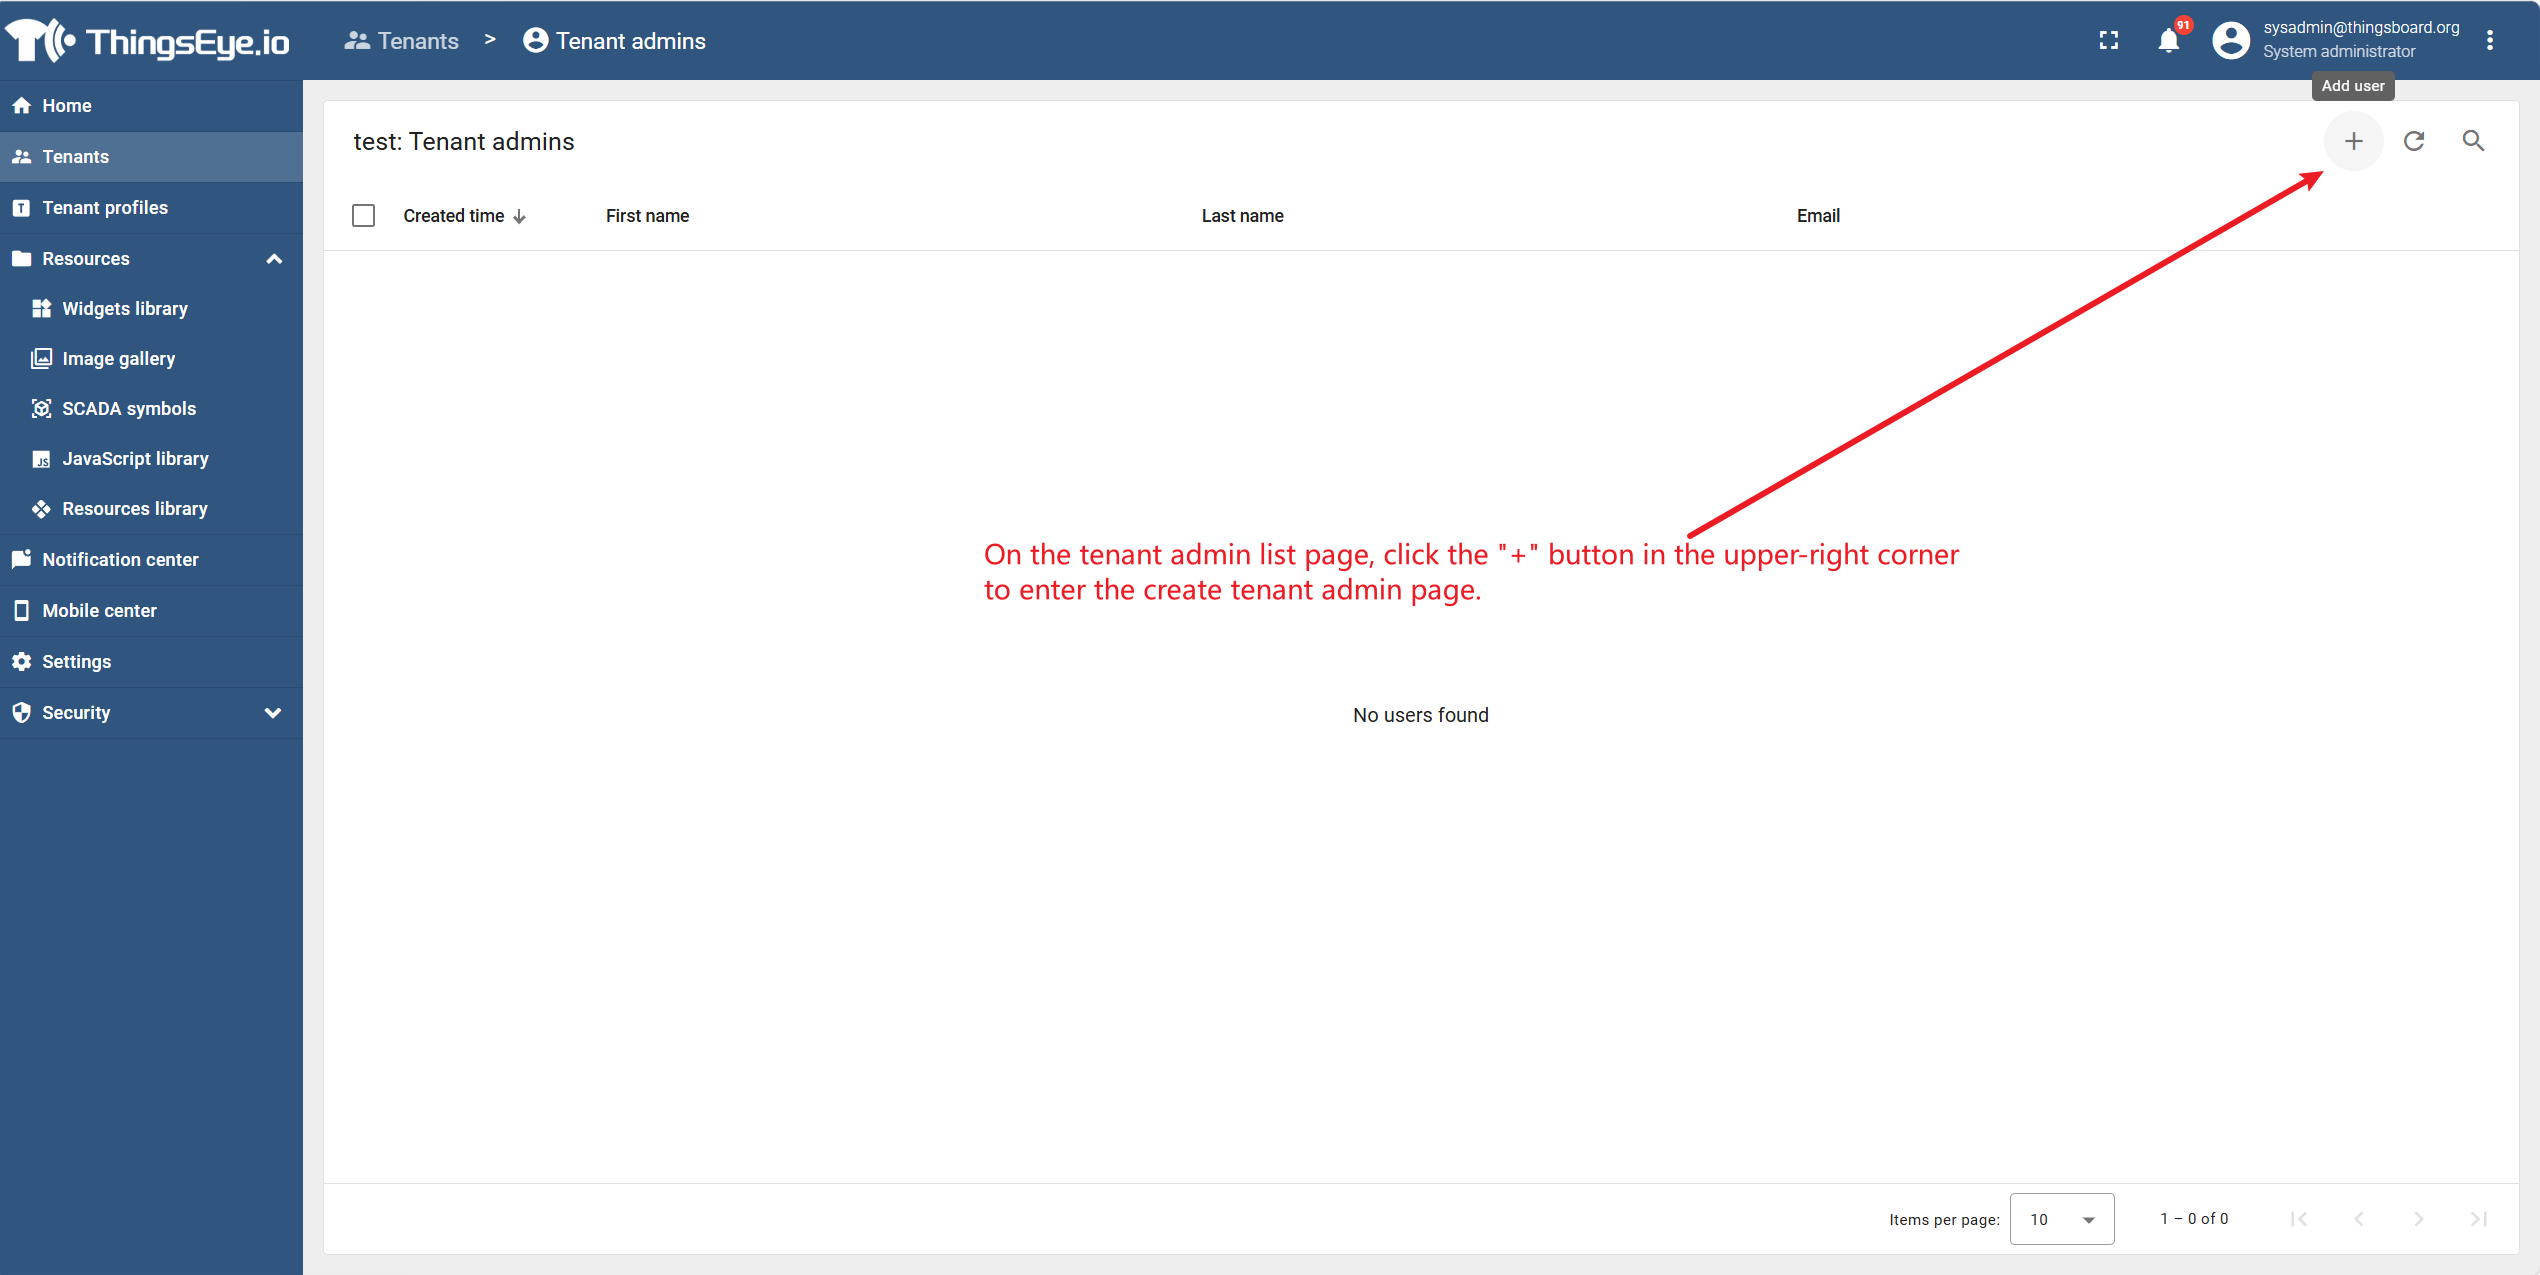
On the Tenant Administrator list page, click the “+” button in the upper‑right corner to go to the Create Tenant Administrator page.
Step 4: Fill in administrator information
Fill in the required fields as needed:
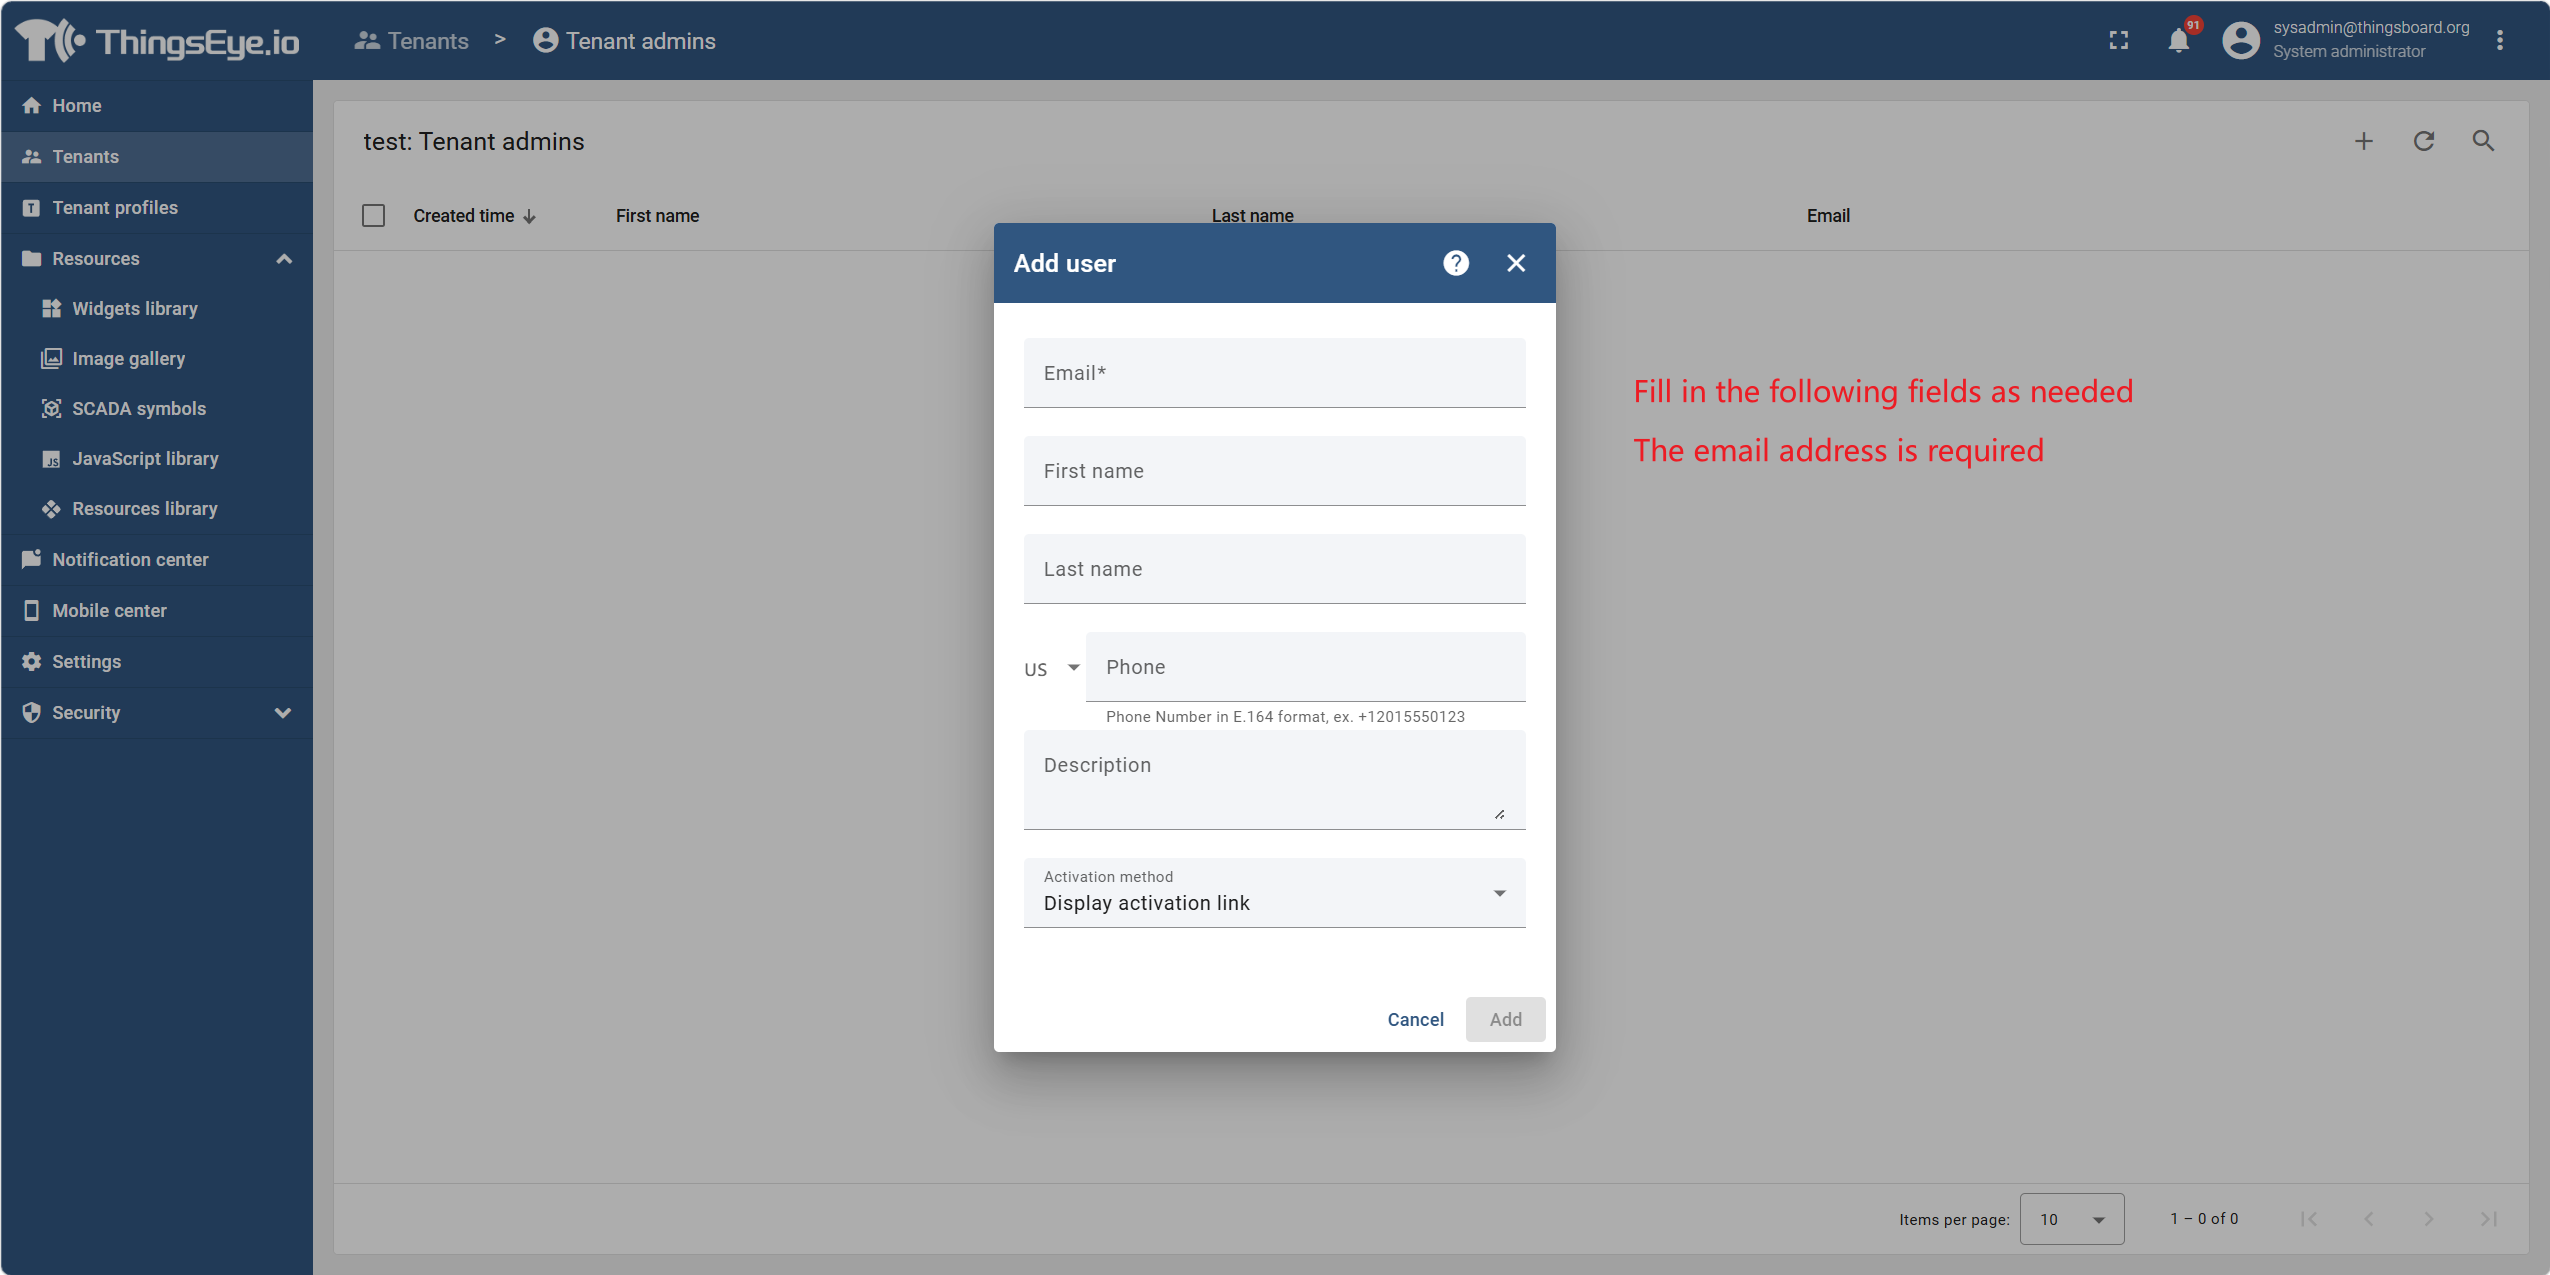
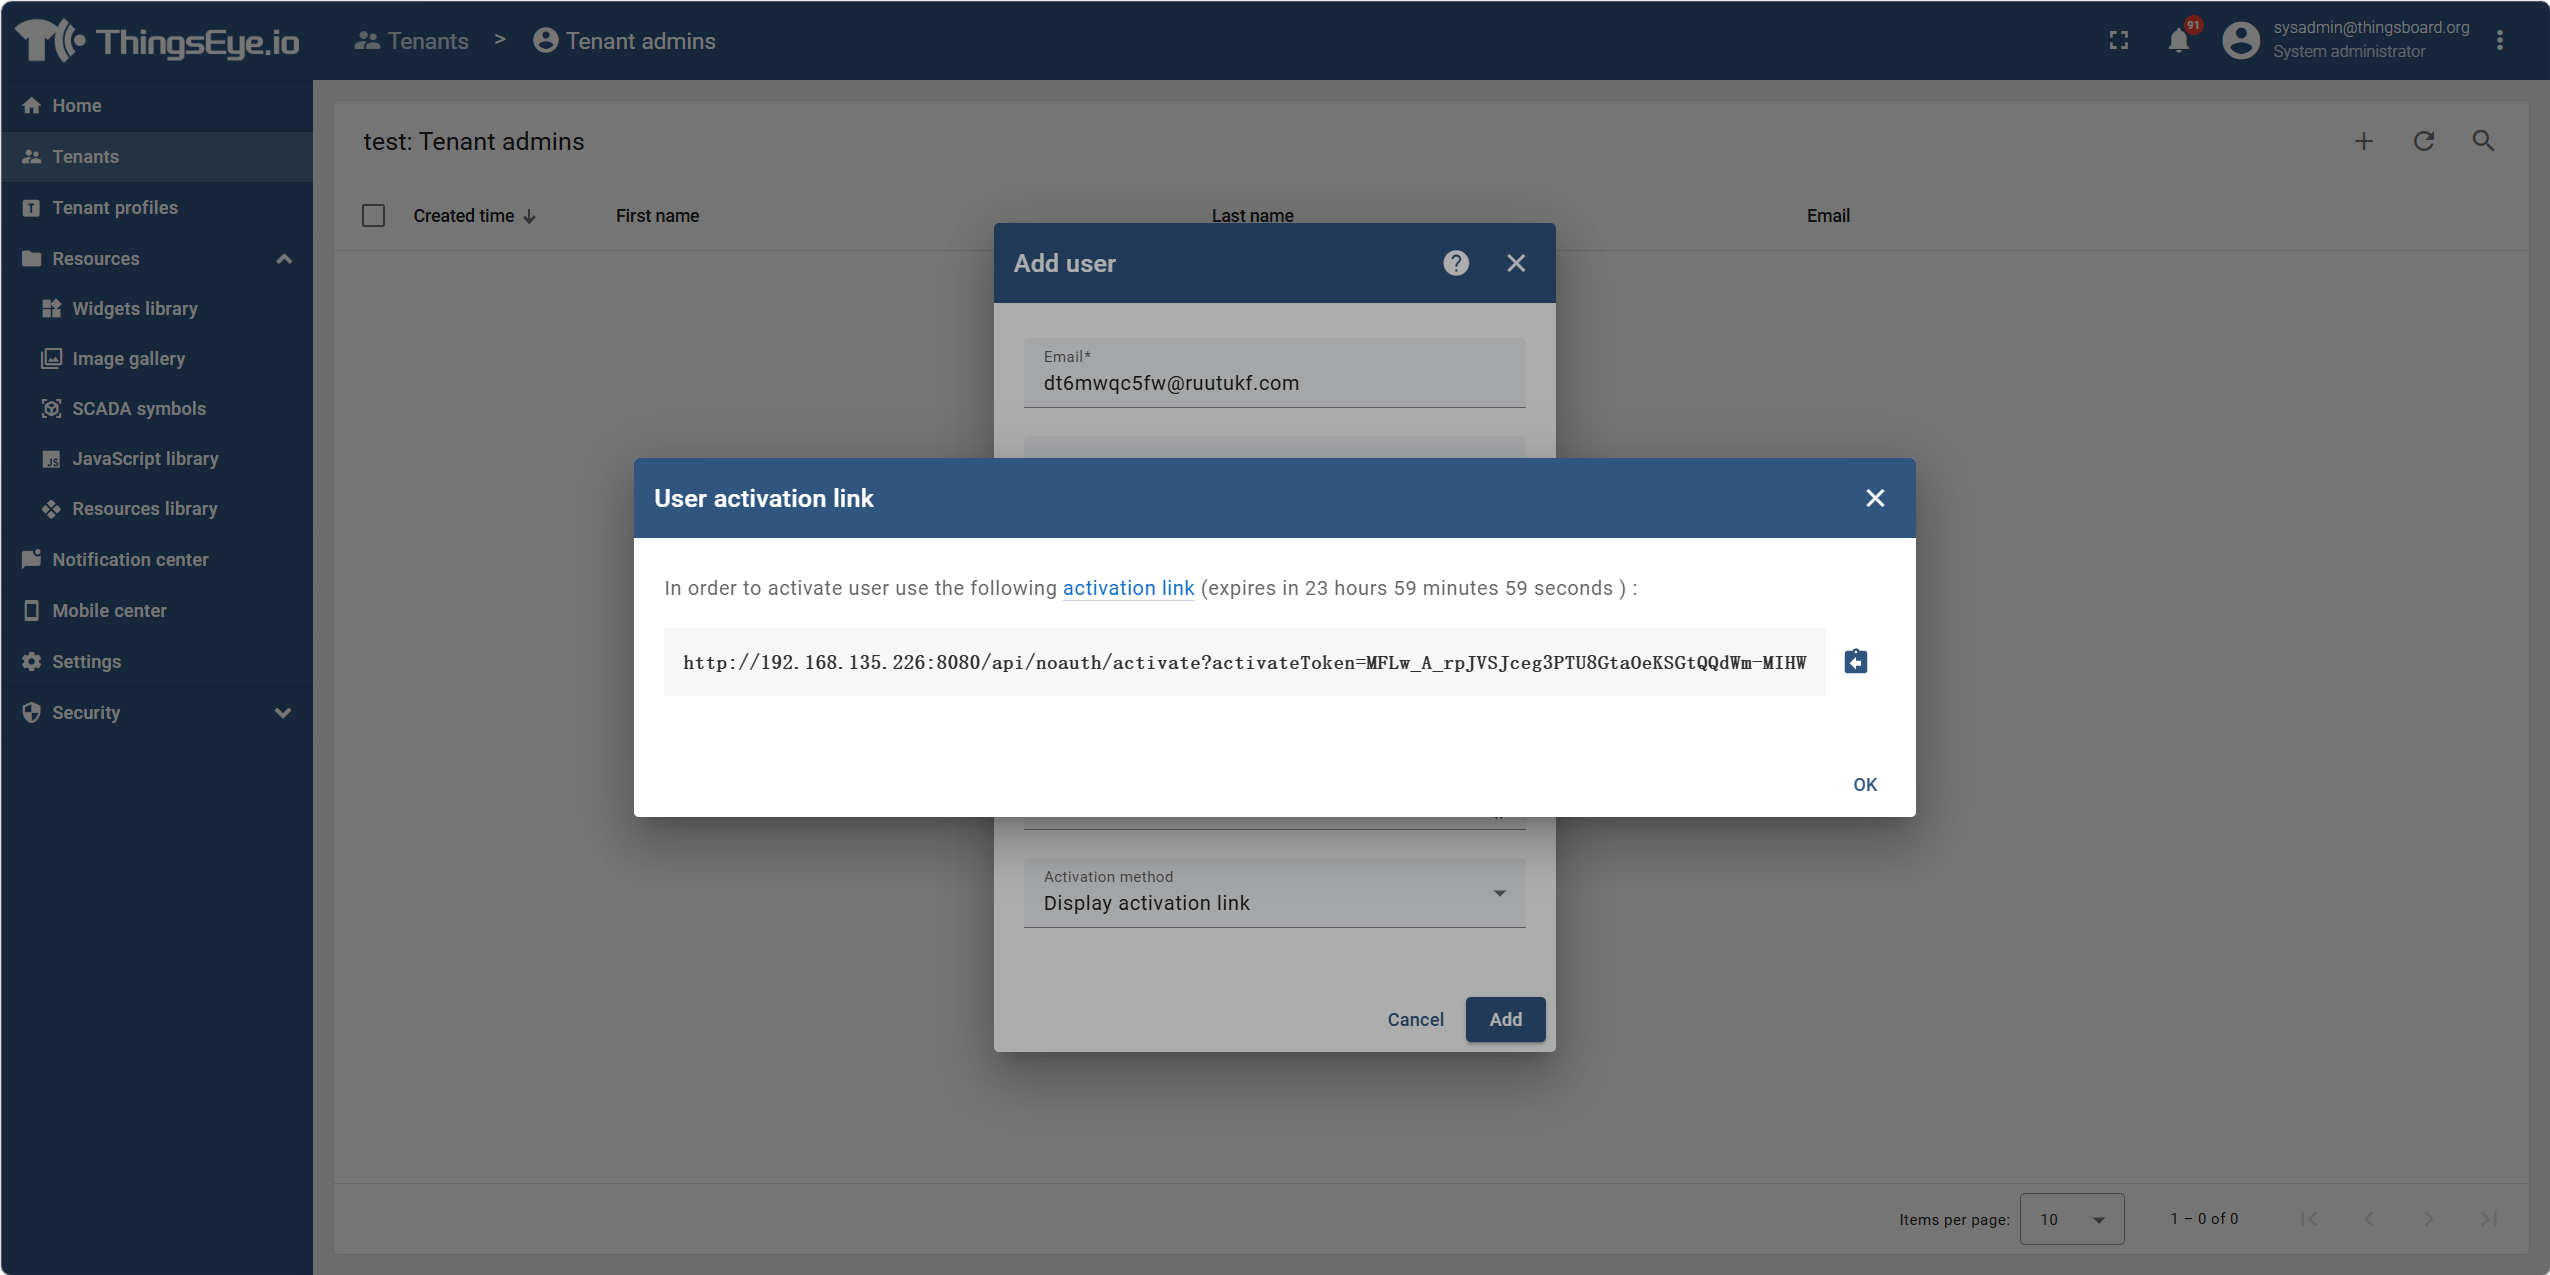
Note: The Tenant Administrator account can be handed off in either of two ways, depending on the creation flow. The System Administrator can securely communicate the account credentials for direct login, or provide an activation link through which the Tenant Administrator sets a password. The system does not automatically send an initial password email.
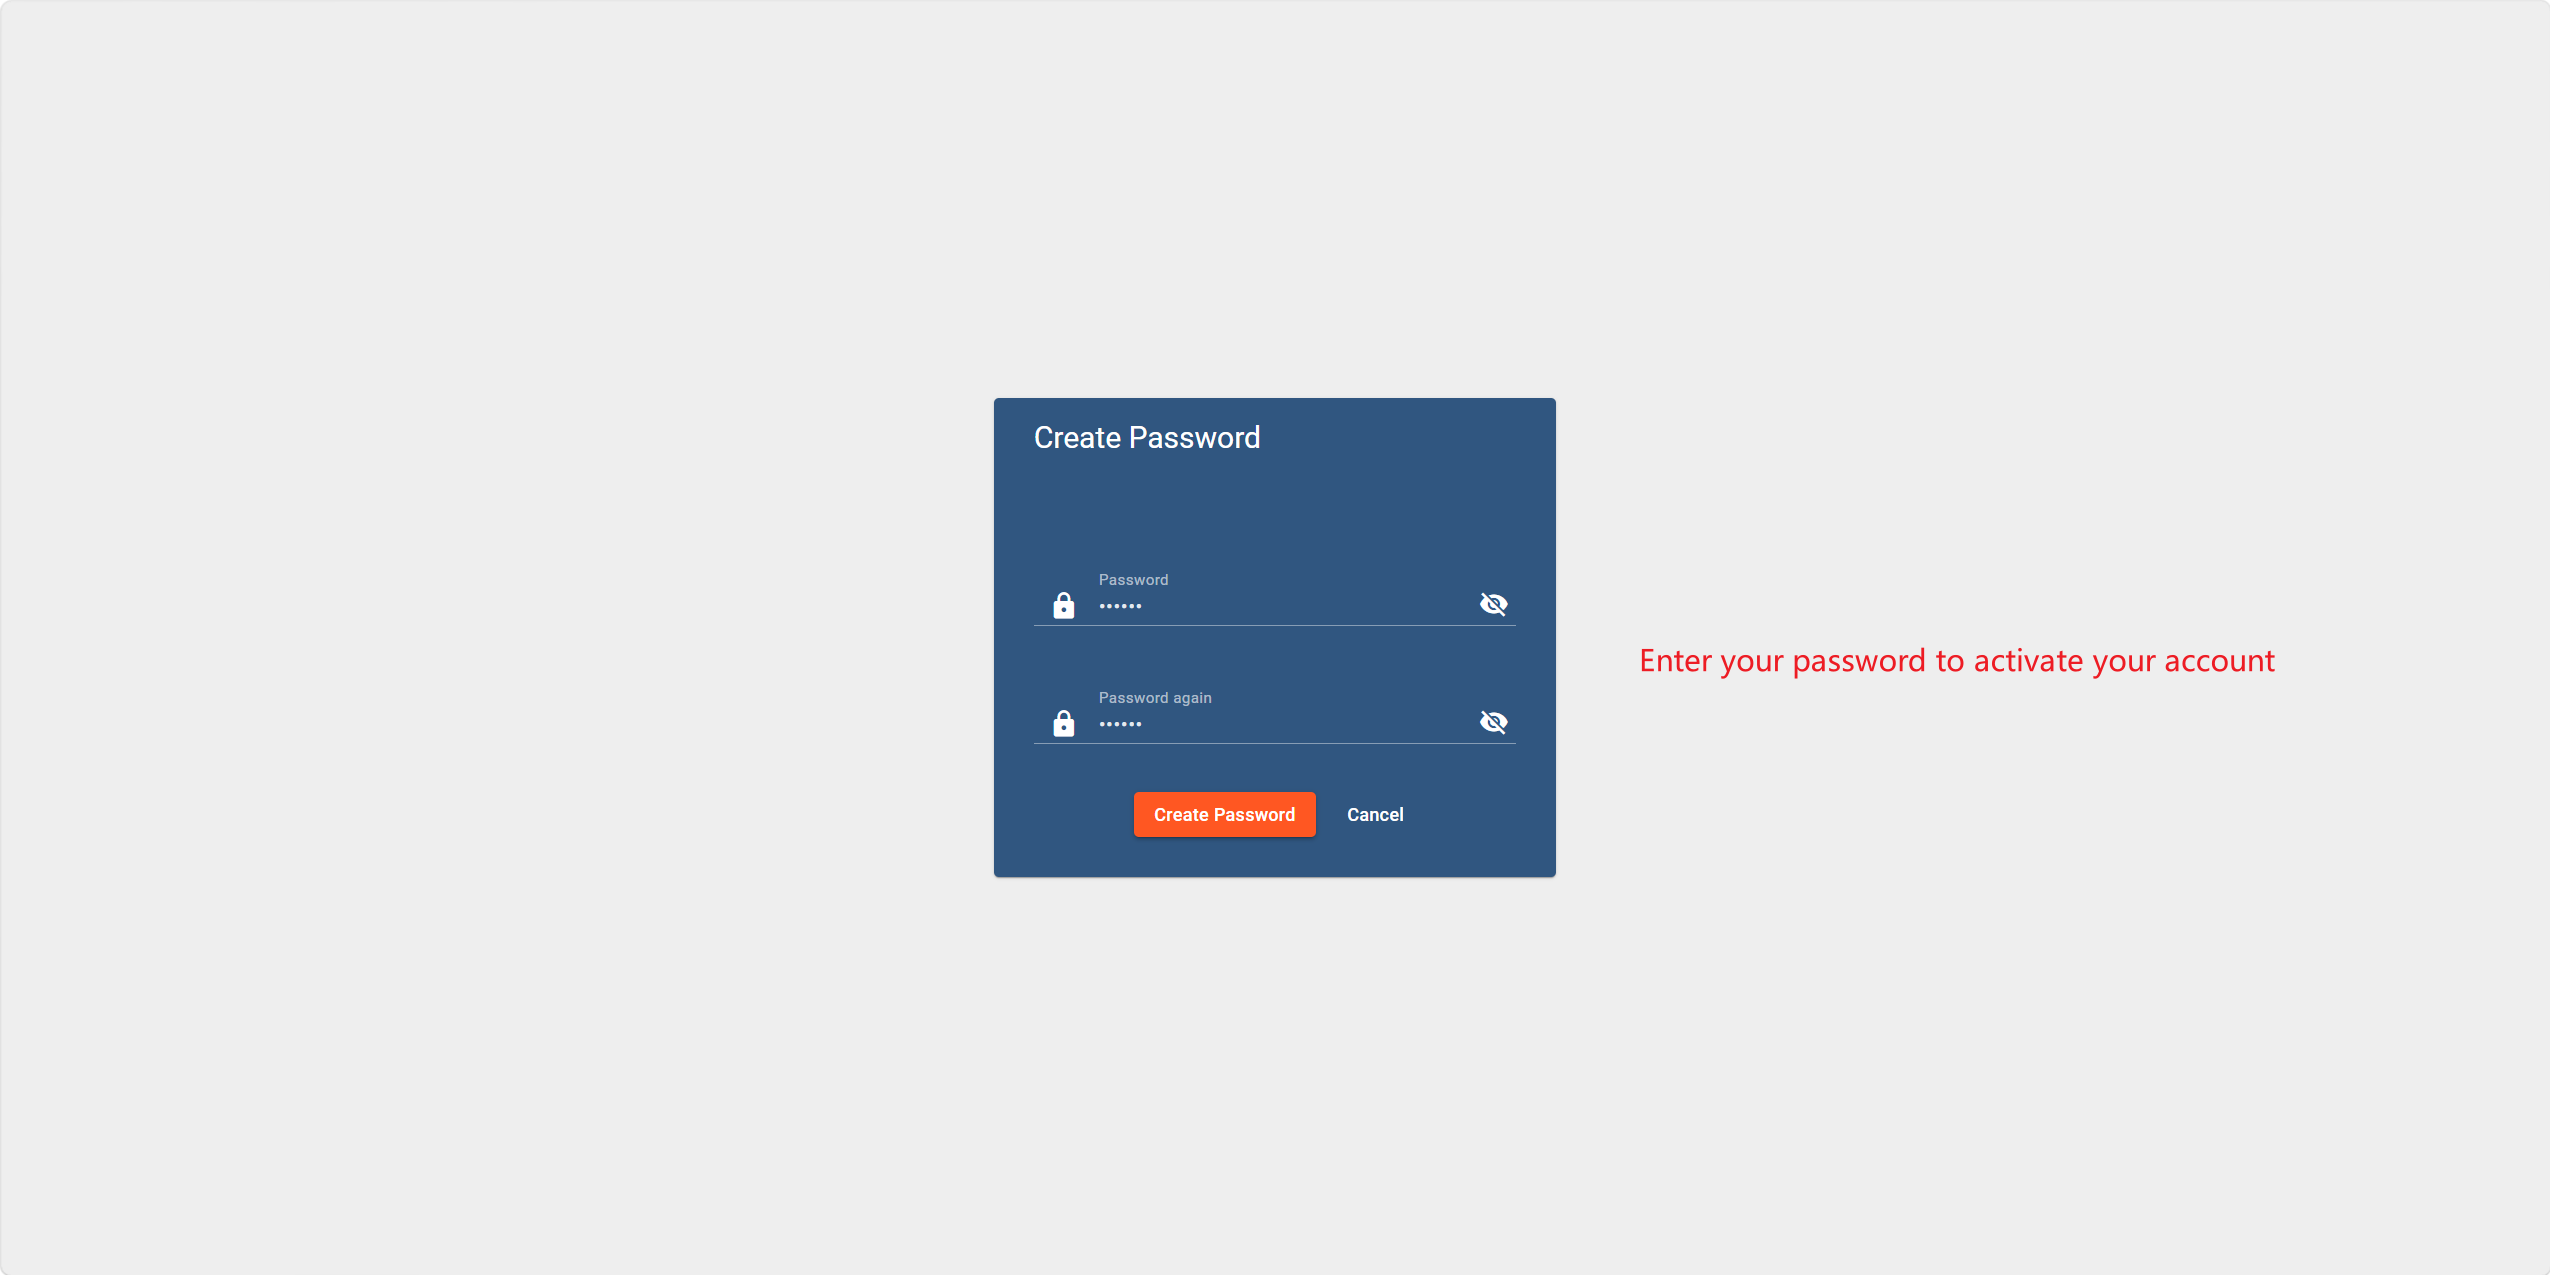
After confirming that all information is correct, click the “Add” button. The system will create the Tenant Administrator account and display it in the Tenant Administrator list. If the activation-link flow is used, copy the activation link and have the Tenant Administrator set a password to activate the account. If credentials are assigned directly, communicate them securely to the Tenant Administrator for the first login.
Step 5: Submit the creation
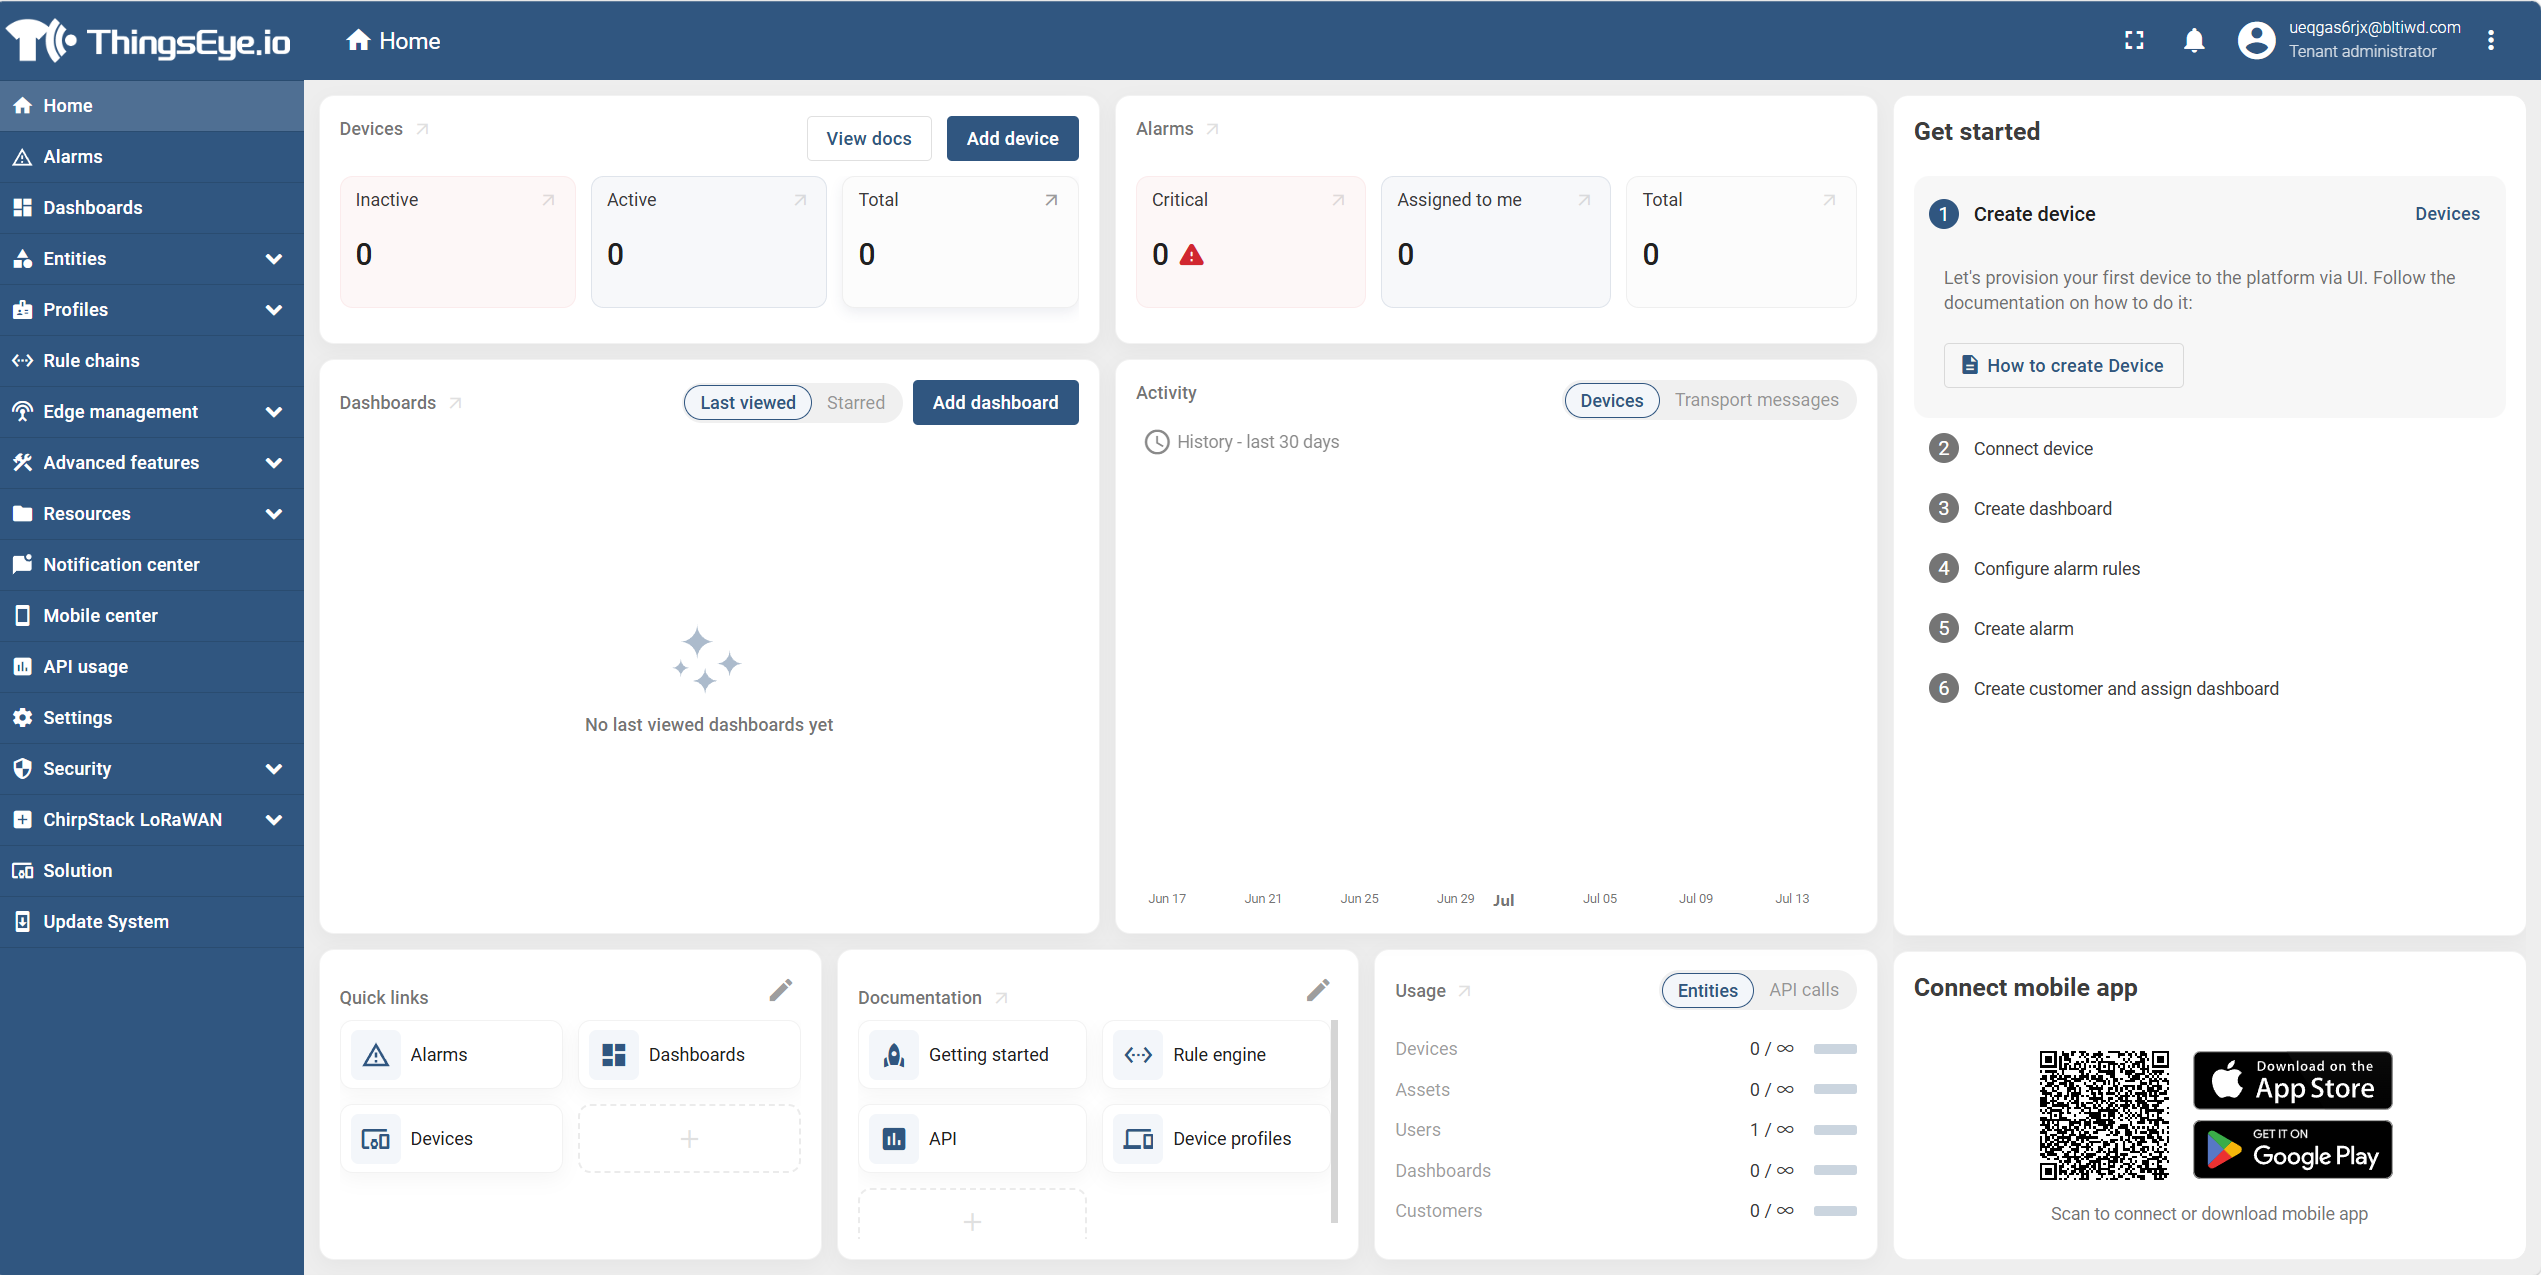
After the password is successfully set in the activation-link flow, the system will redirect to the Tenant Administrator interface. For the direct-credential flow, the Tenant Administrator can log in with the credentials provided by the System Administrator.
Next Steps
After the Tenant Administrator is created, you can use that account to log in to the tenant management console to perform management operations for users, devices, assets, dashboards, etc., within the tenant.
2. Edit a Tenant Administrator
Procedure
Step 1: Go to the tenant management page
Select the “Tenants” menu from the left sidebar to go to the tenant list page.
Step 2: Select the target tenant
Locate the target tenant in the tenant list and click the “Manage Tenant Admins” button on the right side of the tenant row to go to the administrator list page.

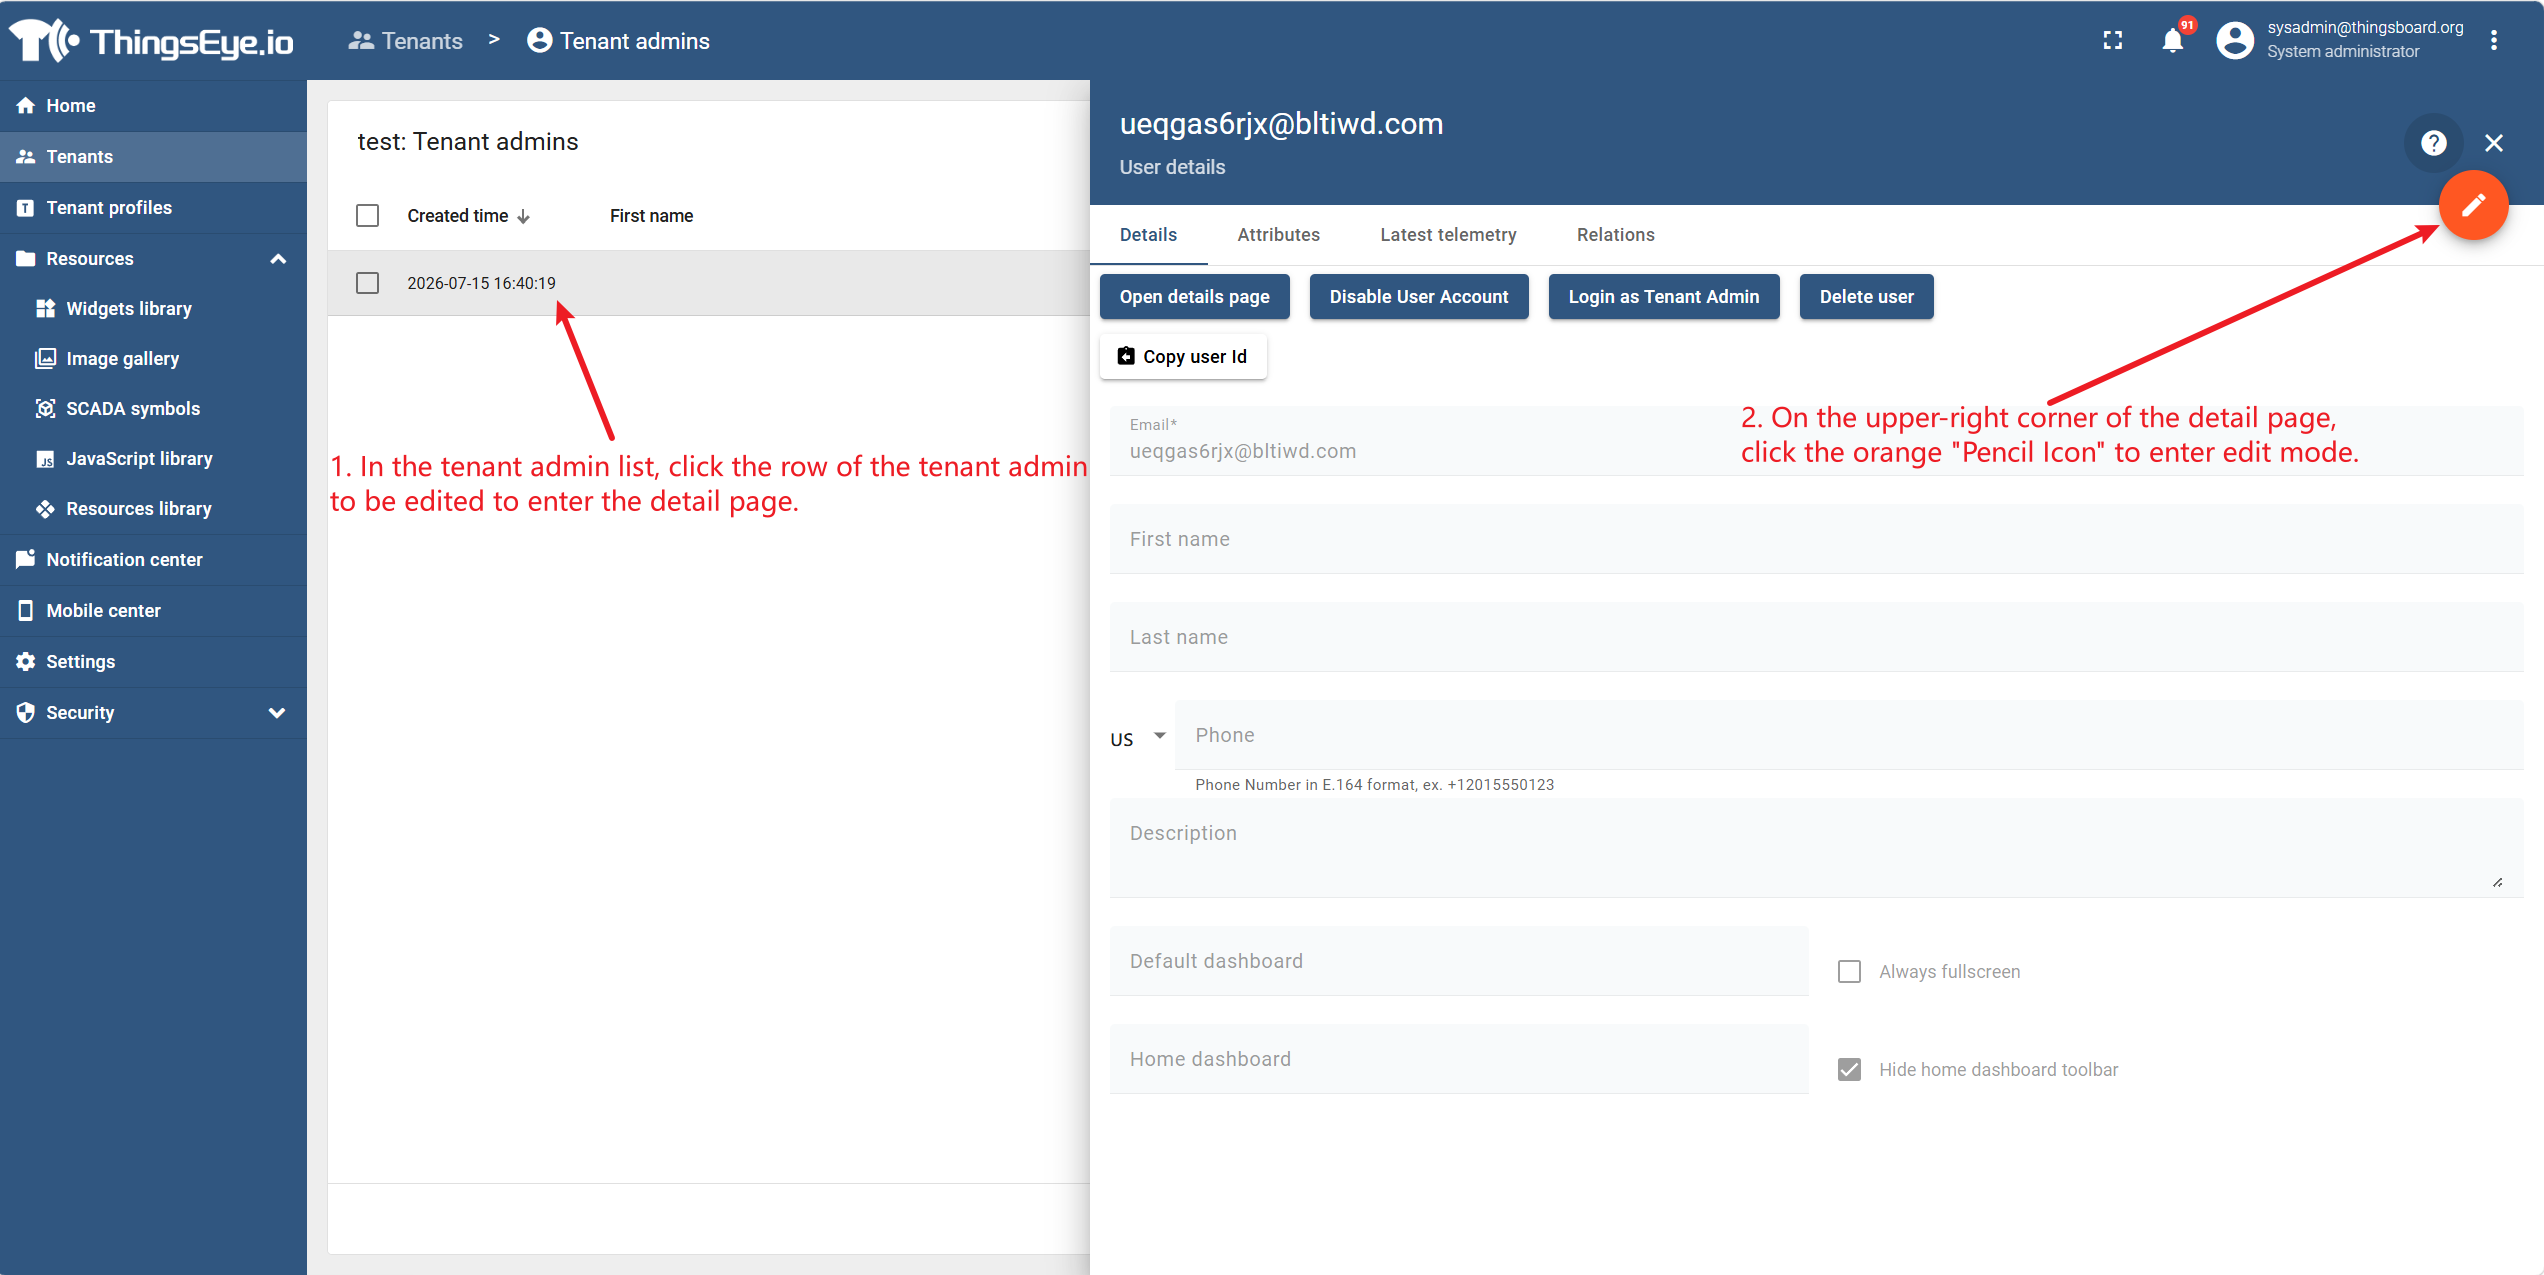
Step 3: Select the target administrator and enter edit mode
In the Tenant Administrator list, click the row of the Tenant Administrator you want to edit to go to the details page, then click the orange pencil icon to enter edit mode.
Step 4: Modify information
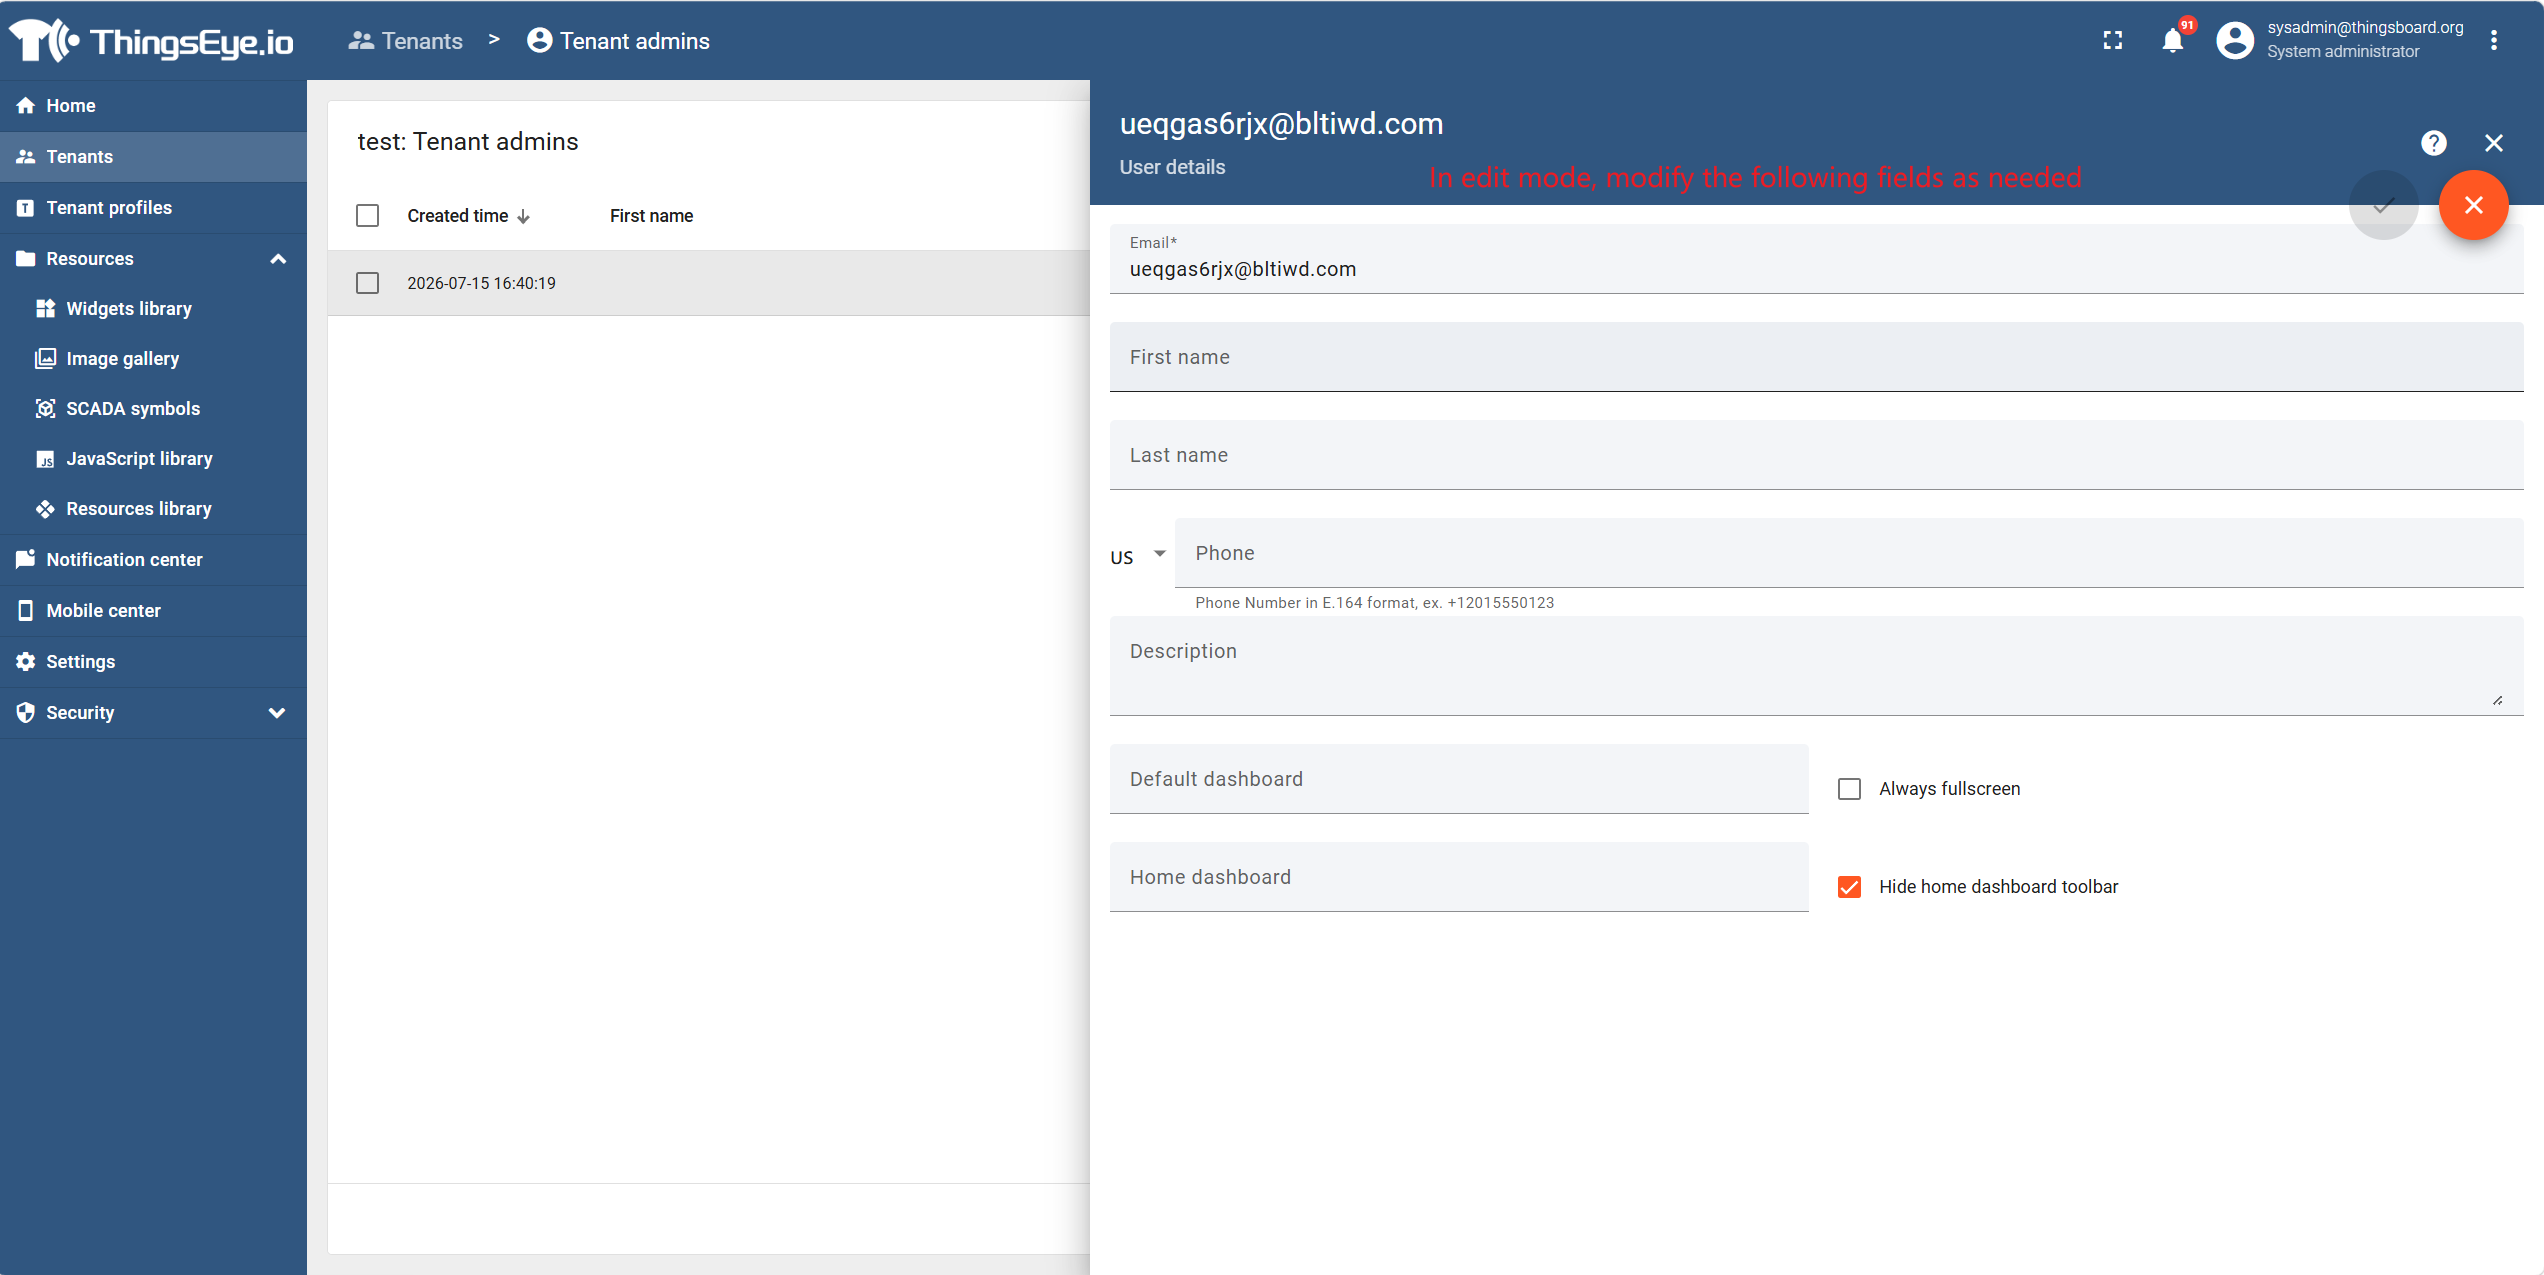
In edit mode, modify the following fields as needed:
Step 5: Save changes
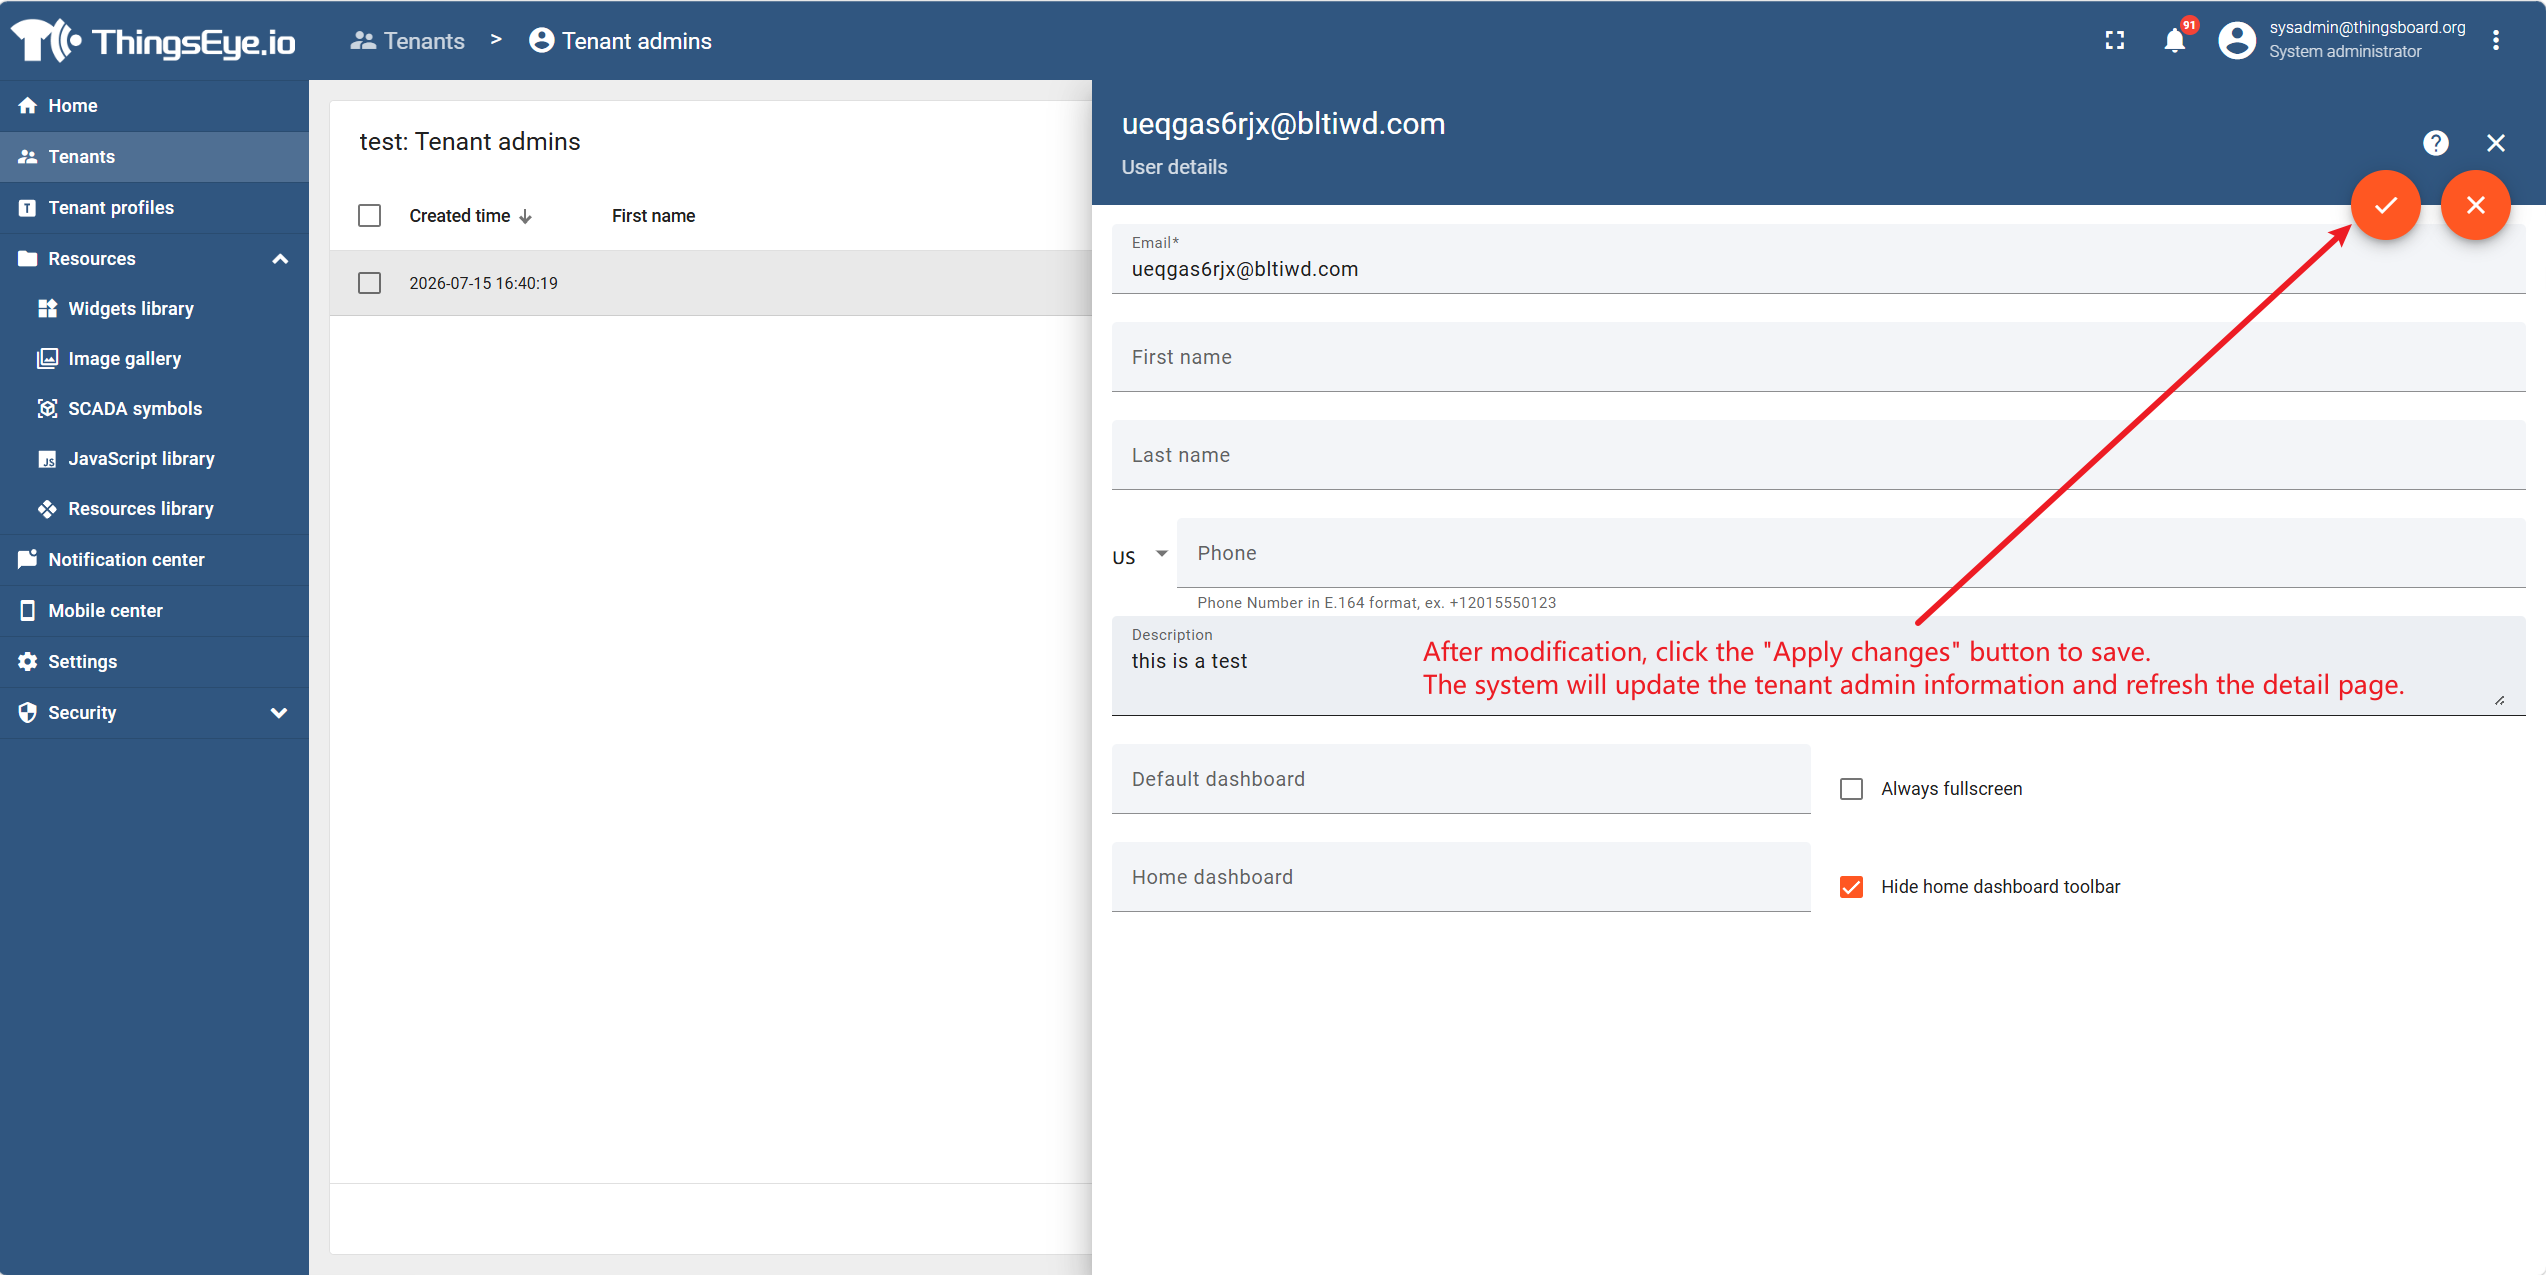
After modification, click the “Apply Changes” button to save. The system will update the Tenant Administrator information and refresh the details page.
Important Considerations
- After changing the email address, the Tenant Administrator must log in with the new email; the old email will become invalid.
- Disabling the account will immediately terminate all active sessions of that administrator.
- Changing the tenant profile may affect the feature set, quota limits, and available modules under that tenant; please confirm the impact scope in advance.
3. Delete a Tenant Administrator
Procedure
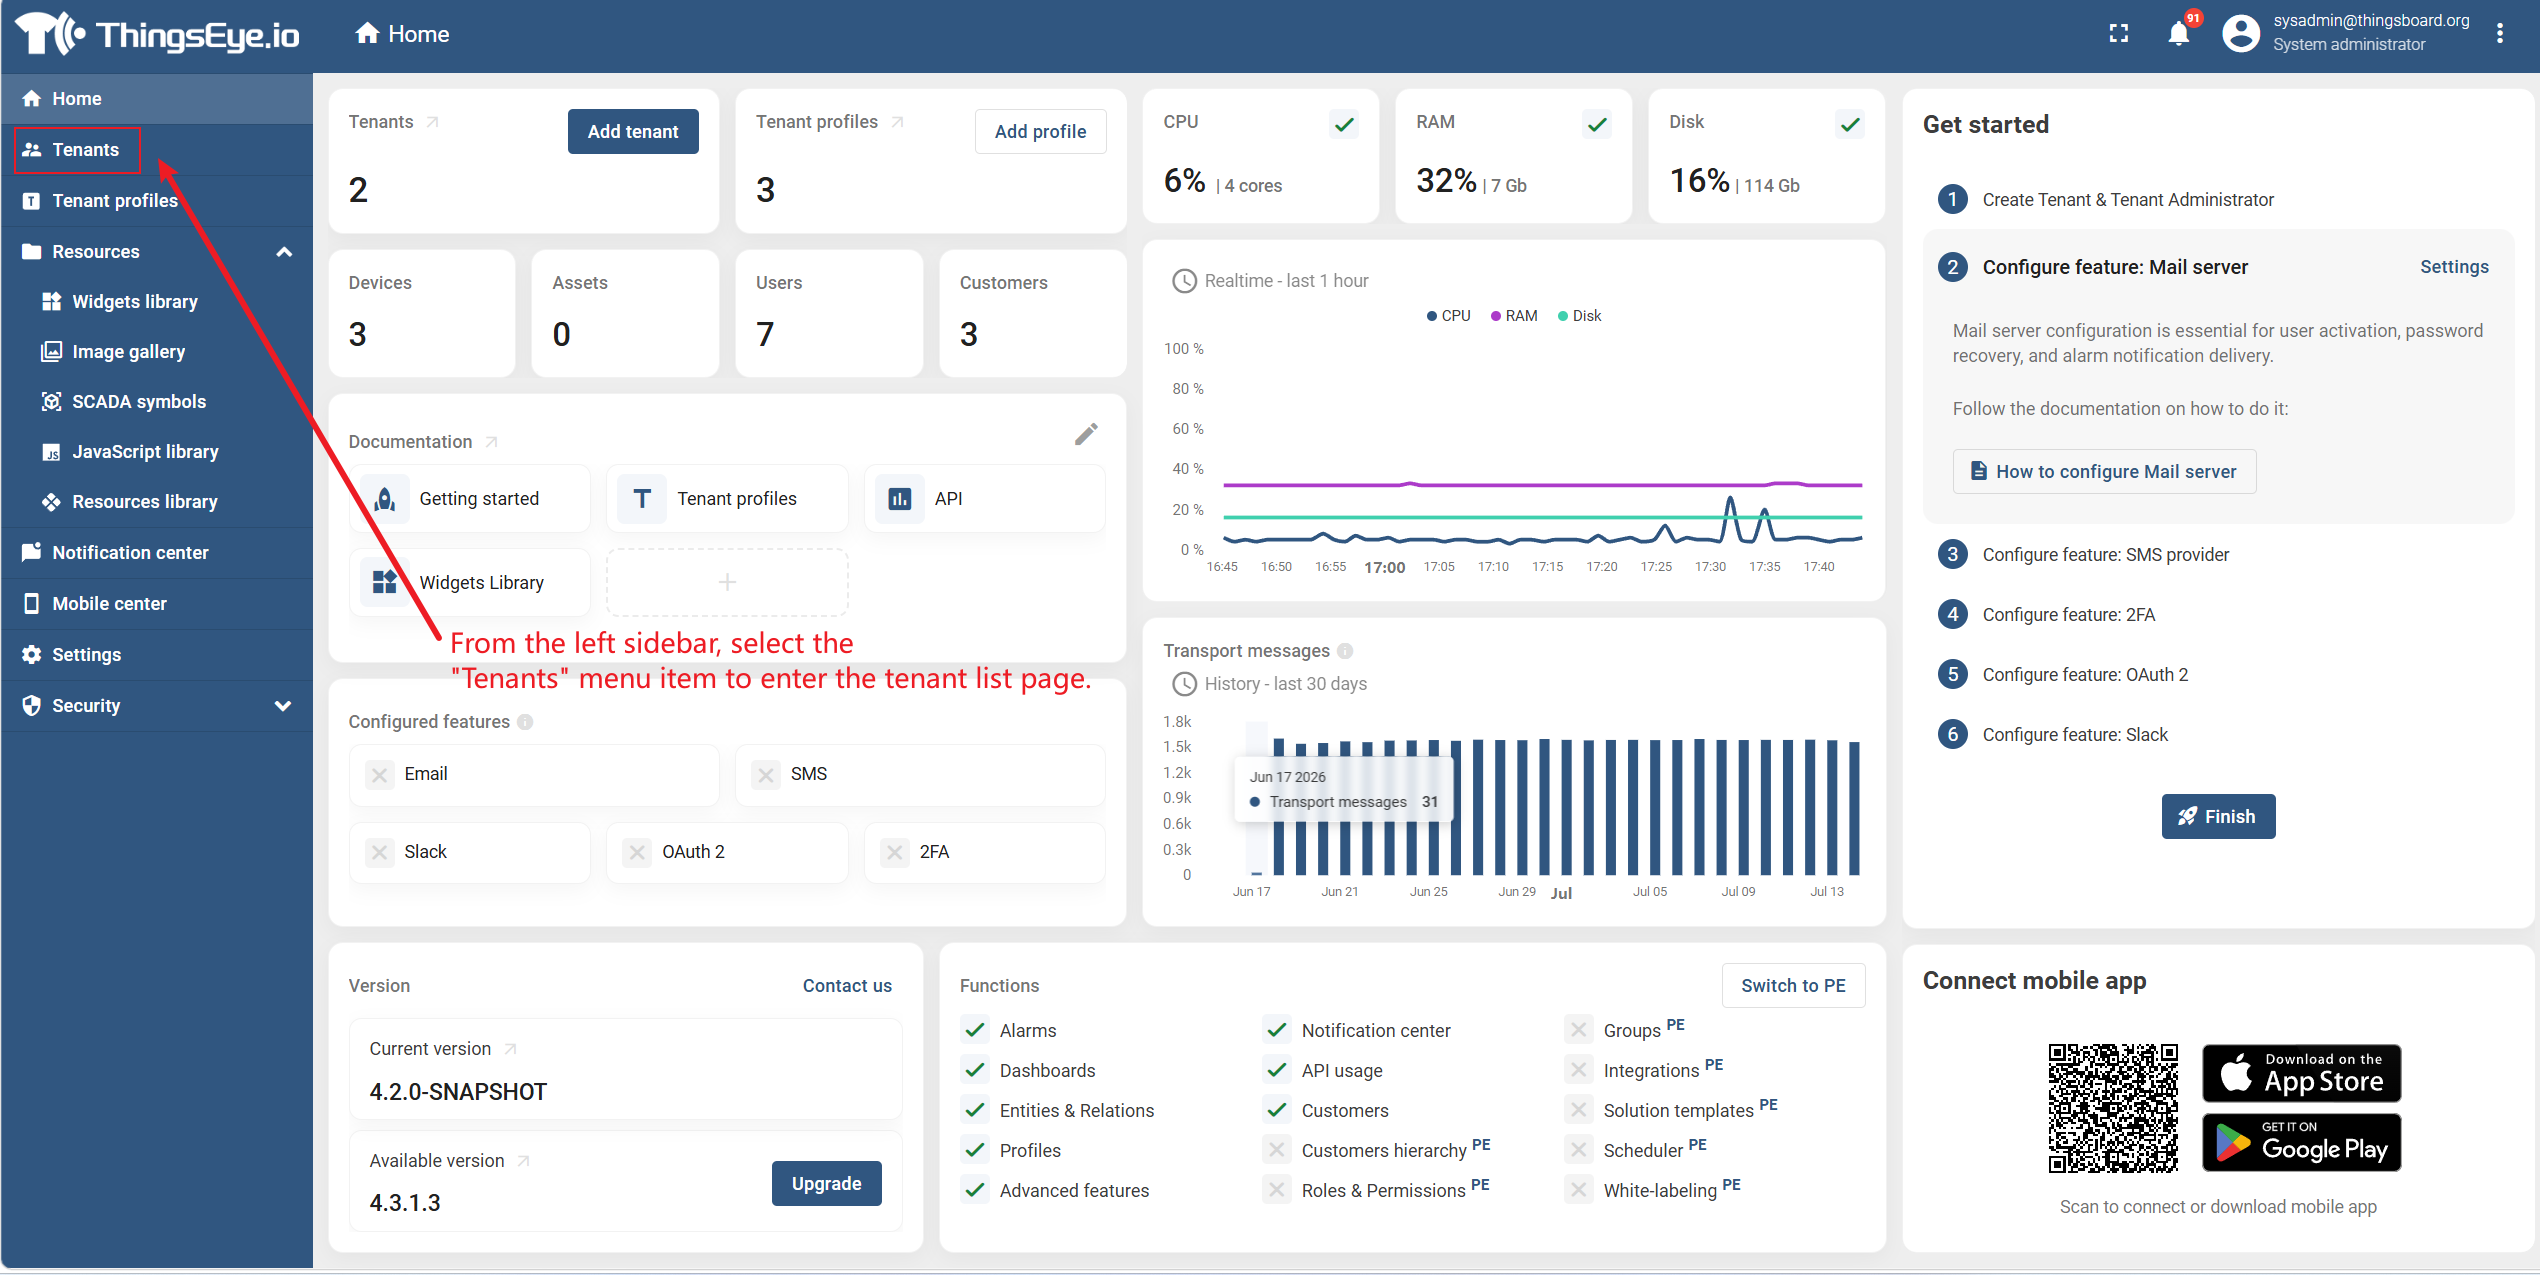
Step 1: Go to the tenant management page
Select the “Tenants” menu from the left sidebar to go to the tenant list page.
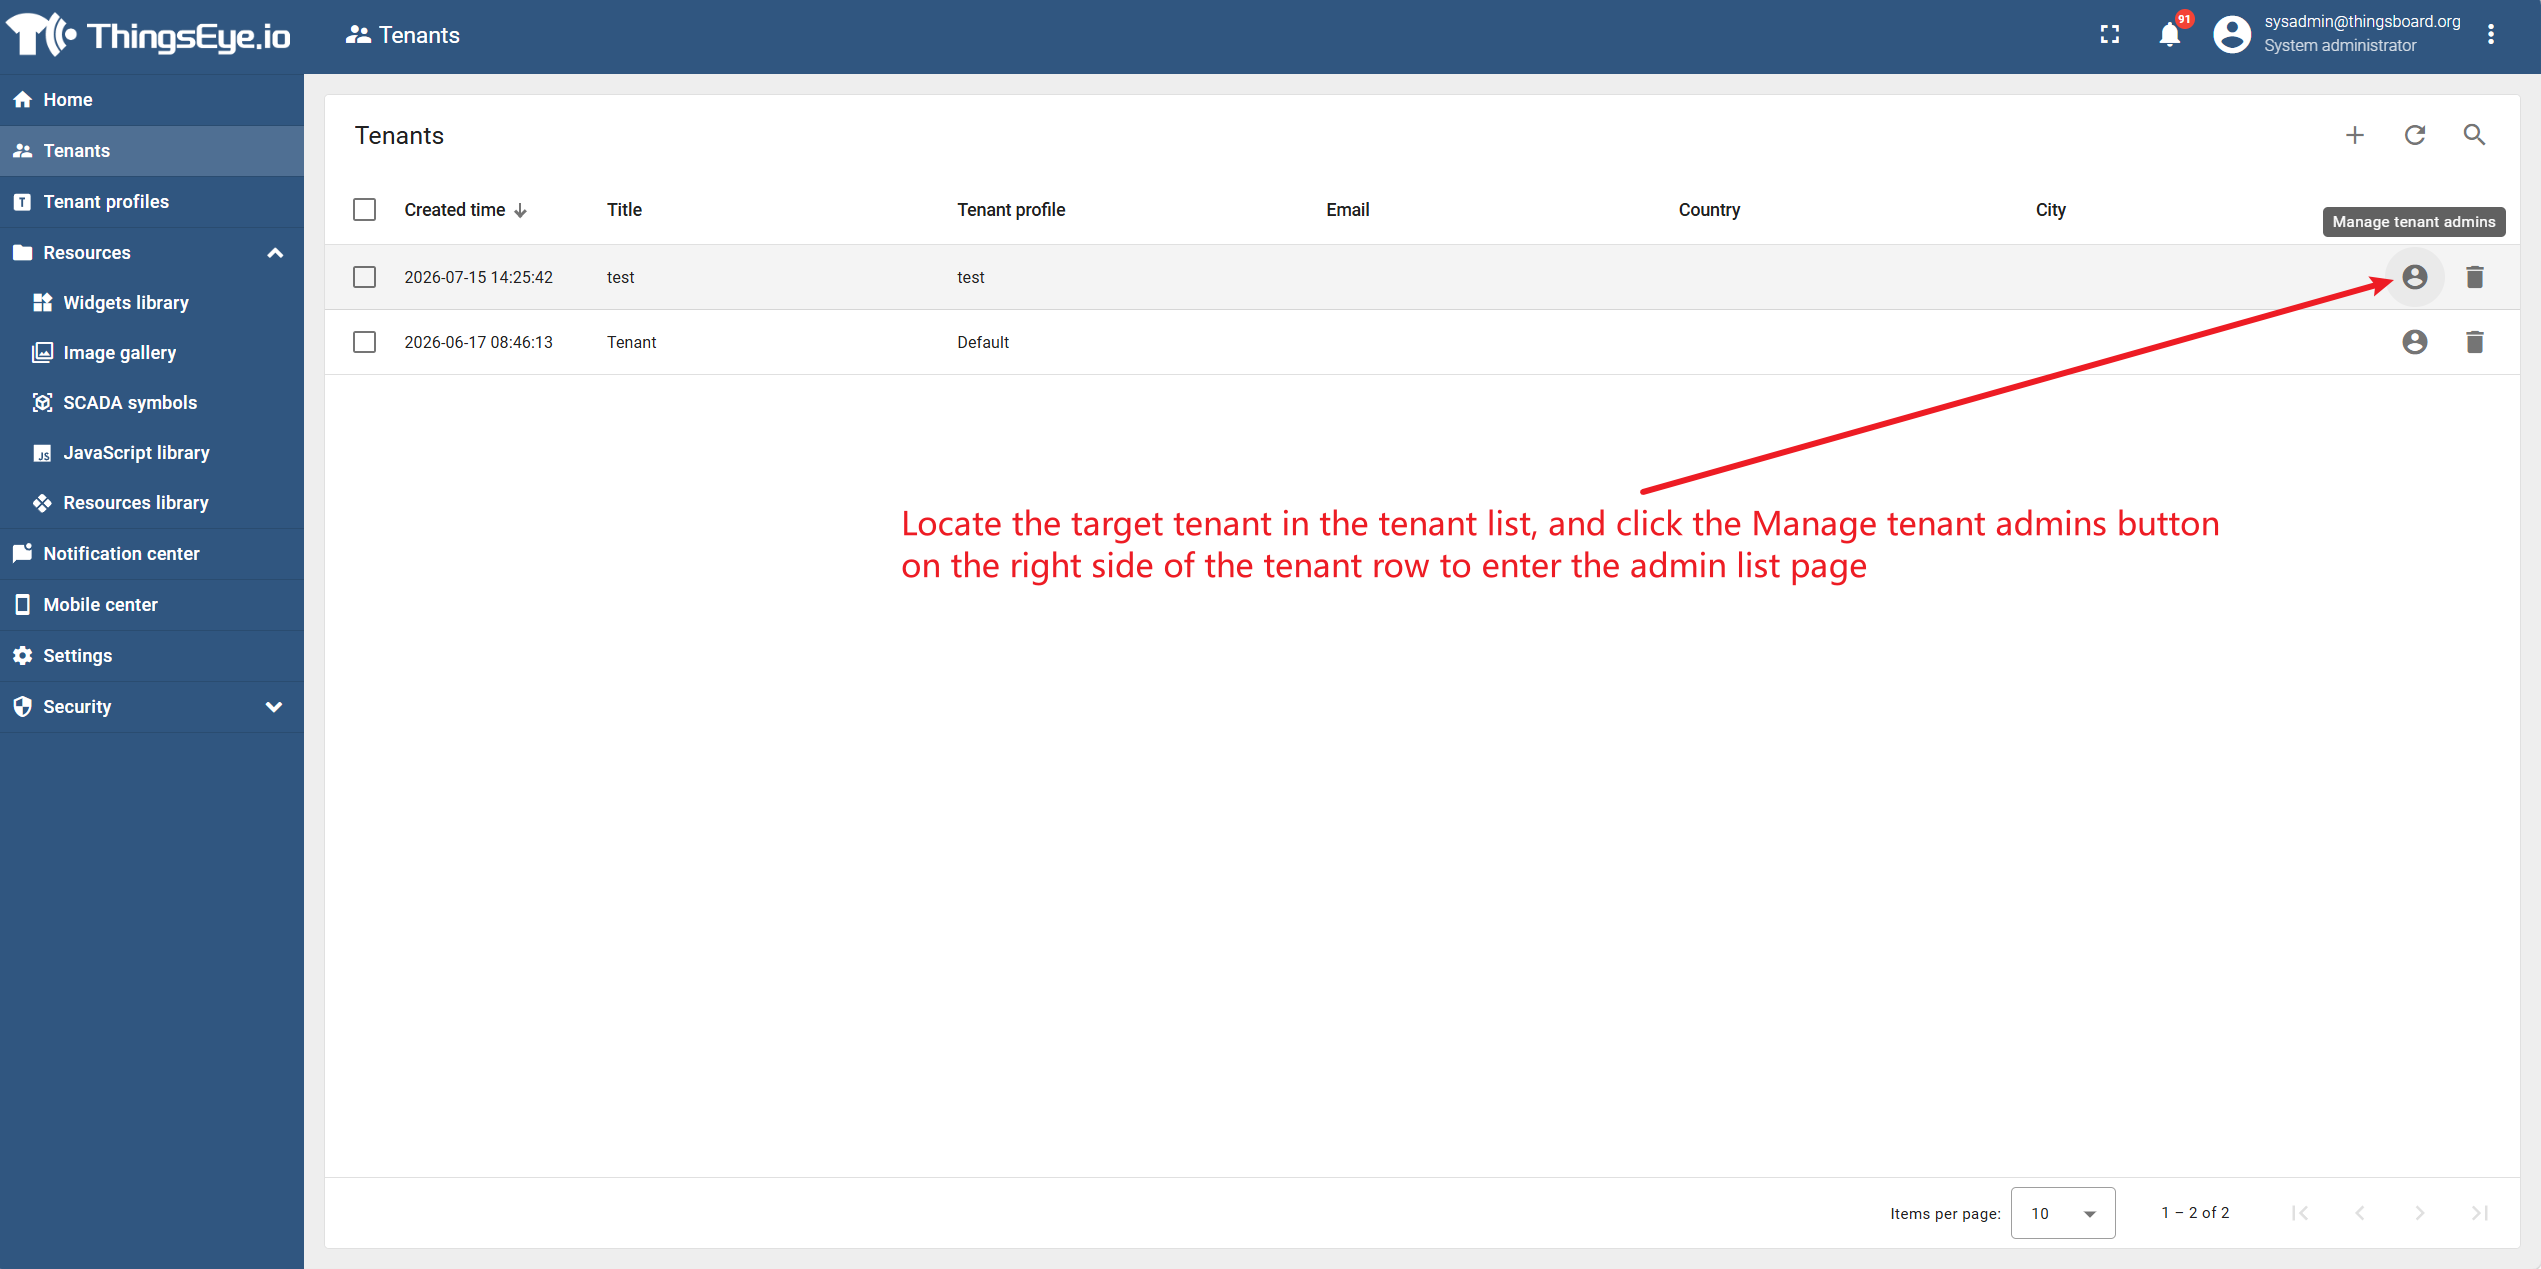
Step 2: Select the target tenant
Locate the target tenant in the tenant list and click the “Manage Tenant Admins” button on the right side of the tenant row to go to the administrator list page.
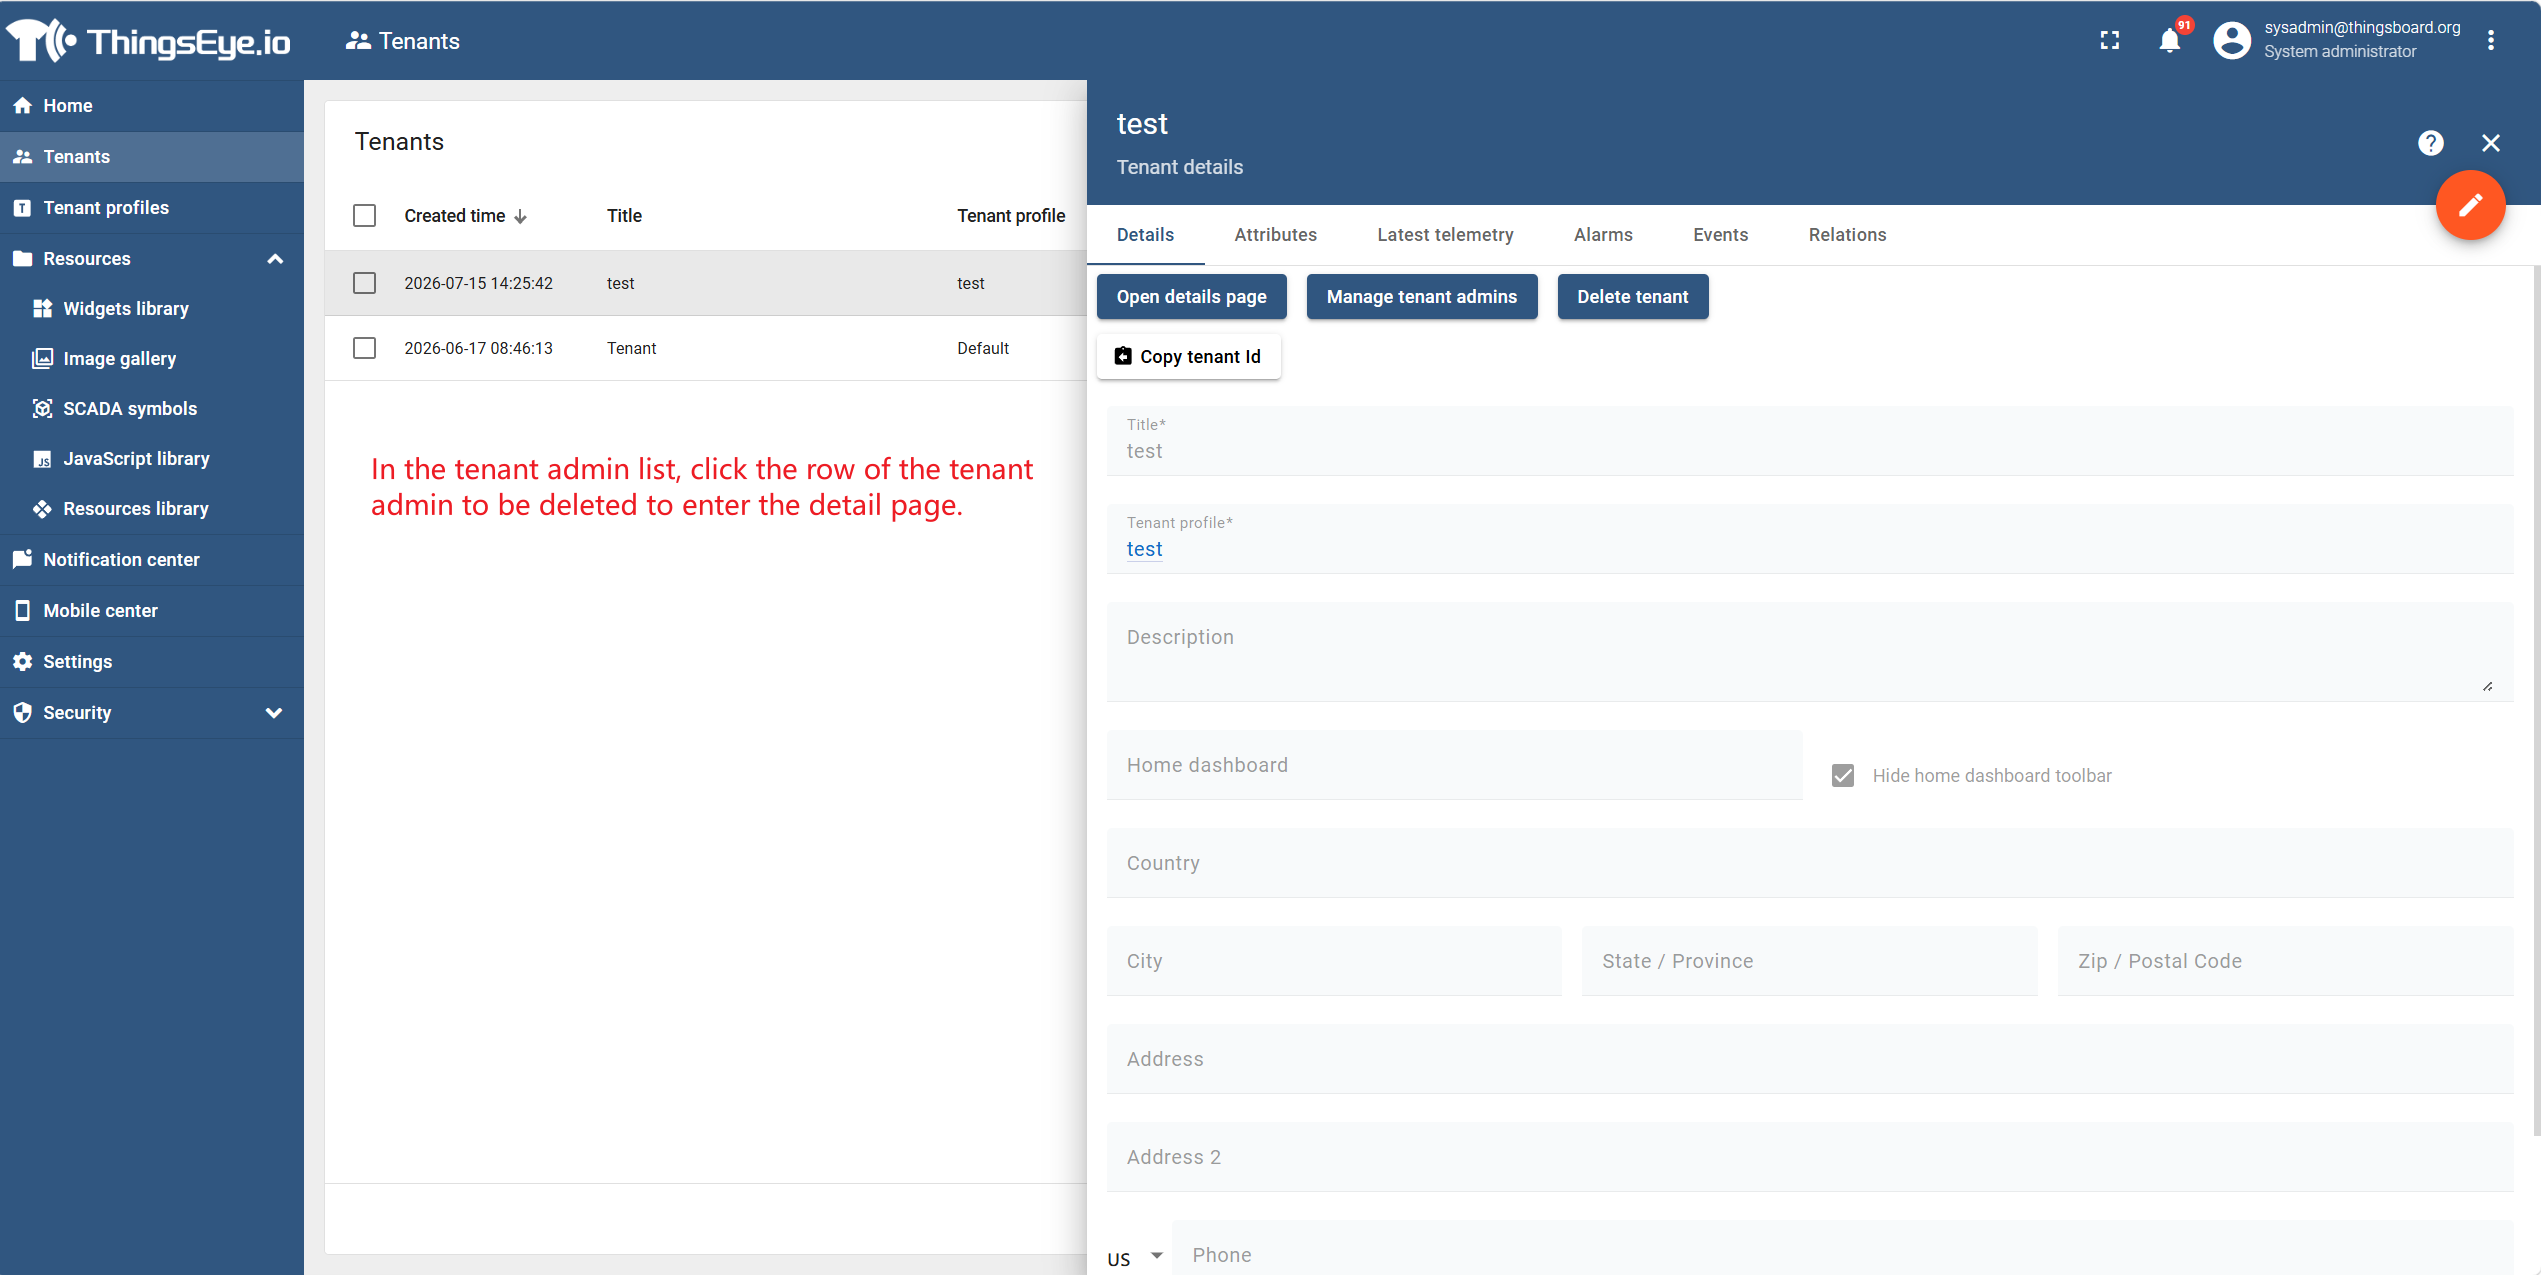
Step 3: Select the target administrator and go to the details page
In the Tenant Administrator list, click the row of the Tenant Administrator you want to delete to go to the details page.
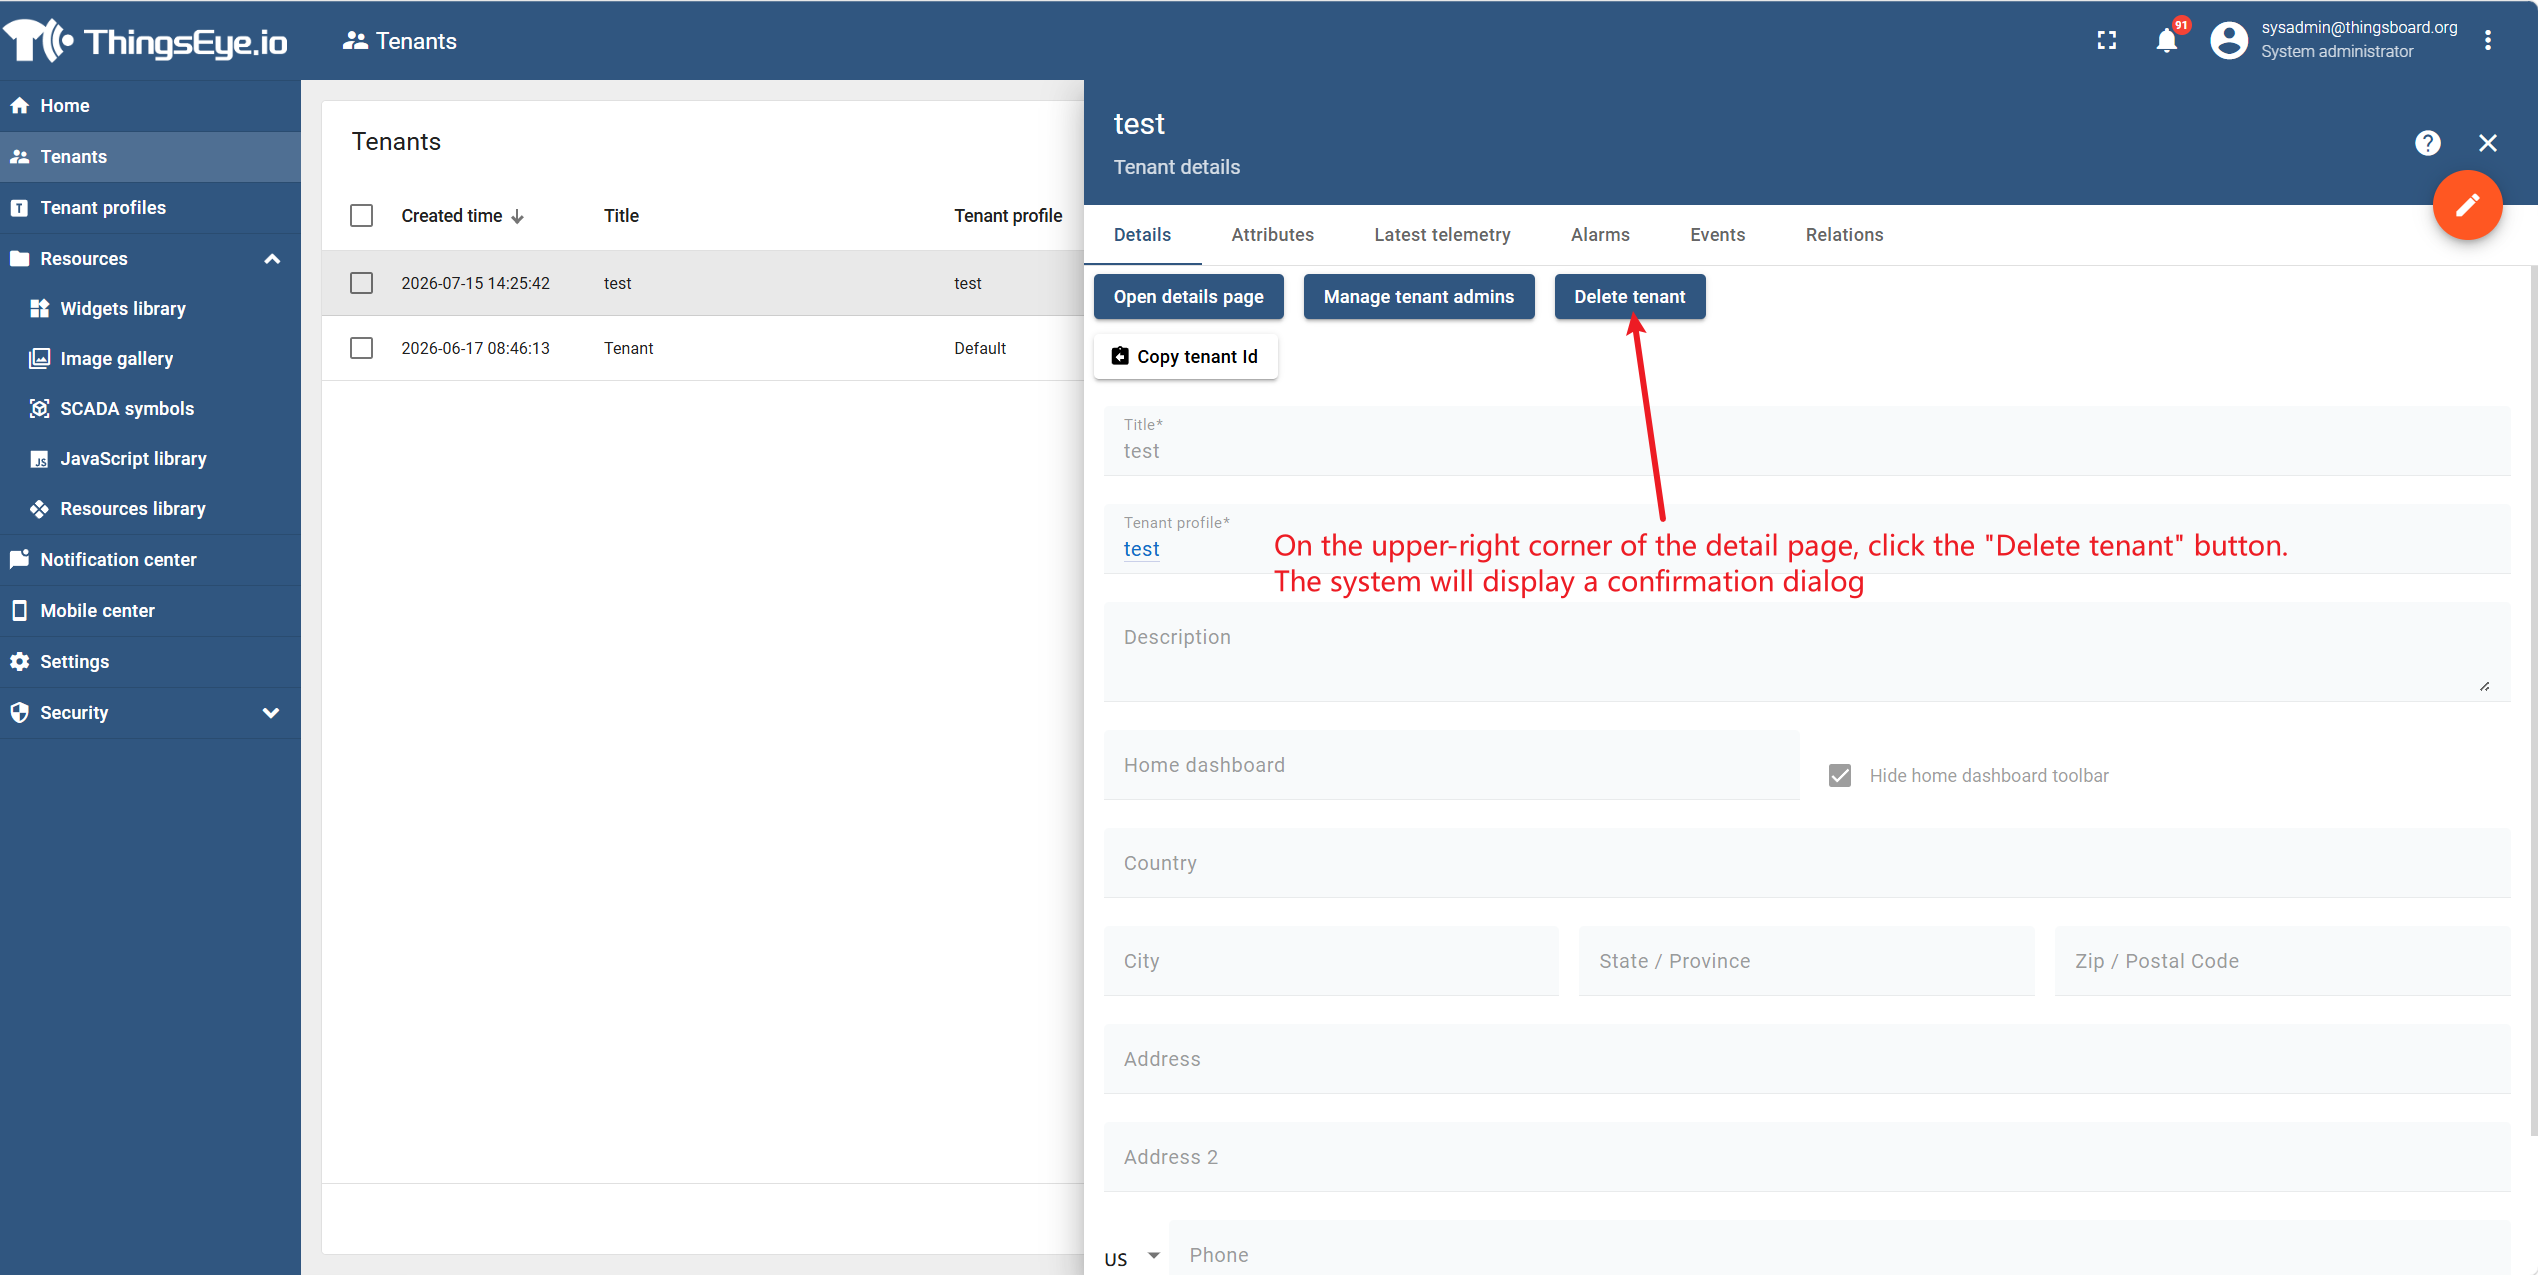
Step 4: Perform the deletion
At the upper‑right corner of the details page, click the “Delete Tenant Administrator” button. The system will display a confirmation dialog.
Click “Yes” to complete the deletion.
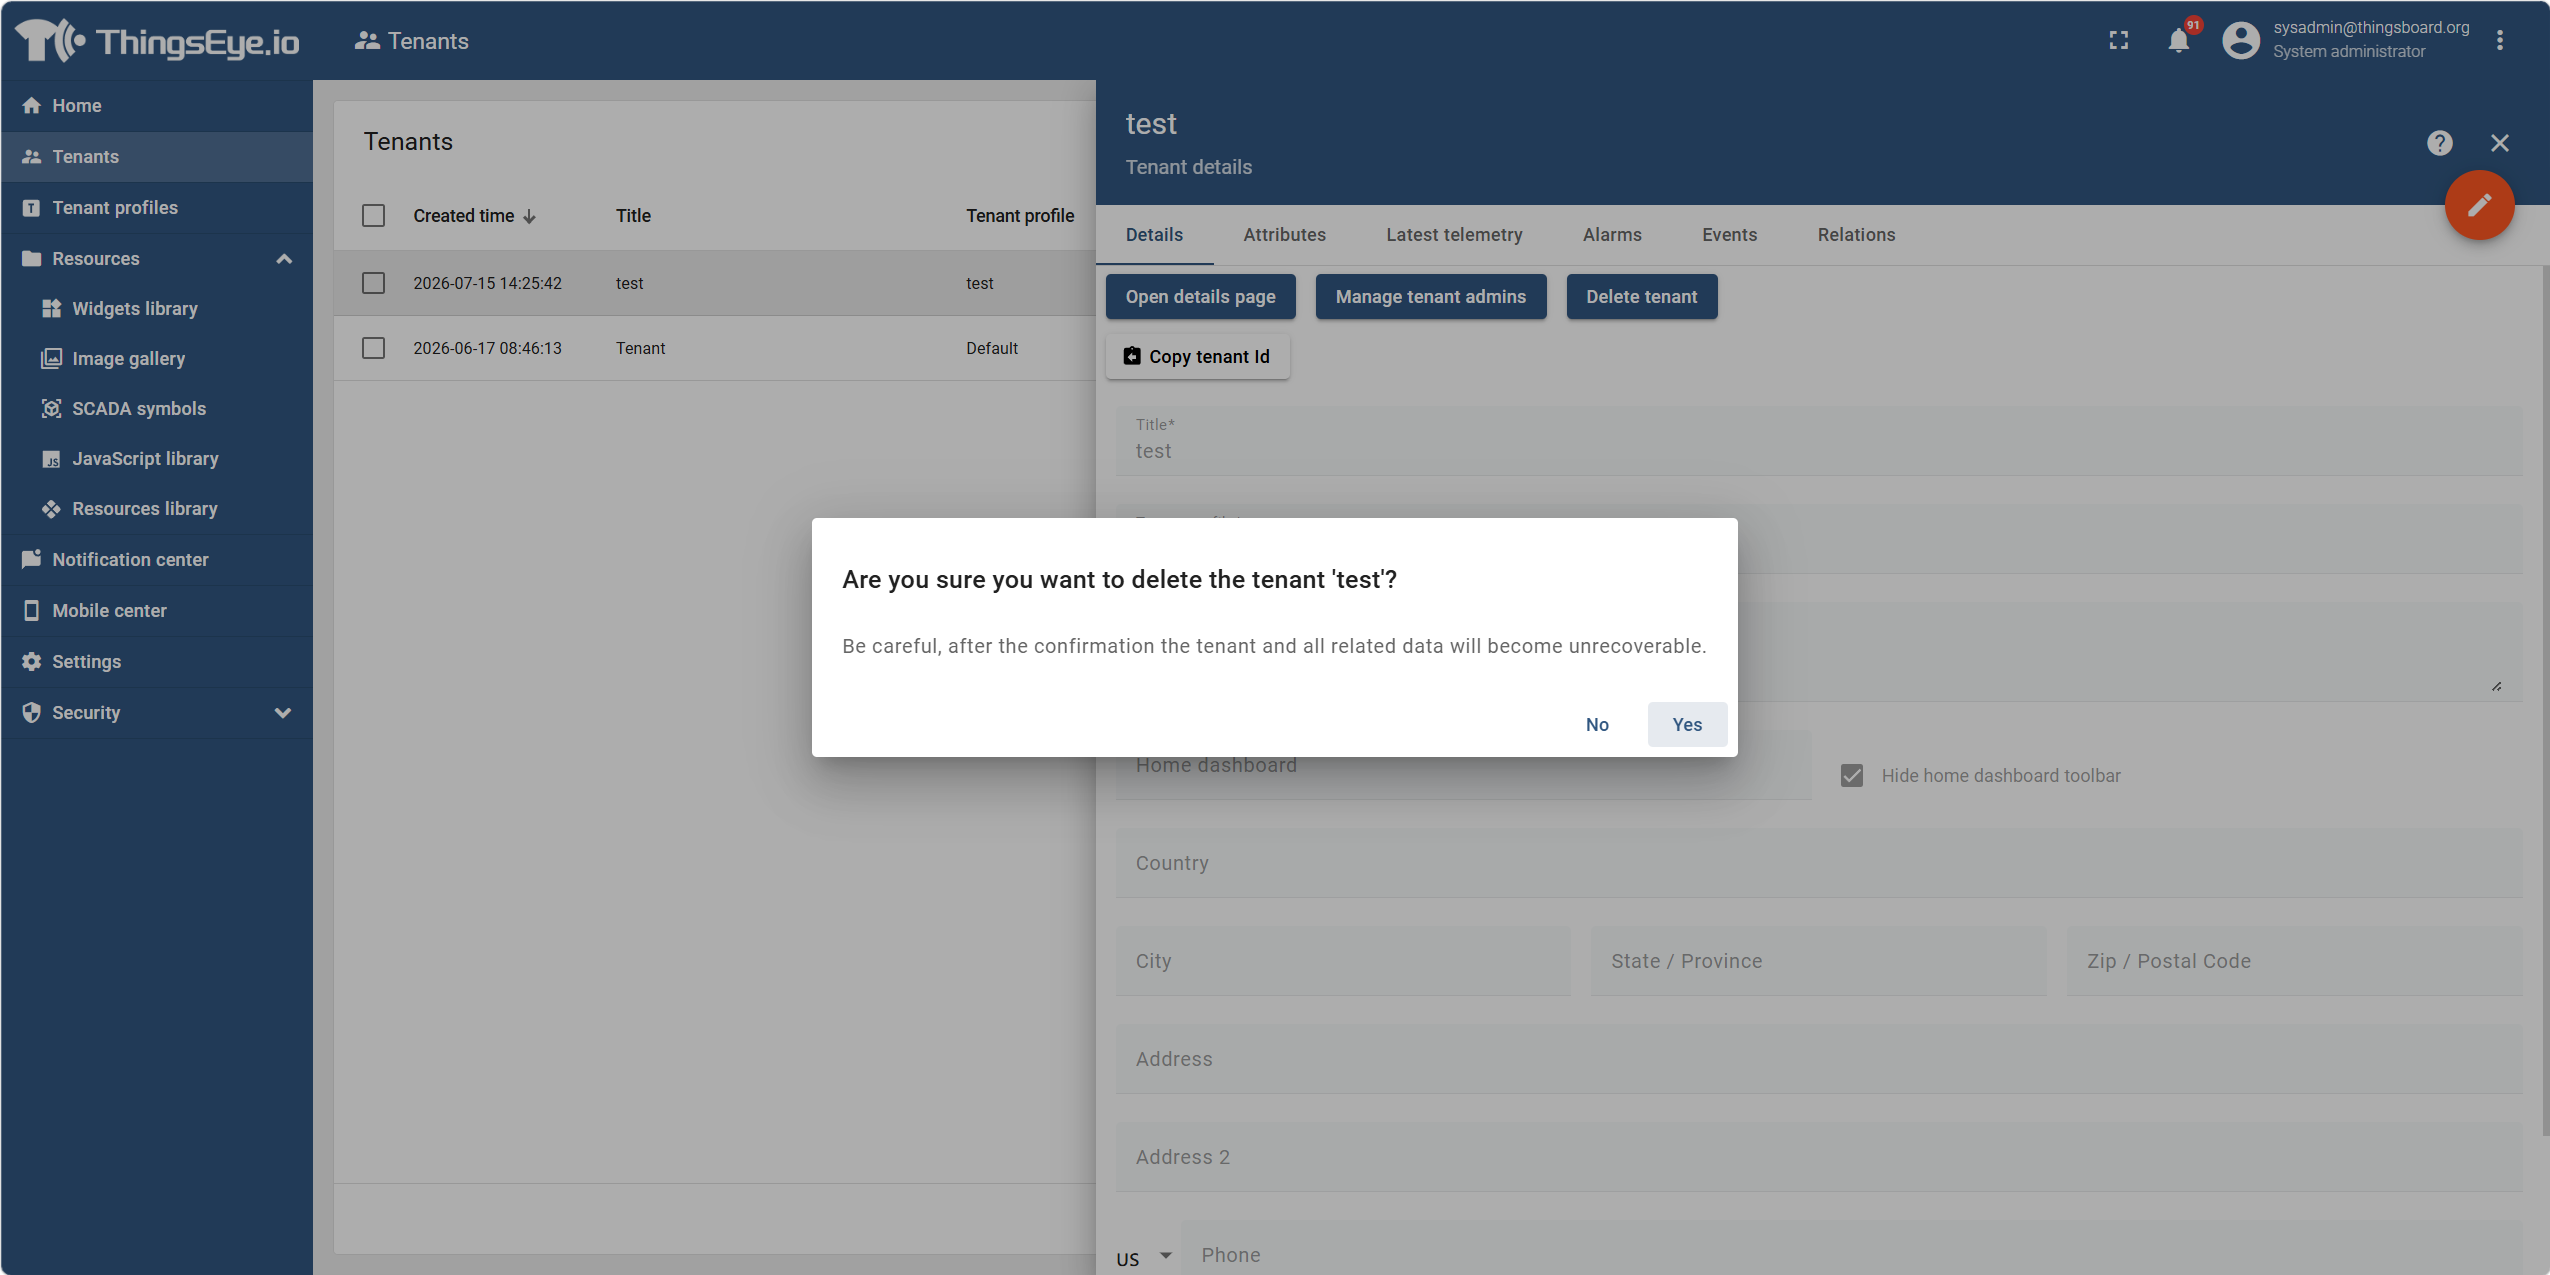
Note: Deletion is irreversible. Once an administrator account is deleted, it cannot be restored. Please proceed with caution.
Bulk Deletion
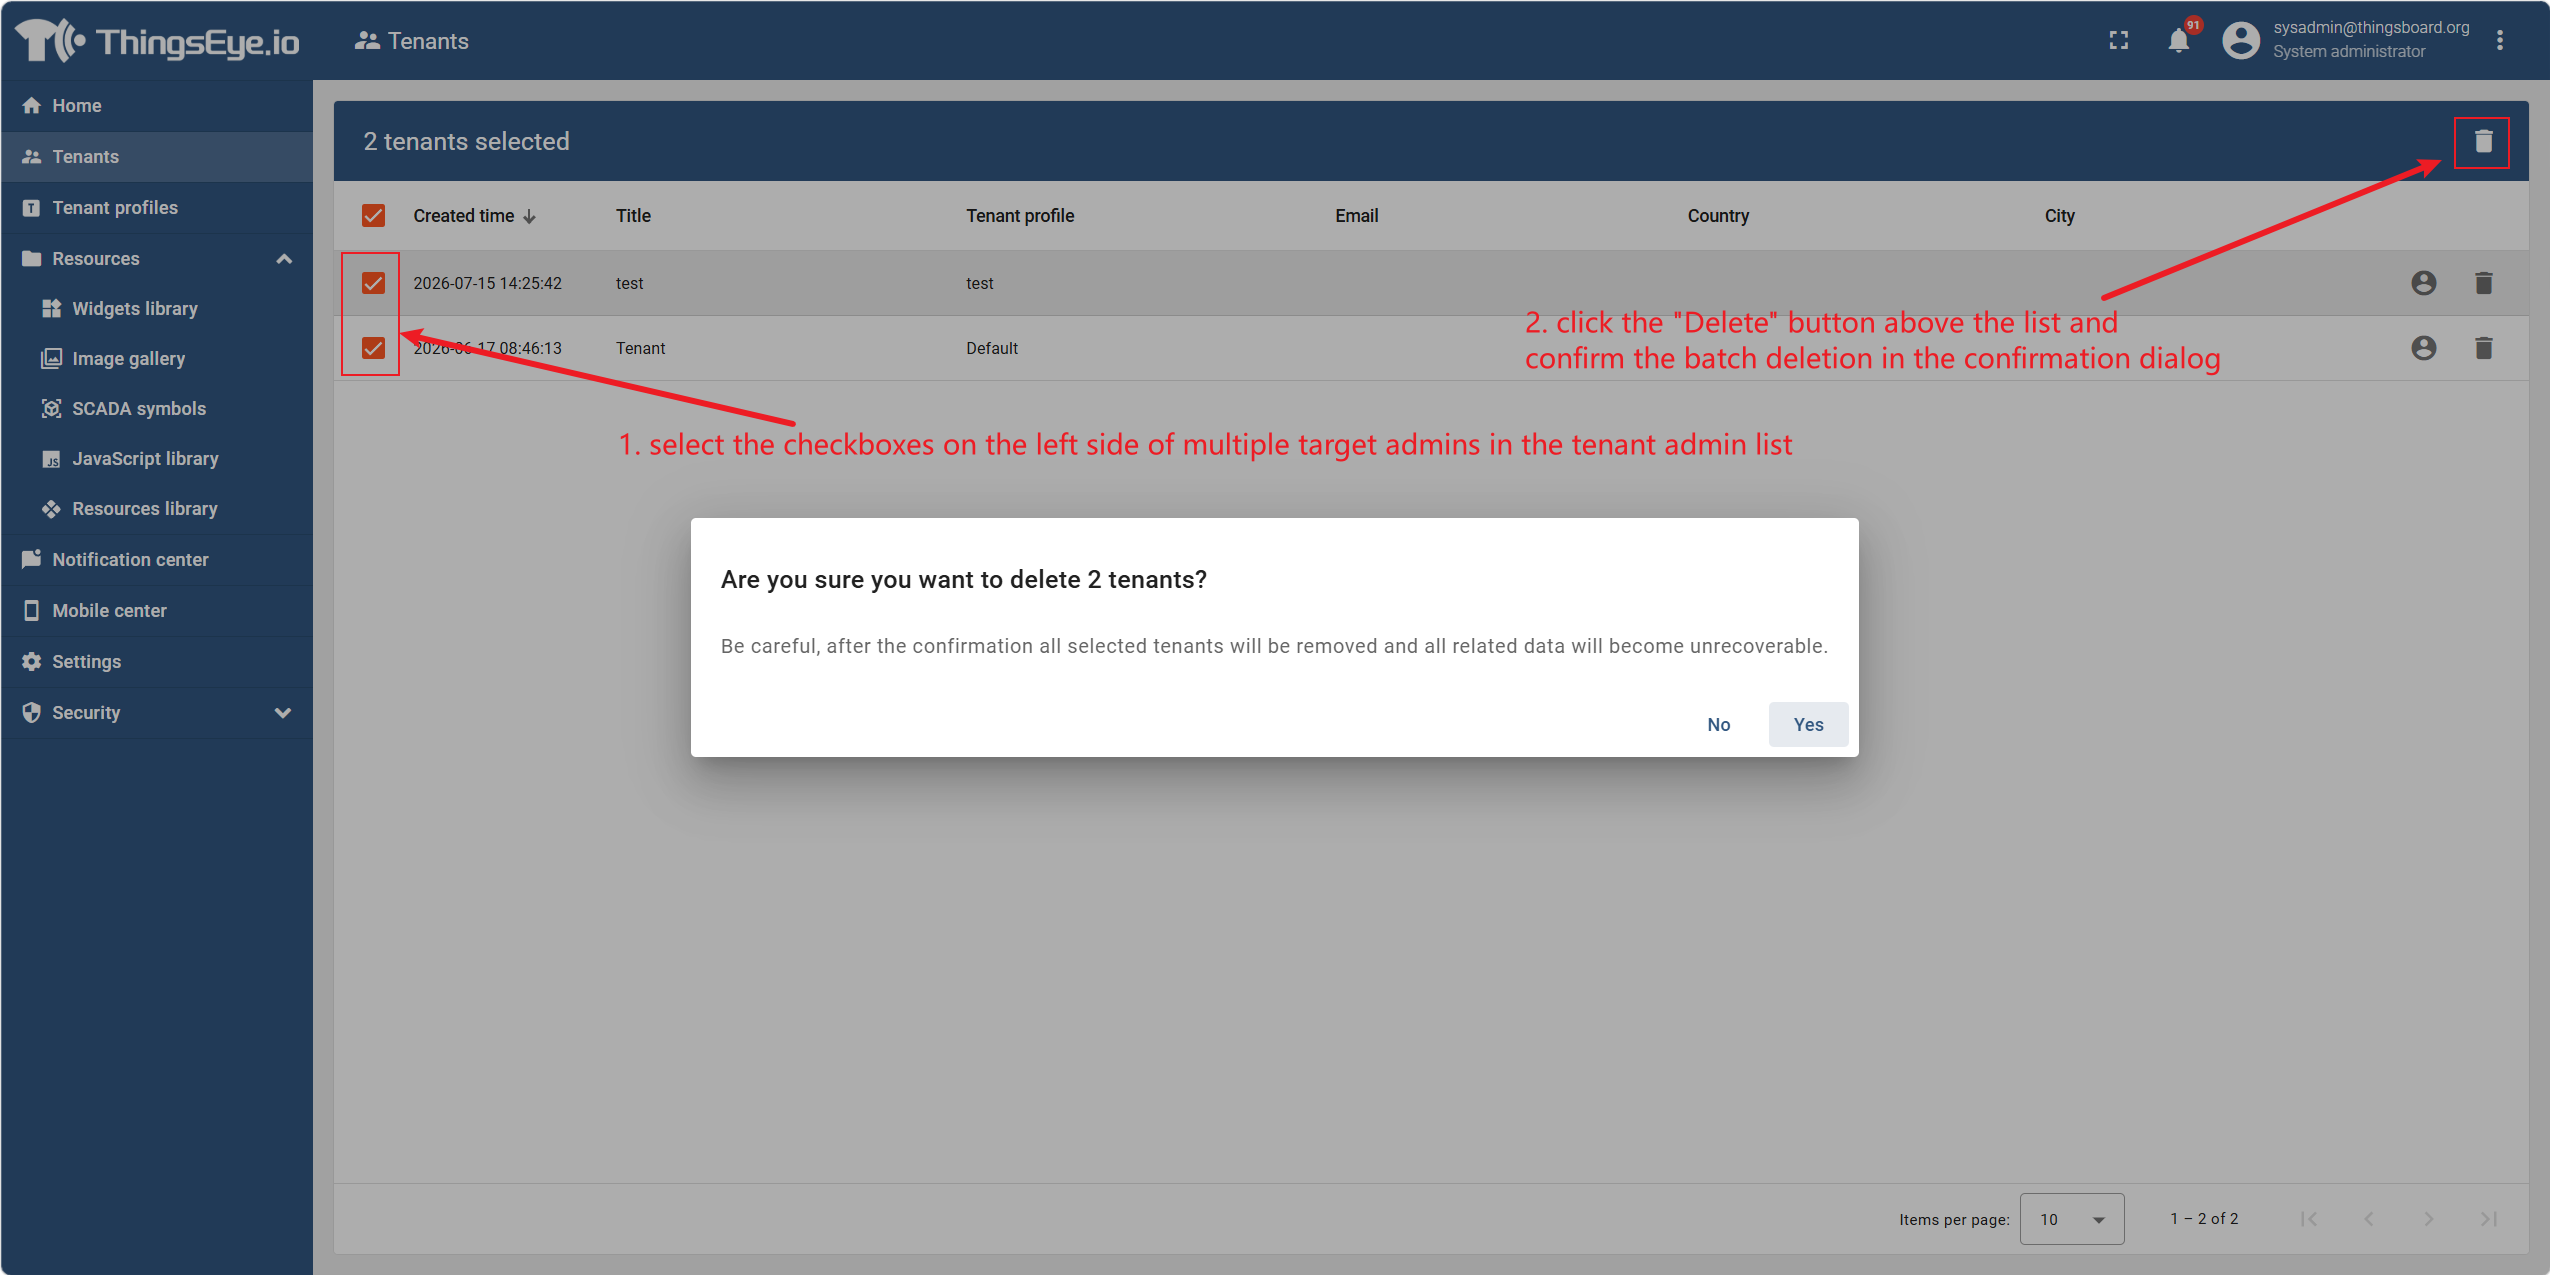
To delete multiple Tenant Administrators at once, select the checkboxes on the left side of the target administrators in the list, then click the “Delete” button above the list and confirm the bulk deletion in the dialog.
Important Considerations
- After deleting a Tenant Administrator account, all users, devices, assets, and other resources created under that account will not be deleted. These resources still belong to the tenant and can be managed by other administrators within the tenant.
- If a tenant has only one administrator and that administrator is deleted, the tenant will lose administrative privileges. Before deletion, ensure that there is at least one other active administrator under that tenant, or create a new administrator first.
- Deletion is irreversible; accounts cannot be restored after deletion and can only be re‑created.
- Audit logs associated with the deleted administrator will still be retained for future audit traceability.