Rule Chain Management
Overview
Applicable Role: Tenant Administrator.
Rule chains are the core engine for data flow and business logic processing in the ThingsEye platform. Through rule chains, Tenant Administrators can define the processing flow after device data is reported, including data parsing, filtering, transformation, persistence storage, alarm triggering, and external system integration, building automated data processing pipelines for different business scenarios.
Important Note: The built‑in root rule chain is essential for platform operation and cannot be deleted. End‑Users do not have permission to create, edit, or delete rule chains. Changes to rule chains take effect immediately; it is recommended to export a backup before modification.
1. Create a Rule Chain
Procedure
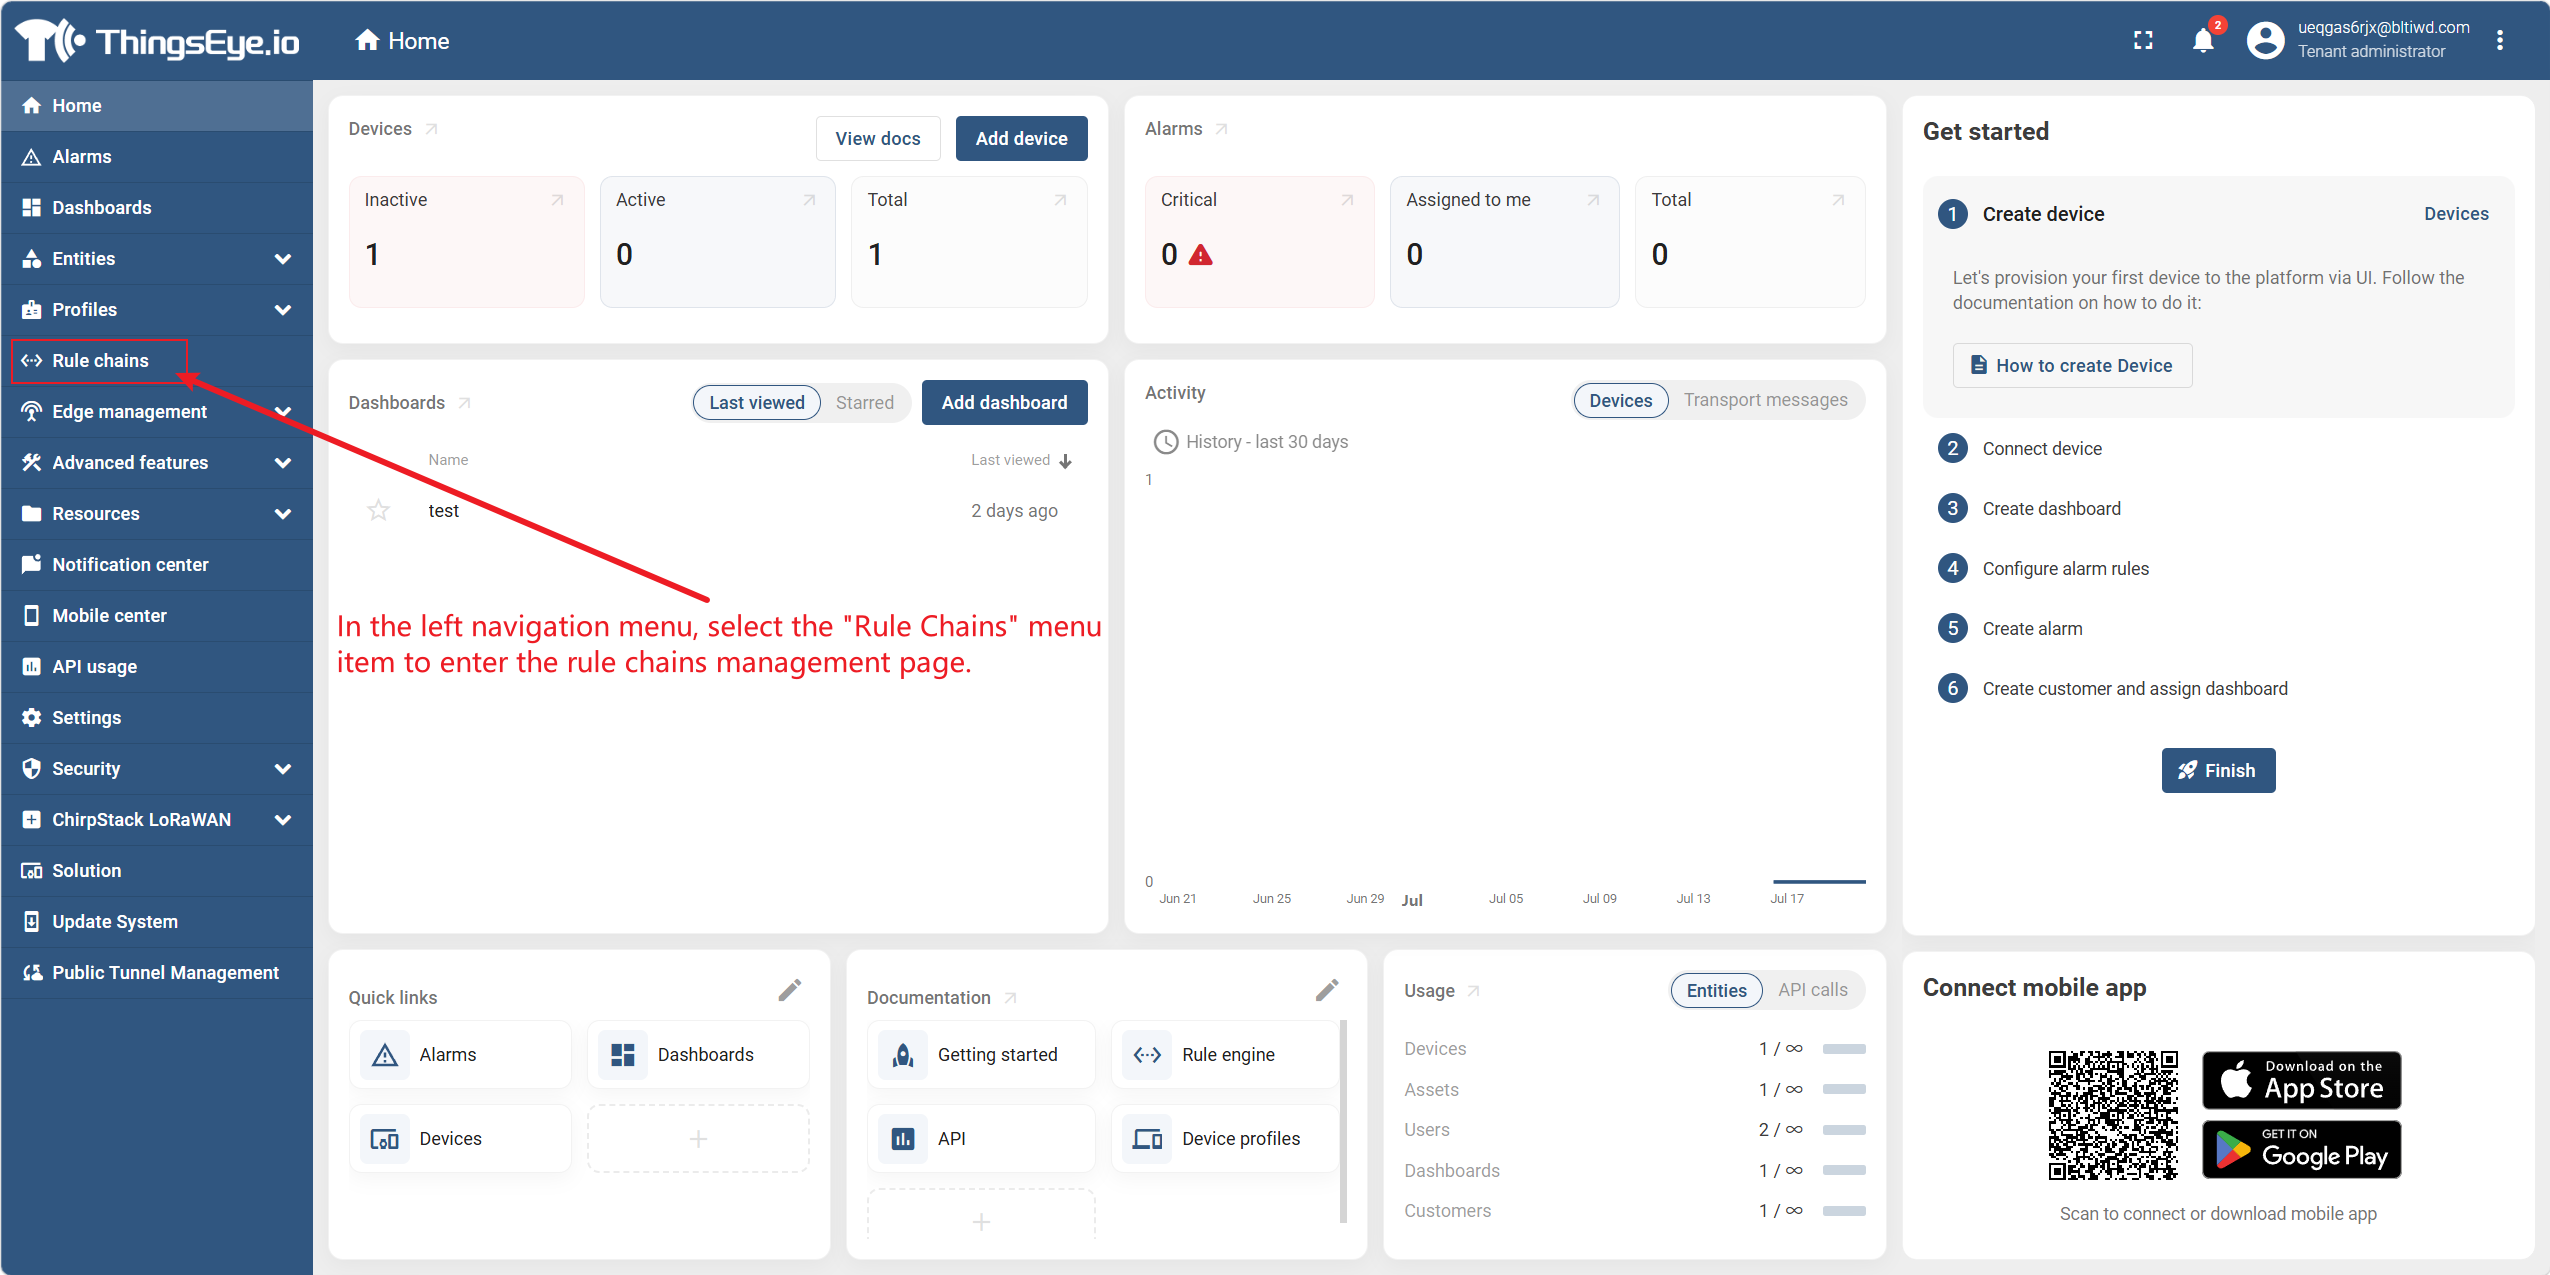
Step 1: Go to the rule chain management page
Select the "Rule Chains" menu item from the left navigation menu to go to the rule chain management page.
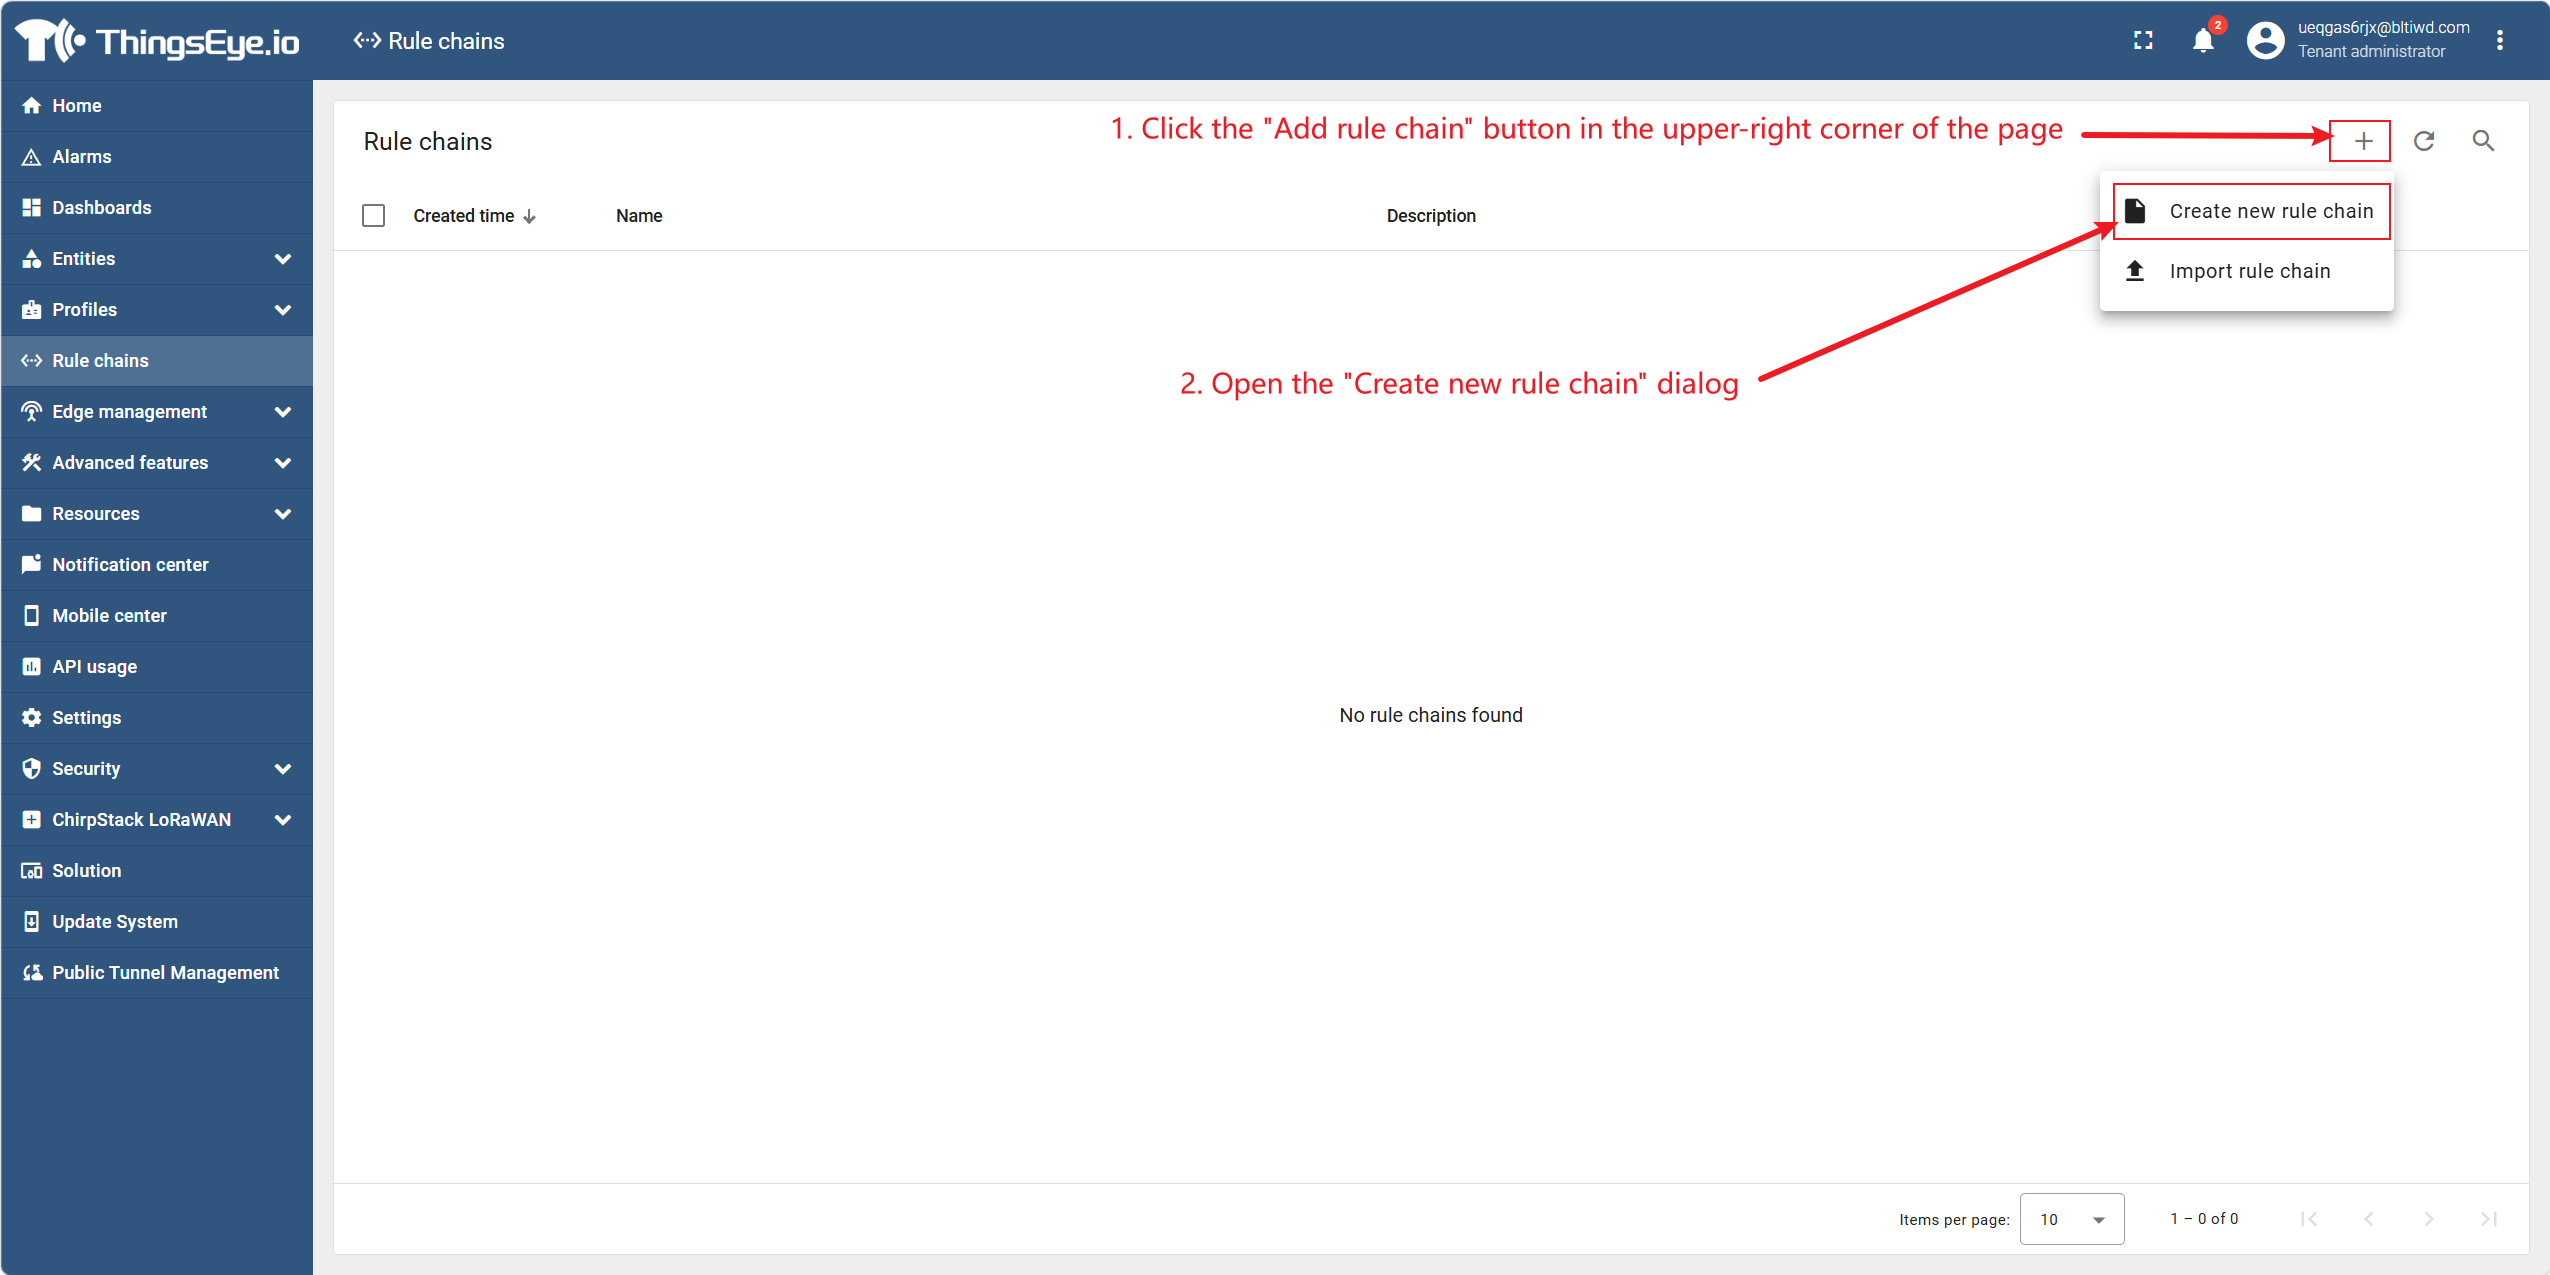
Step 2: Create a new rule chain
Click the "Create New Rule Chain" button in the upper‑right corner of the page to open the "Create New Rule Chain" dialog.
Step 3: Fill in the basic properties of the rule chain
Fill in the following fields in the dialog:
| Field | Description | Required | Example |
|---|---|---|---|
| Name | The name of the rule chain; it is recommended to use a name with business meaning for easy identification | Yes | Device Data Processing Rule Chain |
| Description | A brief description of the rule chain's function | No | Parses and stores temperature & humidity device data |
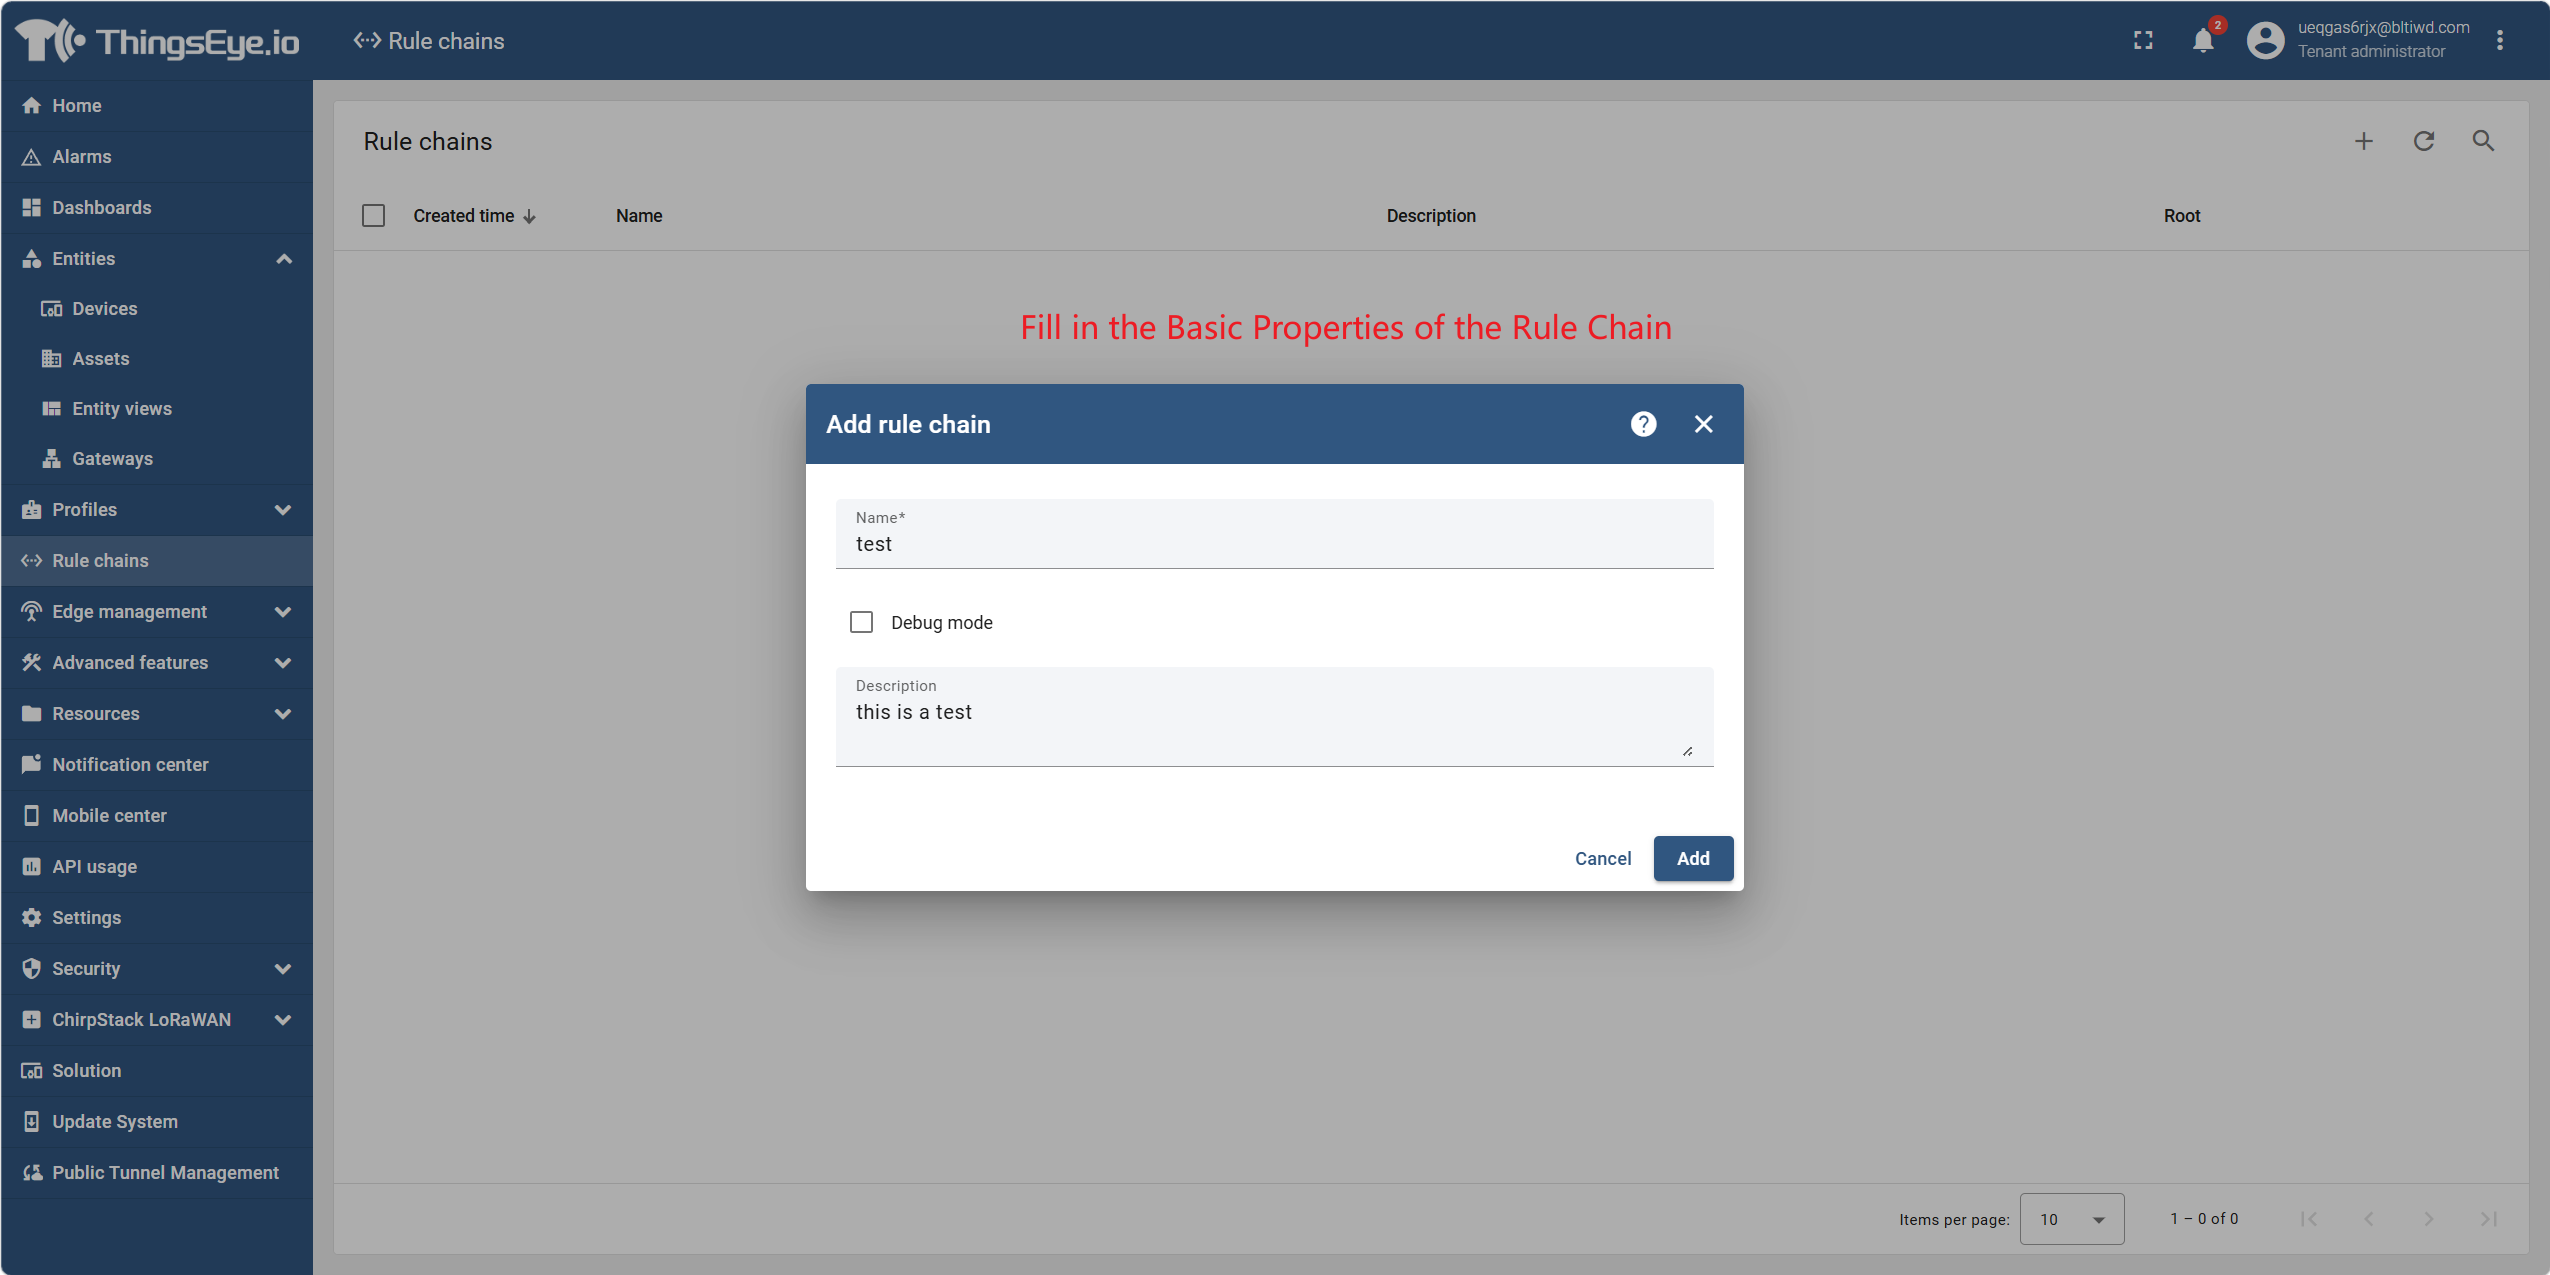
Step 4: Submit the creation
After filling in the required fields, click the "Add" button at the bottom of the dialog to complete the creation. The newly created rule chain will appear in the rule chain list.
2. Configure Rule Nodes
Procedure
Step 1: Open the rule chain editor
On the rule chain management page, click the row of the target rule chain to open the rule chain editor. The editor presents a visual canvas with the node panel on the left and the workspace in the center.
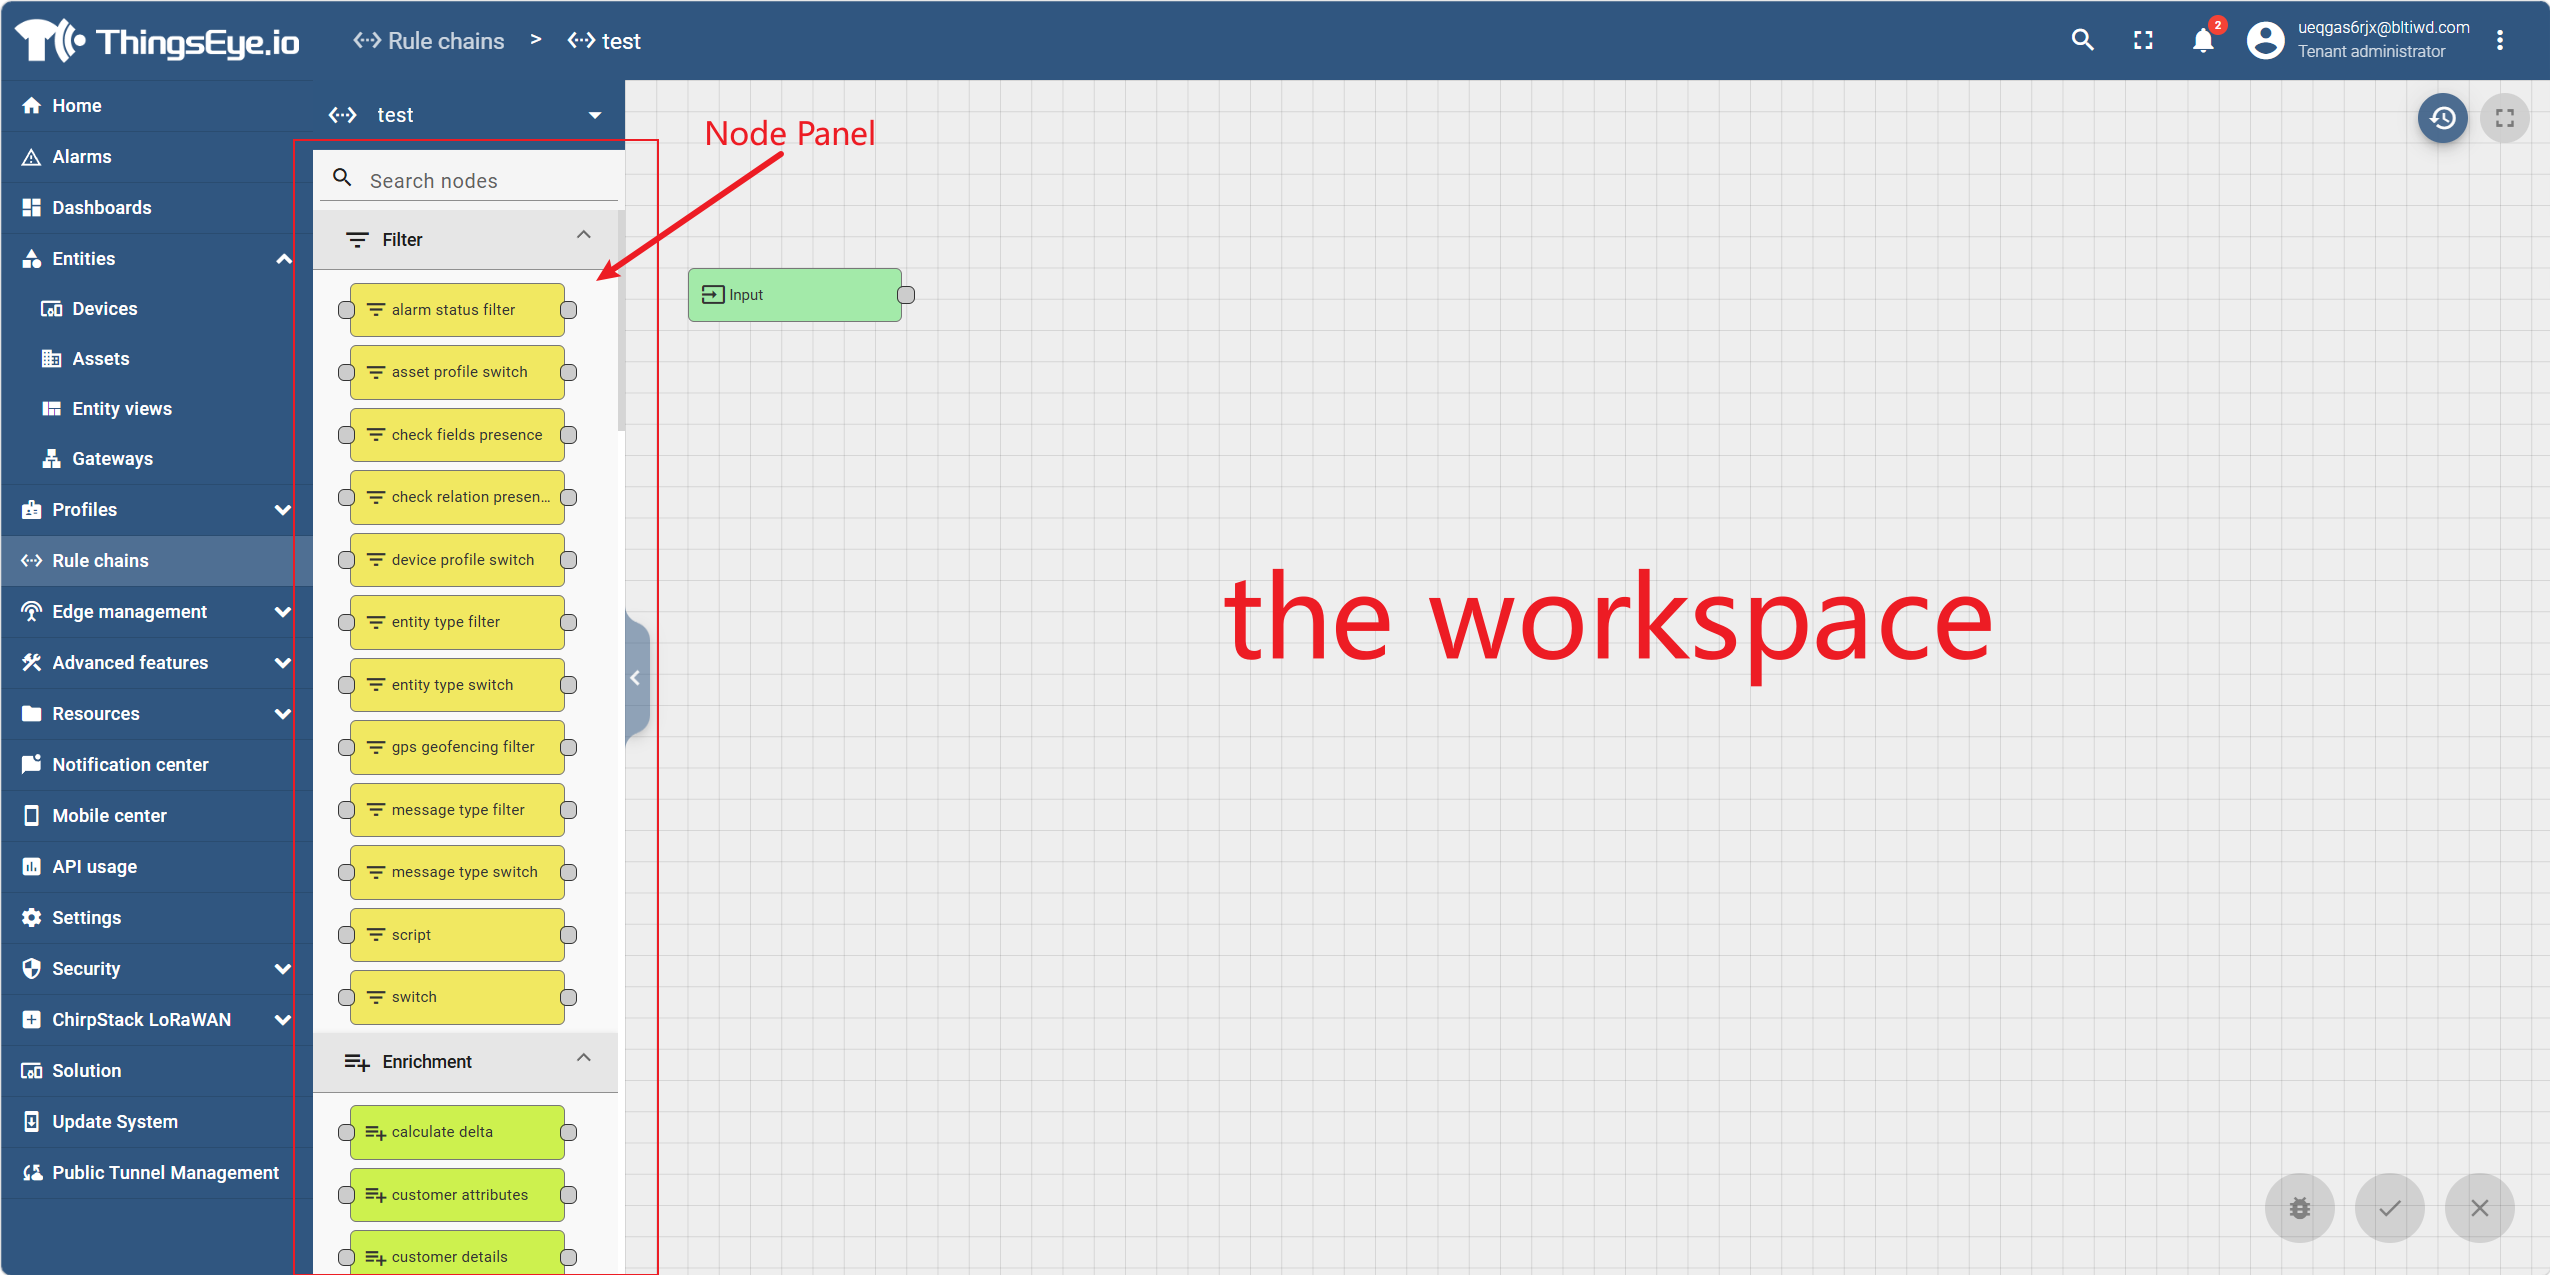
Step 2: Add a rule node
In the left node panel, browse the required node type by category, drag it to the canvas and release it; the node configuration window will open automatically.

The built‑in rule nodes in ThingsEye are mainly divided into the following categories:
| Category | Description |
|---|---|
| Filter | Determines whether a message continues to flow based on conditions (e.g., Script Filter, Message Type Filter) |
| Transformation | Modifies the content or structure of a message (e.g., Script Transformation, To JSON) |
| Action | Performs specific operations (e.g., Save Time Series, Create Alarm, Send Email) |
| External | Integrates with third‑party systems (e.g., MQTT, Kafka, RabbitMQ) |
| Flow | Controls message routing (e.g., Message Type Switch, Rule Chain) |
Step 3: Configure rule node parameters
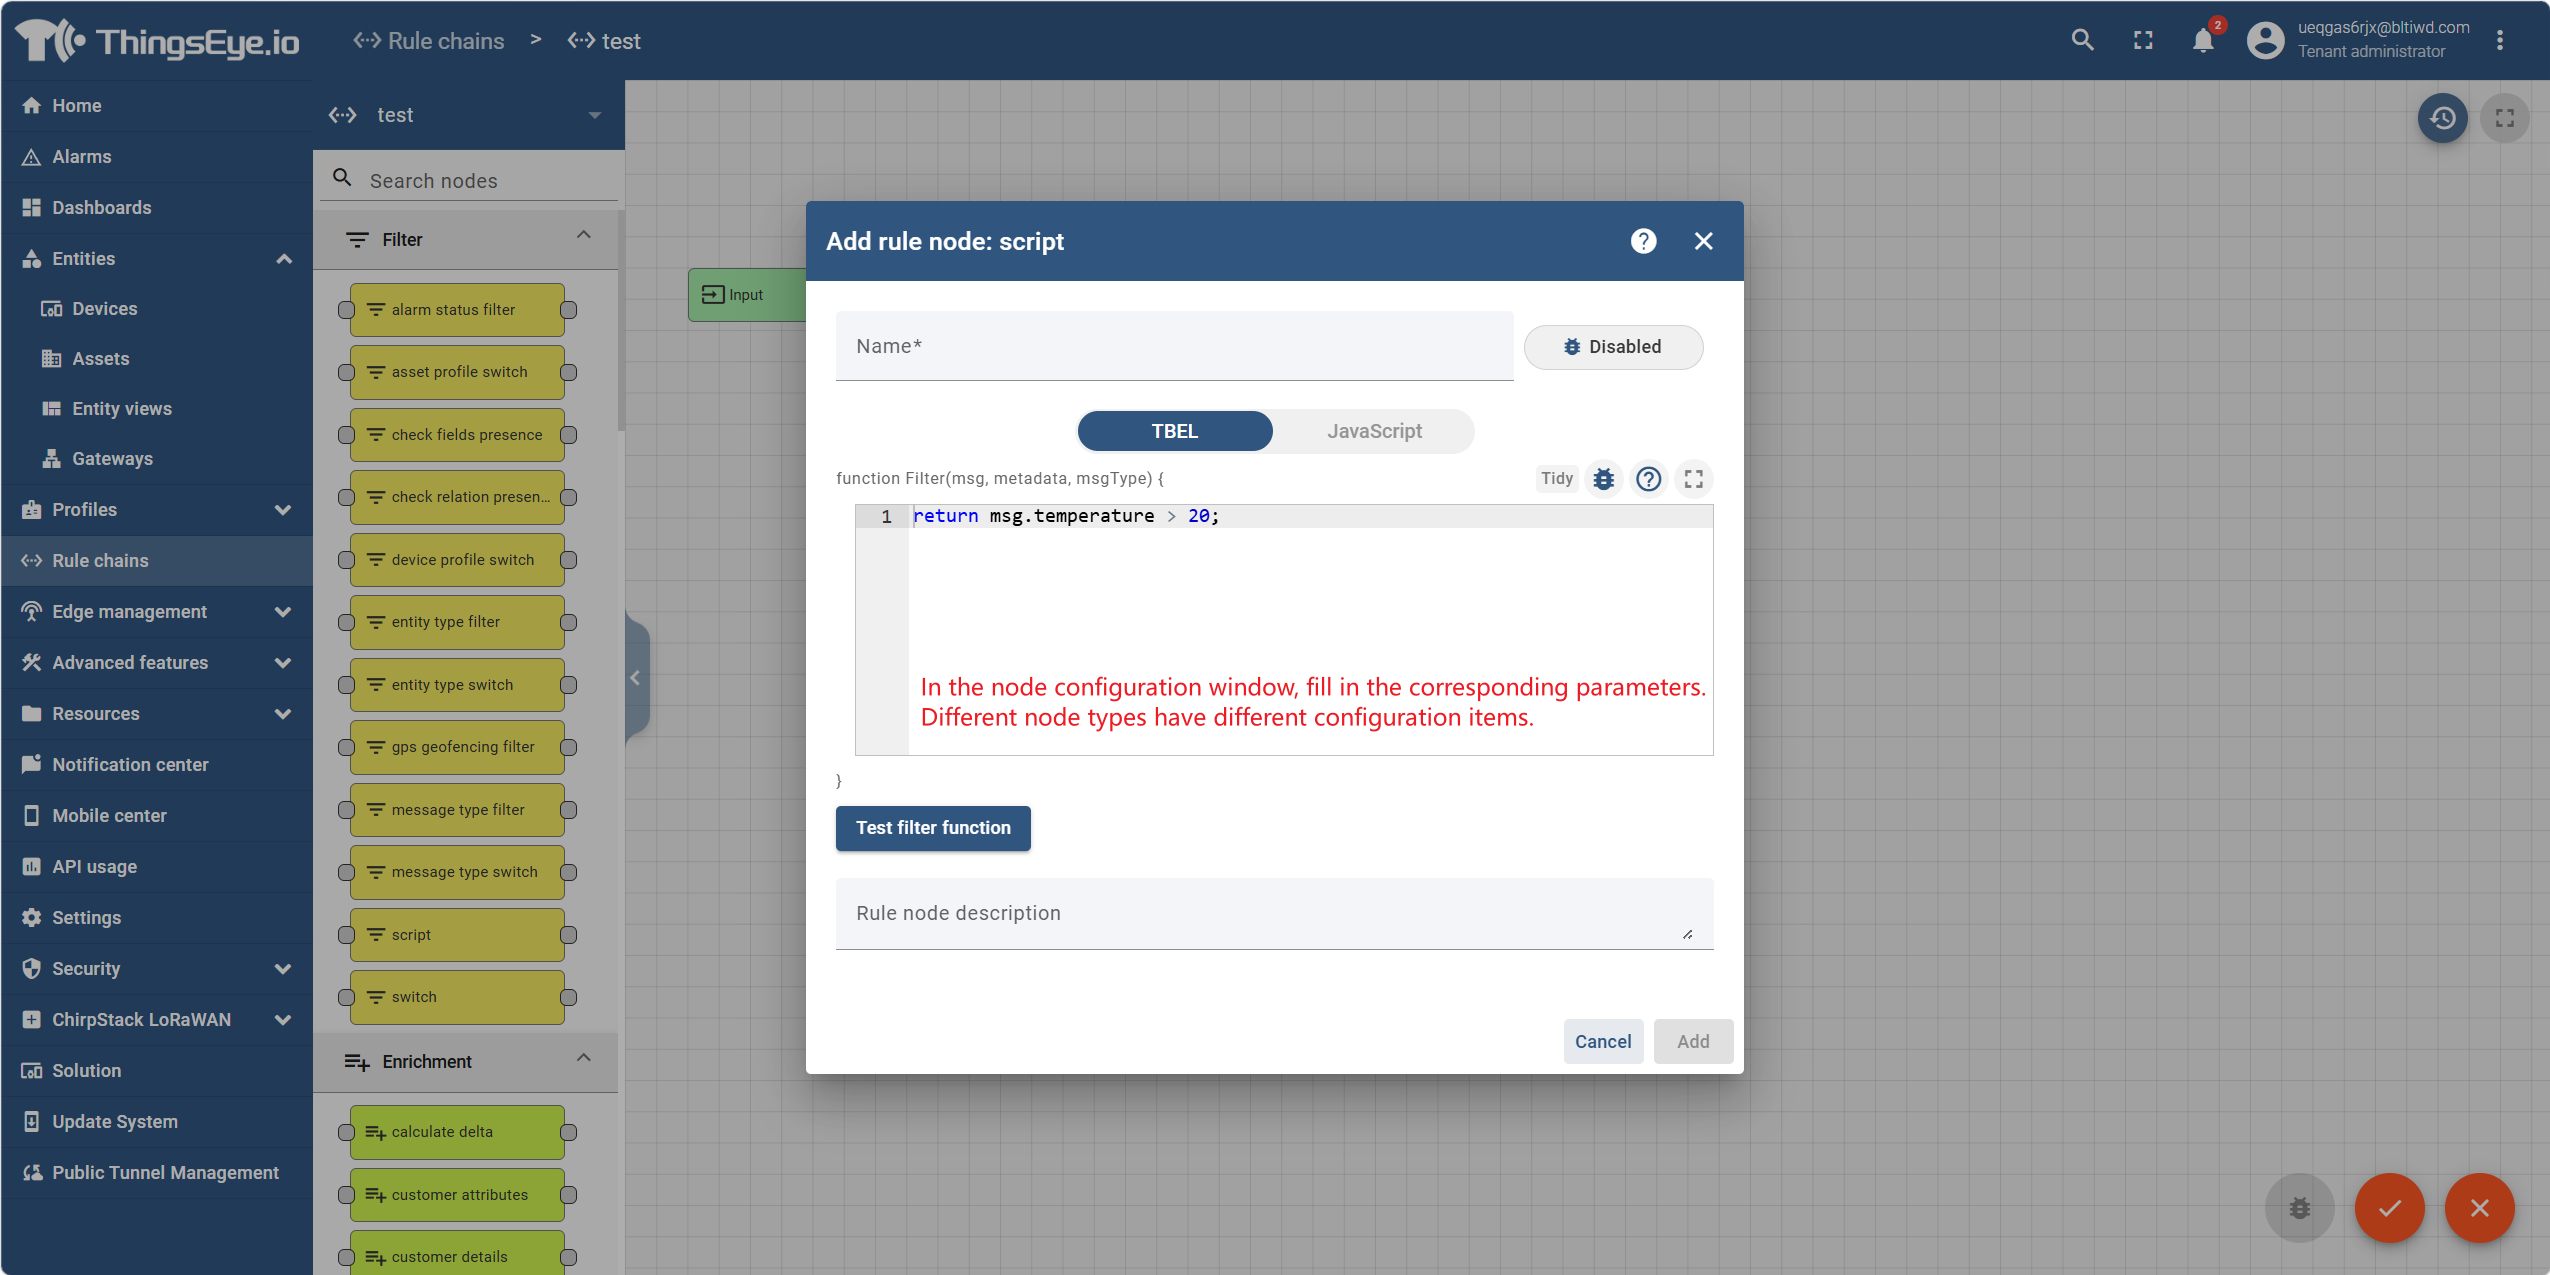
Fill in the corresponding parameters in the node configuration window. Configuration items vary by node type; the "Script Filter" node is used as an example:
| Field | Description | Required | Example |
|---|---|---|---|
| Name | The name displayed on the canvas; it is recommended to use a name with clear business meaning | Yes | Temperature Threshold Filter |
| Script Language | Select TBEL (ThingsEye Expression Language) or JavaScript. TBEL has higher execution efficiency and is recommended as the first choice | Yes | TBEL |
| Script | The script that defines the filtering condition. Returns True to route via the True relation, False to route via the False relation | Yes | return msg.temperature > 30; |
Note: In ThingsEye, TBEL has higher execution efficiency than JavaScript. For simple conditional evaluation scenarios, it is recommended to use TBEL first.
Step 4: Connect rule nodes
Click the grey circle on the right side of the source node, drag it to the grey circle on the left side of the target node, and release to establish a connection between the nodes. If the source node supports multiple relation types (e.g., Script Filter supports True/False, Save Time Series supports Success/Failure), a relation selection dialog will automatically pop up upon release; select the desired relation type and click the "Add" button to confirm.

The output relation types of each node depend on the node type and its execution result, for example:
- Script Filter node: Outputs True or False based on the script return value
- Create Alarm node: Outputs Created, Updated, or Failure based on the operation result
- Clear Alarm node: Outputs Cleared or False based on the operation result
- Save Time Series node: Outputs Success or Failure
Note: If the Failure relation is not connected to any downstream node for processing, the message will be marked as processing failure. It is recommended to connect the Failure relation to a log node for troubleshooting.
Step 5: Save the rule chain
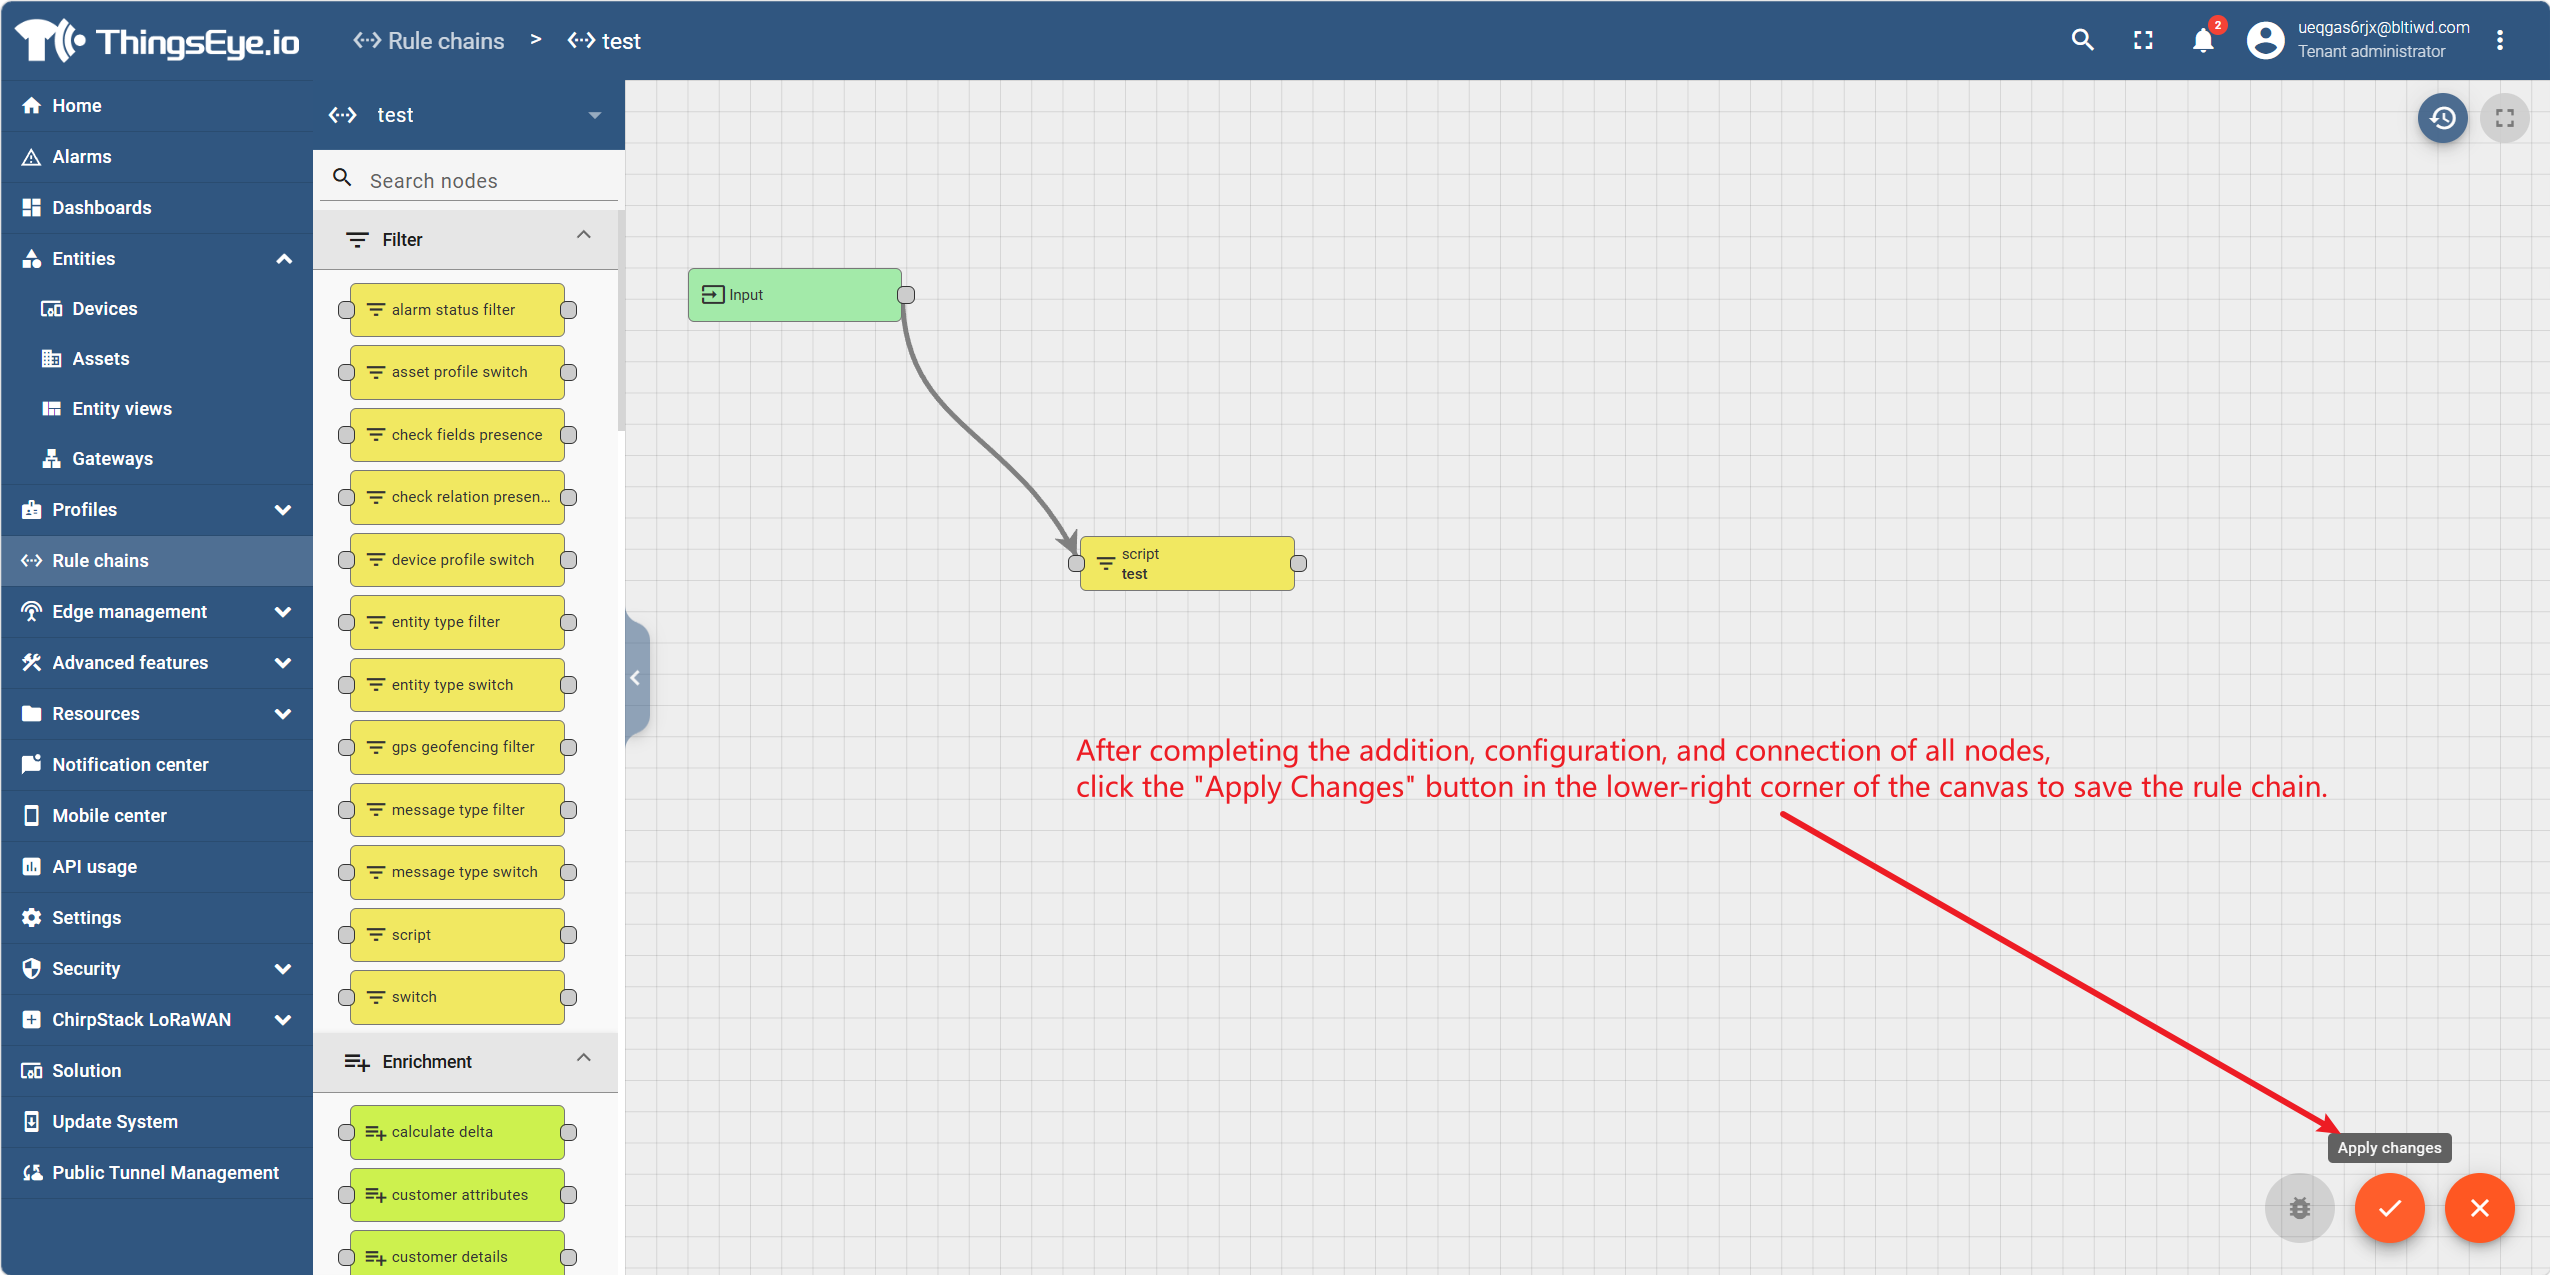
After completing the addition, configuration, and connection of all nodes, click the "Apply Changes" button in the lower‑right corner of the canvas to save the rule chain.
Common Node Configuration Reference
| Node Type | Purpose | Key Configuration |
|---|---|---|
| Script Filter | Filters messages based on script conditions | The script return value determines True/False routing |
| Script Transformation | Modifies message payload or metadata | Returns the modified msg, metadata, and msgType objects |
| Save Time Series | Saves telemetry data to the database | No additional configuration required |
| Create Alarm | Creates or updates an alarm | Alarm type, severity level, alarm details script |
| Clear Alarm | Clears an existing alarm | The alarm type must match the one configured in the Create Alarm node |
| Message Type Switch | Routes by message type | Select the message types to route; unselected types go to the Other chain |
| Rule Chain | Forwards messages to another rule chain | Select the target rule chain |
3. Assign a Rule Chain to a Device or Asset
Procedure
Step 1: Assign a rule chain via a device profile
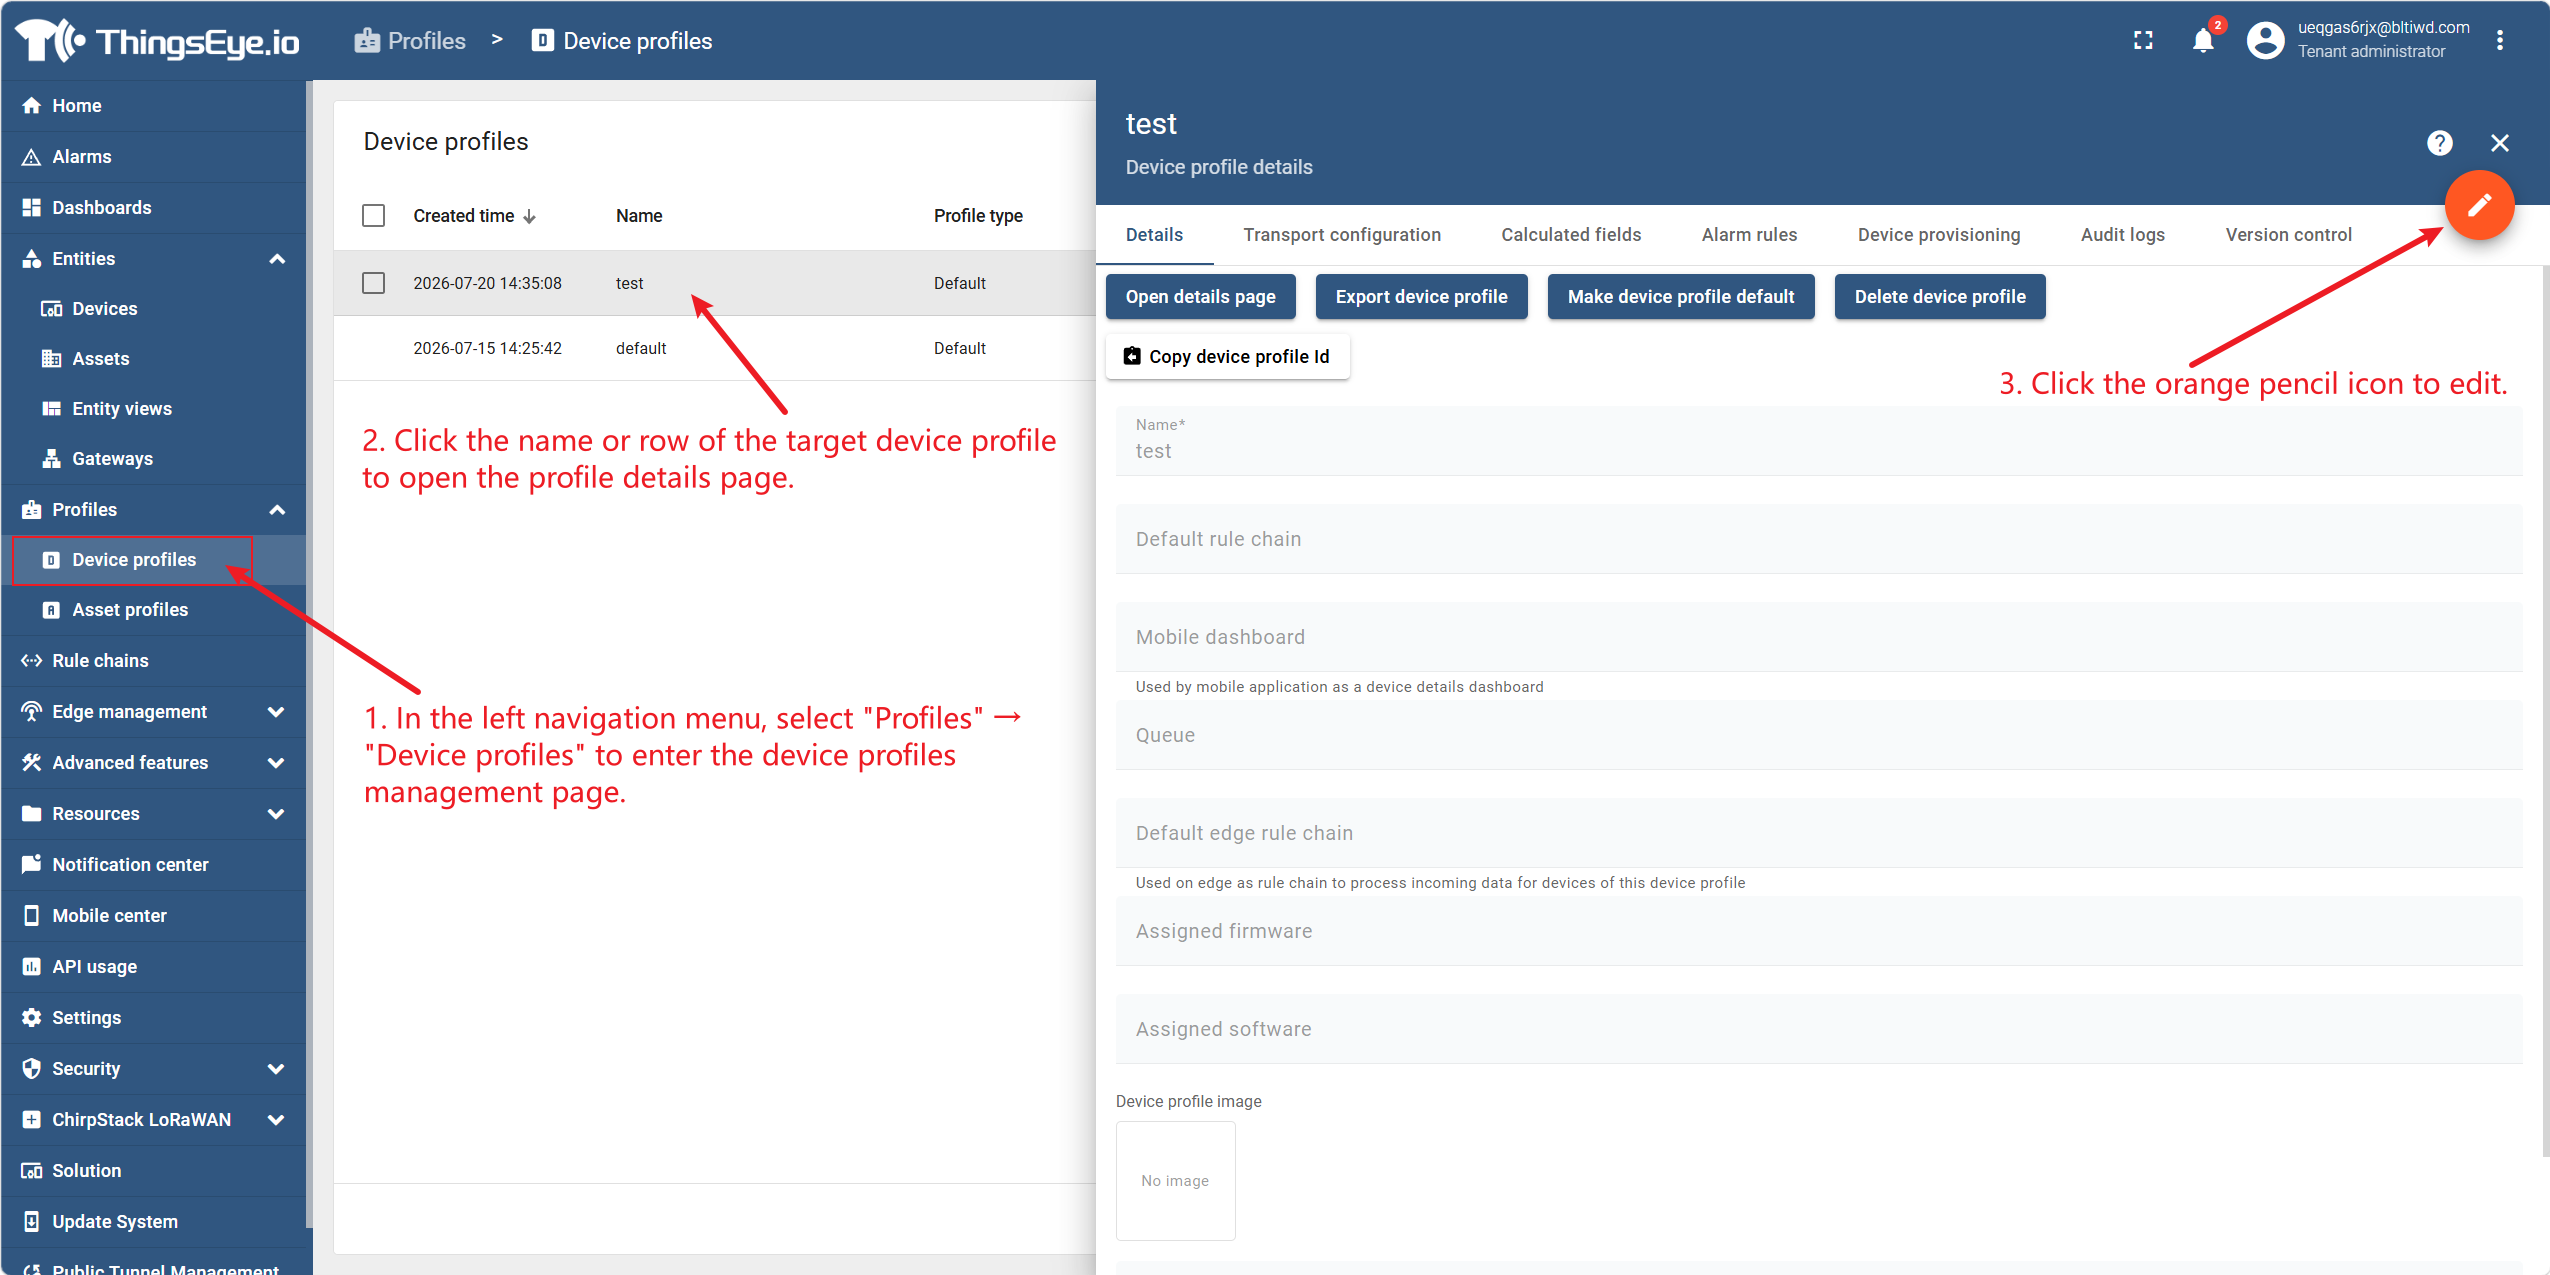
In the left navigation menu, select "Profiles" → "Device Profiles" to go to the device profile management page.
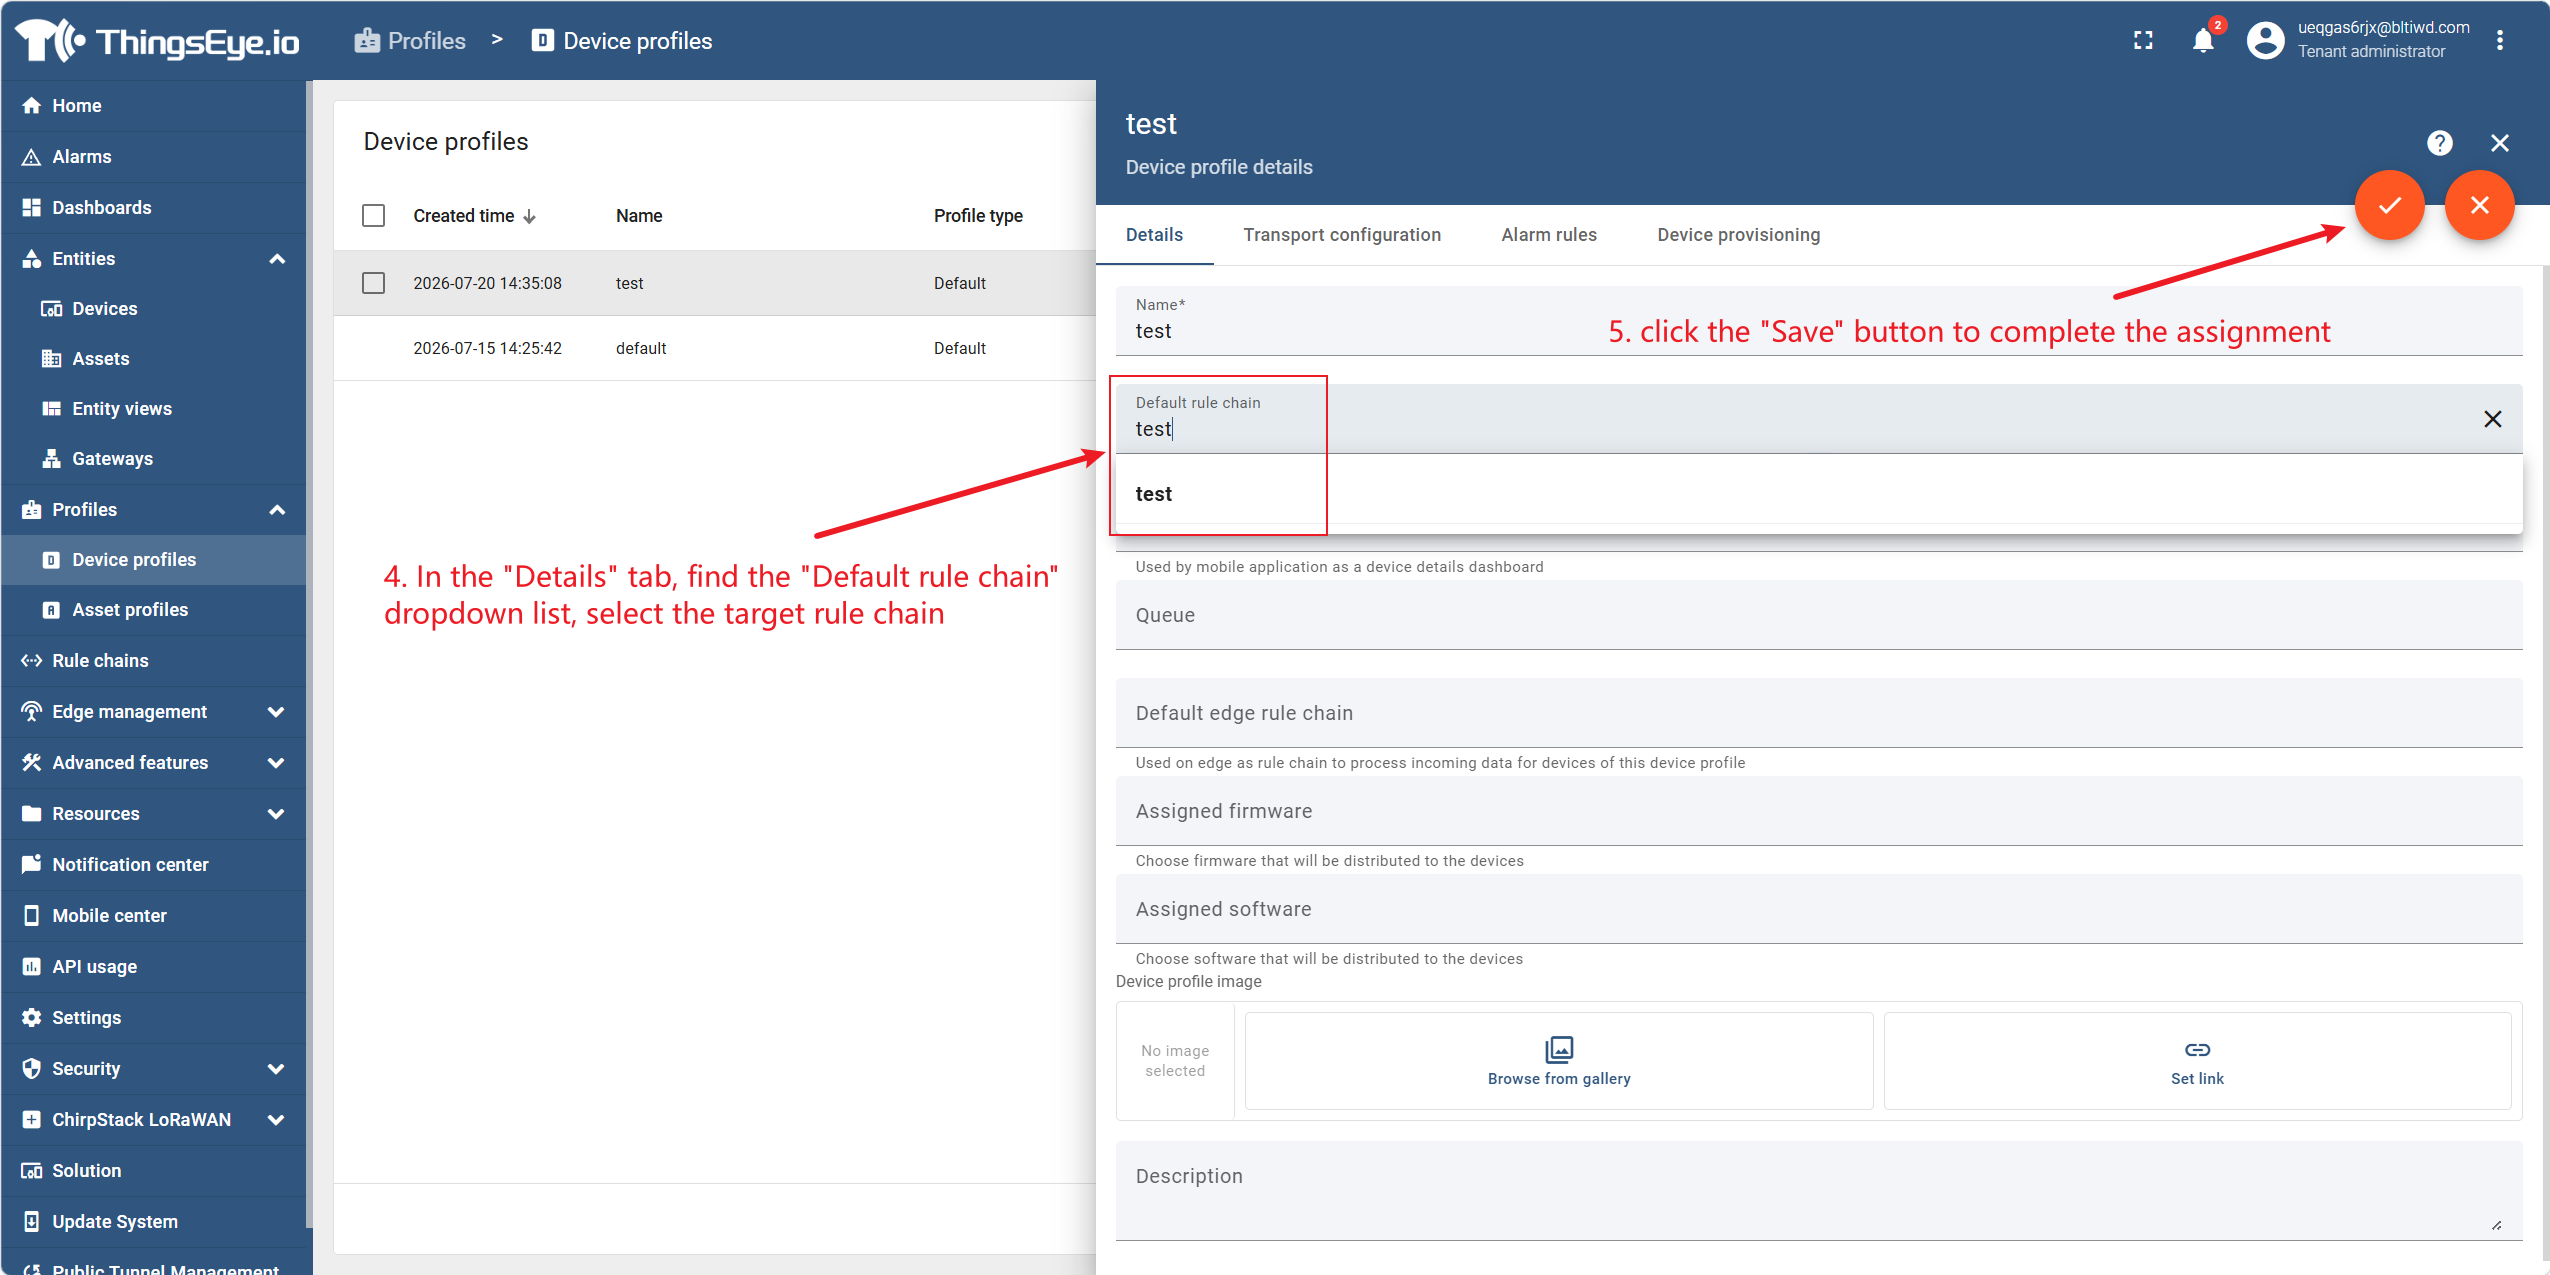
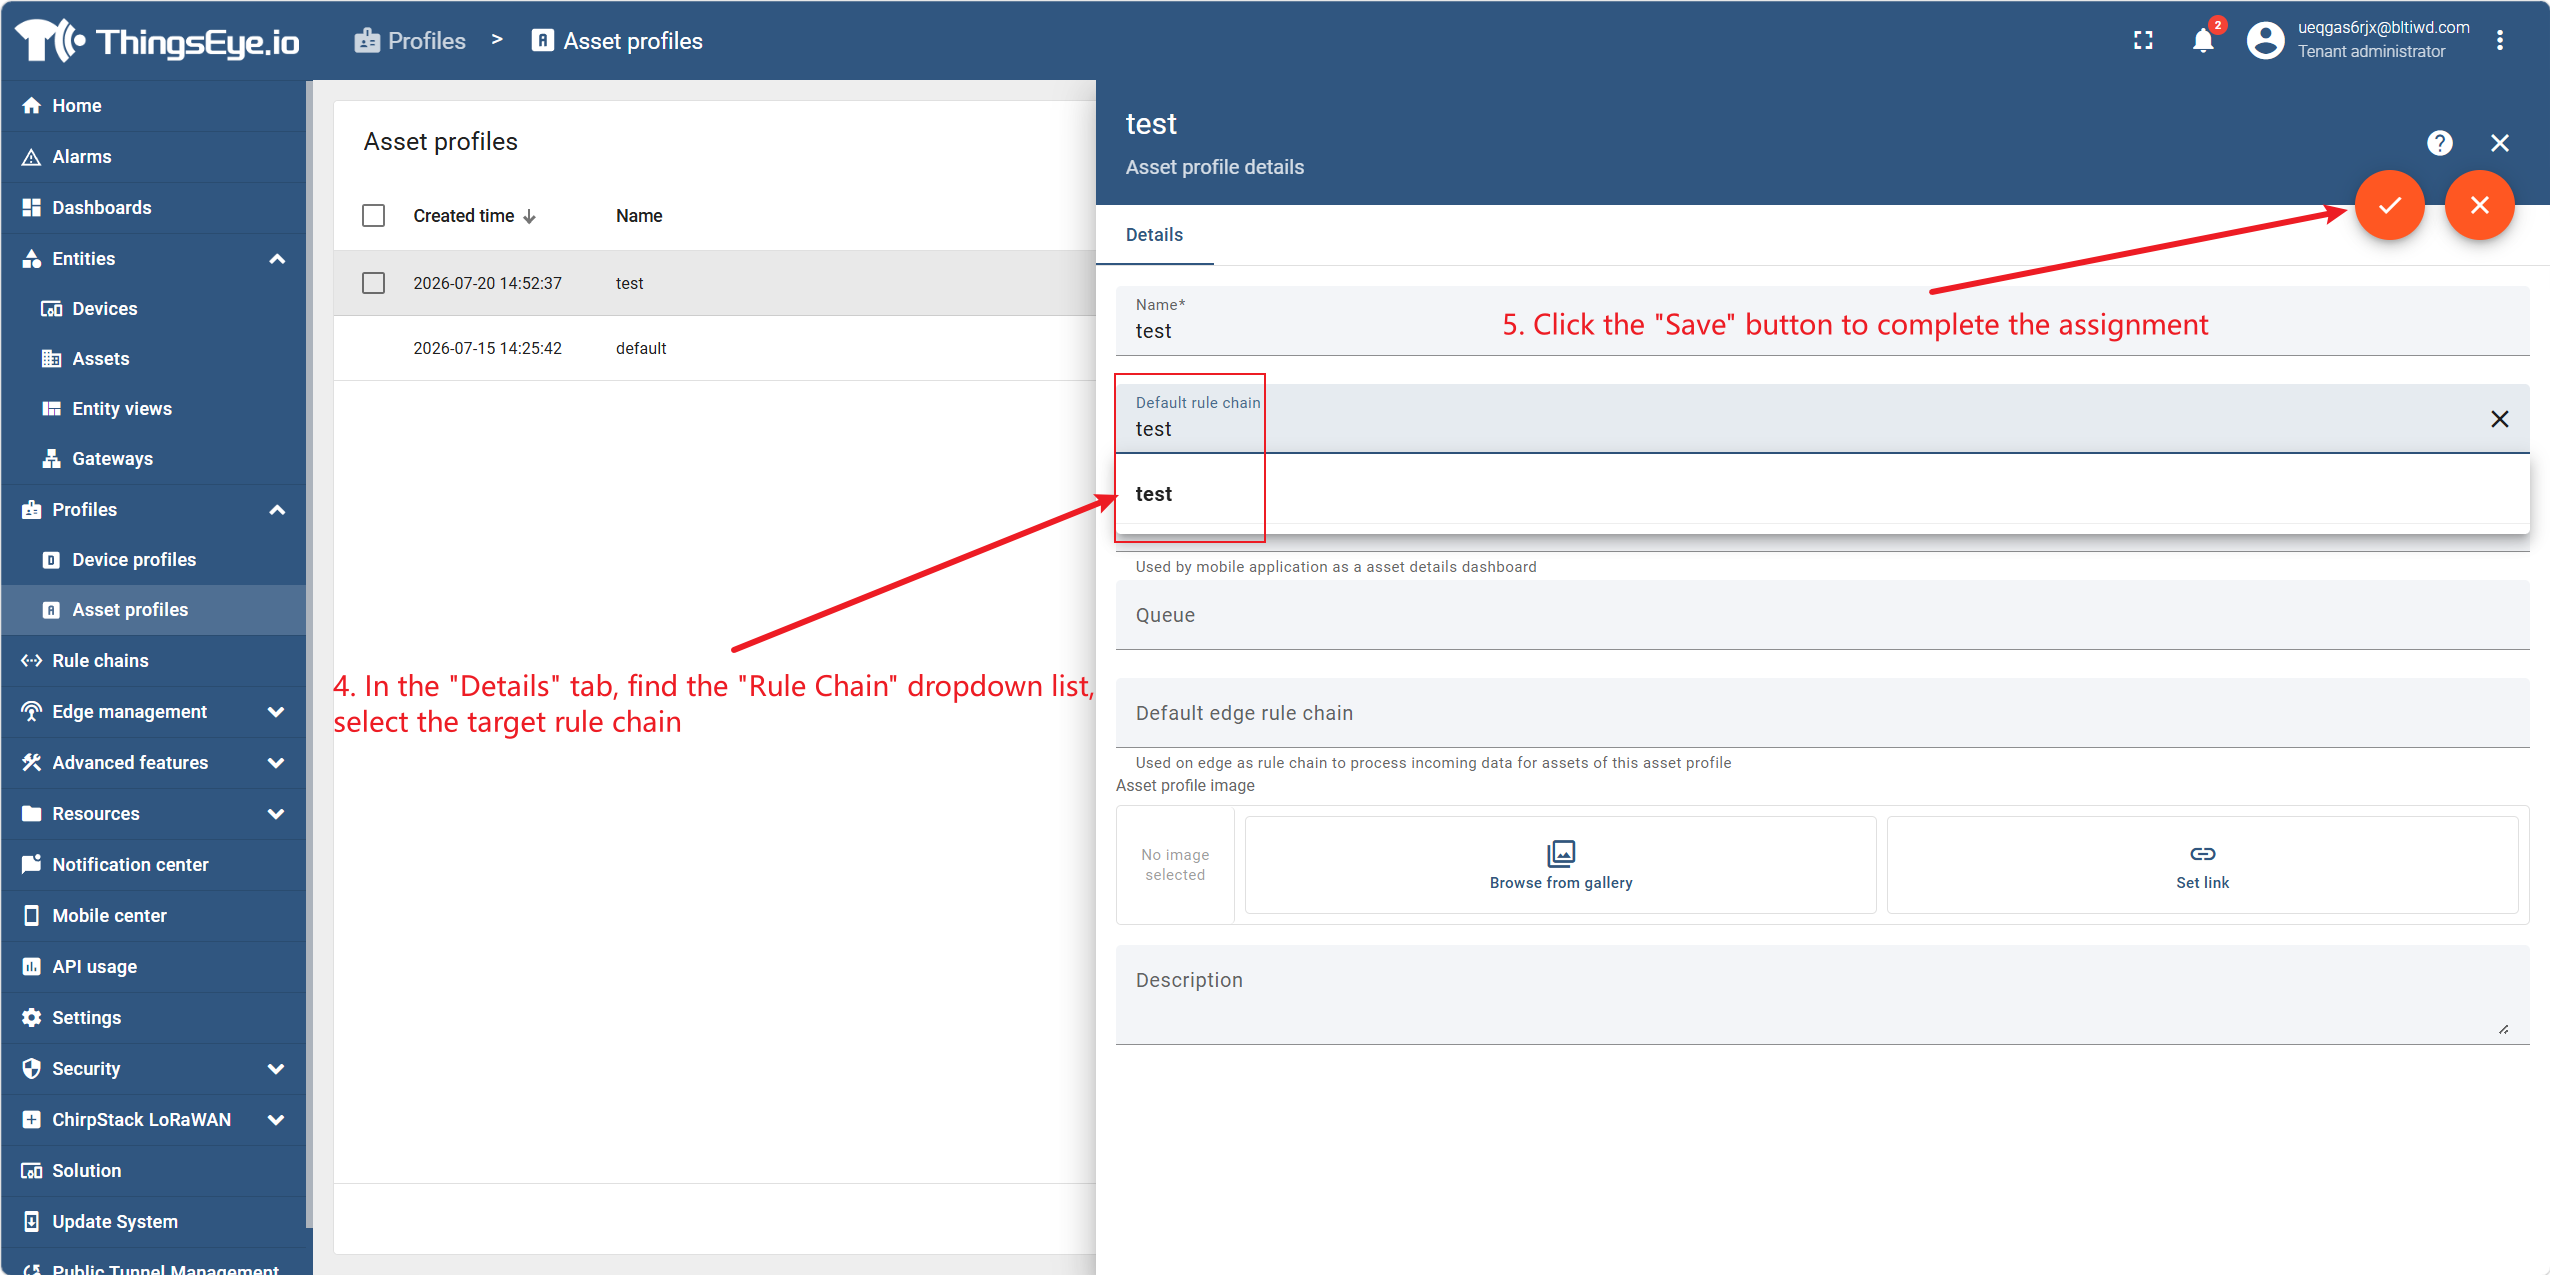
Click the name or row of the target device profile to open the profile details page. In the "Details" tab, find the "Default Rule Chain" dropdown list, select the target rule chain, and click the "Save" button to complete the assignment.
Step 2: Assign a rule chain via an asset profile
In the left navigation menu, select "Profiles" → "Asset Profiles" to go to the asset profile management page.
Click the name or row of the target asset profile to open the profile details page. In the "Details" tab, find the "Rule Chain" dropdown list, select the target rule chain, and click the "Save" button to complete the assignment.

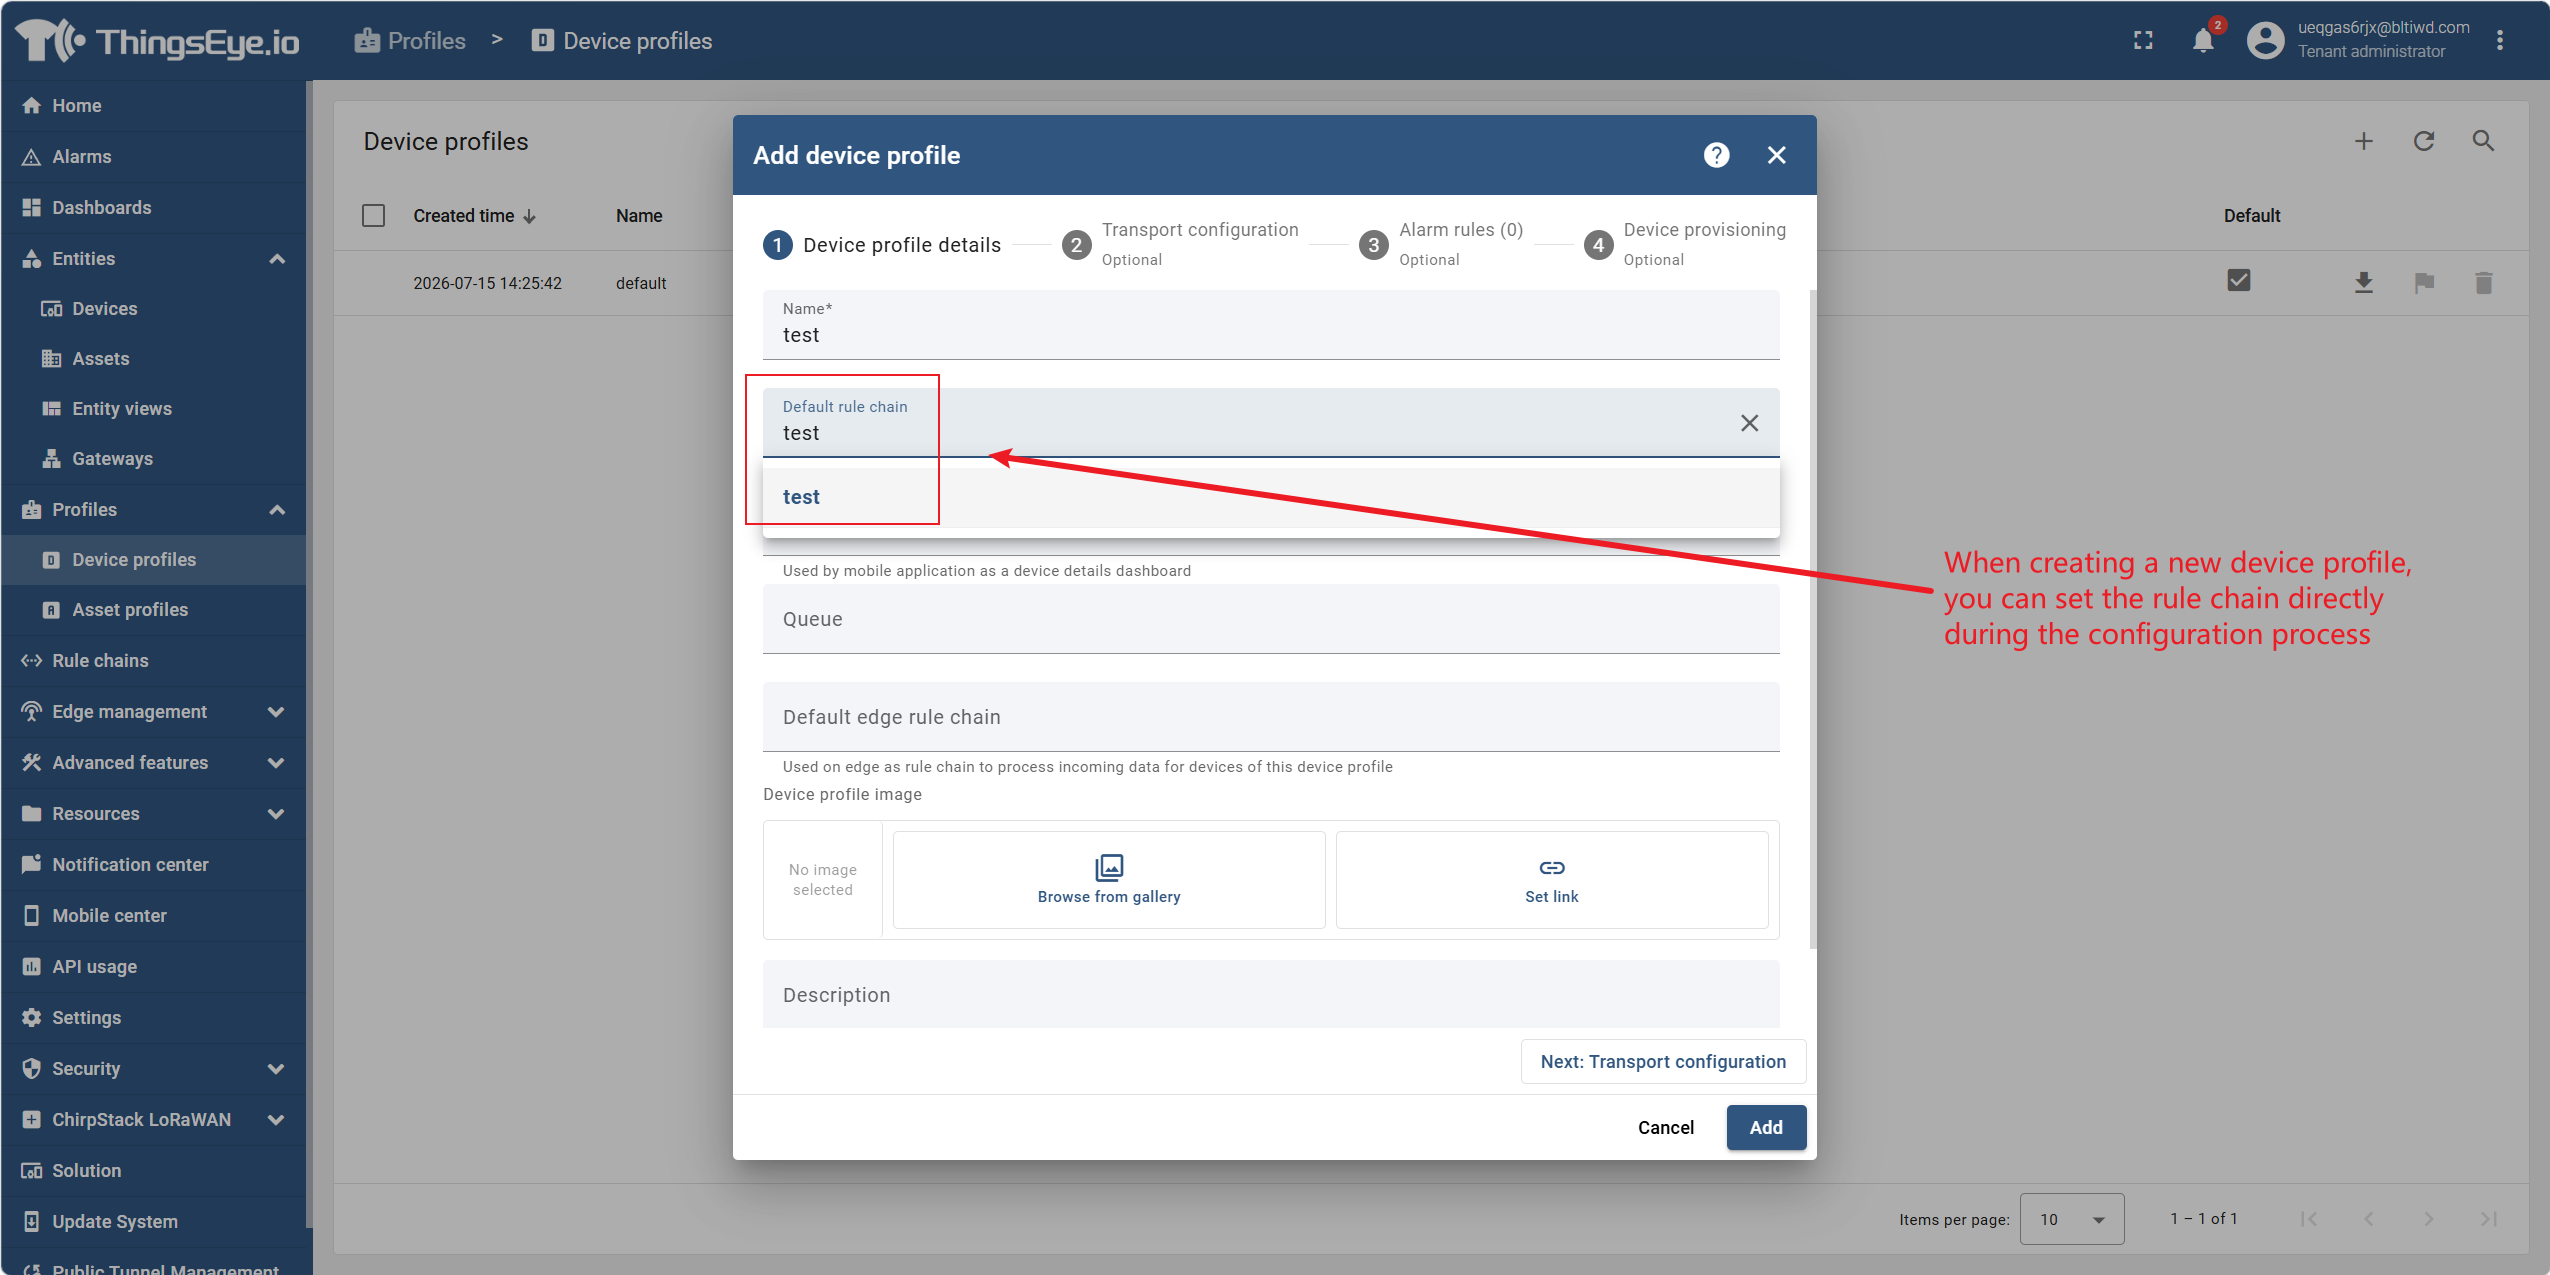
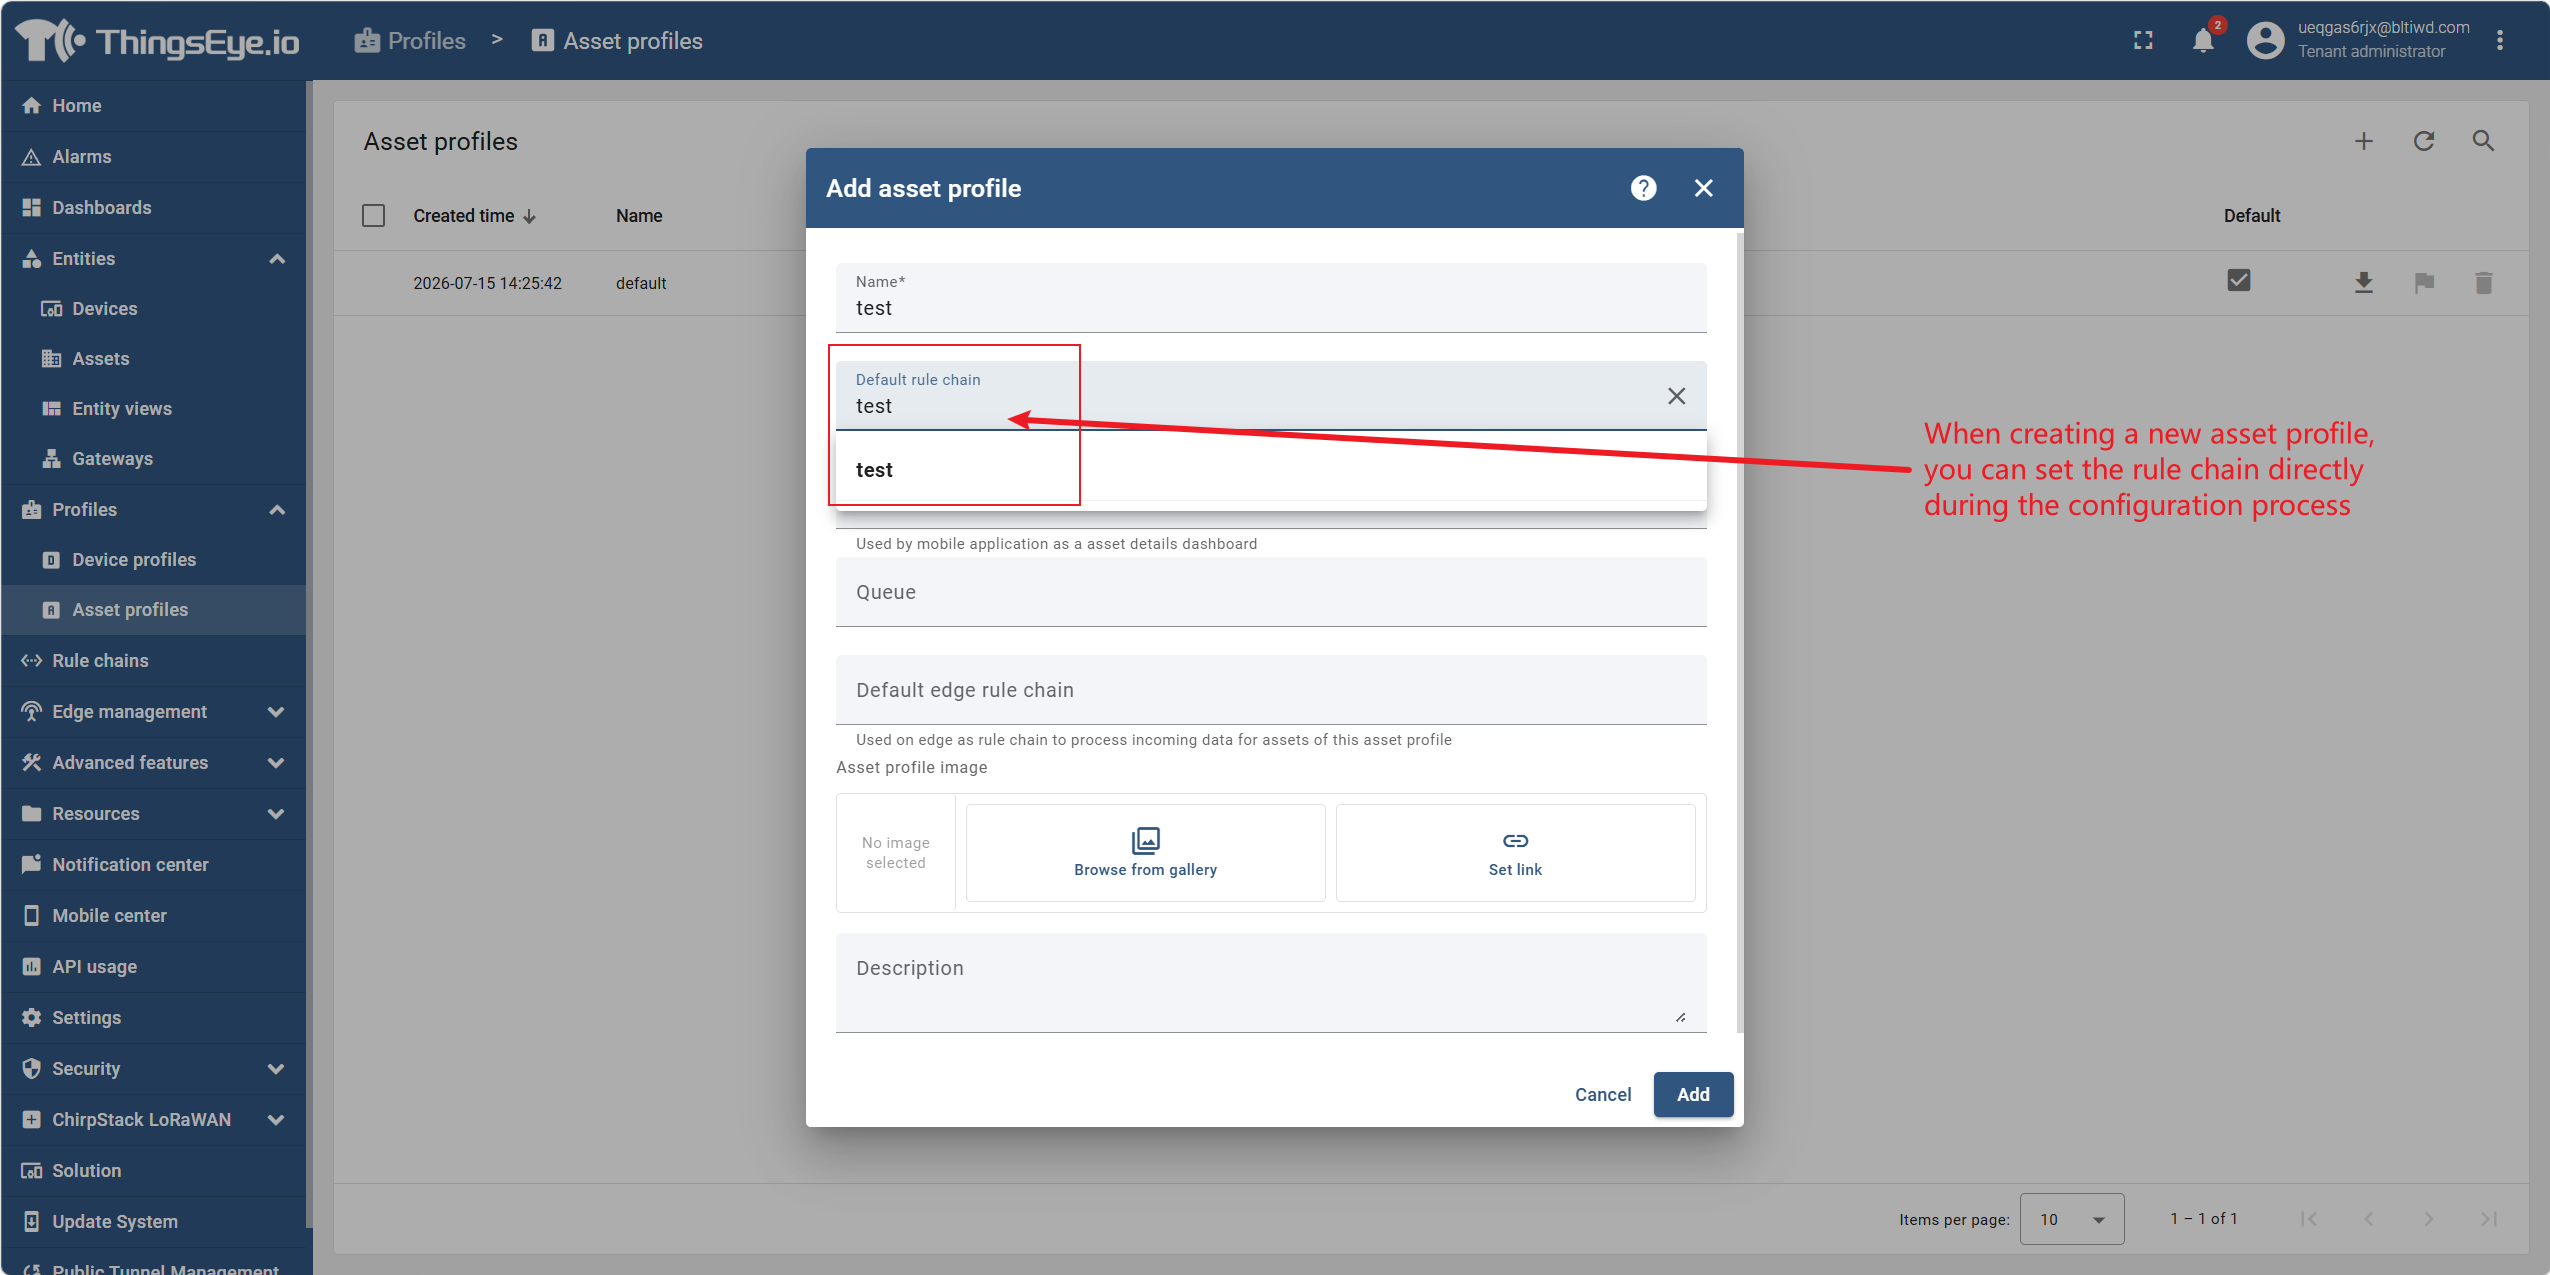
Step 3: Assign a rule chain when creating a new profile
When creating a new device profile or asset profile, you can set the rule chain directly during the configuration process. For specific creation steps, see "Device Management > 6. Create Device Profile" and "Asset Management > 5. Create Asset Profile".
Assignment Method Descriptions
| Method | Scope | Description |
|---|---|---|
| Device Profile | All devices under the same profile | Set in the "Default Rule Chain" dropdown list on the profile details page; all devices under this profile inherit it automatically |
| Asset Profile | All assets under the same profile | Set in the "Rule Chain" dropdown list on the profile details page; all assets under this profile inherit it automatically |
Note: When a device or asset is created, it inherits the default rule chain of its assigned profile. If you need to assign a different rule chain to an individual device or asset, you can edit that device or asset separately. This override operation affects only that single entity and does not change the profile's default configuration.
Final Logic of Override and Inheritance
Once a rule chain override operation is performed on an individual device or asset, that entity permanently breaks away from automatic synchronisation with the rule chain of its assigned profile. Thereafter, any modifications to the profile's default rule chain will not be synchronised to the overridden entity.
| Scenario | Device/Asset Rule Chain Result |
|---|---|
| Entity has never been overridden, and the profile's default rule chain is modified | Automatically inherits the profile's new rule chain |
| Entity has been overridden, and the profile's default rule chain is modified | Retains the original override value, unaffected by profile changes |
Method to restore inheritance: To make an overridden entity follow the profile's synchronisation again, go to the edit page of that entity and clear its individually set rule chain (i.e., stop specifying a custom rule chain) so that the rule chain field returns to the "not individually configured" state. Thereafter, the entity will once again follow changes to the profile's default rule chain.
4. Import or Export a Rule Chain
Procedure
Step 1: Export a rule chain
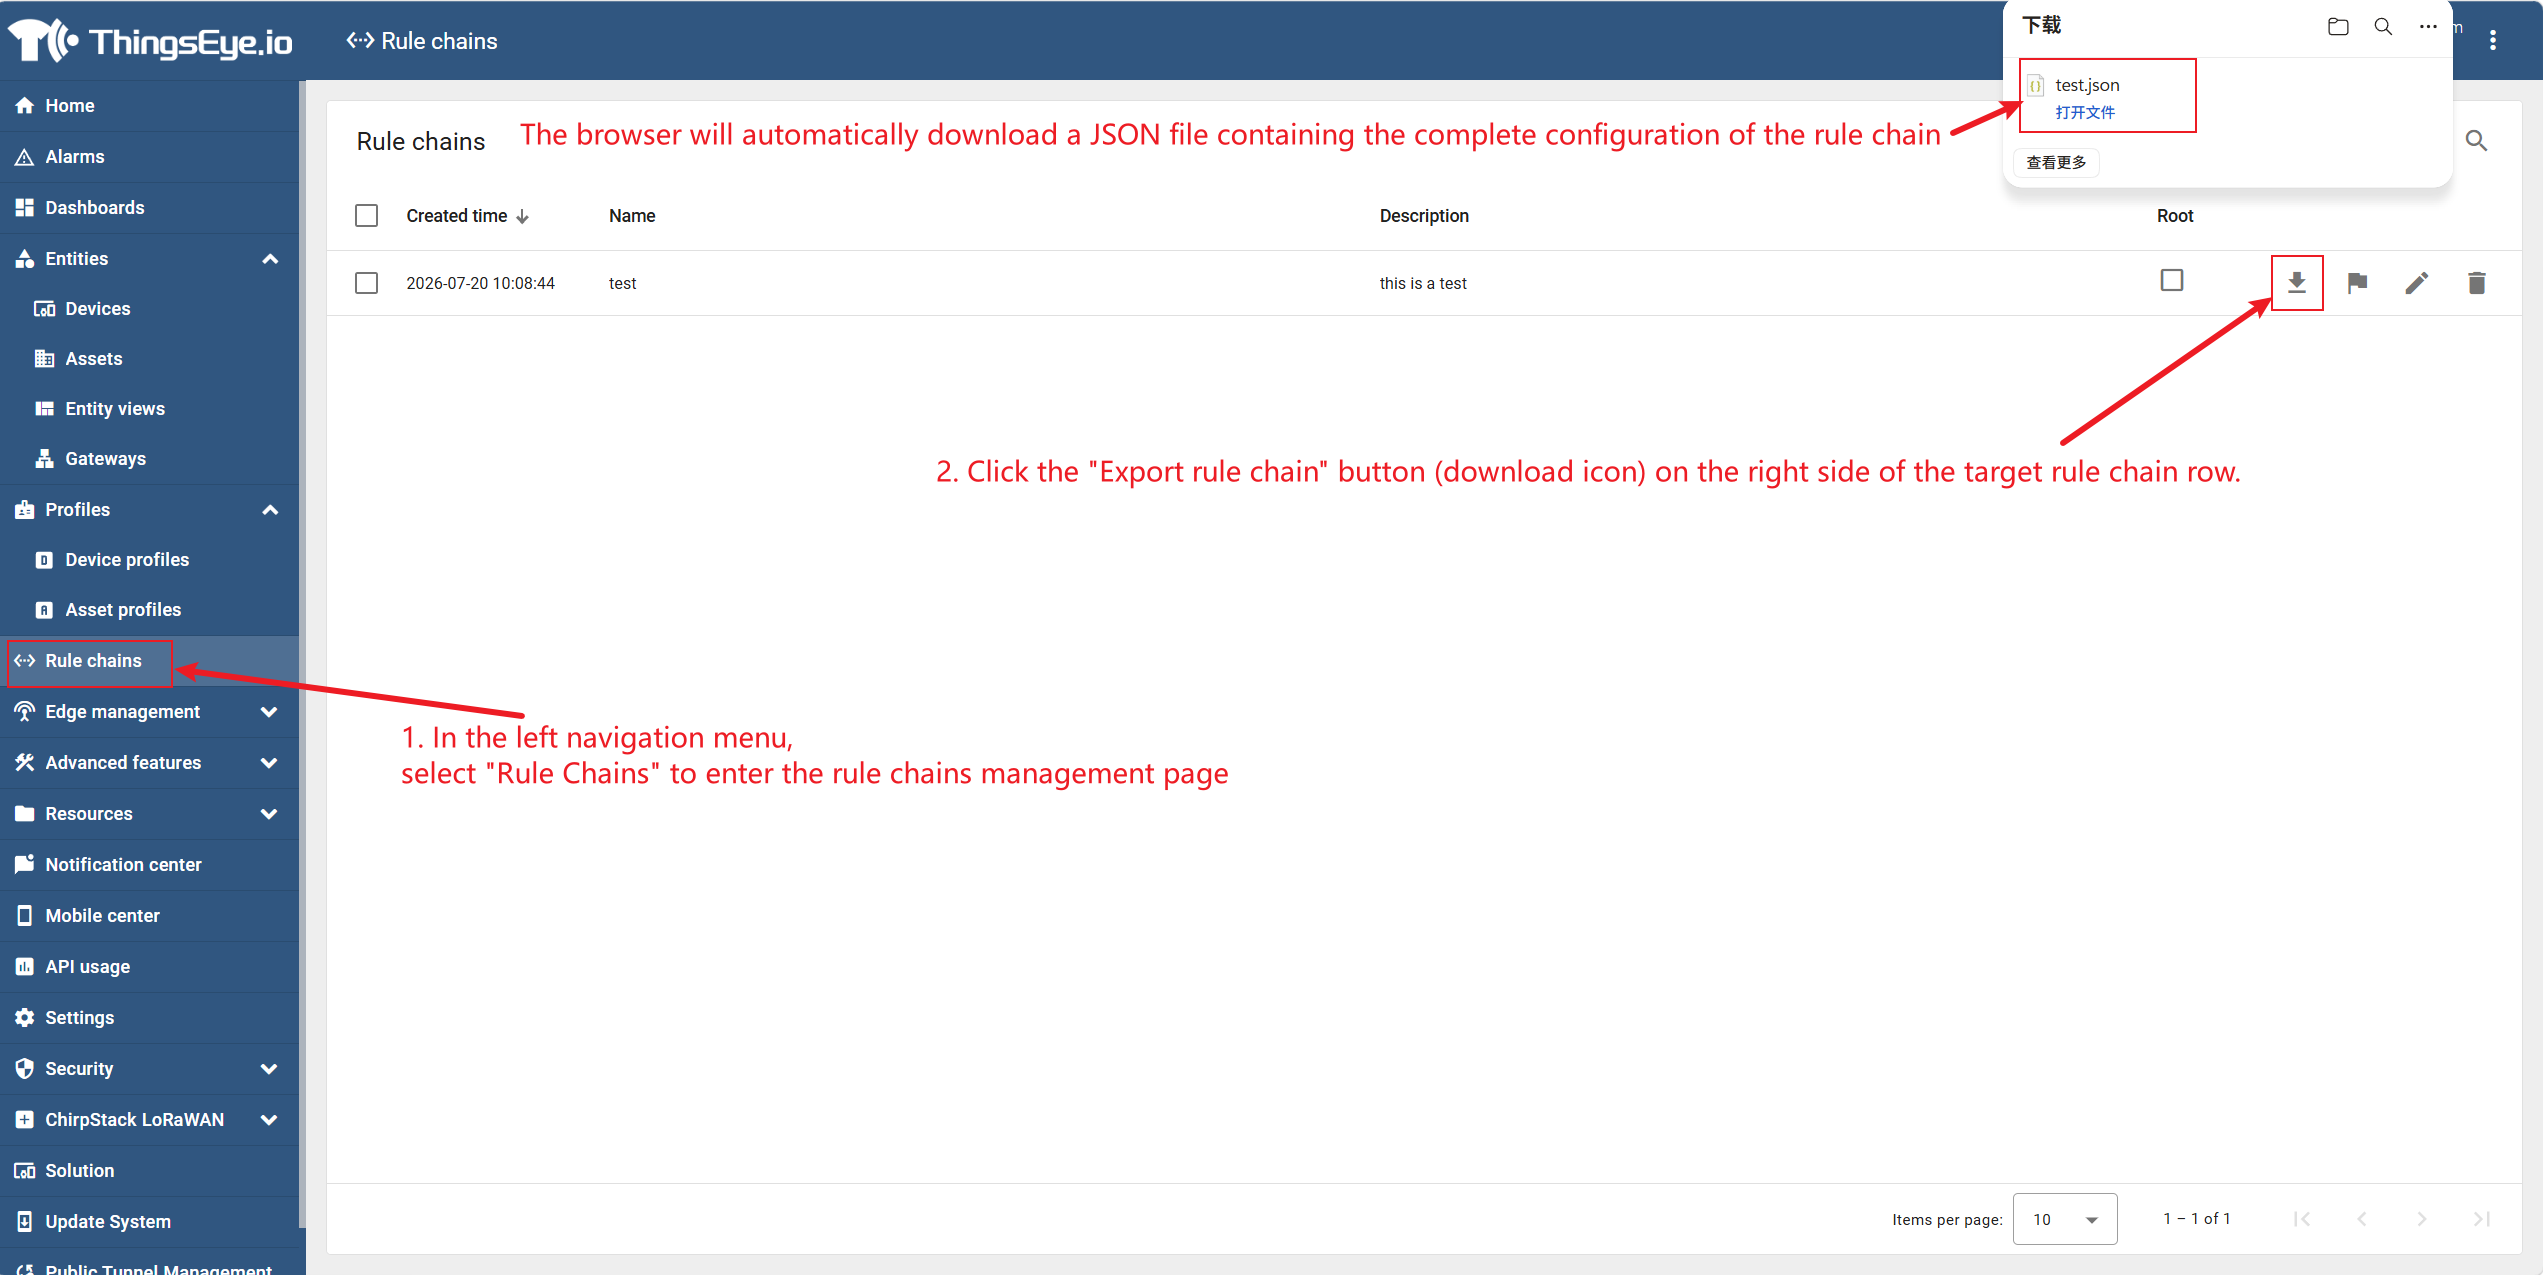
In the left navigation menu, select "Rule Chains" to go to the rule chain management page.
Click the "Export Rule Chain" button (download icon) on the right side of the target rule chain row; the browser will automatically download a JSON file containing the complete configuration of that rule chain.
Note: The exported JSON file contains the complete definition of the rule chain, including all node types, node configurations, and connection relationships between nodes. This file can be directly used for import into the same or a different ThingsEye instance.
Step 2: Import a rule chain
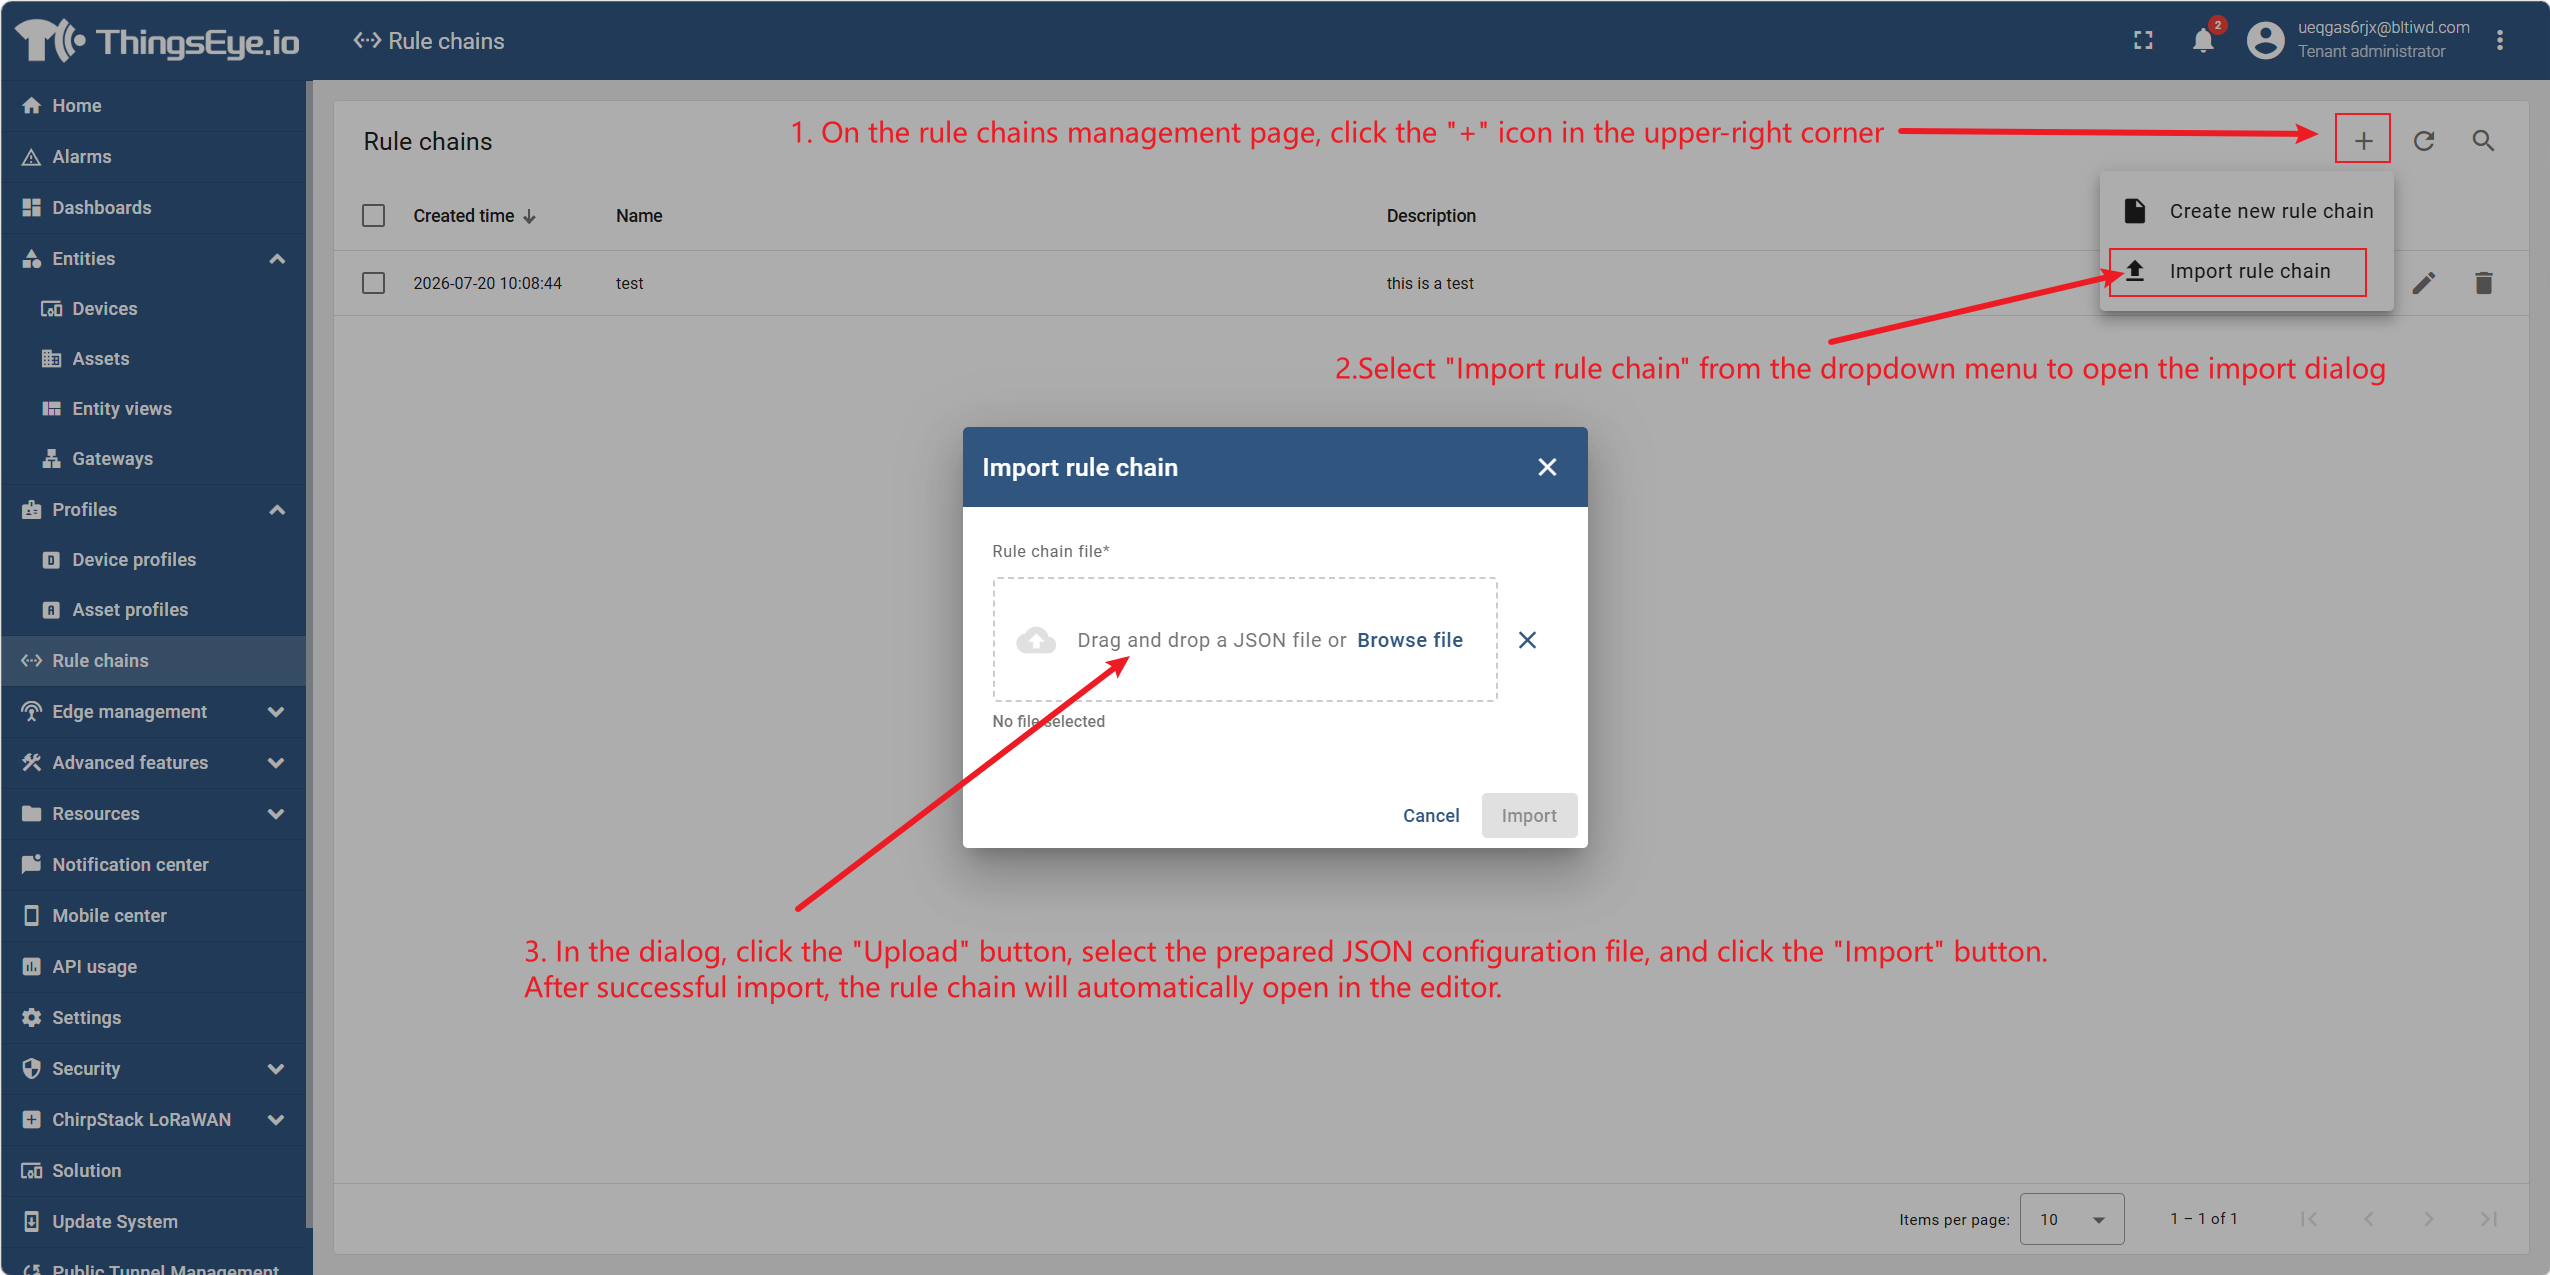
On the rule chain management page, click the "+" icon in the upper‑right corner, select "Import Rule Chain" from the dropdown menu, and open the import dialog.
In the dialog, click the "Upload" button, select the prepared JSON configuration file, and then click the "Import" button. After successful import, the rule chain will automatically open in the editor.
Step 3: Save the imported rule chain
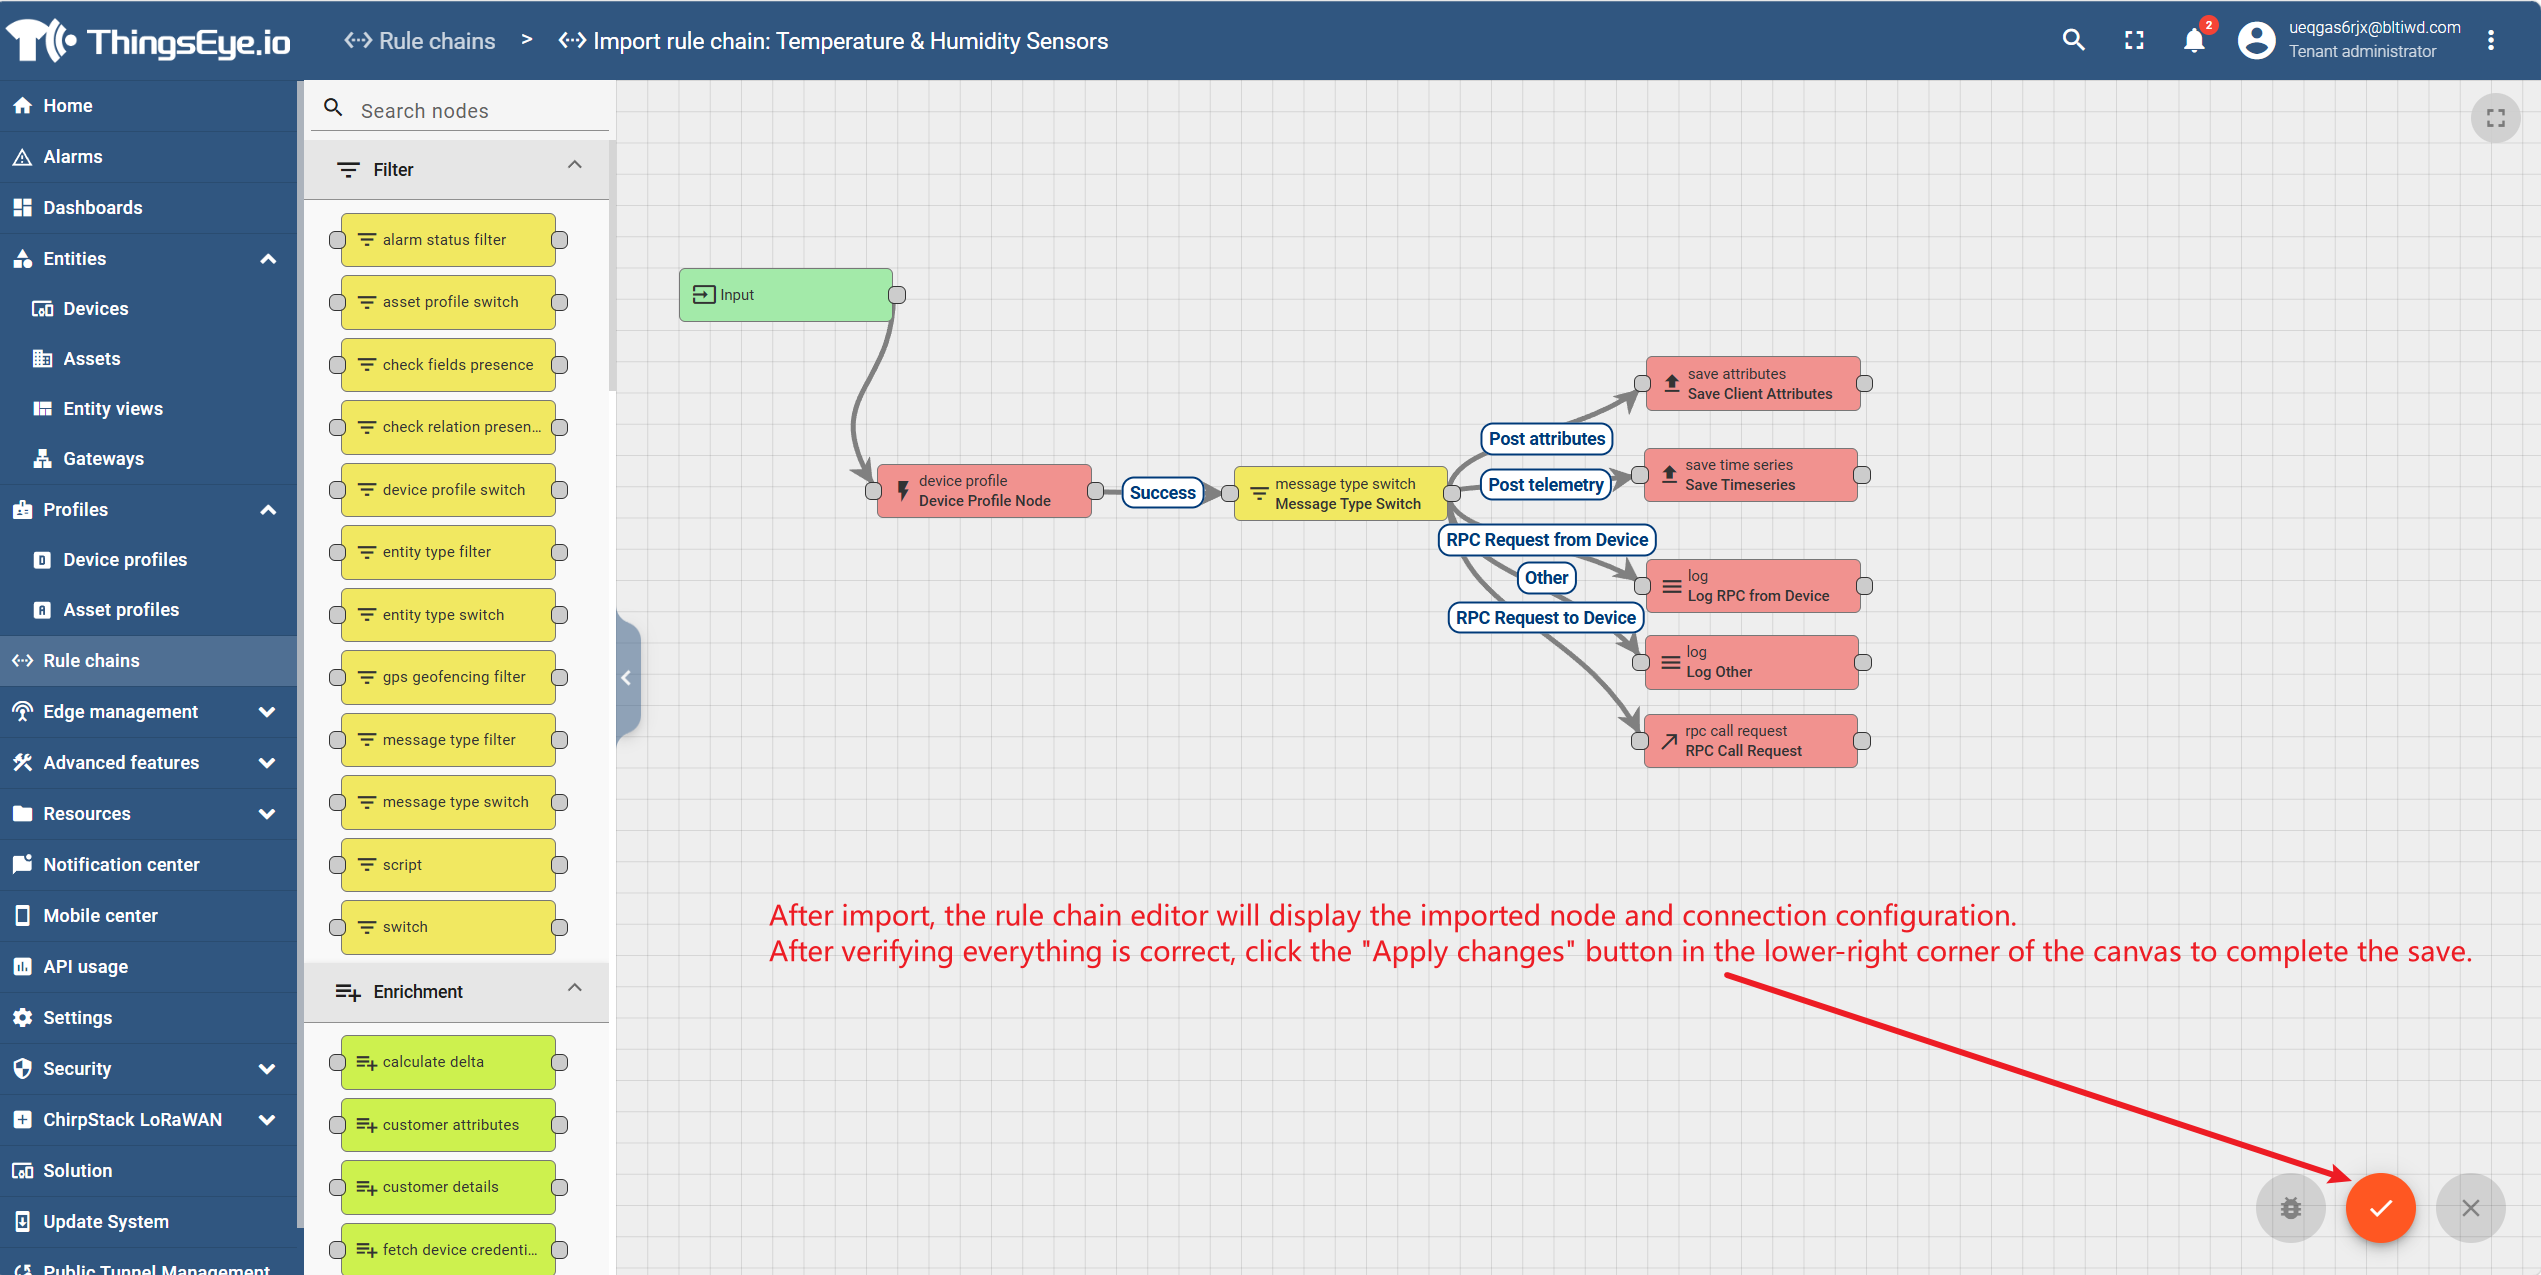
After import, the rule chain editor will display the imported nodes and connection configurations. After confirming everything is correct, click the "Apply Changes" button in the lower‑right corner of the canvas to complete the save.
Important Notes:
An imported rule chain does not automatically become the root rule chain. All imported rule chains are ordinary rule chains; if needed, they can be manually set as the root rule chain.
References must be updated manually: If the imported rule chain contains references to other rule chains (via the "Rule Chain" node), these references must be updated manually after import to ensure they point to target rule chains that actually exist in the current environment; otherwise, an error will occur when saving.
Step 4: Import via REST API (Advanced)
ThingsEye also provides a REST API for rule chain import operations. The overwrite parameter controls whether to overwrite a rule chain with the same name.
POST /api/ruleChains/import?overwrite=false
Note: The API method is suitable for automated deployment and CI/CD scenarios. For daily operations, it is recommended to use the UI method.
Import/Export Considerations
| Consideration | Description |
|---|---|
| File Format | Both export and import use JSON format, containing the ruleChain header and the metadata body (including nodes and connections) |
| Root Flag | The root field in the exported rule chain is false; it will not automatically become the root rule chain after import |
| Cross‑environment References | If the rule chain references specific devices or assets, ensure these entities already exist in the target environment before importing; otherwise, references need to be updated manually |
| Overwrite | When importing a rule chain with the same name, the overwrite parameter in the API controls whether to overwrite; UI import does not overwrite by default |